Last updated: Apr 19, 2026
Lynn homeowners face a compounded threat: coastal Nor'easter wind pushing rain and salt-laden spray, followed by winter snowpack that freezes and thaws. Those freeze-thaw cycles can turn moisture that infiltrates a roof into ice damming at the eaves, backing water up under shingles and flashing. This isn't a once-a-season worry; each heavy Nor'easter can stress older roofs enough to reveal weak points and hidden leaks. When a storm hits, the combination of wind-driven rain and sudden temperature swings can overwhelm gutters, downspouts, and edge details that were already showing signs of age. In practical terms, the roof system must be designed and maintained to shed both wind and moisture quickly, or otherwise vulnerable spots will start leaking after the last gusts die down.
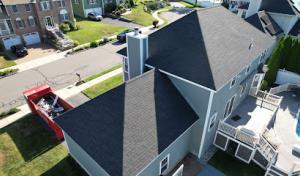
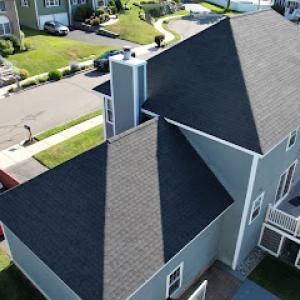
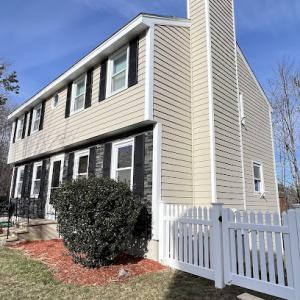
Older Lynn houses often feature complex rooflines: dormers that create multiple planes, chimneys perched through the deck, and attached porches that add variable eaves and flashing details. Each transition becomes a potential leak point when ice forms in a narrow valley or under a misfit flashing piece. When water moves around attic penetrations, it can sit along a seam or travel along a rafter bay until gravity finally reveals the problem at the ceiling below. The result is often a pattern of intermittent leaks that worsen after a wind event or a heavy snowfall. If the flashing around dormers and chimneys isn't meticulously integrated with the roof deck, or if ice backs up behind gutter systems, a small breach today can become a big, costly repair tomorrow. In these homes, the roof isn't a single layer-it's a patchwork of transitions where moisture can sneak in quietly until the first warm day cracks the dam.
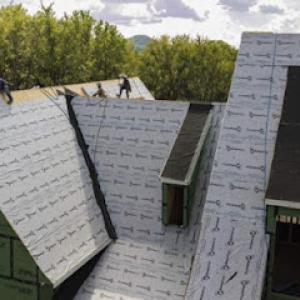
Because wind-lifted shingles are a common hazard after a Nor'easter, the first line of defense is a robust roof covering that seals well against wind uplift. Asphalt shingles can perform, but a roof with past wind damage is at higher risk for edge blow-off or lifted flashing. Metal roofs offer better wind resistance in some Lynn configurations, but the flashing details at dormers and chimneys still demand careful detailing. The presence of ice damming is not just an aesthetic issue; it directly translates to water backing up behind eaves and spreading under shingles as temperatures swing. In neighborhoods with close-packed homes and shared eave lines, a single vulnerable edge can become the first domino in a rhythm of leaks during late winter or early spring thaws. Your aim is to interrupt that cycle with a roof system that drains efficiently and with flashing that remains watertight under pressure.
If you notice water streaks on ceilings after a north-facing storm, or if stained areas track along a dormer line or chimney chase after a freeze-thaw spell, treat it as a current risk rather than a future worry. In this climate, damage often progresses from a discreet drip to a larger interior intrusion within a single melt cycle. Addressing the problem quickly means not waiting for the next big storm to reveal the extent. Start by inspecting eaves, gutters, and valleys for loose material, ice buildup, or white mineral deposits that signal mineral deposits from flashing failure. Don't overlook small telltales: a faint musty odor near an interior wall or a damp spot on a ceiling during the cold part of the year is a clue that moisture is finding a path through compromised roof lines.
Focus first on the transitions: dormers, chimneys, and attached porches. Ensure flashing around these features is continuous and properly sealed against wind-driven rain. Check the attic for proper insulation and ventilation to reduce the temperature differential that fuels ice dam formation. Clear out gutters and downspouts before the heavy season arrives, and verify that any ice guards extend far enough to cover the critical edges. If existing venting or attic access has been compromised, address it to maintain a dry attic and prevent condensation from turning into interior moisture damage during thaw cycles. In a Lynn climate, every edge detail matters, and attention to these facts can make the difference between a manageable winter and a costly, ongoing leak cycle.
Hidden leaks often start where you least expect them: at masonry chimneys that edge into the roof while sharing a wall with an interior fireplace, or at the joints where two additions meet the main roof plane. In older stock, those chimneys can sag, tuck under deteriorating flashing, or develop spalling mortar that channels moisture straight into attic rafters. Intersections between roof planes-think a dormer meeting a gable, or a wing added years ago that shares a common roof line-create lines where ice dams can form and where water can creep laterally under shingles. The main field of the roof might still look reasonably sound, but the leak path has already found the weakest point where flashing has aged, or where valley metal has degraded from decades of Nor'easter-driven wind-driven spray and salt air exposure.
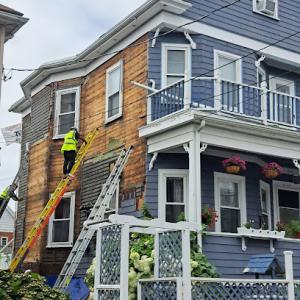
In neighborhoods with older homes and mixed-era renovations, you will see skylight tie-ins and patchwork re-roof transitions that were installed haphazardly or without consistent waterproof details. A skylight cut can become a moisture magnet if flashing around the unit was not integrated with the surrounding roof underlayment, or if the curb flashed improperly and sits over a rotted deck. Patch jobs-whether a dormer retrofit, a flat roof patch over a bay window, or a secondary entrance canopy-often reuse old flashing details that no longer match the current roof geometry. When those connections fail, moisture follows the easiest path and bypasses the surrounding shingles, leaving widespread staining and hidden rot behind the backsplash of the interior walls.
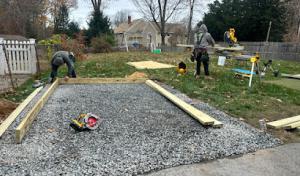
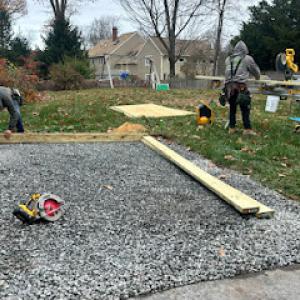
Dense lot lines and closely spaced homes in Lynn compound the challenges of any roofing project. Staging becomes a real constraint, as do tear-off cleanup and protecting neighboring properties from falling debris. With limited space, crews may have to work over compacted driveways or narrow walkways, increasing the risk of accidental damage to siding, gutters, or adjacent landscaping. When water is already pooling at a vulnerable edge, even small missteps in rain or wind can spray onto siding and windows or splash onto adjacent roofs during a tear-off. This proximity elevates the importance of meticulous containment, careful debris management, and clear containment plans to prevent damage to neighboring homes and shared structures.
Older roofs in this area often carry the scars of long-term ice damming that begins at the eave and travels inward along rafters. The failure pattern is not surprising: the edge conditions and flashing around protrusions take the first hit, while the main field may show only minor wear from years of exposure. If the drip edge or gutter apron is compromised, meltwater can back up into the overhang and find its way under edges where shingles have begun to curl or lift. In practice, that means a leak often shows up after a storm as a slow, spreading watermark along ceilings near outer walls rather than as a single hard drip.
Look for dark staining along ceilings near exterior walls after heavy rain, damp patches around chimneys and skylight frames, and musty odors in attic spaces where light leaks could be feeding mold growth. Inspect flashing at chimneys and where roof planes meet additions after winter storms when ice damming can stress sealants and metal. If a patch project looks uneven or if sealant around valleys and penetrations has frayed, plan for a targeted assessment rather than a full re-covering that could overlook underlying rot. In this climate, prevention means treating the vulnerable points first-the flashing, the intersections, and the tie-ins-before the main roof shows widespread wear.
Find contractors experienced in skylight installation, flashing, and leak repairs to bring natural light into your home.
De La Rosa Roofing
(978) 979-7865 www.delarosaroofingllc.com
90 Allen Ave, Lynn, Massachusetts
4.9 from 133 reviews
Deyvin's Construction.Inc
(781) 215-4301 deyvinsroofing.com
118 New Park St #1, Lynn, Massachusetts
4.9 from 54 reviews
Lynn Roofing Solutions
(781) 806-9825 bostonroofingsolutions.com
34 Boston St, Lynn, Massachusetts
5.0 from 14 reviews

JN Construction & Improvements
(978) 728-8120 jnconstructionboston.com
25 Lake Ave, Lynn, Massachusetts
5.0 from 202 reviews
JN Construction & Improvements offers expert roofing, gutter, and exterior construction services across Lynn and surrounding Massachusetts areas. With 20+ years of hands-on experience, founder Ruben Nolasco has built a reputation for reliability, quality workmanship, and affordability. As a proudly immigrant-owned business, we are committed to raising industry standards and delivering durable, client-focused solutions for every home or building.
B&D Construction & Painting
27 Oakville St, Lynn, Massachusetts
5.0 from 88 reviews
Established in 2010, B&D Construction & Painting tackles a wide range of exterior and interior home improvement projects in the greater Boston area. Their services include roofing, painting, fence installation, gutter cleaning, and snow removal, ensuring your property is well-maintained year-round.
De La Rosa Roofing
(978) 979-7865 www.delarosaroofingllc.com
90 Allen Ave, Lynn, Massachusetts
4.9 from 133 reviews
Welcome to De La Rosa Roofing, your trusted source for top-quality roofing solutions in Lynn and surrounding areas. With years of experience serving residential and commercial clients, we specialize in all aspects of roofing, from installations to repairs and maintenance. Our team of skilled professionals is committed to delivering exceptional service and superior craftsmanship on every project. Whether you need a new roof for your home or repairs for your business, we've got you covered. We work with precision and efficiency to ensure your satisfaction and the durability of your roof. Customer satisfaction is our top priority, and we strive to exceed your expectations with every job.
Deyvin's Construction.Inc
(781) 215-4301 deyvinsroofing.com
118 New Park St #1, Lynn, Massachusetts
4.9 from 54 reviews
Carpenteria
Jere Construction Roofing
(781) 888-7440 jereconstructionsroofing.com
6 Belle Ave, Lynn, Massachusetts
4.8 from 22 reviews
Jere Construction Roofing is a trusted general contractor and roofing specialist in Massachusetts. We offer a wide range of services, from roof installations and repairs to kitchen and bathroom renovations, to snow removal. Our team of experienced professionals is dedicated to providing our customers with the highest quality work and customer service. We use only the finest materials and techniques to ensure that your project is completed to perfection. Contact us today to learn more about how we can help you with your next home improvement project.
American Team General Contracting
www.americanteamgeneralcontracting.com
319 Lynnway Suite 310, Lynn, Massachusetts
4.6 from 34 reviews
A strong, reliable roof is more than protection; it’s peace of mind. At American Team General Contracting, Inc, we help homeowners and business owners in Lynn, MA safeguard their properties with expert craftsmanship and dependable service. Since 2009, our licensed and insured team has built a reputation for quality, honesty, and professionalism. With over 25 years of experience, we bring the skills, care, and precision needed to handle every roofing challenge, from small repairs to full replacements. As a leading roofing contractor, we specialize in comprehensive roofing services designed to fit each customer’s needs.
FJM Construction
(781) 731-4757 fjmconstructioninc.com
26 Manson St, Lynn, Massachusetts
4.8 from 18 reviews
Fjm construction offers Roofing contractor services in Lynn, MA and surrounding areas.
Hernandez General Construction
(781) 228-9798 hernandezsidingboston.com
Lynn, Massachusetts
5.0 from 8 reviews
Hernandez General Construction is your trusted source for reliable and professional roofing solutions. We believe your roof deserves the highest level of craftsmanship and care. From minor repairs to full-scale replacements, our team brings unmatched expertise and a dedication to excellence on every project. With years of hands-on experience and a commitment to superior service, we protect what matters most — your home, business, and peace of mind.
Avery's General Construction
(781) 513-9903 averysconstruction.com
55 Spencer St, Lynn, Massachusetts
5.0 from 8 reviews
Choosing the right roofing contractor for Massachusetts residents has always been a daunting task. That’s because a lot of ill-trained contractors masquerade as expert roofers. They end up providing roofing services that are as good as nothing. When these contractors aren’t quacks, they’re either too expensive or exude poor professional etiquette. As dedicated roofing experts who love what we do, we cringe at the difficulties roofing customers face in the industry. To this end, our outfit provides all-around roofing services for our clients with all the advantages they can’t get somewhere else. To this end, our outfit provides all-around roofing services for our clients with all the advantages they can’t get somewhere else.

Hallmark Homes
(781) 592-5900 hallmarkhomesllc.com
Lynn, Massachusetts
5.0 from 6 reviews
END YOUR SEARCH FOR A HOME IMPROVEMENT CONTRACTOR LET OUR EXPERTS TAKE CARE OF YOUR HOME IN LYNN, MA Do you want a picture-perfect home? Let Hallmark Homes, LLC in Lynn, MA bring our special touch to your property. You can entrust a variety of projects to our home improvement contractors, including a wide range of exterior work.
Pro Builders Home Improvement
(413) 519-0902 probuildershomeimprovement.com
81 Eutaw Ave, Lynn, Massachusetts
5.0 from 5 reviews
Services offered in the state of Massachusetts: Roofing Services offered in Springfield, MA and surrounding areas: Roofing, Siding, Decks, Kitchens, Bathrooms, General Contracting
McGilley Roofing & Construction
(781) 520-9086 www.mcgilleyroofing.net
Serving
4.9 from 49 reviews
McGilley Roofing & Construction has served Saugus and surrounding communities since 2004, backed by over 30 years of roofing experience. We specialize in roof installations, roof repairs, siding replacements, siding repairs, gutter installations, and gutter repairs for residential and commercial properties. As a GAF Certified contractor, we offer top-tier materials, strong warranty coverage, and honest workmanship. We provide free estimates, maintain clean job sites, and prioritize every customer’s peace of mind. Family-owned, fully insured, and built on trust.
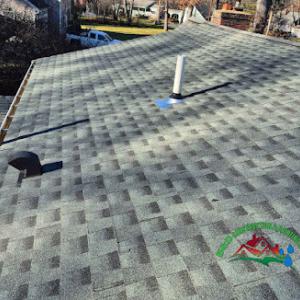
Asphalt shingles remain the practical default for most Lynn homes because they fit the city's large stock of older pitched residential roofs and are easier to replace after storm damage than premium systems. In a coastal climate, choose a shingle with good adhesion and a high wind rating to withstand Nor'easter gusts and blowing debris. When planning a replacement, pay attention to the roof's deck condition and spacing of nails; an updated underlayment layer helps shed moisture quickly and reduces ice dam risk on overhangs. For houses with limited attic ventilation, consider a slightly lighter color to reduce heat buildup near the soffits, which can influence snow melt patterns and dam formation along the eaves. Regular inspections after nor'easter events help catch loose tabs or damaged flashing before leaks become a problem.
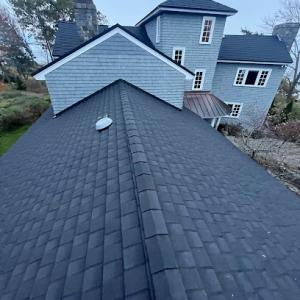
Metal roofing has a niche in Lynn for owners prioritizing snow shedding and coastal durability, but detailing matters around older trim profiles and adjacent masonry. A standing-seam metal system can shed snow more reliably and resist salt spray, but the fasteners and trim must be suited to older masonry and trim shapes to avoid leaks at joints. If the house has historic or ornamental trim, explore retrofit options that preserve the look while providing a watertight seam. Ensure the retrofit includes proper flashing at roof-to-wall intersections and around dormers or chimneys, where the risk of ice dams remains high. Metal can be a good fit on steeper pitches or where there's a clear need for long spans without frequent seams, but compatibility with existing structure matters as much as the metal choice itself.
Slate, clay, concrete tile, and copper appear mainly on higher-end or historic-style properties, where structural load, matching existing architecture, and specialized labor affect feasibility. These materials bring elegance and long life, but they carry significant weight and require precise structural assessment to avoid settling that invites leaks. If the roof line includes delicate cornices or brickwork, ensure the flashing details accommodate movement and prevent ice dams at the ledger lines. Historic houses with steep pitches may benefit from slate or concrete tile, but be prepared for selective maintenance and trained installers who understand historic detailing. Copper delivers durability and a distinctive look, yet it demands careful compatibility with surrounding materials to avoid electrochemical corrosion at metal-to-metal contacts. For any of these options, confirm that the roof framing can support the tile or copper weight, and plan for a meticulous installation with attention to eave and rake edge drainage to minimize standing ice buildup.
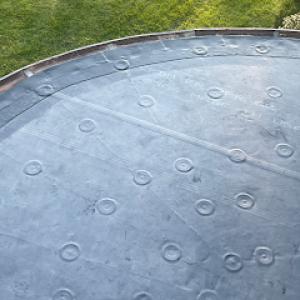
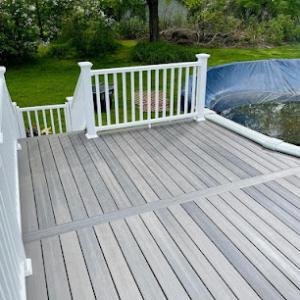
In Lynn, multifamily buildings, rear additions, porches, and mixed-use structures create a meaningful flat- and low-slope roofing market alongside traditional pitched roofs. Those low-slope sections sit against mailboxes, walkways, and narrow structural ties that were never meant to hold up heavy Nor'easters and annual salt spray. The aging assemblies common to triple-deckers and nearby storefronts struggle most at transitions where newer membranes meet older roof areas. Snow retention and spring thaw can expose drainage weaknesses on these roofs faster than on steeper sections, so early attention to the flat roof landscape is essential.
Older North Shore buildings often reveal the trouble spots first: drains that clog or back up, edge metal that corrodes where salt air meets moisture, and wall transitions where flashing has dried out or cracked. Where a low-slope roof ties into a vertical wall or a walkable deck, nail heads corrode and fasteners loosen. In Lynn, these failures aren't just about leaks-they're about how the system handles the weight of wet snow, the freeze-thaw cycle, and the spring melt that rushes toward every throat of a drain. Check the roof plan for every drain, scupper, and transition detail, and map any area where older membranes butt up against newer material.
Step by step, start with a clean roof deck and clear all debris from drains and scuppers before the first big storm. Inspect edge metal for loose fasteners, punctures, or loose seams, and replace with metal that won't corrode quickly in salt air. Pay particular attention to wall transitions: look for deteriorated sealants and cant-strips that have separated from the wall. For rear additions and porches, verify that drains flow to a functional downspout and that any expansion joints remain free of debris. In Lynn, careful attention to these details reduces the chance of hidden water paths that reveal themselves only after a Nor'easter.
When spring thaw begins, remove any remaining snow buildup along parapets and edge details to prevent ice dam build-up behind edge flashings. If you notice rivulets or staining along a seam, plan for resealing those joints with a product compatible with the existing membrane and substrate. For mixed-use structures, keep a close eye on transitions where roofing materials meet masonry or siding, and consider a staged plan to reseal or reflash high-risk joints. Regular, targeted inspections in the shoulder seasons prevent small issues from becoming costly repairs after the first hard winter.
Find specialists in TPO, EPDM, and built-up flat roofing systems for residential and commercial properties.
Lynn pricing is affected by the city's older roof geometry, frequent chimney and flashing work, and the added labor of working on tightly spaced urban lots. When the roof line steps or meets multiple valleys in a narrow lot, crews spend more time fitting materials and patching flashing around dormers and chimneys. Expect longer job access and more careful clean-up in these dense neighborhoods, which pushes the price up relative to wider suburban layouts.
Asphalt shingles remain the most common, with a typical range around 350-700 USD per square. If you're considering metal, plan for roughly 700-1500 USD per square, especially where close-in detailing around gutters and vent stacks has to be custom cut. For historic look or long life, clay or concrete tiles run higher, about 1000-2500 USD per square for clay and 900-1800 USD for concrete. Slate is a premium choice at 1500-3200 USD per square, with copper roofing topping the scale from 2000-4500 USD per square. In Lynn, specialty materials to match older homes and preserve a historic aesthetic can add both material and labor costs, particularly on steep pitches or intricate rooflines.
Spring and fall are preferred replacement windows in Lynn because winter snow risk and summer humidity can complicate scheduling, which can tighten contractor availability after major storm periods. If a project lands in late spring or early fall, you may see more flexible crew availability and potentially lower project delays, but spring storms can still require contingency planning for tarping and temporary heat or cooling needs during installation.
Costs can rise when a Lynn project involves historic-district review, or when structural considerations for slate, tile, or copper systems are present. Slates and copper require precise retrofits, heavier scaffolding, and meticulous flashing around chimneys and dormers, translating to higher labor hours. If the existing roof structure needs reinforcement or deck repairs to properly support a heavier system, budget accordingly, as framing or plywood replacement adds to the total.
Get three detailed bids that itemize material, waste disposal, and flashing work. Ask each contractor to map out how they will handle chimney and dormer flashing, as well as any needed roof vent and gutter integration. In tight urban lots, confirm access plans and debris control measures to avoid neighborhood disruption and ensure safe disposal, which can influence final costs.
Get a clear picture of your project costs upfront - no commitment required.

A full roof replacement in Lynn typically requires a building permit through the City of Lynn Building Department, and the contractor usually handles the application. Before any shingles come off or new underlayment goes on, confirm that the contractor has submitted the plan and that the permit is active in the job file. Building codes here lean on ensuring proper attic ventilation, drainage plan, and flashing details to stand up to Nor'easter winds and salt air. If the property sits in a historic district, the scope may trigger additional approvals, so start the permit dialogue early and document any architectural review needs. Anticipate questions about roof penetrations, skylight work, and the alignment of fascia and gutters with historical character.
Lynn inspections are used to verify ventilation, flashing, underlayment, and drainage during and after the roofing job rather than treating the project as a simple tear-off only. A typical sequence involves a rough-in check after underlayment and flashing are installed, followed by a mid-project review if any structural or venting changes occur, and a final inspection upon completion. During these inspections, inspectors look for proper drip edge installation, vent placement, attic insulation reach, and proper drainage slope to prevent ice damming and water travel toward interior spaces. Plan access for inspectors and have quick-dry coverings ready for rain-sensitive windows or exposed roof decks during the process.
Historic districts in this area can trigger additional approvals, so homeowners with older or architecturally sensitive properties should confirm review requirements before ordering materials. If you are replacing like-for-like with historically appropriate materials, bring color and profile samples to the initial permit appointment to streamline the process. Be prepared for possible delay if a feature such as a historic fascia profile or cornice detail needs preservation or careful replication. Align material choices with anticipated climate stressors-strong eave overhangs, integrated ventilation, and durable flashing-to minimize revisit cycles with the Building Department.
Lynn sits in a Massachusetts insurance environment shaped by wind, hail, and Nor'easter claim activity, so storms leave more than a mark on shingles-they reshape how claims are reviewed. Each coastal blow can prompt adjusters to scrutinize roof conditions, previous leaks, and the timeline between a storm event and any reported damage. The outcome of a roof claim can influence future coverage decisions, especially when a long history of weather-driven losses exists. You are playing a longer game where clear records can pace the claim process and protect what you've invested in your home.
For homeowners, adjusters often need clear records of wind damage, active leaks, temporary tarping, and interior staining after coastal storm events. Immediate actions matter: take dated photos of shingles, flashing, and any visible soffit or gutter damage; preserve damaged materials for inspection; keep tarps in place until a professional can verify weatherproofing. Interior signs like staining on ceilings or walls can confirm moisture intrusion paths. A concise log with dates, what was observed, and any temporary repairs helps convert a storm event into a credible claim rather than a lingering mystery.
Because insurers may reassess premiums after major roof replacements depending on material choice and claim history, Lynn homeowners should compare long-term insurance impact before upgrading materials. Durable options can influence future rates, while a history of frequent claims can complicate coverage. When evaluating a retrofit, consider how the chosen material, its expected lifespan, and the likelihood of future Nor'easter activity align with both protection needs and insurance expectations.
Connect with contractors who help homeowners navigate the claims process from damage assessment to final approval.


Tear-offs and full replacements don't always play nicely with Lynn's spring thaw and heavy rain. If crews are trying to swing a tear-off during a thaw, unexpected rain can stall work for days and stretch schedules. Plan for windows of dry weather in late spring to early summer, and keep a backup plan in mind if a late spring cold snap or a burst of soaking rain hits the forecast.
Winter snow and ice drive a different tempo. Emergency leak work becomes more common than planned replacements when ice damming and sudden leaks show up after storms. Those calls tend to compress the calendar, pulling resources away from planned projects. If you're facing an active leak in winter, quick temporary fixes may buy you time, but be prepared for a longer path to a full replacement once the thaw arrives.
Humid summer conditions in Lynn can affect sealants and ventilation work. Some sealants cure more slowly in heat and humidity, and attic ventilation can feel tight when crews are working through humid afternoons. For a full replacement, many homeowners target spring or fall when conditions are steadier and interior temps are more forgiving for finishing work and attic vent adjustments.
After North Shore storm events, Lynn homeowners can face longer wait times because emergency calls surge before standard replacement schedules reopen. If a storm has just passed, securing a firm start date may require patience and a clear plan for continuity once crews can reallocate resources. Having a staged approach-addressing critical leaks first, then progressing to a full replacement when feasible-helps keep the project moving while weather and demand shift.