Last updated: Apr 19, 2026
This neighborhood pattern features dense, older multifamily homes and attached buildings with mixed rooflines. Flat or low-slope rear sections meet steeper front roofs at transition points that are notoriously vulnerable. In a winter that mixes freeze-thaw cycles with Nor'easter rain, aging flashing and membrane seams can fail where these transitions occur, letting moisture travel from roof to interior walls. The waterfront climate pours salt-laden wind and heavy precipitation, which accelerates wear on sealant gaps and low-slope details. When a leak starts, it often first appears at a parapet, around a chimney, or where a roof meets a wall, then snakes into living spaces before a homeowner notices.
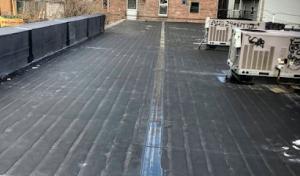
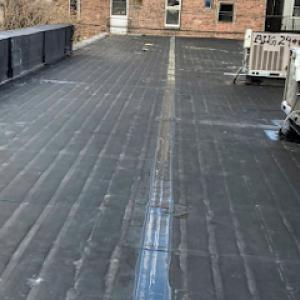
Snow and ice will sit longer on low-slope sections than on steep asphalt roofs. When temperatures swing above and below freezing, those ponds of water can refreeze and open up tiny seams into bigger leaks. Look for blisters or granule loss on the surface, hairline cracks around flashing plastics, and any staining near ceiling corners beneath the attic or top floor. Pay extra attention to the rear sections that appear flatter, especially where a deck, bulkhead, or parapet sits above a living space. In borough storms, winds can push moisture sideways even if the rain falls at a different angle, so every transition point deserves a close look after every storm.
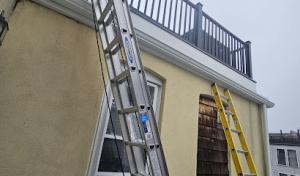
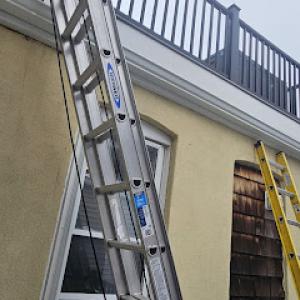
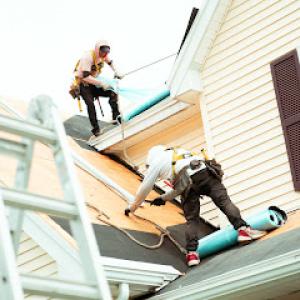
If you notice damp patches after a storm, inspect the area from a ladder with a buddy, focusing on joints where metal flashing meets masonry or wood, and where the roof deck meets parapets. Clear debris from gutters and downspouts to prevent water backup toward the roof edge. Seal exposed gaps with a durable, weather-rated sealant suitable for exterior use, but avoid over-reliance on temporary fixes. If a flashing boot or membrane seam shows signs of lifting, flag it for professional attention immediately, because small delaminations can expand quickly in winter conditions. Keep flashings clean and free of iron-rich debris that rusts seals and corrodes metal edges.
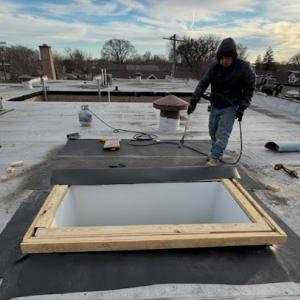
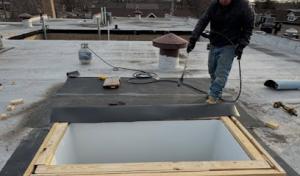
A comprehensive approach targets both the flat rear sections and the steep front roofs at their interface. Consider overhauling aging flashing with modern reinforced membranes that handle freeze-thaw stress better than older materials. If there is a parapet wall, a continuous cap or counter-flashing that integrates with the main membrane reduces the chances of moisture creeping behind joints. For low-slope transitions, install proper slope adjustments where feasible to encourage drainage toward existing scuppers or internal drains, reducing ponding risk. Insulation and ventilation upgrades in attic spaces behind these roofs help minimize condensation that travels down to interior rooms. Addressing these elements now pays dividends when a Nor'easter howls in, rather than reacting to a leak in a crowded hallway during a winter night.
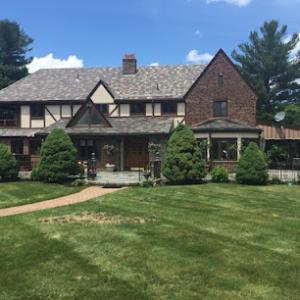
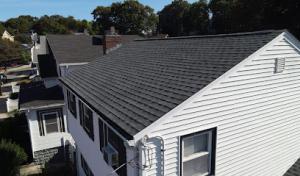
In Chelsea, homes commonly mix asphalt-shingled pitched roofs with small low-slope sections that cover porches, additions, or rear angles. This combination means you'll regularly balance quick rain resistance on the main roof with careful detail work on low-slope areas. For a typical lot, plan for closer attention to wind-driven rain and freeze-thaw cycles where the low-slope portions meet vertical walls. The practical approach is to keep the primary shingles in good condition and treat the low-slope areas as their own weather system, with dedicated flashing and seams that won't share the same failure points as the main roof.
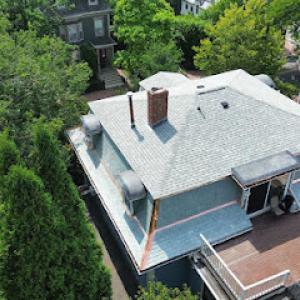
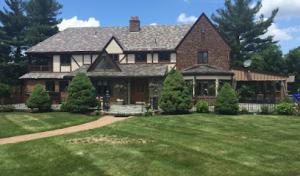
Older premium materials, such as slate, show up on historic-era rows and brick-fronted homes. These roofs carry charm but also complexity: slate requires precise pattern work, proper headlap, and reliable valley and chimney details. If your home leans toward historic character, expect that repairs will demand matching material and careful integration with existing chimneys and masonry penetrations. When slate is present, consider staged replacements that protect the structure while preserving curb appeal, and anticipate coordinated work with compatible underlayments and flashing to respect the original geometry.
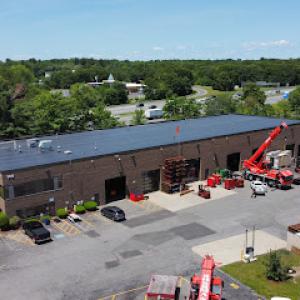
Dense layouts near the harbor often leave porches and additions with low-slope roofs. These areas are frequent leak sources, especially after Nor'easters and winter storms. A practical workflow is to pre-inspect these zones in late fall, focusing on edge weatherproofing, drip edges, and termination at parapets or walls. On these planes, you'll want proven low-slope detailing: continuous membranes beneath penetrations, robust flashing around any vent pipe terminations, and careful seam management to minimize ice dam vulnerability when temperatures swing.
Chimneys are a recurring roof detail, and masonry penetrations remain a common leak source. Treat each chimney as a potential joint failure point: ensure flashing is continuous and properly anchored to both the chimney and the surrounding roof planes, and verify that masonry joints are not directing water toward vulnerable seams. In mixed stock areas, you'll often encounter brick or stone chimneys that require compatible sealants and compatible flashing metals to resist corrosion from salt air and winter moisture.
Staging and dumpster placement are frequently constrained by tight lot lines and neighboring structures. This reality shapes how crews approach either a rowhouse or a multi-unit property: plan for smaller, more frequent teardown windows, careful debris containment, and clean edge work where adjacent units share walls. For historic and premium materials, limit vibrations during removal and use appropriate protection to avoid incidental damage to neighboring facades or delicate trim. In all cases, anticipate quick-react responses to wind-driven rain and sudden temperature shifts, with a plan to seal vulnerable detailing promptly after the initial repair to prevent recurring leaks.
Autumn and winter coastal storms bring wind-driven rain that can expose weak flashing, ridge details, and aging shingle tabs on Chelsea roofs. On tightly packed triple-deckers and rowhouses, wind can find its way along the most vulnerable seams and where old sealant has dried out. The result is sudden leaks around valleys, chimneys, and roof-to-wall transitions after a Nor'easter passes. In these blocks, small failures multiply quickly as insulation and attic ventilation struggle to keep up with cold air pulling moisture downward. Residents should treat any new damp spot on ceilings or attic stains as an immediate red flag, not a seasonal annoyance. The key is preemptive action: inspect during a lull in a storm window, repair missing or cracked flashing, and reseal loose shingles before a forecasted gust event. A quick, decisive response saves interior damage and avoids emergency callouts when the next storm rolls in.
Debris impact and uplift risks are amplified on tightly built Chelsea blocks where neighboring trees, utility lines, and adjacent structures can funnel wind and drop branches onto roofs. A branch that lands on a low-slope surface or over a dormer can compromise hidden fasteners and water diversion systems. Ridge vents, cap shingles, and metal step-flash details along side walls are common failure points during a Nor'easter wind surge. The most reliable mitigation is a proactive exterior check after storms: look for lifted tabs, loose sealant, and worn boots around vents. If a branch or shingle fragment is found, treat it as a priority repair-don't wait for a routine maintenance window. Engage a local roofer who understands how wind interacts with congested rooflines and overhanging eaves in these neighborhoods, and schedule targeted fixes before the next round of weather.
Because Chelsea sits near the harbor and major urban corridors, storm-related demand spikes can compress scheduling after regional weather events. After a major Nor'easter, crews may book up quickly and parts can be scarce. If a leak is suspected, contact a trusted local contractor promptly to secure a slot and avoid a waiting cycle that could push repairs into more critical winter months. Prioritize securing flashing collars around vent stacks and re-sealing any cracked edge metal where wind-driven rain can funnel under shingles. Keep a careful eye on rear low-slope sections, where water can travel farther along the roof plane before appearing inside. In congested blocks, coordinating small, targeted repairs now keeps the rest of the season from becoming a cascade of emergencies.
Find local contractors experienced in assessing and restoring roofs after hail, wind, and severe weather events.


Gibbs Roofing
(617) 793-7724 gibbsroofings.com
Serving
5.0 from 24 reviews
Gibbs Roofing provides expert roofing services to homeowners and businesses throughout Everett. Our experienced team specializes in roof repairs, full installations, leak detection, and preventative maintenance. We work with durable, high-quality materials—including asphalt shingles, metal roofing, and flat roofing systems—to deliver lasting results. Whether you're addressing storm damage, aging shingles, or planned upgrades, we offer clear, transparent estimates and responsive scheduling. With a commitment to quality workmanship, safety, and your satisfaction, Gibbs Roofing is the trusted choice for professional roofing care in Everett.
Art Slate Roofing
(617) 913-1130 www.artslateroofing.com
Serving
5.0 from 20 reviews
For over 20 years, Art Slate Roofing has been the go-to roofing company in the Cambridge area. We specialize in Historical Renovations, as well as Slate & Copper roofing. From leak repairs to emergency blow-offs, curb installations to coating, preventive maintenance to roof asset management, our roofing team can handle it all. We also offer masonry work, chimney repair, and Gutter & Downspout services. Ask about our warranty! Call today for a free estimate!

Immediate Roofing MA
(781) 382-8581 immediateroofingma.com
Serving
5.0 from 15 reviews
"With 30 years in the commercial rooting industry, our company has become a trusted leader in providing durable, high-performance roofing solutions. We've worked with businesses of all sizes, delivering tailored systems that protect their buildings and stand up to the toughest conditions. Our three decades of expertise mean we understand the unique challenges of commercial properties, from flat roofs to large-scale industrial facilities. When you choose us, you're not just getting a roofing contractor-you're getting a partner dedicated to excellence, safety, and your long-term success.

Clancy Roof & Leak Repairs
(617) 467-2455 clancyroofrepaircharlestown.com
Serving
5.0 from 53 reviews
Clancy Roof & Leak Repairs specializes in finding and fixing roofing issues before they turn into costly damage. The team is skilled at tracing leaks to their exact source, repairing problem areas with durable materials, and ensuring the rest of the roof remains in good condition. For more extensive damage, they provide clear recommendations and handle larger repairs with the same attention to detail. Customers often note the quick response times, the straightforward advice, and the quality of the finished work. Clancy Roof & Leak Repairs is committed to keeping properties secure and weatherproof.
All For U Roofing & Masonry
(617) 362-8254 allforuroofing.com
Serving
5.0 from 49 reviews
All For U Roofing & Masonry provides carpentry services, gutter services, masonry services, patio services, and more to Boston, MA, and the surrounding areas.
Northeast Industrial Roof
Serving
5.0 from 123 reviews
With 20 years of experience, Northeast Industrial Roof INC is your trusted roofing company in Medford, MA. Located at 510 Riverside Ave, we specialize in shingle, metal, tile, cedar, EPDM, slate, flat, green, TPO, and PVC roofing. Our services cover both commercial and residential roofing needs, including roof repair, maintenance, replacement, waterproofing, and gutters. Whether you need a new roof, a repair, or regular maintenance, our expert team is here to help. Choose us for reliable, high-quality roofing services in Medford and surrounding areas. Your satisfaction is our priority. Keywords: roofing Medford MA, roofing company Medford MA, roofing contractor Medford MA.
Mairink Roofing Experts
(978) 566-2537 mairinkroof.com
Serving
5.0 from 12 reviews
We are a local Residential & Commercial roofing contractor located in Revere, MA. At Mairink Roofing, we strive to deliver the best quality services at an affordable price. Whether it is a small repair or a full roof replacement, you can count on the team at Mairink Roofing to get it done right the first time! Since 2014, Mairink Roofing has served the Roofing needs of our neighbors in Boston and surrounding areas. We treat our customers like family, and they appreciate our approach to every residential or commercial project that we take on. When you work with us, we create a personalized proposal for you. We will keep you informed every step of the way so you know every step of the way what's going on on your roofing project.
CAN Roof Construction
(857) 415-7727 canroofconstruction.com
Serving
5.0 from 119 reviews
CAN Roof Construction is one of the best Roofing Contractor and Deck Builder in Boston Massachusetts providing Asphalt Roof repair and replacement, Rubber Roof Repair and replacement, Flat Roof Roof repair, Gutter installation, Deck and Porch building and serving Metro West, the Greater Boston area and all surrounding cities. We are the top Roofing Contractor in Boston MA, committed the highest customer service and workmanship quality. We are proper licensed and Insured. If you have roof leak, missing shingle or damage on your roof, get in touch with us, we would love to help you with your roof repair or replacement project. We CAN Roof it!
Corolla Roofing
(617) 561-1333 www.corollaroofing.com
Serving
4.7 from 19 reviews
Corolla Roofing, also known as Corolla Contracting, is a trusted roofing contractor located at 120 Banks Street, Winthrop, Massachusetts. They specialize in providing top-notch roofing solutions tailored to meet the unique needs of both residential and commercial clients. With over 30 years of experience, Corolla Roofing is known for their expertise and attention to detail, ensuring durable and long-lasting roofs. Their services include new roof installations, repairs, and maintenance, all delivered with exceptional customer service. The skilled team at Corolla Roofing is committed to completing every project on time and within budget, making them the preferred roofing experts in Winthrop and the surrounding areas.

Doherty Slate Roofing
(617) 595-1551 dohertyslateroofing.com
Serving
4.9 from 55 reviews
We are slate copper specialists and an award-winning company. Our craftsmanship is prestigious. Unlike other roofing companies, We match identical roof slates to existing slate roofs. This means slate size, slate color, slate age, and thickness to conduct slate roof repairs. We design and install high-end custom copper roof work, Copper Gutters, and install rubber roofs. Were veteran owned and operated. We strive to be the leading slate roofing company in the Boston, Brookline, Newton, and Wellesley areas. We also repair slate tile and carry out annual drone slate roof inspections, slate repairs, slate restoration, and slate installation. Searching for a slate roofing company near me, we are your slate roofing contractor.
A.C. Roof Repair
Serving
4.1 from 52 reviews
A.C. Roof Repair is a licensed, bonded, and insured roofing contractor with years of roofing experience. Our highly trained staff of roofing contractors are guaranteed to get the job done right the first time. We are experts in all types of roof repairs and roof installation, including shingle replacement, flat roof repair, rubber roofs, EPDM, roof coatings, metal roofing, hail damage repair, & more. A.C. Roof Repair does it all at a price you can afford. WE'LL GET IT DONE RIGHT, AND SAVE YOU A TON OF MONEY! Don't trust just anyone with your roofing repairs! Unlike general contractors, construction companies, & chimney repair outfits, we specialize in roofing, and Only Roofing.
Master Seal Roofing
(781) 941-6119 mastersealroofing.com
Serving
4.5 from 85 reviews
Here at Master Seal Roofing we are licensed,bonded and fully insured.We have been in business over 23 years,and are roof repair and replacement experts.We specialize in all types of roofing, leak repair,flat roofs, and more.We give free fully detailed estimates with pictures,with no obligations.We work on residential and commercial properties.We have 24/7 emergency roof repair, snow and ice removal with 100% satisfaction guaranteed.All our work comes with a 5-10 year maintenance programs free of charge.We stop your roof from leaking and can locate were it's leaking from to stop further damage in one trip,and offer same day service. We can stop your leaking roof.We provide all types of roof repairs and replacements and overlays.
Chelsea's dense urban layout can raise labor and disposal costs when crews have limited driveway access, narrow side yards, or little room for material staging. When a tear-off is needed, crews often have to maneuver within tight sidewalks and street parking, which can slow progress and push waste-haul charges higher. Plan for shorter work days with a practical storage plan so materials don't sit on the curb and invite scavenging or weather damage. This reality directly affects total square-foot pricing, especially on mixed-pitch or low-slope sections that require careful sequencing.
Older Chelsea homes may require extra decking repairs once tear-off begins, especially where long-term leaks around chimneys, valleys, or low-slope transitions have gone unnoticed. Expect surcharges if the contractor finds soft decking, warped boards, or failed fasteners once the roof is opened. Since many tri- and quad-unit buildings stack roofs closely, any decking work can cascade into shared costs, shared access, and coordinated schedules with multiple tenants. A proactive deck inspection before ordering materials helps prevent surprises once the project starts.
Material choice matters sharply here: asphalt shingles remain the most budget-friendly option, while slate and tile can be much more expensive to repair or replace on older structures. For low-slope and mixed-pitch roofs, asphalt keeps repair logistics simpler and labor times shorter, which can translate to steadier pricing in a dense block. Metal roofing offers durable performance but can incur higher install complexity in tight confines. Clay and concrete tile deliver a distinctive look but demand careful handling on aging framing and can elevate both tear-off and replacement costs.
Begin with a realistic allowance for staging areas, dumpsters, and limited driveway space. Get a written plan that outlines sequence, decking assessment, and weather contingency. For older structures, request a deck and valley inspection included in the teardown quote, and verify that the contractor accounts for potential extra work in the final bid.
Get a clear picture of your project costs upfront - no commitment required.
In Chelsea, a full re-roof typically requires a permit through the City's Building Department rather than being treated as informal maintenance. That distinction matters when the project involves low-slope rear sections or mixed-pitch roofs that are common on older triple-deckers and rowhouses. If a contractor suggests skipping permitting or treating the job as simple maintenance, that is a red flag. Permits help ensure structural aspects, ventilation, and drainage meet local standards, which is crucial when winter conditions stress aging roofs.
Contractors generally submit the project scope and roofing material details to obtain approval before work starts. This means you should expect plan drawings or a brief scope outlining roof type, underlayment, fasteners, flashing details, and venting. If your home has any historic features or unique eaves, the submission should address how those will be preserved or integrated with the new roof. Ask for a copy of the submitted package and keep a file in case questions come up later during inspections.
Inspections occur during and after completion to verify that the installation complies with local building requirements. Expect at least one rough inspection during the roof's installation and a final inspection when the project is done. The inspectors will check proper nailing patterns for your chosen material, flashing around chimneys and vents, and the integrity of underlayment on low-slope sections. If any deviation from the approved plan is found, repairs may be required before the project can pass.
Delays can arise if permits are not secured or if the submitted scope lacks detail. In winter, a paused project can expose rafters and insulation to moisture, compounding leak risk. If inspections fail, the contractor must correct deficiencies, and this can extend timelines and complicate insurance coverage. Keeping the permit and inspection records organized helps with future repairs and resale, and shows you are aligned with local expectations rather than taking a gamble on informal fixes.
Coordinate with the contractor to review the permit package before work begins, and confirm who will schedule inspections and who attends them. After completion, request final inspection signs-off and keep copies of all permit documents, inspection notes, and approved plans. This makes it easier to verify compliance if future roof issues arise, particularly on the more exposed cold-season surfaces that feed into Chelsea's aging building stock.
After a roof replacement or major storm repair in this area, Massachusetts insurers tend to be very documentation-driven. The file often lands on an adjuster's desk with a clear, photo-backed story of what was done and what materials were used. For a repair project in Chelsea's dense triple-deckers and rowhouses, expect the insurer to want evidence that the work was completed to spec, using the chosen materials and a legitimate contractor. Having a straightforward, organized package helps move the claim along without delays.
Your file should include contractor licensing documentation that demonstrates legitimacy, a detailed material invoice showing manufacturer, type, and quantity of every item installed, and photo evidence taken at multiple stages: before, during, and after the work. If the project involved multiple roof pitches or a low-slope area near the rear, capture close-ups of seams, flashing, and any splice repairs. The photos should be timestamped and labeled so an adjuster can quickly verify scope and workmanship.
Prepare a short, clear summary of the scope that aligns with the photos: what was replaced, what was repaired, and where. If a veteran Chelsea contractor performed the work, include a concise note that the crew followed standard local practices for our climate-freeze-thaw resilience, wind-driven rain, and low-slope drainage considerations. Insurers often rely on detailed before-and-after comparisons rather than a contractor's summary alone, so build your file to support every claim line item with visual proof.
Connect with contractors who help homeowners navigate the claims process from damage assessment to final approval.

Clancy Roof & Leak Repairs
(617) 467-2455 clancyroofrepaircharlestown.com
Serving
5.0 from 53 reviews

Late spring through early fall is usually the best replacement window in Chelsea because Massachusetts winter freeze-thaw conditions can shorten installation days and complicate sealing. That period gives crews a longer stretch of dry days and more predictable temperatures for handling underlayment and flashing. If you're coordinating a low-slope or mixed-pitch roof, aim to start projects after the first major thaw and before the first hard frost, so crews can complete full seal training before winter returns. Planning around a midweek start can also help avoid the typical weekend traffic and parking constraints in dense neighborhoods.
Spring rain can delay tear-offs and expose older roof decks to moisture if scheduling is too aggressive. In tight rows and triple-deck configurations, moisture on an exposed deck can seep into gaps you don't want to see opened during insulation and resealing work. If a storm front moves in, a practical approach is to stage the tear-off to avoid drying times clashing with work on the deck or vent penetrations. A conservative calendar that builds in buffer days helps prevent rain from turning a routine replacement into a moisture-management challenge.
Summer heat and humidity can slow installation pace and affect sealants, especially on low-slope sections where flashing joints demand careful curing. High attic temperatures can also strain crews working on attic access points and reclaimed boards. Consider starting earlier in the day and scheduling crews for the hottest weeks when the forecast shows one or two dry spells rather than back-to-back heat waves. This keeps sealants and taped joints from sweating out during the cure period and helps maintain consistent adhesion across mixed-pitch areas.
Autumn Nor'easters can interrupt otherwise ideal fall roofing schedules. Winds whipping rain along the harbor side increase tarp requirements and edge protection needs, particularly on rear sections with lower slopes. Build in a contingency week or two to accommodate unexpected wind-driven rain, and coordinate with a crew that can mobilize quickly to reseal flashing after a storm passes. A proactive cadence during this season reduces the risk of lingering leaks once temperatures drop.