Last updated: Apr 19, 2026
Burlington sits in South Jersey's storm track, where spring and fall wind-driven rain events are a recurring roofing trigger. That means every heavy gale can collide with roofs that are already fighting age and weathering. The combination of Delaware River exposure, older in-town roofs, and patchwork repairs means shingles, flashing, and underlayment have less margin for error when hit by wind and driving rain. In practical terms, a storm can turn a small, localized leak into a fast-spreading problem across ceilings and walls if the deck isn't properly protected.
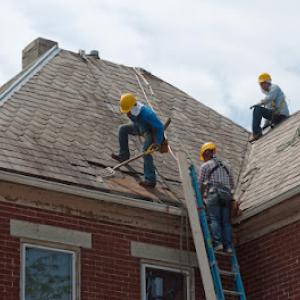
When the storm roars through, time is of the essence. If you notice water entry or dripping, prioritize stopping more water from getting in. Begin with tarping any visibly exposed sections of the roof, especially around weakened valleys, flashing lines, and edge details where wind can lift materials. Move quickly to protect valuables and indoor finishes from further staining or damage. After tarping, keep a careful eye on attic ventilation: poor or compromised vents can trap moisture and accelerate rot. If you see the roof deck or insulation becoming saturated, that is a signal to mobilize professional help sooner rather than later.
On aging roofs, repeated freeze-thaw cycles have already stressed the surface. Shingles may be cracked, cupped, or lifted; flashing around chimneys, vents, and transitions can separate or corrode; underlayment may be split or displaced. Storm wind pressure can exploit these weak points, pushing moisture under the layers where it hides until it finds a breach. Expect that a storm season often reveals not just one weak spot but several, especially in areas with complex roof lines or older decking. The resulting leaks may show up far from the original impact site, so a holistic look after every event is essential.
If a leak is active during a storm, safe tarping is your first line of defense while waiting for a contractor. Use a sturdy, weatherproof tarp, securing it with battens or weighted edges to prevent wind uplift. Seal seams with UV-stable tape or heavy-duty fasteners, ensuring the tarp covers the source area and extends up onto intact portions of the roof to prevent new leaks from forming. Document damage with photos from inside and outside, noting the date and the storm's intensity. Keep a log of when tarping was applied and when a crew is scheduled. Do not attempt to climb a roof during ongoing storms; wait for calmer conditions to complete any on-roof work.
Once the weather clears, do a careful walk-around and interior check. Look for new stains, damp insulation, or softened plywood in the attic and along ceilings. Inspect exterior flashings, vents, and edges for lifted shingles or gaps. Record any areas where tarping was done and note if moisture has penetrated beyond the attic into living spaces. If you detect active seepage or consistent dripping in multiple spots, prioritize quick response from a local roof professional who specializes in storm damage and emergency repairs. A rapid assessment after the storm can prevent widespread deterioration and guide a focused, effective repair plan.
Storm-focused work in this area tends to surge into emergency repairs and rapid containment rather than purely elective replacements. Seek a contractor with proven experience handling wind-driven leaks on aging systems, who can provide immediate tarping, leak containment, and a thorough post-storm assessment. Ask for references from recent Burlington projects, and verify that the team can coordinate quick on-site inspections, temporary protection, and a clear plan for addressing multiple weak points that storms tend to reveal. Quick, decisive action protects the home's structure, interiors, and long-term roof performance in the face of persistent storm risk.
Revolution Roofing & Remodeling
(609) 228-9527 myrevolutionhome.com
13 Orly Way, Burlington, New Jersey
4.8 from 75 reviews
Welcome to Revolution Roofing & Remodeling – the premier contractor for all your home improvement needs. Our experienced crews provide top-quality, cutting-edge roofing, interior, and exterior home remodeling services. Our team has the vision and expertise to take on your next home improvement project, no matter how simple or complex!
Cooper Roofing
(800) 945-2833 www.cooperroofing.com
Serving
4.6 from 60 reviews
Cooper Roofing is a family-owned and operated commercial and industrial roofing contractor with over 30 years of experience. We work with property owners and managers along the entire East Coast, and support our clients by growing with them, and servicing their portfolios nationwide. Our customers trust us as part of their team because we deliver reliable service, fair and reasonable pricing, and quality workmanship. Cooper Roofing operates over 30 fully-licensed and insured crews a day, so we’re always there when our customers need us (24/7). Cooper Roofing is certified for Versico, GAF, and other roofing systems for commercial, industrial and residential clients.
A. Brooks Construction Inc. Presents Kanga Roof
(215) 752-6145 abrooksconstruction.com
Serving
5.0 from 792 reviews
Kanga Roof has been providing residential and commercial roofing services in the Bucks County area since 1987. We are certified in PA and NJ, bonded and insured. Our employees are drug tested, background checked and professionally trained. We're dedicated to providing the best roofing services in a safe and professional environment.
Roof Repair & Replacement
(856) 372-4291 www.roofreplacementandrepair.com
Serving
4.8 from 20 reviews
Given the wide array of choices that you have for roofing repairs in NJ, why should you choose us? For starters, because we're a licensed and bonded company with GAF certification — which means you can trust that our work will be up to code and provided with a satisfaction guarantee. Second, you can also take stock in our competitive prices and exceptional numbers of choices regarding general contractor services in New Jersey .However, the most important aspect is the fact that we're backed by customer reviews and testimonials — all of them satisfied clients who trusted their business with us.
Thunders Solutions
(609) 864-7591 thunderssolutions.com
Serving
4.9 from 73 reviews
At Thunders Solutions in Mount Holly, NJ, we are dedicated to providing exceptional roofing services for both residential and commercial properties. We specialize in roof repairs, installations, and maintenance, as well as expert siding and gutter services. Our focus on quality and customer satisfaction includes offering free inspections and personalized consultations. We use the finest materials to ensure each project meets the highest standards, making us a trustworthy choice for your roofing needs.
Cover All Exteriors
(215) 839-9335 coverallexteriors.com
Serving
5.0 from 66 reviews
Cover All Exteriors is your one-stop shop for any exterior contracting work needed on your home. Cover All has both roofing and siding specialists who are standing by to assist with storm damage, or to help replace old weathered exteriors. You can rely on the decades of experience the team has at Cover All to provide you peace of mind that the work will be done properly. This is why Cover All also offers extensive warranties so that you know your siding or roofing was built to last. Contact Cover All Exteriors for a free roof or siding inspection today!
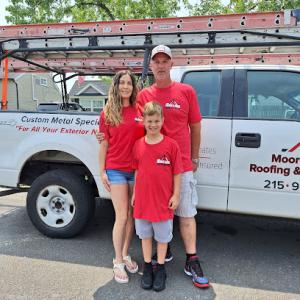
Moore & Sons Roofing & Contracting
(215) 954-8273 www.lmooreandsons.com
Serving
4.9 from 29 reviews
Family owned licensed and insured Roofing and Contracting business. Both commercial and residential roofs, as well as repairs or new roofs. window installation and capping, among other contracting needs.
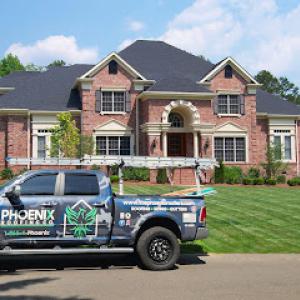
Phoenix Roofing & Siding
(267) 367-7610 thephoenixroofers.com
Serving
4.9 from 83 reviews
Welcome! We are Phoenix Roofing & Siding of Bensalem, PA! We are more than just roofing contractors – we are dedicated professionals committed to delivering excellence in every project. Based in Bucks County, we proudly serve Eastern PA and South NJ (and surrounding areas) providing top-notch residential and commercial roofing services, siding installations, and comprehensive storm damage repairs.
KPI Jr. Exteriors
(609) 658-9925 www.kpijrexteriors.com
Serving
5.0 from 118 reviews
KPI Jr Exteriors, LLC is a trusted roofing contractor in Bucks County, serving NJ, Chester, and Montgomery Counties since 2017. We specialize in roofing, siding, gutters, windows, doors, and custom decks. As certified GAF and CertainTeed installers, we use only premium materials. Fully licensed and insured in PA and NJ, we’re committed to job-site safety, clear communication, and total satisfaction. Contact us today for reliable home services in Bucks County and a free, no-obligation estimate.
Farrell’s Roofing
farrellsroofingphiladelphia.com
Serving
5.0 from 74 reviews
We are a family owned and operated business that’s licensed and insured for residential and commercial properties and have been in the roofing business for over 20 years. We specialize in all types of roofing and we stay familiar with roofing material brands so we can provide you with top quality material for your home or business project. We also do siding, capping, skylights, gutters and spouts. We do Re -flashes and Coatings also if you’re just looking to maintain your roof.

Cephalo Roofing New Jersey
(347) 282-1041 cephaloroofing.com
Serving
5.0 from 91 reviews
When it comes to dependable roofing services, Cephalo Roofing is the go-to choice for homeowners and businesses across North and Central New Jersey. Whether you need a roof replacement, expert roofing repair, or a local roofer to address storm damage, we’re here to deliver exceptional results tailored to your needs and budget. From the scenic neighborhoods of Allendale and Franklin Lakes to bustling areas like Fort Lee and Englewood Cliffs, our team is trusted for maintaining the integrity of roofs in communities large and small. In towns like Paramus, Ridgewood, and Ho-Ho-Kus, we’ve earned a reputation for quality Roof Replacement 📞 Call us today for a free estimate and let us show you why we’re the trusted roofing company near you!
Crudello's Roofing
(201) 478-0012 crudellosroofing.com
Serving
5.0 from 57 reviews
Your Search for a Truly Honest NJ Roofer Ends Here! Let's face it, finding a reliable roofing company in New Jersey can feel overwhelming. At Crudello’s Roofing NJ, we get it. We're not here for a quick sale; we're here to build trust, one sturdy roof at a time. What You Can Expect From Us: Real Talk, Always: We'll give you straight-up, honest advice about your roof's condition. If it doesn't need repairs yet, we'll tell you! No unnecessary upsells, ever. Quality That Lasts: We stand behind our work. That's why most of our comprehensive roofing packages come with an incredible 30+ year warranty. Imagine that – decades of peace of mind and protection for your biggest investment. Crudello's Roofing a partner you can trust!
Asphalt shingles are the dominant practical choice for Burlington because they fit the area's common detached-home roof forms and the local contractor base has stronger asphalt specialization than any other steep-slope material. For many aging roofs, that familiarity translates into quicker leak response, better guidance on ventilation, and more dependable warranties when storms push the envelope. If your home has the familiar gable or side-gabled profile, shingle systems tend to pair most predictably with standard decks and existing ventilation paths, reducing surprises during cold snaps and hot spells alike.
Seasonal precipitation, hot summers, and winter freeze-thaw cycles demand a resilient underlayment and a robust roof deck. Beyond asphalt, the choice of materials that bend with Burlington weather requires careful attention to how the underlayment is tied to roof geometry and attic ventilation. When a storm hits and wind-driven rain tests the seams, a well-sealed underlayment acts as the first line of defense before the shingles or panels come into play. In older homes, where the deck may show signs of wear, upgrading to a high-quality synthetic underlayment and improving attic venting can markedly reduce the chance of escape routes for moisture.
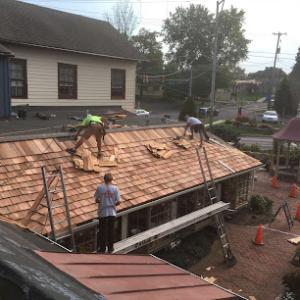
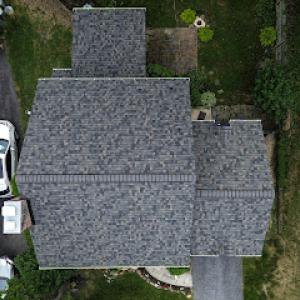
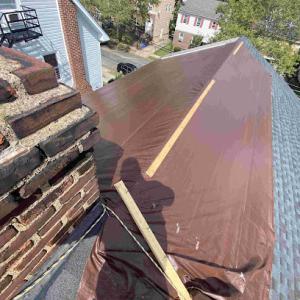
Storm-driven leaks in aging roofs often reveal themselves along eave edges, near penetrations, and where older flashing has degraded. In Burlington, wind tends to peel back shingles at corners, rake edges, and push water toward valleys if valley underlayment is compromised. Immediate response after a wind event should focus on temporary tarping if a large area is exposed, followed by inspection of flashing around chimneys, vents, and skylights. A practical approach is to verify that attic insulation has not been compacted by moisture and that soffits remain clear to maintain cross-ventilation. When shingles are blown loose, replacing only damaged areas with matching shingles often buys time, but ensure the deck beneath remains sound and properly ventilated to prevent hidden rot.
Tile, concrete tile, wood shake, and synthetic products exist in the market, but Burlington's hot summers, winter freeze-thaw cycles, and seasonal precipitation make underlayment quality and roof structure suitability critical when moving beyond asphalt. Metal roofing is present but more specialized locally, making contractor selection and detailing more important for homeowners considering an upgrade from standard shingles. If exploring metal, expect heightened attention to seam details, base sheet compatibility, and sealing at penetrations to prevent wind-driven leaks. For heavier materials, assess whether the existing structure can support additional weight and whether attic ventilation can accommodate the added roof mass without creating new condensation routes.
On aging roofs, prioritize a robust deck assessment before any re-covering. Look for loose or missing fasteners, cupping shingles, or signs of moisture intrusion near penetrations. Plan for a complete venting check: ensure soffit intake, ridge or turbine vents, and attic baffles are unobstructed. If you notice repeated leaks after storms, map leak locations to determine if the problem is flashing, deck rot, or inadequate underlayment. When replacement is on the table, choose a system that aligns with the home's roof form and ensures a continuous weather barrier from eave to ridge, with attention to how the profile will perform under Burlington's seasonal extremes.
In this part of New Jersey, the decision on replacement windows has to balance draft control with the realities of a windy Delaware River edge and aging homes. Dry, milder months are the preferred window for installation, because extreme heat can complicate sealants and fasteners, and freezing conditions can hinder precise glazing. A well-sealed vinyl or resin/frame option often performs reliably in this climate, with laminated glass or double- or triple-pane configurations to keep seasonal swings from transferring indoors. For homes with existing wood trim or historic accents, a high-quality wood-clad option can preserve aesthetic value while delivering modern energy efficiency. Regardless of material, look for units with reinforced sashes and robust weatherstripping, since Burlington homes frequently endure wind-driven drafts that awaken older seals.
Spring and fall can feel like the right windows for replacing windows, but those seasons bring enough wind and rain to disrupt both scheduling and installation quality. Older Burlington structures often reveal deck and framing vulnerabilities once openings are exposed, so plan for a window project to include a thorough inspection of surrounding masonry and flashing. If a tear-off or infill step is needed, your contractor should stage material protection to keep interior spaces dry during a sudden shower. In practice, choosing mid-season months with stable temperatures reduces the likelihood of sealant failure and keeps interior temperatures manageable during heavy work.
Replacement windows must contend with the condition of aging exterior decks and roof edge details. Burlington homes frequently show channeling or minor shifting at the sill line due to settlement over decades, which can complicate flashing and water shedding around the window. A careful assessment should confirm that the rough opening is plumb and square, and that there is uninterrupted water management from the roofline down to the window head. A window with an integrated drainage system and a water-resistive barrier behind the trim helps defend against the common Burlington issue of wind-driven leaks around deck edges. If the house uses traditional framed openings, a professional should verify that masonry joints, sealants, and kick-out flashing are compatible with the new unit to prevent interior moisture events after a storm.
Winters impose both scheduling delays and load concerns for older structures, making pre-winter planning prudent. Installing windows ahead of heavy snows avoids the risk of disturbing settled ice dam formation and allows proper shingle or siding integration before cold snaps intensify. In milder months, you gain more forgiving conditions for sealing along edges and testing interior air barriers. After installation, routine maintenance-cleaning seals, inspecting exterior trim, and checking for any wind-driven movement along the casing-helps preserve energy performance and prevent small leaks from becoming bigger problems during the next sharp storm.
When a full roof replacement is planned, the process is driven by the local building department rather than treated as informal maintenance. A permit is required, and the approval path centers on safe installation practices, proper ventilation, deck protection, and correct underlayment. The permit acts as a formal acknowledgment that the project will meet current code expectations for Burlington's climate and housing stock. Before any tear-off or new installation begins, confirm that a permit is in place and that the appropriate administrative steps have been fulfilled.
Inspections are not a single post-project checkpoint in this city. A typical reroof will be reviewed during the work to verify ongoing compliance with ventilation requirements, deck protection measures, and underlayment installation. These checks help ensure that aging structures, exposed to Delaware River winds and seasonal moisture, do not fall behind on critical details that affect long-term performance. Expect a review mid-project to confirm materials and methods align with code intent, and be prepared for adjustments if the inspector flags any discrepancies.
A second, final inspection usually occurs once the roofing work is completed. This inspection confirms that all aspects-ventilation, deck protection, underlayment, flashing, and the overall roof assembly-conform to code and meet Burlington's standards for safe, durable performance. If the final review identifies gaps, a short remediation window may be provided to address them before the project is officially closed in the permit record.
Because the city uses a permit-and-inspection workflow for full replacements, it is essential to establish who is responsible for pulling the permit before any work starts. The contractor or the homeowner can handle the application, but the responsibility needs to be clearly decided and documented to ensure that inspections align with the project timeline. Clarify upfront whether the contractor will pull the permit or if ownership will initiate the process, and confirm the timeline for inspection appointments to avoid delays during critical weather-sensitive windows.
Burlington cost expectations span from about $360 to $640 per square for asphalt shingles, $800 to $1400 for metal, $1200 to $2100 for clay tile, $1000 to $1800 for concrete tile, $900 to $1300 for wood shingles or shakes, and $700 to $1100 for synthetic or composite shingles. Those ranges reflect a mix of aging homes, deck exposure from Delaware River weather, and the regional market that swings with storm activity. After a major wind and rain event, prices can rise as crews, materials, and emergency response flow increase.
When a storm hits, you'll often see a tight window for replacement, plus higher labor rates and material staging costs. In practice, that means a Burlington project may push toward the higher end of the local range, especially if multiple homes are competing for crews. If your roof is aging or shows wind-caused damage, expect discussions about tear-off debris disposal, temporary protection, and the sequencing of the tear-off and replacement to influence overall timing and price.
Older homes in the area frequently uncover decking repairs during tear-off, or find ventilation and underlayment needs that weren't anticipated at the planning stage. These fixes can move a project toward the higher end of the local cost spectrum. A thorough inspection should check for damaged boards, dry rot, and the condition of ridge vents and soffits, since these elements affect long-term performance and energy efficiency as well as code-compliant ventilation during re-roofing.
Start with a clear material choice aligned to your house style and wind exposure risk. If you're weighing asphalt versus metal or tile, map out long-term durability and replacement intervals against initial cost. Factor in potential storm-season price spikes and the possibility of unseen decking repairs once removal begins. Clear communication with the contractor about tear-off scope, underlayment type, and ventilation plan helps keep a Burlington project on track and closer to the lower end of the expected range when conditions are calm.
Get a clear picture of your project costs upfront - no commitment required.

In the storm-prone Delaware River corridor, roof age and prior condition matter a lot when a claim hits the file. Standard replacements are still insurable in New Jersey, but Burlington homeowners should expect carriers to ask for roof age, prior condition, and detailed replacement records when storm damage is involved. If the roof has known vulnerabilities from previous leaks or aging decking, expect a tougher review or a more conservative payout. Clear history beats guesswork, so gather any past inspection notes, maintenance records, and photos that show how the roof looked before the recent damage.
Adjusters in this market commonly want contractor-supplied photos and may request a roof certification, which matters in Burlington because storm-related leak calls and emergency repairs are so common. Take fresh, timestamped photos from multiple angles after a wind or rain event, and keep them organized by date. Include close-ups of fasteners, flashing, and flashing transitions around dormers or valleys that often suffer after a blow or heavy rain. A simple, honest narrative connecting the photos to the observed leaks helps prevent back-and-forth delays.
Some carriers require verification from a licensed contractor, so Burlington homeowners should document damage immediately after wind or rain events and keep permit and completion records tied to the replacement. If a claim involves decking or underlayment damage, insist on a detailed scope from a licensed pro that notes ventilation and deck protection, since those steps are scrutinized during the re-roof process. Keep a running folder of contractor communications, certifications, and any temporary repairs, so the file reflects a clear progression from damage discovery through completion. The more transparent the trail, the better the odds of a timely, fair resolution.
Connect with contractors who help homeowners navigate the claims process from damage assessment to final approval.
Revolution Roofing & Remodeling
(609) 228-9527 myrevolutionhome.com
13 Orly Way, Burlington, New Jersey
4.8 from 75 reviews

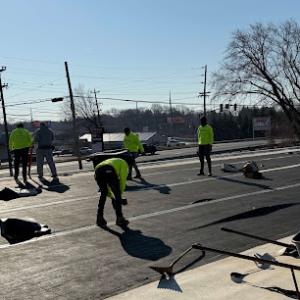
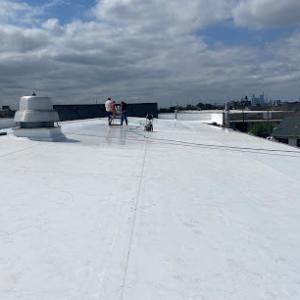
Flat and low-slope roofs show meaningful demand in this area, driven by older in-town additions and newer suburban extensions. In Burlington, those low-slope sections often need careful edge detailing and proper drainage planning to avoid standing water after heavy rains. If your flat area uses a built-up or rubber membrane system, make sure the edge flashing runs full width past the parapet and that overflow scuppers are clear. Aging membranes can develop hairline cracks that trap water, so schedule a fall inspection after the wet season and freeze-thaw cycles. Pay attention to any evidence of ponding near transitions from flat to pitched sections, where dead air and cold weather can accelerate deck deterioration.
Skylight penetrations are a recurring leak point during heavy rain and freeze-thaw cycles. In Burlington, skylight flashings should be integrated with the surrounding roof deck and shingle line rather than sitting on top of an older layer. Inspect the flashing boot, curb seal, and the sealant surrounding the skylight for signs of wind-driven ingress or deterioration from UV exposure. If you notice condensation between panes or damp insulation around the frame, plan a targeted reseal or flashing replacement. When replacing skylights, choose units with laminated glass and reinforced curb mounts that stand up to local wind loads.
Chimneys are a frequent source of leaks in this area, where older housing stock meets modern weather patterns. The key area is the roof-to-masonry flashing, which can fail as mortar ages or shifting occurs. Inspect the step flashing along the chimney sides and the counter-flashing where it meets the shingles. Look for rust on metal flashing, loose or lifted shingles at the base, and cracked or smeared masonry joints. A chronic leak might require re-flashing with a continuous metal strip and a compatible sealant at the field of the chimney crown. Proactive maintenance-repointing the masonry and resealing the crown-can pay off in long-term water control.
Find specialists in TPO, EPDM, and built-up flat roofing systems for residential and commercial properties.
Roof Repair & Replacement
(856) 372-4291 www.roofreplacementandrepair.com
Serving
4.8 from 20 reviews
The warranty landscape for aging roofs in this town can be a quiet trap door if not read carefully. Manufacturer-backed protection tends to stay in force only when the full roof system aligns with the installer's and the product maker's requirements. Ventilation, underlayment, deck protection, and correct flashing are not afterthoughts - they're the pieces that keep a warranty from turning into a paper promise after the first storm-driven leak or wind event. In a market where local weather can test the integrity of an aging deck, understanding which parts of the system the manufacturer actually covers is essential to avoid a stale claim when high winds or driving rain expose gaps.
Burlington homeowners have access to a meaningful pool of manufacturer-certified contractors, which matters when comparing warranty strength rather than just base price. Certified installers typically follow installation protocols that preserve coverage, including the nuances of venting and underlayment that are scrutinized during inspections here. If the crew cuts corners or substitutes components without notice, the warranty can shrink or disappear at the moment a claim is needed most. A certified installer also tends to keep better records of materials used, the exact underlayment type, and the sequence of installation - documentation that helps when the unexpected happens.
When you're vetting contractors, ask specifically about what the warranty covers - material defects, workmanship, and period length - and whether coverage requires a complete roof-system installation per the manufacturer's guidelines. Request a written list of each component the warranty depends on, including ventilation and underlayment, and who is responsible if a claim arises from wind damage or storm leakage. Confirm the installer's certification status, recent references, and whether there's a dedicated claim contact. In this market, the strongest protection comes from a proven, certified installer who can demonstrate adherence to manufacturer requirements across the whole roof system.