Last updated: Apr 19, 2026
Spring hail and wind events in this area can strike without warning, leaving shingle damage, lifted flashing, and sudden leaks that scream for immediate attention. After a storm, you need to act fast: shallow, weather-tight tarps and temporary patching buy you time before a full repair, especially when cold snaps follow and ice dams form. A rapid response minimizes interior staining and secondary damage to ceilings, attics, and insulation. In this market, emergency repair teams and storm-damage specialists are a common, trusted call for homeowners, so keeping a clear plan of attack helps you separate urgent needs from routine maintenance.
New Jersey insurers expect a precise, timely paper trail. Mount Holly homeowners should capture high-resolution photos of missing or damaged shingles, bent or lifted flashing, and any interior staining that indicates leaking from above. Document the exterior eaves, vents, and valleys where wind and hail most often strike, plus close-ups of weathered or scalloped edges that hint at larger underlying failures. Keep a dated sequence of photos to show progression, if any, and collect weather notes from the storm that matches the damage timeline. When the claim is filed, your file should include these images, a brief narrative of what happened, and a list of affected areas. If an adjuster needs access, be prepared to guide them through attic spaces to verify roof deck conditions and any staining above interior ceilings.
Ice-dam stress during winter can force leaks into the home even when the visible damage looks minor. In the spring, prioritize securing any active drips from valleys, flashing, or chimney leads. Temporary tarping should cover the most vulnerable roof planes first, especially over living spaces and bedrooms where a leak can interrupt daily life. If snow or ice remains, work with a roofer who can clear or safely manage ice dams while preserving roof edges. Avoid delaying temporary fixes; a small leak today often becomes a larger repair tomorrow, and weather in this area tends to swing quickly from sunny to stormy.
A storm-damaged roof can affect interior spaces rapidly, so plan for a staged recovery: get the worst leaks halted first, then schedule a measured, methodical rebuild. Keep notes on all temporary repairs, including who performed them and when, so the insurance claim trail remains coherent. When you meet with an adjuster, have a concise summary of observed damage: shingle loss patterns, flashing deformation, and any interior staining that aligns with roof line failures. A calm, organized presentation can smooth the review process and help ensure your claim reflects the actual scope of damage.
The local contractor signal mix in this market leans toward emergency repair and insurance-driven work. Seek contractors who respond quickly after a call, provide clear timelines, and document progress with photos and written updates. In a county-seat setting where historic homes are common, framings and details can complicate repairs, so choosing a contractor familiar with both older stock and modern weatherproofing helps prevent missteps. When a storm hits, your priority is to secure the home, document the damage comprehensively, and connect with a reputable team that can guide you through an efficient, insurer-friendly restoration.
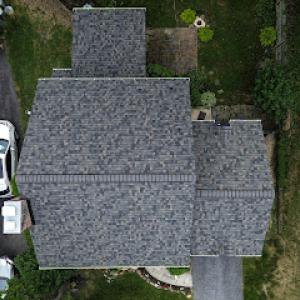
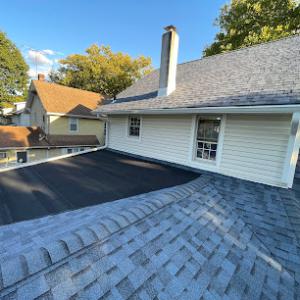
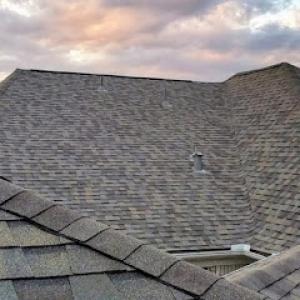
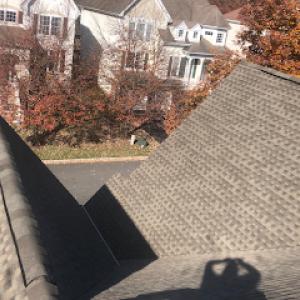
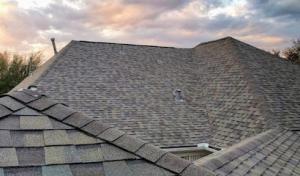
Asphalt shingles are the dominant practical choice in this market. The familiar composite shingle works well on most older Burlington County homes that carry brick, wood, or stucco siding and moderate roof pitches. In Mount Holly, the freeze-thaw cycle and hot, sunny summers mean ventilation becomes essential. A roof with proper intake and exhaust vents helps prevent attic moisture buildup and reduces heat transfer into living spaces. Pair asphalt with a quality underlayment rated for cold weather and reflective ice-dam protection at the eaves and in overhanging valleys to reduce ice formation during midwinter thaws. If you expect frequent storm-driven leaks, ensure the system includes leak barriers around chimneys, skylights, and dormers, where freeze-thaw stress tends to show up first.
Metal roofing is active but still secondary in this market. It appeals when snow shedding and storm resistance are a priority, especially where homes face recurring exposure to Nor'easter winds and hail. Metal panels or standing-seam profiles can offer longer service life and quicker water shedding after storms. The weight is lighter than many tile options, but installation still benefits from a professional assessment of roof structure and attic ventilation. A reflective coating or lighter color can help manage summer heat, and careful detailing around penetrations reduces wind-driven water intrusion. Expect more precise surface fastener work to prevent squeaks and corrosion in the coastal air and winter moisture.
Tile and wood products exist in the local material mix, but their weight, maintenance profile, and installation complexity make them more specialized choices than standard asphalt re-roofing here. Clay and concrete tiles demand a reinforced deck and careful fastener spacing to handle freeze-thaw pressure and wind uplift. Concrete and clay tiles can crack under abrupt temperature shifts if installed without expansion joints or proper underlayment. Wood shingles or shakes bring a classic look but require ongoing maintenance to resist moisture, mildew, and insect exposure. In areas with harsh winters and direct sun, frequent inspections are advised to address potential curling, cupping, or hail-related bruising.
When choosing a roof for the local climate, pay attention to attic insulation and ventilation ratios, as heat and moisture management directly affect shingle lifespan and leak risk after storms. Ice-dam protection is a practical must in the winter, especially on older homes with improved but not ubiquitous insulation. Wind uplift resistance matters in gusty spring fronts, so confirm that fasteners and edging meet the expected wind zone loads for the area. In storm-damaged situations, document damage promptly for insurance purposes, keeping photos of the roof surface, gutters, and attic signs of water intrusion. A solid combination of underlayment, venting, and appropriate roof material will serve long-term performance in this county-seat setting.
When budgeting a re-roof, you'll see clear differences by material. Asphalt shingles sit in the 350 to 700 USD per square range, making them the most common for older Burlington County homes that aren't pursuing premium looks. Metal roofing runs higher, from 700 to 1400 USD per square, delivering longevity and a modern profile but at a steeper upfront cost. Tile systems-including clay and concrete-run substantially higher, which matters if you're replacing an existing roof with a tile option. Concrete and clay tiles can push total project cost well beyond simple replacement estimates, especially on homes with complex rooflines or deeper overhangs.
In Mount Holly, costs can rise when a storm season spikes across South Jersey. Emergency scheduling, insurance-related repair volume, and tightened labor availability all contribute to scheduling challenges and higher crew rates. If a wind, hail, or winter event hits and many roofs need attention at once, you may see a temporary bump in both material access and labor timing. Planning for a potential short-term premium is prudent, especially if your project timelines align with peak storm season or after a widespread storm.
Established Burlington County neighborhoods feature older homes with more complex roofs. Tear-off work, decking repairs, flashing around chimneys and vents, and ventilation upgrades commonly add to the bottom line. If the existing sheathing is soft or damaged, expect additional costs for replacement or reinforcement. Skirt around underlayment upgrades, ridge vent updates, and perimeter flashing enhancements, since these items often surface as part of a comprehensive re-roof in older structures. All of this can push final pricing above simple per-square replacement estimates, so it's wise to budget a cushion for decking and flashing work when you're mapping out options.
Start with a written scope that differentiates between a straight replacement and a full tear-off with decking work. Compare bids that itemize materials, fasteners, underlayment, drip edge, flashing, ventilation, and chimney or stack work. Demand a clear schedule that shows storm-season contingencies and lead times for materials. If you're weighing asphalt versus metal, consider long-term value: asphalt offers affordability and quick repairs, while metal can lower maintenance needs and resist wind-driven leaks better in a high-wind season. For tile, confirm roof slope suitability and ballast requirements, since these influence installation complexity and cost.
Thunders Solutions
(609) 864-7591 thunderssolutions.com
Serving
4.9 from 73 reviews
At Thunders Solutions in Mount Holly, NJ, we are dedicated to providing exceptional roofing services for both residential and commercial properties. We specialize in roof repairs, installations, and maintenance, as well as expert siding and gutter services. Our focus on quality and customer satisfaction includes offering free inspections and personalized consultations. We use the finest materials to ensure each project meets the highest standards, making us a trustworthy choice for your roofing needs.

J. Patterson Construction
(609) 743-5074 thejpattersonconstruction.com
Serving
5.0 from 13 reviews
J. Patterson Construction offers roofing and gutter services in Hainesport, NJ and the surrounding areas. They have over 25 years of experience providing residential and commercial clients with inspections, certifications, repairs, and installations for their roofs and gutters. J. Patterson Construction is committed to providing top-notch service and can also handle emergency situations.
Champion Exteriors
(800) 276-0032 champion-exteriors.com
Serving
4.6 from 195 reviews
Champion Exteriors has been serving homeowners and businesses in New Jersey and Pennsylvania since 1936. We specialize in residential and commercial roofing, including flat, metal, TPO, EPDM, and RhinoBond systems. As a James Hardie Preferred Contractor, we also install siding, windows, gutters, doors and decks. Our team is known for fast response, free inspections, and delivering long-lasting exterior solutions. Whether you need emergency roof repair or a full siding replacement, Champion Exteriors provides trusted service backed by over 85 years of experience.

Cephalo Roofing New Jersey
(347) 282-1041 cephaloroofing.com
Serving
5.0 from 91 reviews
When it comes to dependable roofing services, Cephalo Roofing is the go-to choice for homeowners and businesses across North and Central New Jersey. Whether you need a roof replacement, expert roofing repair, or a local roofer to address storm damage, we’re here to deliver exceptional results tailored to your needs and budget. From the scenic neighborhoods of Allendale and Franklin Lakes to bustling areas like Fort Lee and Englewood Cliffs, our team is trusted for maintaining the integrity of roofs in communities large and small. In towns like Paramus, Ridgewood, and Ho-Ho-Kus, we’ve earned a reputation for quality Roof Replacement 📞 Call us today for a free estimate and let us show you why we’re the trusted roofing company near you!
Crudello's Roofing
(201) 478-0012 crudellosroofing.com
Serving
5.0 from 57 reviews
Your Search for a Truly Honest NJ Roofer Ends Here! Let's face it, finding a reliable roofing company in New Jersey can feel overwhelming. At Crudello’s Roofing NJ, we get it. We're not here for a quick sale; we're here to build trust, one sturdy roof at a time. What You Can Expect From Us: Real Talk, Always: We'll give you straight-up, honest advice about your roof's condition. If it doesn't need repairs yet, we'll tell you! No unnecessary upsells, ever. Quality That Lasts: We stand behind our work. That's why most of our comprehensive roofing packages come with an incredible 30+ year warranty. Imagine that – decades of peace of mind and protection for your biggest investment. Crudello's Roofing a partner you can trust!
AAA Apex Construction
(201) 682-5251 aaaapexconstruction.com
Serving
5.0 from 81 reviews
We are a Family Owned Company in New Jersey with more than 20 years experience working with roofing, chimney, and masonry. Over the years, the company has undertaken many challenging projects and accumulated skills, know-how and experiences in repair, replacement, design and build solutions, project management services, and related construction works. We are a fully insured and licensed Construction Company.
Prime R&J Roofing
(201) 952-0585 primerjroofing.com
Serving
5.0 from 48 reviews
High-Quality Roofing Installation. Excellence Guaranteed
All State Home Improvement
(973) 856-0200 allstatehomeimprovementinc.com
Serving
4.9 from 63 reviews
All State Home Improvement is a trusted roofing and home improvement contractor in Hillside, NJ, proudly serving residential and commercial clients across New Jersey. We are GAF Residential & Commercial Certified, Owens Corning Certified, James Hardie Certified, and Pella Certified Contractors. We ensure every project meets the highest standards of quality and durability. Our expert team specializes in roof repair, roof replacement, siding, gutters, windows, doors, and home additions, as well as complete interior remodeling services. Whether you need emergency roof repair, a full exterior/interior upgrade, or energy-efficient window installation, we deliver reliable craftsmanship with honest pricing. Contact us today!
Randy's Roofing Construction
(551) 293-2997 www.randysroofingconstruction.com
Serving
5.0 from 38 reviews
Top rated roofing contractor with over 11 years of experience. We offer roofing services from roof repair, roof installation, emergency roof services, and more. Happily providing top notch roofing services all throughout New Jersey.
High Caliber Roofing
Serving
5.0 from 36 reviews
High Caliber Roofing provides roof installation services to the Rahway, NJ area.
Guinness Pro Construction & roofing
(800) 654-2987 guinnessproconstruction.com
Serving
4.9 from 52 reviews
Guinness Pro Construction and roofing servicing New Jersey! We offer Roofing Install and Repairs for Residential and Commercial Construction, leak Repairs, Leak Detection, and other Construction Services. Guinness Pro Construction ,family owned and operated, licensed and bonded, being passed on generations now ,and taking great pride from our trusted customers,our secret and specialty is quality and professionalism on every single job! Call now!
Uncle Al's Roofing
(267) 222-1861 unclealroofing.com
Serving
4.9 from 68 reviews
Uncle Al's Roofing provides residential and commercial roofing services to customers in Pennsylvania, New Jersey, and Delaware.
For a full re-roof, a building permit is typically required, and the process involves formal municipal review rather than a contractor-managed swap. This means scheduling with the township and aligning your project with local codes and neighborhood character. Expect paperwork that confirms roof materials, structural considerations, and adherence to historic-influenced sightlines common in the county-seat area.
The permit process is handled by the Mount Holly Township Building Department. Contact the department early in the planning stage to confirm required forms, documentation, and any neighborhood or zoning overlays that might affect your project. Building inspectors will be involved at key milestones to verify compliance with structural and safety standards, as well as storm-related repair considerations that come with New Jersey's weather patterns.
Inspections occur during crucial stages of installation, including the underlayment and final inspection. The underlayment stage ensures proper ventilation, weatherproofing, and adherence to local moisture-control practices that matter in winter freeze-thaw cycles and spring storm events. The final inspection confirms that all components-sheathing, underlayment, flashing, and penetrations-are correctly installed and meet code before the project is signed off. Plan for these inspections in your project timeline so that weather delays don't push you past permit deadlines.
Plan review can be affected by zoning and structural considerations, which matters more when a project changes roof assembly details rather than simply replacing like-for-like materials. If the replacement introduces new venting layouts, different insulation approaches, or alternate roof deck configurations, anticipate additional scrutiny. Historic and district-adjacent properties may trigger extra review steps to preserve neighborhood character, so have detailed roof diagrams, product specs, and load calculations ready for the Building Department.
Keep a clear line of communication with your contractor and the Building Department. Maintain a file of permit approvals, inspection reports, and any corrective actions requested by inspectors. Documentation that demonstrates compliance with wind, hail, and winter-weather requirements will streamline the process and reduce delays, especially after a storm repair scenario where timely leaks response is often critical to protecting the home.
New Jersey's regular weather-related roof losses mean insurers in this area scrutinize claims more closely. Expect a stronger focus on roof age, prior claims, and maintenance history when a storm test arrives. In a historic county-seat setting like this, roof systems often bear older underlayment, mixed materials, and sometimes limited access for quick repairs. That combination can influence how quickly a claim is approved and how much of the work an adjuster considers covered. The reality is that legitimate damage may be weighed against the roof's proven condition, so the more you can demonstrate ongoing care, the better your position when a claim lands on the desk.
Coverage availability and underwriting can vary by carrier and claim history, which makes repeated storm claims a long-term cost factor for households even when damage is legitimate. If a roof has weathered back-to-back seasons of wind, hail, or winter freeze-thaw cycles, insurers may view it as a higher risk asset. That doesn't mean a claim is blocked, but it can affect deductibles, the scope of coverage, or the need for more robust documentation and expert opinions. In Mount Holly's market, where storm events are common enough to stay top of mind, understanding how your carrier evaluates risk after multiple incidents is essential to avoid surprises during settlement.
Detailed photo records, contractor findings, and adjuster-facing documentation are especially important locally because storm, wind, hail, and winter leak claims are all plausible in this market. Take wide and close-up photos of roof surfaces, flashing, gutters, and any interior signs of water intrusion. Gather contractor notes that specify the condition of shingles, underlayment, and fasteners, plus a written assessment of what failed during the last event and what materials would restore the roof to pre-loss condition. If you have prior claim summaries, keep them organized and readily shareable. Present this material with your claim to help the adjuster quickly determine what is necessary and what is a legitimate scope of work.
Create a dated dossier for your roof: photos from before a storm, after the event, and any interim repairs. Keep receipts and inspection notes from reputable local roofers who understand our weather patterns and housing stock. After a storm, contact your insurer promptly and request a claim reference and an adjuster appointment, and be prepared to bring the dossier to the first meeting. If you have a known history of leaks or patchwork, bring that documentation too-transparency helps reduce back-and-forth and speeds up the process. In this market, the goal is to show a clear, professional trail that aligns repair needs with credible evaluations rather than leaving storm responses to chance.
In this area, the cold winters create repeated freeze-thaw cycling that can open vulnerable shingle tabs, stress flashing, and worsen underlayment failures around eaves. If gutters clog or debris sits on the roof, the freeze layer can push at edges and joints, creating micro-leaks that show up after a warm spell. Inspect after a cold snap for any lifted tabs or shingle edges, and look closely at the flashing where roof meets walls and around chimney valleys. Address small gaps before they widen into active leaks, especially on older stock common to the county-seat style homes.
Ice dams are a real local seasonal risk, so attic ventilation and insulation details matter as much as the outer roofing material when homeowners are trying to prevent repeat leaks. Start with insulation depth in the attic and ensure warm air isn't escaping to the roof deck. Add or upgrade soffit and ridge ventilation if you notice condensation or musty attic air. Seal attic penetrations and consider a radiant barrier or additional attic vents to balance heat flow in winter and summer. If ice forms along gutters, remove snow from the lower roof edge with a plastic scoop or broom to reduce dam buildup.
Warm summers accelerate asphalt aging and make ventilation performance a practical lifespan issue for the most common roof type in this market. During hot spells, lift between shingles can indicate marginal ventilation or aging underlayment. Maintain a clear path for attic airflow, keep soffits unobstructed, and check ridge vents for wind-blocking debris. If shingles show excessive curling or granule loss after a heat wave, plan a preventive inspection before another cycle begins. In steep or multi-level homes, consider staged maintenance to keep the roof deck dry through the hottest months.
When leaks appear, the most practical first step is targeted tracing around skylight curbs and flashing. In older Burlington County stock, skylight penetration points are a frequent source of infiltration after wind events or freeze-thaw cycles. Inspect the curb flashing for breaks or detachment where it meets the roof deck, and check the skylight seal along the frame. If water is tracking down the glass or pooling at the curb, re-sealing the perimeter with a compatible sealant and re-flashing the curb can stop a minor leak fast, buying time before a larger roof repair. Document any damaged flashing with photos for insurance claims and to guide a contractor's diagnosis.
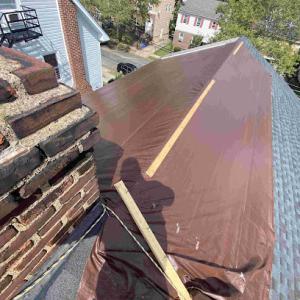
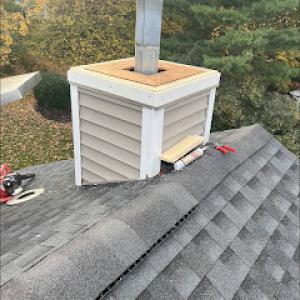
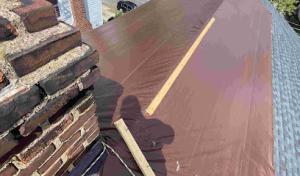
Chimney-roof intersections are a visible point of vulnerability on older homes. Look for cracked mortar, missing shingles at the base, or loose step flashing along the chimney chase. Leaks often travel from the intersection inward, so inspect both the flashing and masonry-adjacent areas. A quick fix may involve resealing the chimney cap and re-flashing the fly wall while ensuring the counter-flashing is properly integrated with the roof plane. When a leak shows up only after storms, focus on the chimney valley and any adjacent shingle failures as the likely culprits.
Mount Holly homes commonly require targeted fixes before a full reroof makes sense. Prioritize securing any active drip lines and tarping exposed sections to limit interior damage while a longer-term plan is developed. Keep a dated log of when leaks are noticed, where they originate, and what actions were taken. This log helps insurance documentation and guides a contractor toward the most urgent repair priorities, reducing time to mitigation and limiting further deterioration.
Prepare clear photos of all suspect flashings, skylight interfaces, and chimney connections, highlighting areas of contact with the roof deck. Note any wind-driven water intrusion after storms and how rain patterns change with different roof orientations. This information streamlines the evaluation process for responders and helps secure the most accurate, timely repair recommendations. Keep records organized for insurance adjusters and for any contractor you invite to assess the roof.
Find contractors experienced in skylight installation, flashing, and leak repairs to bring natural light into your home.
Garden State Mount Laurel Township
(856) 395-9297 neighborhoodroofing.com
Serving
4.8 from 25 reviews
All State Home Improvement
(973) 856-0200 allstatehomeimprovementinc.com
Serving
4.9 from 63 reviews
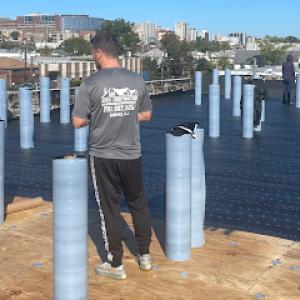
In a town with older Burlington County housing stock, you'll notice flat-roof and coating signals popping up alongside traditional steep-slope shingles. This is not the default everywhere, but a practical option when a section of the roof has already begun to show wear, or when a full tear-off isn't the best path for a specific area. For example, a porch, canopy, or partial flat plane can benefit from a targeted coating system that adds a weatherproof layer without disturbing the rest of the roof's character. The key is to treat coatings as a precise tool-chosen for the right patch rather than the entire roofscape-so that the project remains compatible with the house's historic and architectural context.
Porches, additions, and mixed-roof configurations present unique failure modes compared with the main shingle field. Winter ponding and freeze-thaw cycles stress these areas differently, leading to slow leaks that may not show up until a thaw or after a heavy snowfall. In Mount Holly's climate, a shallow slope or flat segment is more susceptible to standing water, which can accelerate membrane aging or coating breakdown if not properly addressed. When evaluating these zones, pay attention to drainage, edge details, and any existing sealant or flashing failures. The goal is a targeted, durable solution that harmonizes with the adjacent roofing material and framing-without forcing an unnecessary full replacement of the surrounding roof.
Because flat and coating solutions respond to a secondary rather than dominant local need, approach them as targeted options for specific roof areas rather than a citywide default. Consider a layered approach: diagnose ponding hotspots, select a compatible low-slope membrane or coating, and integrate flashing and edge trims to match the surrounding slope transitions. Maintenance should include regular inspections after winter storms, with attention to fasteners, seam integrity, and any signs of early wear on edges where the coating meets shingles. This deliberate, area-specific strategy helps preserve the historic roofline while delivering practical protection where it matters most.
Find specialists in TPO, EPDM, and built-up flat roofing systems for residential and commercial properties.

In this market, warranty-offered and manufacturer-certified signals both carry weight. Many established contractors compete on workmanship and product-backed coverage, which matters when winter frost and spring hail test older Burlington County homes. You should look for clearly stated coverage that survives beyond the immediate project and for manufacturers with a track record of honoring claims on the products you're choosing. A clean, written warranty paired with a factory certification can be a practical protection against short-lived fixes after a storm.
Storm repairs are common locally, so it's essential to read the fine print about what a warranty actually covers. Some warranties focus on the shingles or materials alone, while others extend to full-system replacement work if widespread damage occurs after a weather event. Clarify whether the warranty obligates the contractor to address only the repaired area, or if it guarantees the integrity of the entire roof system over time. In a town with frequent wind-driven impacts and freeze-thaw cycles, a robust full-system warranty can save headaches down the line.
In a market with many long-established and family-owned firms, warranty credibility is tied not just to paperwork but to whether the contractor is likely to still be servicing the area years later. Ask how the company supports ongoing service, whether they have local crews, and if the same team will handle future claims. Prefer contractors with verifiable local histories and a demonstrated willingness to return for warranty work, especially when icy winters or heavy seasonal storms test the roof's resilience.
Keep a detailed record set: dates of installation, product models, and the exact scope of work. After a weather event, photograph damage promptly and maintain a clear line of communication with the provider. A solid warranty is only as good as the documentation backing a claim.