Last updated: Apr 19, 2026
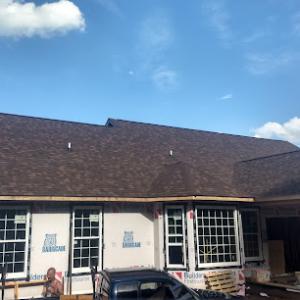
In this valley, spring thunderstorms and hail are a recurring trigger for roof trouble. The risk profile is real: strong gusts, hail chips, and sudden leaks can hit with little warning, and repair timing must align with shifting weather and a busy east Tennessee market. Your roof history matters, because the longer a leak sits, the more damage digests into decking, underlayment, and framing. This section speaks directly to Elizabethton homeowners dealing with storm-driven damage, not cosmetic upgrades, so you can move quickly and right.
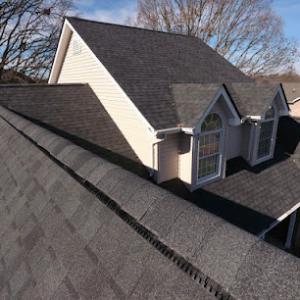
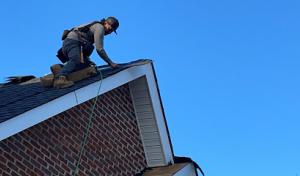
After the storm, walk the perimeter with care only if safe. Look for missing shingles, granule loss, dented metal, and lifted edges, especially on high sections and valleys. If a leak is active inside, place a temporary containment to protect ceilings and electronics. Photograph visible damage as soon as weather allows. Insurance activity in this region is influenced by wind and hail events, so dated photos become the baseline for any claim. Keep your phone handy to timestamp the sequence of damage and any interior staining or active leaks.
Adjusters arriving to evaluate a claim in this market expect clear, organized evidence of what happened and what needs replacement. Take wide exterior shots showing the roof footprint, then close-ups of damaged shingles, flashing, and underlayment when accessible. Save a weather log from the day of the storm and subsequent days, noting wind speeds and hail size if observed. Gather contractor estimates that itemize material and labor, and ensure those estimates reference underlayment condition and shingle integrity as observed from roof and attic space. This combination-dated interior photos, exterior roof shots, and estimate detail-speaks directly to a thorough storm damage assessment and reduces back-and-forth delays.
Post-storm triage shifts focus toward active damage control. Start with making a temporary roof cover or tarping any exposed deck or valley to deter further water intrusion during the next round of storms. Prioritize leaks that threaten ceilings, insulation, or electrical systems. If decking or underlayment shows moisture, plan for a paving-safe repair sequence rather than waiting for perfect conditions. In this climate, wet conditions drive material choices: you'll want products that perform well under frequent rain events and temperature swings, with fast installation windows when permits and access become available.
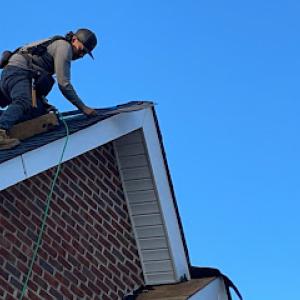
Contractors in this area signal emergency response and storm damage remediation more than cosmetic upgrades. Look for teams with a track record handling hail and wind damage, and who can provide a credible, detailed scope of work anchored to your insurer's expectations. Ask for references from recent storm claims, proof of the ability to document underlayment and shingle condition, and a transparent timeline that respects both weather windows and the insurance process. Communication should be steady, with daily updates during the initial triage and significant milestones clearly explained.
When you engage the insurer, present the documented sequence: storm date, visible damage, attic or decking moisture indicators, the scope of needed underlayment replacement, and the proposed material matches. Insurers commonly require evidence of preexisting conditions and the extent of storm-related damage. Staying organized with a clear file of photos, log notes, and detailed estimates can shorten the review period and move repairs from plan to progress, rather than letting uncertainty stall action.
Find local contractors experienced in assessing and restoring roofs after hail, wind, and severe weather events.
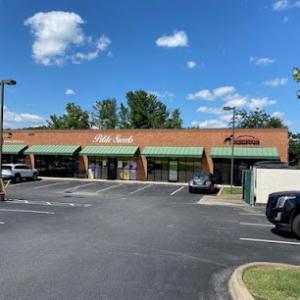
Golden Rule Roofing & Construction.
(423) 430-7283 goldenruleroofing.squarespace.com
234 Roosevelt Ave, Elizabethton, Tennessee
5.0 from 10 reviews
Steel strong roofing
Elizabethton, Tennessee
5.0 from 29 reviews
Steel strong roofing is a family owned and ran business that specializes in metal roofing, siding/soffit installation and any repair to make sure your home stays dry. Let us help you with your next roof or gutter adventure! Check us out on Facebook at steel strong roofing.
Golden Rule Roofing & Construction.
(423) 430-7283 goldenruleroofing.squarespace.com
234 Roosevelt Ave, Elizabethton, Tennessee
5.0 from 10 reviews
Golden Rule Roofing is a trusted roofing contractor serving Elizabethton and the Tri‑Cities. With 20+ years of experience, we specialize in roof repairs, metal roofing, shingle replacement, storm damage, and leak detection. We treat every home with honesty, quality workmanship, and the Golden Rule. Fast estimates, fair pricing, and dependable service you can count on.
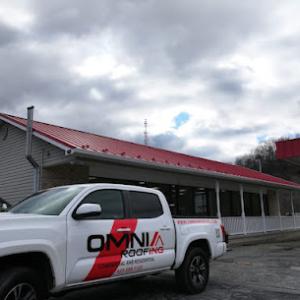
OMNIA Roofing
(423) 589-1122 omniaroofing.com
Serving
4.8 from 92 reviews
Serving TN, NC, SC & VA! Omnia Roofing is a local, quality roofing installation, inspection, and repair service. We have over 20 years of roofing experience in residential and commercial roofing. We offer specialized services in metal roofing, shingles, standing seam, 5V, trapezoidal, flat roof rubber membrane roofing, gutters, and commercial-grade fluid applied roofing systems! We offer the finest products in our installations, including the AkzoNobel paint system on our metal roofing offerings. This comes with a LIFETIME warranty (10 year transferrable)! We would love to give you a free quote! Please give us a call and one of our staff will be glad to help you.
Redemption Roofing & Construction
(423) 740-5004 www.redemptioncrs.com
Serving
5.0 from 185 reviews
Redemption Roofing and Construction in Johnson City, TN provides expert roof replacements and full-service roofing solutions for homeowners and businesses. Our team handles tear-offs, re-roofs, and new installations using durable materials built to withstand Northeast Tennessee’s heavy rain, high winds, and seasonal storms. We also address common local challenges like aging shingles, leaks, and storm damage to keep properties safe and looking their best. Known for reliable service and attention to detail, we take pride in serving our community with professionalism and care. Redemption Roofing and Construction is licensed, insured, and trusted by Johnson City residents as experienced roofing contractors.
L&T Roofing & Home Improvements
Serving
4.9 from 10 reviews
L&T Roofing and Home Improvements offers professional services an an affordable price. With 20+ years in the home industry. Rather a home repair or a new project there is "NO JOB TO BIG, NO JOB TO SMALL," give us a call.
Mighty Dog Roofing of Johnson City
(423) 300-6042 www.mightydogroofing.com
Serving
4.8 from 23 reviews
Mighty Dog Roofing specializes in Roofing, Storm Damage Repair, Siding and Windows. A locally owned and operated company is your choice for servicing Johnson City. Mighty Dog Roofing is the most trusted name in the roofing industry, offering state-of-the-art 25 point inspections using our GoLive and Drone Superscan technology. This technology, matched with the highest quality products and superior workmanship, allows you to have peace of mind on the most important investment you have - your home. Do you keep your roof “top of mind”? Our Mighty Watchdog Maintenance Program keeps an eye out for any issues today to avoid big repairs or replacements tomorrow.
Rolando Roofing
(423) 429-4023 rolandoroofingllc.com
Serving
5.0 from 21 reviews
We are a roofing company with over 9 years of experience serving Johnson City, Tennessee, and the surrounding area. Our services include roof installation, roof repair and maintenance, fascia and soffit repair, and exterior siding. We offer 24/7 emergency service. If you are interested in any of our services, please contact us.

YES Roofing & Exteriors
(423) 820-3216 www.yesroofingandexteriors.com
Serving
4.8 from 481 reviews
YES Roofing & Exteriors is a GAF Master Elite roofing contractor providing roof replacements, roof repairs, siding installation, seamless gutters, decks, windows, doors, and storm damage restoration throughout Tennessee, Virginia, and North Carolina. Since 1994, our licensed and insured team has delivered dependable service, premium materials, 50-year warranty options, and top-rated customer care. We offer free inspections, honest estimates, financing options, and expert workmanship backed by hundreds of 5-star reviews. Call YES Roofing & Exteriors for trusted roofing and exterior solutions for your home or business.
David calderon roofing
Serving
5.0 from 22 reviews
Small local roofing business starting out servicing the tricities and surrounding areas give me a call my name is David Calderon and give us chance to earn your business free estimates very professional and knowledgeable able to answer any questions you have
Storm Guard Roofing & Construction Of The Smokies
(423) 393-6000 www.stormguardrc.com
Serving
4.7 from 67 reviews
Storm Guard specializes in exterior restoration for roofing, siding, windows and gutters.
Tri-Cities Roofing
(423) 268-4240 www.tri-cities-roofing.com
Serving
4.8 from 69 reviews
At Tri-Cities Roofing, we make it our ultimate goal to ensure that your roofing experience goes as seamless as possible. We understand that a business is ultimately measured by customer satisfaction, and we strive to be the best. We are set apart from our competitors by our close owner oversight, persistent communication, and insurance negotiation ensuring you're taken care of every step of the way. From inspections to full exterior remodels Tri-Cities has got you covered. We service the Tri-Cities, NE Tennessee, SW Virginia, and surrounding areas. Some of our focal points are as follows: Johnson City TN residential and flat roofing, seamless gutters, soffit and fascia, siding, and much more. Tri-Cities Roofing: Where Quality Comes First!
NRJ Roofing
(423) 202-5532 www.nrjroofing.com
Serving
5.0 from 33 reviews
We can do metal, shingles, repairs at competitive prices. We give free estimates!
East Tennessee's four-season pattern means hot humid summers, cold winters, and frequent rainfall all influence how long roofs last in Elizabethton. With spring rains, inspect the roof as soon as it's dry enough to walk the surface. Look for missing shingles, lifted tabs, and pooled water in low spots or along drainage paths. Valleys should be cleared of debris to prevent moisture retention that can lead to mold and wood rot. After a storm, photograph damaged areas from multiple angles and document any interior leaks with dates and affected rooms. A quick, careful check of attic insulation and ventilation helps prevent condensation that mimics leaks in damp springs.
Hot humid summers stress roofing materials differently, especially in valleys where insulation and ventilation performance matter. Schedule a mid-summer walkaround to verify flashing around chimneys, vents, and transitions remains watertight. Keep gutters clean so that heavy rainfall does not back up and seep under the edge of the roof. If a storm arrives, inspect the attic after the first heavy shower for sudden condensation or damp spots along rafter tails. Quick tarping of shallow inlets or temporarily securing loose shingles can limit additional water intrusion until a full repair is possible.
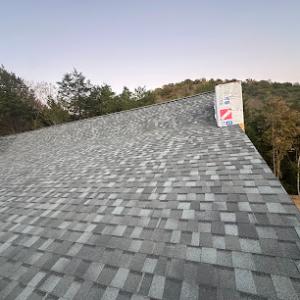
Autumn leaf drop and rapid temperature swings matter locally because they increase moisture retention concerns in valleys and drainage paths before winter sets in. Clear leaves from eaves, valleys, and downspouts to prevent early moisture buildup. Look for spongy or curling shingles indicating underlying moisture damage, especially along the roofline and at edge seams. Reroute any surface drainage away from walls and into established drainage paths. If you notice granule loss on asphalt shingles, plan for a targeted repair before the first cold snap to minimize exposed decking.
Winter freeze-thaw cycles are a real local wear factor for shingles and roof valleys, making late-fall maintenance and spring inspections especially relevant in this area. Ensure attic cooling is balanced to minimize ice dam risk, and check for small leaks that widen with freezing temperatures. When thawing occurs, inspect valleys and eyelids for any newly formed gaps or surface cracks. If a leak is detected, capture with a bucket, seal temporarily, and arrange a prompt permanent fix to prevent ongoing interior damage.
Document every storm, including hail events, with photos and dates. Keep a simple log of when leaks were first noticed, how they were mitigated, and which areas were affected inside the home. This record supports insurance communication after East Tennessee thunderstorms and helps prioritize repairs with contractors. For quick response, identify a trusted local roofer and have contact details ready, along with your policy numbers and claim contact information to streamline documentation should a panel or adjuster need to review storm-related damage.
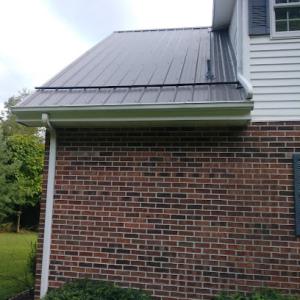
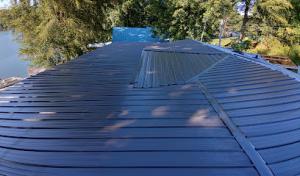
In Elizabethton, metal roofing stands out in the contractor market, signaling strong local demand for upgrades that endure in the Appalachian foothills. Shingles remain the workhorse choice for many homes, especially when a reroof is sparked by age or weather. This contrast matters because your decision often hinges on how a roof performs under repeated storms, freeze-thaw cycles, and long-term repairability. The local signal pattern shows most homeowners here are choosing between standard shingle reroofs and metal upgrades, with metal increasingly viewed as a proactive, long-term protection strategy rather than a cosmetic addition.
The area's wet, four-season climate tests roofs differently than drier regions. Frequent rain and thunderstorms push you toward materials that shed water quickly and resist wind-driven impacts. Metal roofs excel in that scenario: they shed rain rapidly, resist hail better in many cases, and can tolerate freeze-thaw cycles with fewer surface vulnerabilities than some shingles. Asphalt shingles, while familiar and cost-effective, can suffer more coating wear after years of moisture exposure and freeze-thaw stress, which translates into more frequent repairs and shorter cycles between reroofs if you stay with shingle systems. Understanding these dynamics helps you forecast how long a roof will actually perform between major overhauls under your local weather patterns.
Tile and wood products appear in the local material mix, but the contractor signal suggests most homeowners here are shopping first between standard shingle reroofs and metal upgrades. If your home features a steep pitch, tall eaves, or a metal upgrade plan pursued during a reroof, metal can align well with traditional architectural cues while offering modern performance. Shingles preserve familiar street-appeal and often match neighboring homes without changing the visual rhythm of the roofline. For homes with historic character or specific neighborhood covenants, the choice may hinge more on appearance expectations and anticipated repair cycles than on raw performance alone.
When you compare metal to shingles, think beyond the initial installation. Consider how each option handles storm-driven damage and incidental impacts from hail. Metal often offers quicker shedding of water and a higher resistance to impact, which can translate into fewer days spent dealing with leaks and interior repairs after a severe thunderstorm. Shingles can be easier to inspect and repair locally, with a broader range of installers experienced in patching and color-matching. In areas with frequent rain and freeze-thaw exposure, choosing a roof that you can repair efficiently over time-without sacrificing essential waterproofing-often yields the most practical, long-term value.
Explore specialists in steel, aluminum, and standing seam metal roofs built to last 50 years or more.
Golden Rule Roofing & Construction.
(423) 430-7283 goldenruleroofing.squarespace.com
234 Roosevelt Ave, Elizabethton, Tennessee
5.0 from 10 reviews
Wyatt's Roofing & construction
(423) 440-1070 www.wyattsroofingandconstruction.com
Serving
4.7 from 28 reviews
When you price a reroof, base the numbers on the local per-square ranges: asphalt shingles 350 to 600, metal 700 to 1200, clay tile 1100 to 1700, concrete tile 900 to 1500, wood shingles or shakes 650 to 1000, and synthetic or composite shingles 550 to 900. This framework reflects Elizabethton's mix of housing stock and the regional material availability. For a typical 20-square roof, that means a material-subject range from roughly 7,000 to 12,000 dollars for asphalt up to 20,000 dollars or more for premium tile, before labor and ancillary needs. In practice, your final price will hinge on slope, deck condition, and whether you choose standard or engineered underlayment.
Storms push repair demand after East Tennessee wind and hail events, and Elizabethton often sees a surge that tightens scheduling. If a hail season hits, you may face a quicker turnaround for emergency leak mitigation, followed by a more compressed timeline for a full reroof. This pressure can push material choices toward readily available options and may influence per-square pricing through expedited delivery or off-season scheduling. If your roof is older or damaged, expect the roof crew to prioritize moisture control, ventilation checks, and shingle compatibility with your existing soffit and ridge lines, which can affect both time and cost.
Beyond the base material price, expect adjustments for ventilation or underlayment issues flagged by the local building process, and for any required flashing upgrades around chimneys, vents, and valleys. Any noticeable decking repairs or replacements also add to the ticket. In practice, planning for a reroof in this area means budgeting a buffer for those contingencies, especially if a prior leak has penetrated the attic space. If a storm response is needed, you may also see temporary tarping and expedited debris removal as part of the project flow, which can influence both timing and overall cost.
Get a clear picture of your project costs upfront - no commitment required.
A roofing permit is typically required for a full reroof through the local building department serving Elizabethton and Carter County. Missing a permit can lead to delays, rework, and trouble when selling the home, especially after East Tennessee storms. The permit process acts as a safeguard against undersized ventilation, improper underlayment, or other code gaps that can show up when the weather turns wet again. Expect that the city and county will review the project to make sure it meets the standard safety and performance expectations for a roof in this climate. A reroof isn't a quick one-visit approval; the permit is the start of a review that can surface questions about materials, attic ventilation, and flashing details.
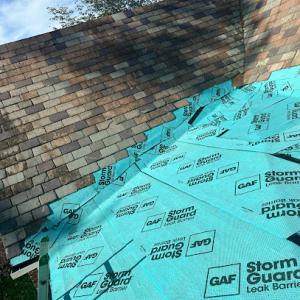
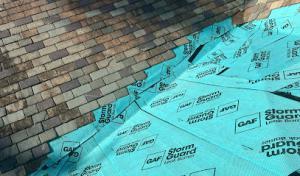
Inspections are a practical reality you should plan for, not an afterthought. In Elizabethton, the typical sequence includes a rough-in inspection during the roof deck installation and a final inspection after all penetrations, vents, and flashing are in place and the system is deemed weather-tight. The rough-in helps verify that the roof deck is solid, nails or screws are correctly placed, and the underlayment is properly installed for the anticipated Appalachian moisture and hail exposure. The final inspection confirms that the roofing system, ventilation, and flashing meet code requirements and that the work is properly completed before the permit is closed. Skipping or rushing these checks can lead to complications if an inspector flags ventilation or underlayment issues later.
Local review can involve plan review and back-and-forth if ventilation, underlayment, or other code compliance issues are flagged during the permit process. For example, an inspector might request additional attic venting or a different underlayment to protect against the frequent wet conditions and seasonal storms typical of this area. Having a clear, dimensioned plan and a selection of approved materials on file helps prevent delays. Be prepared for questions about how roof penetrations for vents, chimneys, and skylights will be flashed and sealed to resist moisture intrusion during heavy rains and hail events common to this region.
Coordinate timing with the weather window, especially since East Tennessee experiences sudden storms. If a reroof is tied to an insurance claim or storm recovery, ensure the permit is filed promptly and that the contractor understands the inspection schedule. Keep a dedicated correspondence trail with the building department, and document step-by-step progress as work advances. If a plan review request arrives, address it quickly with precise notes and, when possible, support the submittal with manufacturer data on ventilation and underlayment compatibility. The goal is to reduce back-and-forth that can stall a project during a season when every dry day counts.
After a thunderstorm in this area, quick action matters. In Elizabethton, wind and hail events generate meaningful roof claim activity, so start documenting as soon as the sky clears. Move quickly to protect the house from further damage and reduce risk of interior water intrusion. If shingles are visibly lifted, cracked, or missing, take clear photos from multiple angles, both up close and at a distance. Time-stamped images are especially helpful.
Insurers commonly ask for dated photos and contractor estimates, so begin gathering materials immediately. Create a simple file: storm date, weather history notes from local sources, your home's address, and the dates you contacted the insurer and a contractor. Record any interior drips or staining with dates. Obtain a written estimate from a local roofing professional who has experience with East Tennessee conditions, including underlayment and flashing details that may be affected by storm-driven wind. Keep receipts for any temporary repairs you implement to prevent further damage.
Adjusters may evaluate not just shingles but also underlayment condition and local weather history when deciding scope and timing for roof replacement approvals. They will compare the roof's current condition to what could be expected given the prior roof age and the storm's intensity. Be prepared to discuss the sequence of events: when the damage occurred, how it progressed, and any subsequent weather that could influence assessment. A thorough, organized set of photos plus a recent contractor estimate helps the adjuster see a complete picture.
Engage a trusted local roofer early to provide a detailed, itemized estimate and note any underlying issues the storm may have exposed. Your contractor can help interpret underlayment and flashing needs, which often factor into approval decisions. Maintain a clear, concise log of all communications, and respond to requests from the insurer promptly to keep the claim moving.
Connect with contractors who help homeowners navigate the claims process from damage assessment to final approval.
Storm Guard Roofing & Construction Of The Smokies
(423) 393-6000 www.stormguardrc.com
Serving
4.7 from 67 reviews
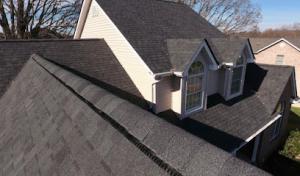
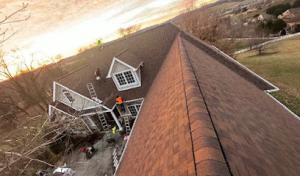
In this market, valleys and other water-concentrating areas are especially vulnerable because repeated rainfall and winter freeze-thaw cycles stress those details over time. When shingles or underlayment fail to shed water quickly, moisture lingers in those low spots, inviting rot, algae, and ice dam pressure. You may notice pooled or slow-draining areas after heavy storms, followed by accelerated wear on flashing and seam intersections. The consequence isn't just a drip at the peak; it's amplified attic warmth shifts, accelerated deck rot, and hidden mold behind ceiling panels. Addressing these weak points early can keep attic spaces drier and the rest of the roof healthier longer.
Hot humid summer installation conditions can affect material handling and performance, which matters in East Tennessee more than in drier climates. Exterior temperatures push shingles, underlayment, and fasteners into unfamiliar expansion and contraction cycles. Improper storage or rapid exposure to sun can curl, warp, or tear components before installation is complete. Shingle tabs can lift in heat, synthetic underlayments may become slick or brittle, and metal edges can heat-up enough to warp if left in direct sun. A rushed process under high heat invites misalignment, accelerated wear, and a shorter service life that becomes visible after the first heavy storm season.
The local emphasis on ventilation and underlayment compliance reflects real regional failure patterns tied to moisture management rather than purely cosmetic reroof work. Insufficient attic ventilation traps humidity, promoting condensation and deck deterioration while the underlayment bears the brunt of sustained moisture exposure. Poorly vented attics can also accelerate cooling losses or ice dam formation in winter. Expect that you'll see failures linked to dampness, such as accelerated shingle granule loss, soft decking, or rusting of metal components when moisture is allowed to linger or migrate improperly.
Common early indicators include staining on ceilings during heavy rain, inconsistent insulation temperatures, or a muffled thud from wind-driven hail over the ridge. If you notice blistering, cupping, or curling shingles, or if gutters run full after a rain without corresponding flow from the roof, investigate promptly. A local inspection focusing on valleys, flashing transitions, and attic ventilation can distinguish between a cosmetic issue and a moisture-driven failure that will worsen with each storm. Taking timely action preserves structure, reduces the risk of interior damage, and avoids compounding problems in a climate where moisture is a steady companion.
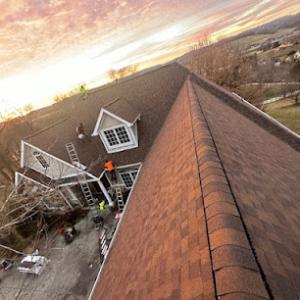
In this market, the strongest contractor pattern is speed. After East Tennessee thunderstorms and hail, homeowners need rapid leak control that limits interior damage and protects roof decking from further exposure. Look for a crew that commits to a defined on-site arrival window, understands storm-driven damage, and brings a stocked van ready to tarp, contain, and stop leaks the same day if possible. A fast response isn't just about beating the clock; it's about reducing cascading damage from wind-driven rain and debris that can worsen with every stormy night.
Cleanliness and protection matter just as much as the repair itself. Homeowners here often judge crews by how well they protect the property and leave it cleaner than they found it. Ask how the crew covers landscaping, floors, and sensitive exterior finishes, and whether they haul away debris immediately after the job. A trustworthy crew will show a plan for debris containment, tarping techniques, and a thorough cleanup checklist before leaving. In practice, the best local crews treat cleanup as a line item, not an afterthought, and document their process with photos for your records.
The Elizabethton market blends affordable pricing with long-established reroof specialists. That means you can find smaller, nimble crews and well-known local firms who have weathered many storms. When evaluating options, weigh both speed and reputation. Ask for a recent storm-related referral from nearby neighbors, and verify how the crew prioritizes temporary leak control versus full reroof work. A proven operator will offer a transparent plan that outlines immediate leak-stopping steps, followed by a clear, staged approach to permanent repairs when the weather allows.
After a storm, the right contractor helps you document damage for the insurance claim. Look for a team that can photograph and timestamp damage, provide an itemized list of visible issues, and communicate clearly with your insurer. The fastest responders also bring a simple, organized packet you can hand to your insurer to illustrate the scope of immediate needs and the sequence for repairs, minimizing back-and-forth and delays.