Last updated: Apr 19, 2026
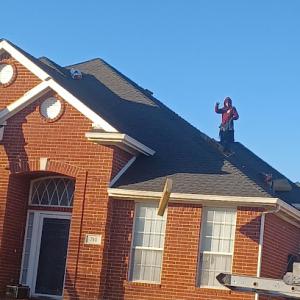
In Cedar Hill, the rhythm of roof damage is driven by spring severe thunderstorms that ride the Dallas-Fort Worth hail corridor. You are more likely to face a sudden, storm-driven decision to replace a roof than to wait for age alone. When a hailstorm hits, the first hours after the hail rush matter as much as the days that follow. Look for bruised asphalt shingles, dented or torn flashing, and granule loss-the kinds of clues that tell you a full roof replacement may be needed rather than a quick patch. If you're standing on a windy, rain-soaked afternoon and you see dimples or curling edges on shingles, treat that as a red flag. The window to respond with a solid plan is tight, especially when multiple storms roll in within a single season.
The exposure to strong summer sun after storm season compounds the risk. A roof that already looked dented or torn can rapidly deteriorate when the heat arrives. Sun exposure dries sealant lines and accelerates the degradation of flashing that hasn't been repaired. That means what looked like a manageable repair in March can become a full replacement decision by July if the underlying decking and underlayment have taken water intrusion or if fasteners have corroded. In Cedar Hill, the impact is visible: a cloudy, bruised surface may still shed water, but the long-term seal and wind resistance you counted on can erode with each hot, dry day following a storm. Plan for a path that acknowledges both the hail damage and the accelerated wear from sun and heat-don't wait for perfectly sunny weather to revisit the scope of work.
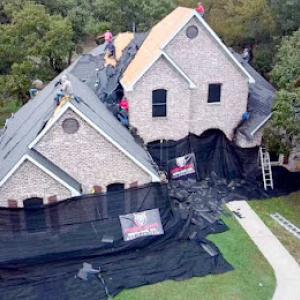
When storm damage is confirmed, separate the emergency protection you put in place from the longer-term replacement plan. The urgent job is to keep water out and to secure exposed decking, vents, and any damaged roofing underlayment. The longer-term decision-whether to re-roof now or after a period of assessment-should be guided by the condition of the decking, the integrity of the flashing around chimneys and hips, and the surrounding fascia. In this market, a swift move to protect the interior is essential, but you must coordinate that protection with a clear, practical plan for the actual roof replacement. Do not let temporary coverings extend beyond what the weather and working conditions safely allow. The peril here is twofold: rain during a rushed installation can compromise new materials, and a rushed job can leave flashing and sealing joints vulnerable to future wind-driven rain.
A Cedar Hill home sits in a landscape where storm timing and sun exposure interact in a way that makes proactive planning worthwhile. If you have confirmed damage, you should assemble a contingency that keeps you protected in the weeks immediately after the storm while you select an installer and a replacement approach that will hold up through the peak sun and the next hail season. You want a plan that minimizes the chance of back-to-back damage and avoids a patched, interim fix turning into a second, more expensive project. Talk through the sequence with your contractor: emergency measures to stop leaks now, followed by a tightly scheduled, durable replacement that restores full weather resistance before the next heat wave arrives. In this climate, timing isn't just about haste-it's about aligning storm response with sun-driven wear and ensuring the roof you install stands up to Cedar Hill's unique blend of hail, heat, and wind.
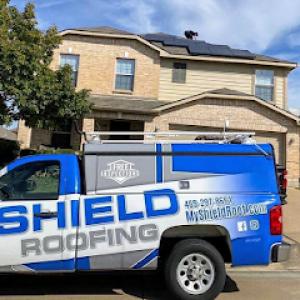
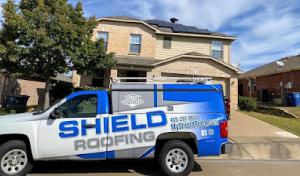
Shield Roofing & Solar
(469) 297-8684 myshieldroof.com
952 N Hwy 67 ste 201, Cedar Hill, Texas
5.0 from 202 reviews
Shield Roofing & Solar stands as a beacon of excellence in residential roofing and solar solutions. Known for our expert roof repair and new roof installation, we are the roofing company you can trust. Our roofing contractors are committed to quality in every roof replacement or roofing repair service. As a solar company, we integrate solar energy seamlessly with our roofing services with solar shingles, providing sustainable and innovative solutions. Choose us for your roofing needs and join our many satisfied clients who know that choosing us among other roofing companies, ensures their homes are well-protected. Shield Roofing & Solar's unwavering commitment is to elevate your home's performance and protection.
4 U Roofing & Construction
(469) 620-0010 www.4uroofing.us
610 Uptown Blvd ste 2000, Cedar Hill, Texas
5.0 from 65 reviews
For over a decade, 4 U Roofing and Construction has been a trusted veteran-owned, family-operated business in Cedar Hill, specializing in home improvement and renovation services. Our skilled craftsmen are dedicated to delivering top-quality workmanship, whether it’s repairing roofs, remodeling kitchens, or revitalizing bathrooms. We take pride in turning your vision into reality with precision and care. Committed to excellence and customer satisfaction, 4 U Roofing and Construction ensures every project enhances both the beauty and functionality of your home.
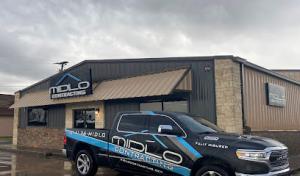
MD Roofing
103 Ramsey St, Cedar Hill, Texas
4.9 from 112 reviews
Your requirements are unique, and so are our solutions. At MD Roofing, LLC in Cedar Hill, TX. We specialize in full commercial & residential roof replacement. Customers know they can rely on us to provide expert roofing assistance. We’ll be there every step of the way to guide you through the insurance claim process. Locally owned and operated. We truly understand just how stressful home and commercial property storm damage caused by high winds, rain, flooding and hail can be.
From On High Roofing & Construction
(469) 992-0047 www.reggietheroofer.com
610 Uptown Blvd ste 2000, Cedar Hill, Texas
5.0 from 46 reviews
We're here to help. Honesty, Integrity, and Trust are the pillars we are founded upon. Let us work with you to ensure your project is completed to your satisfaction.
The Last Roof Construction Company
(214) 435-8536 lastroofingcompany.com
609 Lemons St, Cedar Hill, Texas
5.0 from 24 reviews
If I left the card at the door your roof looks like it qualifies for a new roof we only knock on doors that we feel like we can get a new roof. We would like to check the roof for free to give you an honest assessment. If it does not need a new roof we will tell you. Again, we don't charge anything. If they do not get you a new roof from the insurance company. The roofs are Gaf timberline hdz..They come directly from home depo that way you know, the roof has come directly from the factory to your house. Most roofers by the cheapest materials all the roofs come with z ridge and Cobra. Attic ventilation is very important for a new roof roofs can get up to a 150°. Again, let us check the roof for free. There is no charge. Thank you 📞
Star 1 Roofing & Construction
(214) 923-1483 star1roofing.com
1050 Kck Way, Cedar Hill, Texas
4.6 from 19 reviews
We specialize in full roof replacement, so our customers know they can rely on us to provide expert assistance. We’ll be there every step of the way to guide you through the insurance claim process. Star 1 is locally owned and operated. With our team of experts growing up in the area, we truly understand just how stressful residential or commercial hail and storm damage can be.
RoofScapes
(972) 333-8872 roofscapesdfw.com
Serving
4.9 from 93 reviews
RoofScapes is a full service exteriors company. We are set on providing you with the best products, warranties, and customer service possible. Specializing in roofing, roof inspections, landscaping, fencing, gutters and chimney repair. From roofing to landscaping we do it all!
Dee’s Shield Roofing
(469) 279-7439 www.dees-shield-roofing.com
Serving
5.0 from 12 reviews
“DEE’S SHIELD ROOFING” PROUDLY SERVES ALL OF TEXAS. We are Owned & Operated since 2011 and going strong. Quality Materials is what we stand by with the Best Deal all-around. We have a reputation of Trust & Honor with our clients and that will continue. Taking good care of your house allows us to take good care of our own. “Let Dee Protect Your Home with a Shield 🛡 over your Roof” - Workmanship Warranty & Manufacturing Warranty is Covered in all of our Roofs. - Guaranteed 100% Satisfaction. - Quality materials. - A Smile 😊 on your Face 😉 Thanks 🙏🏾 for Allowing Us to take Great Care of You!
Highland Roofing
(877) 766-3852 www.highlandroofing.co
Serving
5.0 from 107 reviews
Highland Roofing is your trusted roofer near me, specializing in top-quality roof replacements, repairs, and free inspections across DFW. We work closely with homeowners and realtors, offering expert insurance claim assistance and innovative solutions like the Catch-All System to protect your property during installations. Every new roof comes with free material upgrades, improved attic ventilation, and a lifetime workmanship warranty. With a 5-star Google rating, we prioritize exceptional service, ensuring lasting results. Contact Highland Roofing for reliable, professional roofing you can count on!
Impact Contracting
Serving
5.0 from 14 reviews
We at Impact Contracting are a trusted, leading contractor committed to delivering professional and top-quality services. Specializing in both commercial and residential construction and repairs, our skilled team ensures durable and reliable solutions. With a focus on excellence, we also extend our expertise to various aspects of commercial and residential construction. Trust Impact Contracting for unparalleled craftsmanship and customer satisfaction.
Accent Roofing
(972) 298-0929 accent-roofing.com
Serving
5.0 from 14 reviews
With over four decades of expertise, Accent Roofing, a family-run roofing company in Texas, we’re dedicated to being top rated roofers. Specializing in roof repair, metal roofing, commercial roofing, and a range of roofing services we pride ourselves on combining the personalized touch of a small business with the exceptional workmanship expected of larger roofing companies. Our team of skilled roofing contractors are swift to respond, thoroughly inspecting your property and providing transparent estimates. Renowned for reliable roof leak repair and comprehensive roofing services, we're the go-to local solution for all roofing needs. Trust in our legacy; Choose us as your roofer; contact us for a free quote.
Berry Good Roofing & Efficiency
(682) 882-3779 www.berrygoodroofs.com
Serving
5.0 from 81 reviews
Berry Good Roofing and Efficiency sprouted to be the Green Roofing Company that does the Most Good in our community. We go green by installing Malarkey shingles. We do the most good by caring about our community, giving back and cleaning up. From roofs to gutters to screens to interior work we can be the one stop spot to hit all your needs. 🏠 We want you to have a sweet experience with any project we undertake for you! Our BERRY core values lead and helps to separate us from the other roofers out there. At the end of the day it comes down to people, education and energy, We have the best bunch of them. When it needs to be good make it BERRY GOOD! We look forward to giving you a Berry Good Experience. 🍓
Cedar Hill homeowners are operating in a high-claim North Texas insurance environment where hail and wind losses are common and adjusters often scrutinize roof age, prior repairs, and upgrade documentation. When a storm hits, you may see adjusters focus on whether your roof was near the end of its expected life, whether prior patches were properly addressed, and whether any upgrades you made since installation are clearly documented. The goal of the carrier is to separate functional damage from cosmetic wear, but that line can shift after a hail event. Expect questions about the roof's history and the sequence of events that led to the current condition; organized, honest answers help ensure the claim reflects real loss without unnecessary delays.
Regional carrier behavior in the Dallas area can affect deductibles, coverage terms, and how aggressively cosmetic versus functional damage is evaluated after a storm. Thorough photo documentation, date-stamped storm records, and proof that a contractor followed Cedar Hill permit requirements can matter when a claim turns into a replacement dispute. Take wide and close-up shots of shingles, flashing, gutters, and the interior attic after the storm passes. Preserve weather reports or emergency service records showing the storm date and severity. Keep receipts and notes for any temporary repairs, and arrange a simple timeline that ties the storm to observable damage. When reviews drag or conclusions feel inconsistent, present the photo chronology alongside your documentation to support a clear narrative.
The aftermath often forces a choice between patching the worst spots and financing a full roof replacement. In a storm-heavy season, many roofs in the area benefit from a full replacement rather than repeated, short-term fixes, especially when the roof age is already a liability in the insurer's eyes. Your decision should balance the condition of the sheathing, underlayment, and flashing, along with a credible record of storm impact. If a replacement is pursued, ensure the claim file includes precise documentation of the damage's extent, why a partial repair won't suffice, and a contractor's statement about how the chosen materials address both now and future storm exposure.
Choose a contractor who understands Cedar Hill's exposure to hail and wind, and who can articulate how the chosen materials perform under future Dallas-area storms. Ask for a detailed scope of work that aligns with the damage observed, plus a clear plan for sequencing repairs to minimize further vulnerability during the claim process. A reputable contractor will help collect stamped timelines, confirm adherence to local procedures, and coordinate photos and reports that reinforce the claim narrative. If disagreements arise, rely on the documented evidence and a consistent, transparent explanation of how the work addresses both immediate damage and long-term resilience.
Connect with contractors who help homeowners navigate the claims process from damage assessment to final approval.
Shield Roofing & Solar
(469) 297-8684 myshieldroof.com
952 N Hwy 67 ste 201, Cedar Hill, Texas
5.0 from 202 reviews
4 U Roofing & Construction
(469) 620-0010 www.4uroofing.us
610 Uptown Blvd ste 2000, Cedar Hill, Texas
5.0 from 65 reviews
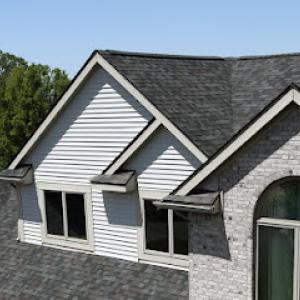
In Cedar Hill, the combination of hail, intense sun, and strong winds creates unique demands for a roof that lasts. Asphalt shingles remain common because they fit mainstream suburban housing stock and offer straightforward repair paths after a hail event. But the DFW hail cycles and prolonged UV exposure can shorten service life compared with milder regions, so choose products with generous wind uplift ratings and robust granule retention. The roof should also pair with reliable underlayment and a vented attic to manage heat buildup and moisture, especially on slopes facing the afternoon sun.
Metal roofing makes sense when longevity under sun is a priority. It handles intense sun well and is increasingly considered after repeated hail cycles, since many panels resist denting and maintain airflow glare. The look matters in storms, so pick a metal profile with clean edge detailing and a finish that hides minor hail dimples. In North Texas weather, ensure the system includes proper backup clips, secure fasteners, and a visible attic ventilation strategy. A metal roof can shed rain and hail more efficiently, but visual match with the house style and the surrounding neighborhood matters for curb appeal during and after storms.
Clay tile and concrete tile bring a long lifespan and strong hail resistance when properly installed, but their weight demands structural compatibility. In a Cedar Hill setting, heavier systems require an assessment of the existing framing and ventilation setup. Clay tile tends to be more brittle under direct impact, so evaluate your area's hail history and inspect for underlayment wear after a storm. Concrete tile offers greater impact resistance and a broader style range, yet the increased mass can affect roof dynamics and venting needs. If choosing these, confirm the upgraded underlayment and attic ventilation are ready to support the heavier load.
Wood shakes and shingles provide a textured, traditional look that can suit certain neighborhood aesthetics, but they demand careful maintenance in sun-soaked conditions. They are more susceptible to UV wear, arc wind-driven debris, and potential mold in shaded pockets. Synthetic shingles mimic the appearance of wood or slate with improved durability, yet still require attention to underlayment quality and ventilation to prevent heat-related issues. When considering these, verify compatibility with existing framing and the environmental exposure from surrounding trees and wind corridors.
Before deciding, perform a focused review of the current roofing structure: check underlayment condition, venting adequacy, and how the roof geometry handles wind-driven hail. Consider color and texture choices that reflect heat without sacrificing curb appeal, and ensure that any selected system integrates with the home's siding and fascia. In areas of frequent hail, prioritize systems with proven impact resistance ratings and robust installation details that resist strong Dallas County winds.
Cedar Hill requires a building permit for full roof replacements, and the Building Inspection Department is the local authority homeowners should expect to see involved before and during the job. The permit process in this town is not something to passively wait on; it governs how wind-rated fasteners, venting, and flashing are installed to meet wind and code requirements that Cedar Hill residents rely on after hail events.
Before any new roof goes on, your contractor must pull the permit. The permit should be posted on the job site and linked to the address so inspectors can verify the scope is the full replacement and not a patch job. Inspections are conducted at key milestones including rough-in and final, so scheduling and passing inspections is part of the real replacement timeline in this city. Your contractor should coordinate these dates and provide access as needed.
Rough-in inspection happens when the roof decking, underlayment, and initial fastening are in place. In Cedar Hill, wind-related fastening and venting requirements are a local emphasis, so expect to see proof that hurricane nails, misted vents, and configured ridge vents meet code. The inspector will verify that the chosen materials align with permit notes and that any changes are documented with written approvals.
Final inspection occurs after all roofing components are installed, penetrations are flashed, and all venting is functional. The inspector confirms that the full replacement complies with current wind and energy codes, and that any attic ventilation calculations are balanced. If deficiencies are found, an approved re-inspection must be scheduled and the permit may stay open until corrected items are verified.
After the final sign-off, retain the permit record and any inspection notices. The Building Inspection Department issue final clearance, and that document becomes part of the project record for future property transactions. Remember, the permit process is the city's mechanism to ensure a durable, code-compliant roof that can withstand Cedar Hill's hail, sun, and wind.
Coordinating with the Building Inspection Department's staff and the contractor during inspections helps avoid delays common after hail storms. On busy weeks after a hail event, expect longer hold times, so plan ahead and keep the job site accessible, with clear corridors for inspectors to move around the workspace. Know your rights and deadlines.
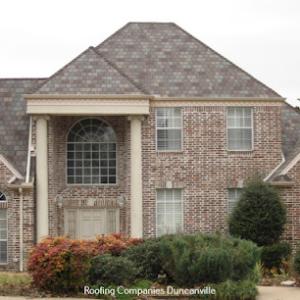
In this area, post-hail demand surges across the wider Dallas-Fort Worth market drive material and labor prices higher for a stretch after major storms. When crews are scarce and replacement schedules back up, you'll see price movement that isn't captured in standard, off-peak quotes. The mix of suburban, sunlit roofs and higher-end homes with tile, metal, or designer products means two crews may quote differently on the same street due to access, roof pitch, and material choice. Expect wider-than-expected price spreads even within familiar neighborhoods during peak repair periods.
Shingle roofs remain the most common starting point for Cedar Hill crews, but the variety in home styles means you'll also see metal and tile options-each with its own pricing quirks. Asphalt shingles remain the baseline, but metal, clay tile, and concrete tile can command noticeably higher per-square costs, especially when the roof has complex geometry, high slopes, or multiple penetrations. Local pricing reflects not just the material but the logistics of bringing materials to a Dallas County job site during a market rebound after hail events. Access to the attic, attic hatch clearance, and the ability to stage materials on the driveway all influence the final quote. In higher-end homes where a tile or designer product is specified, material costs can diverge significantly from a basic asphalt package, even within the same neighborhood.
Be prepared for price spreads within a single block. A tile roof on a two-story home with a steep pitch may cost more than a flatter, sun-facing asphalt roof on a rancher next door, even if the square footage is similar. The per-square ranges provide a helpful baseline, but actual bids will reflect the specific roof geometry, access challenges, and the chosen product's installation demands in this climatically exposed landscape.
When hail events hit, the most consequential cost driver becomes scheduling and crew availability. You may encounter compressed timelines and install windows that align with the next available crew or material shipment. Weather windows, ladder access, and the proximity to Joe Pool Lake can also affect how quickly work proceeds and how efficiently crews move through the job. Plan for potential back-and-forth with your selected contractor to align product choice, color, and shingle pattern while balancing the market-driven price dynamics that come with post-storm demand.
Don't let upfront costs delay a critical repair - these contractors offer payment plans to fit your budget.
Robinson Brothers Roofing & Construction
(469) 940-4602 robinsonroofing.site
Serving
4.8 from 75 reviews
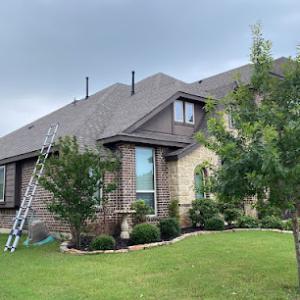
Cedar Hill sits on an elevated southwest Dallas County tier, where prolonged North Texas summer heat accelerates granule loss, thermal aging, and sealant fatigue. Dark asphalt systems, in particular, absorb more sun and can show accelerated wear on the exposed portions in just a few hot seasons. When a roof is heat-stressed, the shingles become more brittle at the edges and the adhesive lines can soften, increasing the risk of lift during wind events. Plan for replacement materials that resist UV degradation and perform a careful inspection of attic access for signs of heat buildup, such as warped felt or discolored decking.
Because local permit review and inspections include venting-related compliance, ventilation is not just a comfort issue in Cedar Hill but part of getting a replacement done correctly. A proper ridge and soffit balance helps curb attic temperatures and minimizes indoor heat gain. When reviewing options, ensure the new system provides adequate intake and exhaust, with flashing that stands up to Dallas-area storms. Insulation compatibility matters too; a well-ventilated attic supports longer roof life by reducing hidden moisture and condensation risk behind the scenes.
Summer workdays in the Dallas area can reduce crew productivity and affect installation timing, making early scheduling important once a replacement decision is made. Coordinate with the contractor to align material delivery with cooler morning hours and plan for longer days only if heat mitigation measures (shade, hydration, and breaks) are in place. If the choice falls on stacked or reflective shingles, confirm that installation windows maximize material performance and minimize heat exposure during adhesive set times and sealant curing. Keep attic vents accessible and free of obstruction during the process to avoid delays.
In this area, fall wind events can loosen fasteners and drive debris into roof valleys and around penetrations, creating leak points long before winter cold snaps arrive. The patchwork of homes on Cedar Hill streets often shows how wind-driven grit and tree debris accumulate where tiles or shingles tuck into valleys, around vents, and near chimneys. You may notice loose shingles or nail pops after a strong North Texas gust, especially on roofs that saw summer heat soften sealants. Stay vigilant: inspect high-risk seams after storms, and plan for proactive resealing and securement before winter settles in.
Occasional freezes in the Cedar Hill area can stress flashing transitions and sealants that were already weakened by summer heat or storm movement. Metal step flashing along dormers, transitions at chimneys, and the edge details where the roof meets fascia are prime trouble spots when temperatures swing. Freeze-thaw cycles can cause micro-cracks to open, letting in water through seemingly minor gaps. If winter lows dip and you notice small drips after successive cold snaps, treat the flashing and sealants as a priority for attention rather than a routine patch job.
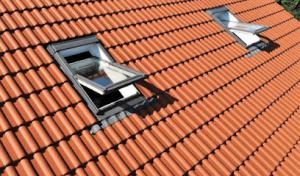
Skylights deserve special attention locally because repeated hail, wind-driven rain, and sealant aging can turn older units into chronic leak sources. The combination of hail strikes and intense sun exposure can degrade glazing seals and the surrounding flashing, particularly on south- and west-facing skylights that take the brunt of afternoon heat. If a skylight shows condensation between glass panes, foggy interior edges, or damp drywall around the cabinet, address it promptly. Re-sealing or replacing aging skylight seals now can prevent stubborn leaks that worsen with each storm season. Regular inspections should focus on the skylight curb, fasteners, and the surrounding roof interface to catch wear before it escalates.
Find contractors experienced in skylight installation, flashing, and leak repairs to bring natural light into your home.
Shield Roofing & Solar
(469) 297-8684 myshieldroof.com
952 N Hwy 67 ste 201, Cedar Hill, Texas
5.0 from 202 reviews
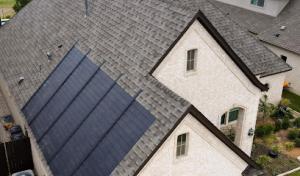
The strong sun exposure here makes solar-related roofing conversations highly relevant, but the roof's condition and timing matter before panels are added in a hail-prone market. Before considering panels, verify that the underlayment, flashing, and ventilation are solid, and that the roof has enough remaining life for panel installation. A hail event can reveal weaknesses quickly, so you want a sturdy base rather than chasing upgrades after the fact. Plan for a thorough inspection of every plane of the roof, including hips and ridges, to confirm there are no hidden leaks or compromised decking.
While most homes feature pitched residential roofs, you will still encounter low-slope sections on additions, porches, or commercial-adjacent structures. Those areas require different drainage philosophy and membrane detailing than standard shingle sections. Ensure proper transitions between slope types and confirm that the chosen membrane and flashing meet local drainage expectations. A well-detailing approach helps prevent pooled water, which can stress the flashing and lead to slow leaks after hail impacts.
In this market, any reroof involving mixed roof geometries should be planned around the same local permit and inspection framework rather than treated as separate informal repairs. Coordinate a single, cohesive plan that addresses shingles, membranes, and flashing for both high and low-slope areas. This unified approach reduces surprises during inspections and keeps timing aligned with weather and inspection cycles.
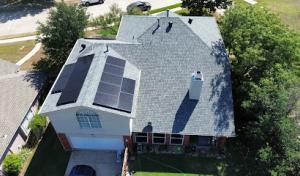
If solar is part of the project, schedule panel mounting after the roofing system has shown stable performance through a hail season or after a robust reroof cycle. Panels add weight and wind considerations, so ensure addressable concerns are resolved before panels are mounted. A well-timed integration minimizes disruption and preserves the roof's long-term resilience.
Post-installation checks should focus on seam integrity, penetrations, and any changes in drainage patterns. Regular inspections after heavy storms help catch micro-damage before it becomes a larger issue, which is especially important for mixed-geometry roofs in this area.
Find contractors who integrate solar panels or solar shingles into your roof for long-term energy savings.
Shield Roofing & Solar
(469) 297-8684 myshieldroof.com
952 N Hwy 67 ste 201, Cedar Hill, Texas
5.0 from 202 reviews
In this part of the southwest Dallas County highscape near Joe Pool Lake, the rush after a big hail event is real. The local market leans toward re-roofing and rapid storm work, so you will hear plenty about emergency availability and help with insurance paperwork. The key is to separate urgency from reliability: a contractor may promise to be on site within hours, but the question is whether the crew will do a thorough, code-respecting replacement rather than a quick, patchy fix that invites future leaks.
Long-established, family-owned, residential-focused contractors tend to stand out because homeowners want dependability after a major hail event rather than the latest storm-chasing outfit. Look for a contractor who has worked in your neighborhood for years and understands the typical Cedar Hill roof lines, attic vents, and drip-edge details that matter in this climate. Ask for a local reference list you can actually call, and verify that crews include experienced roofers who can handle full replacements when necessary, not just quick tarp-and-cap jobs.
After a severe hail season, many teams will offer help with insurance claims, but beware of overpromising. A trustworthy Cedar Hill roofer will provide clear documentation of storm damage, photos from multiple angles, and a concise scope of work. They should guide you through what counts as hail-driven damage versus wear and tear, and they should provide a written, itemized adjustment of what the insurer will likely cover. Avoid contractors who rely on pressure tactics or unclear scopes that delay real repair.
Cleanup is a major local hiring priority, especially in neighborhoods where repeated storm debris and tear-off waste can become a homeowner complaint point. Expect crews to dedicate dedicated cleanup shifts, properly bagging and hauling old shingles, nails, and waste. Insist on a defined cleanup plan, including daily end-of-day debris sweeps and confirmation that your landscape beds and irrigation lines won't be damaged during the process.