Last updated: Apr 19, 2026
Hopewell sits where the Appomattox River meets the James River, creating a humid river-influenced environment that can keep roofs damp longer after rain. That dampness accelerates the aging of shingles, underlayments, and flashing, especially after back-to-back rainstorms. In the Tri-Cities area of central-eastern Virginia, spring thunderstorms, hail, and tropical-system remnants can all affect roofing in the same year. The combination means a single roof faces multiple stressors in a single season: moisture intrusion from wind-driven rain, hail damage that can worsen over weeks, and lingering dampness that invites mold and wood decay. The result is not only a leak problem but also hidden rot that undermines structural integrity and complicates insurance claims later on.
Low-lying areas near the rivers concentrate moisture and can trap damp air against the eaves and walls. Flashing around chimneys, vents, and skylights is a frequent weak point after storms, especially when wind shifts accumulate salt and silt from river spray. Asphalt shingles can shed granules more quickly in hail-prone years, but failure often follows the underrated risk: moisture intrusion at the roof-to-wall junctions where flashing corrodes or pulls away. Shingle edge lift after high winds is a warning sign, yet the real danger lies in moisture that saturates roof decks and underlayment before a visible leak appears on ceilings. In homes with older metal flashing, corrosion can advance unnoticed behind gutters and fascia, inviting slow leaks that travel along rafters and fasteners. Wood shingles and shakes, if present, are particularly susceptible to moisture staining, warping, and fungal growth in this climate. Synthetic or composite shingles provide some resilience, but under severe storms their fasteners can loosen, creating wind-driven gaps that invite water intrusion.
Inspect the roof from the ground with a binocular view or a sturdy ladder, focusing on missing or curled shingles and obvious granule loss. Pay special attention to the valleys where two roof planes meet; those joints bear the brunt of wind-driven rain and can trap moisture if sealants are compromised. Check around vents, chimneys, and skylights for lifted flashing or visible gaps. Look for stains or damp spots on interior ceilings that align with roof sections above, which can indicate hidden leaks behind painted surfaces. In low-lying areas, moisture migration may not cause an immediate drip; feel for dampness in attic insulation or sheathing after a rain event, and note any musty odors that signal lingering moisture. When a storm has just passed, treat any sign of dampness as a priority: moisture intrusion now tends to worsen quickly with the next round of storms.
Given the riverine climate, records matter. Keep a dated log of storm events, observable roof damage, and interior moisture symptoms. Photograph visibly damaged areas from multiple angles, capturing close-ups of flashing, fasteners, and edge conditions. Maintain copies of previous maintenance and prior claim notes to show patterns of wear versus new storm-induced damage. If a contractor recommends temporary protections such as tarping or boarding, document and arrange promptly to minimize further water intrusion. For claims related to wind and hail, assemble timelines of storm dates, the onset of leaks or attic moisture, and any professional assessments performed quickly after a storm. Clear, precise records support faster processing and reduce back-and-forth with adjusters when the river's weather repeatedly tests the same roof.
Asphalt shingles are a dominant roof type in Hopewell, making heat-related granule loss and shortened service life a primary local concern. The river air keeps humidity high, and summer sun compounds thermal cycling. In practice, you'll notice granules washing off gutters after hot days, curled edges on older shingles, and a sooner-than-expected fading of the roof color. When shingles age unevenly, it often points to heat-driven drying and brittleness rather than a single storm event. Regular visual checks after the dog days of summer help catch early signs before leaks appear.
Hopewell's hot, humid summers make attic ventilation performance especially important for homes with dark asphalt roofs. In poorly vented attic spaces, heat builds up under the deck and can accelerate shingle aging and adhesive deterioration. If the attic feels warm to the touch or you notice persistent musty odors, that's a cue to inspect intake and exhaust soffits, ridge vents, and any obstructed vents. Aim for a balanced setup where the attic air moves freely; this reduces heat buildup that can soften asphalt underlayment and contribute to faster wear at flashings and penetrations.
The city's mix of older housing stock and year-round precipitation means homeowners often need to distinguish between ventilation-related wear and active leak sources at penetrations and flashing. Streaks or damp spots along a wall or ceiling during a rain event might signal active leakage, but persistent mineral deposits or granular shedding around vents can simply reflect aging shingles and degraded sealant from heat exposure. When moisture shows up without a heavy rain, check for loose or missing nails, lifted flashing, and signs of sealant failure around roof penetrations. If you're unsure, test by inspecting after a dry spell and comparing to the latest heavy rainfall cycle.
Begin at the chimney, vent stacks, plumbing stacks, and skylights. Look for cracked sealant, rusted or loose flashing, and any gaps where water can seep in. Copper or zinc strips near flashing can help with corrosion in humid air, but they require proper installation and clearance from shingles. While inspecting, note any areas where shingles have curled or lifted at edges, especially where flashing meets shingles. In older roofs, fasteners near penetrations may back out from heat cycles, creating micro-leaks that only show during rain. Mark suspect spots and plan targeted resealing or shingle replacement as needed.
Keep gutters clean to prevent granule-laden runoff from masking underlying damage. Trim overhanging branches to reduce shade-induced heat pockets that accelerate aging on dark shingles. If attic ventilation is marginal, consider adding intake or exhaust capacity or sealing air leaks in the attic floor to improve overall air exchange. When replacing shingles, match the original shingle profile and ensure proper sealing at the nailing line to reduce wind uplift, which is a common issue on roofs exposed to storm-driven winds in this area.

Mueller Builders
(804) 533-7663 www.muellerbuildersllc.com
Serving
4.9 from 244 reviews
Central Virginia and Eastern North Carolina's Leading Roofing and General Contractor. Mueller is a licensed Class A building contractor based in Prince George that serves Central Virginia and Eastern North Carolina. We provide services for both residential and commercial construction projects.
Save More Roofing
(804) 289-0174 www.savemoreroofing.net
Serving
4.7 from 16 reviews
Full service roofing contractor. Serving all of Central Virginia. Free Estimates! Roof repair and replacement.
RVA Roofing Services
(804) 609-0535 www.rvaroofingservices.com
Serving
5.0 from 55 reviews
RVA Roofing Services provides residential and commercial roofing installation, rejuvenation, and repair work in Colonial Heights, VA, and the surrounding area.
Premier Roofing
(804) 525-8377 www.premierroofingva.com
Serving
4.9 from 104 reviews
A very reputable company and specialize in Commercial, Residential , and Industrial roofing.
Walter D Witt Roofing
(804) 862-4040 walterwittroof.com
Serving
4.9 from 513 reviews
Walter D. Witt Roofing in Chester, VA provides commercial and residential Roof replacement and Roofing repairs in Central Virginia.
McDaniel Roofing
(804) 356-0934 www.mcdanielroofing.com
Serving
4.9 from 68 reviews
Local Roofing Company serving all of Richmond, Chesterfield, Henrico, Hanover, New Kent, Northern Neck, and Williamsburg. Class A Licensed & Insured.
Cross Timbers Roofing
(804) 275-9373 www.crosstimbersroofing.com
Serving
4.9 from 137 reviews
Cross Timbers Roofing has had the pleasure of being Virginia's trusted company for over 30 years. Specializing in both residential and commercial roofing, Cross Timbers Roofing has earned the trust and respect of homeowners and contractors alike by treating each roof like it is our own. Cross Timbers Roofing prioritizes safety and satisfaction above all else. From the initial phone call to the final quality control inspection, Cross Timbers Roofing is there for the customer every step of the way Cross Timbers Roofing has attained the highest certifications possible with four of the largest shingle manufacturers in the United States and the only roofing contractor in Central Virginia to do so. Call us today to see how we can help you!

Howerton Roofing & Construction
(804) 837-2621 howertonroofing.com
Serving
4.9 from 28 reviews
Are you ready to install a new roof on your home? Do you need prompt and effective roof repair? Howerton Roofing & Construction, LLC is a full-service roofing contractor in Chesterfield, VA, proud to serve Richmond, VA, and surrounding areas with any roofing needs. Our roofing professionals have years of experience and can handle any roofing project, small or large. As a fully insured company for both General Liability and Workman's Comp, you can rest assured that your roof is in good hands with our team.

Timothy's Home Improvement
(804) 526-1694 timothyshomeimprovements.com
Serving
5.0 from 6 reviews
When it comes to Roofing Contractor, Roofing Company, Roofer and more, no one compares to Timothy's Home Improvements With years of combined experience, Timothy's Home Improvements has worked hard to build the trust of our clients in Colonial Heights and surrounding areas. Visit our website to learn more or better yet, call us today!

Moore Roofing
(804) 778-7466 www.mooreroofingllc.com
Serving
4.3 from 11 reviews
Here at Moore Roofing we provide roofing, skylight, gutter, and siding installation and repairs. We maintain quality control by always having a supervisor on the job site to ensure a good line of customer communication and satisfaction. We offer free estimates on our provided services. Please call 804-778-7466 for a free estimate or email us at mooreroofingllc@gmail.com
SlopePro Roofing
(804) 585-3141 slopeproroofing.com
Serving
4.9 from 135 reviews
SlopePro Roofing is a professional roofing company in Richmond, VA servicing the greater Richmond area. As a family-owned and operated company, we are committed to helping you make better roofing investment decisions. Our professional roofers specialize in both residential and commercial roof repairs and roof replacements. Call us today to schedule an inspection.
Pyramid Roofing
(804) 823-9577 pyramidroofing.com
Serving
4.9 from 158 reviews
Pyramid Roofing is a trusted residential roofing company since 1986. Proudly serving the Greater Richmond Region, Hampton Roads, Middle Peninsula, and Virginia Beach areas. Now offering roof replacement & gutter estimates! You can find more information about us through the BBB. As a BBB accredited business, we are proud of our A+ rating! *Drug Screened, Background Checked and Factory Trained Technicians *100% Satisfaction Guarantee *Financing Available
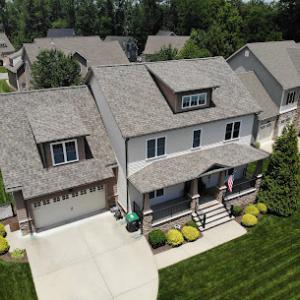
In this part of the river corridor, your neighbor's roofs are built from a familiar mix: asphalt shingles, metal roofing, clay tile, concrete tile, wood shingles or shakes, and synthetic or composite shingles. Each material plays its own role against Hopewell's humid air, frequent rain, and storm-driven winds. Asphalt shingles remain the everyday workhorse because they balance cost, ease of repair, and broad availability. Metal roofs stand out for rapid rain shedding and wind resilience, an advantage during late-spring squalls and fast-moving storms. Clay and concrete tiles bring a distinct look and long life, but they demand a careful check of the structure underneath to carry the weight, particularly on older houses. Wood shingles or shakes bring a traditional texture that handles the humidity well when properly maintained, yet they require more frequent maintenance to prevent moisture-related issues. Synthetic or composite shingles mimic the appearance of tile or wood with less weight, appealing to homes aiming for a certain aesthetic without adding mass to the roof.
Because Hopewell sits along the confluence of the James and Appomattox rivers, the climate can push older homes beyond typical wear patterns. Heavier materials like clay and concrete tile demand that the underlying structure can bear the extra load. On newer subdivisions, framing is often prepared for heavier options, but on older houses you should confirm rafter spacing, deck integrity, and potential retrofit needs before selecting a weighty option. If the roof structure isn't reinforced, the risk of sagging or fastener failures increases after a season of heavy rain and wind-driven hail. In practice, a structural engineer or a seasoned local roofer can help determine whether your attic layout, ceiling joists, and wall connections are up to the task before you commit to a tile installation.
Metal stands out in this region for shedding rain quickly and resisting wind damage, which matters when seasonal storms sweep through the confluence area. If you're evaluating metal, look for panels with a good coating system that handles humidity without peeling or corrosion. Wind uplift ratings should be checked to ensure the panel and its fasteners stay secure during severe gusts. A standing-seam system can offer a cleaner look and tighter weather seal, though it can be pricier than exposed-fastener options. In settings where shade and cooling are concerns, metal can also contribute to reflecting heat away from the attic, aiding overall comfort and energy performance.
Clay and concrete tile bring durability and a classic silhouette, but these heavy roofs require careful pairing with roof deck strength and, on older homes, potential retrofits. Tile metabolism under moisture is predictable when properly installed, yet hairline cracks can propagate under hail or temperature swings. Regular inspections after storms help catch cracked tiles before moisture penetrates underlayment or into the sheathing. If you're drawn to a tile look with less weight, synthetic or composite options offer the aesthetic with easier handling and installation, while still resisting moisture damage and wind to a practical degree.
Wood shingles and shakes deliver authentic texture that suits many period and craftsman-style homes. In this climate, they require proactive moisture management and periodic treatments to prevent rot, mold, and insect activity. Synthetic shingles or composites can emulate wood or tile appearances while offering improved resistance to moisture and less weight, though long-term performance depends on the product's UV stability and warranty. For homes near the river, choosing a product with good dimensional stability helps address expansion and contraction through humidity cycles.
When choosing between these options, consider your roof's age, existing structure, and the storm history of your block. A quick structural check, followed by a targeted inspection after major weather events, informs whether you can safely upgrade to heavier tiles or should lean toward lighter, resilient options like metal or synthetic composites. For every material, prioritize a high-quality underlayment, solid flashing at joints and penetrations, and a trustworthy installation crew with local experience handling riverfront climates.
Milder spring and fall periods are typically the best reroof windows in Hopewell because summer heat and winter freeze-thaw conditions complicate installation quality and scheduling. When the air is moderate, shingles seat properly, underlayment stays pliable, and crews can work without chasing extreme heat or cold. If you're hoping to avoid delays, plan projects for late April into early June or late September into early November.
Spring storms and hail can create sudden replacement demand in Hopewell, which can tighten contractor availability after severe weather. If your roof shows new random granule loss, dented metal edging, or curled shingle edges after a hail event, start getting bids quickly and ask about storm-season scheduling. Proactive communications with your chosen contractor help you secure a spot before backlogs build up between downpours and the next round of storm activity.
Winter freezing cycles in Hopewell can affect underlayment and flashing when moisture is already present, making delayed repairs riskier on aging roofs. If you notice frost pockets under shingles, exposed flashing, or suspect ice dam formation during thaw cycles, address these issues promptly. Waiting through the coldest periods can trap moisture in the decking and complicate what should be a straightforward reroof.
If your shingles are consistently curling, edges are lifting, or you're seeing widespread granule loss after a season of humidity and rain, reroofing becomes a practical option. In this market, the confluence of James and Appomattox influences humidity levels, so aging roofs under continuous moisture exposure tend to degrade faster than in drier inland areas. For a home in this climate, a planned reroof during a calm, shoulder-season window reduces the chance of weather-driven delays and yields a more predictable installation.
When you're ready, aim to book ahead just before the typical shoulder-season lull, and confirm that your contractor has a plan for moisture management during installation. If spring storms loom, ask about temporary tarp strategies and how they'll protect attic spaces during the project. This approach helps ensure a durable roof that stands up to Hopewell's river-influenced humidity and storm patterns.
For asphalt shingles, expect bids around 300 to 650 USD per square. If metal is on the table, prices commonly run 500 to 1100 per square. Clay tile tends to sit between 1000 and 2100 per square, while concrete tile usually lands 900 to 1800 per square. Wood shingles or shakes commonly range from 700 to 1200 per square, and synthetic or composite shingles fall in the 450 to 900 per square neighborhood. These ranges reflect local material choices found across Hopewell-area homes and give a practical baseline when you start discussing bids with contractors.
Prices in Hopewell can rise after spring storms or hail events when demand spikes across the Tri-Cities and greater Richmond labor market. In the aftermath, crews book out, materials are less available, and emergency repairs become the norm. Expect bid timing to stretch and some volatility in the numbers as crews prioritize storm-related work. If you're comparing multiple bids after a notable storm, look for clear notes on material substitutions, anticipated lead times, and how the contractor handles temporary protection and moisture control while waiting for full replacement.
Older Hopewell homes can increase reroof pricing when decking repairs, flashing replacement, or structural review is needed before installing heavier materials. If your roof is over compacted or has damaged decking, or if flashing shows extensive corrosion near the James-Appomattox confluence, the bid should separate decking and flashing work from the core roof replacement. Heavier materials like clay or concrete tile will heighten the need for structural checks and potentially reinforce trusses or rafter spans. Expect these items to show up as add-ons or line-item estimates, not as afterthoughts.
Ask for a per-square price that includes tear-off, disposal, underlayment, fasteners, and flashing. Request a separate line for decking repair or replacement and for any required structural review if heavier materials are proposed. Confirm access to supply shortages and whether your bid accounts for potential freight delays common after storms. Finally, ensure the bid specifies wind uplift considerations appropriate for local wind patterns and storm exposure along the river, so you're comparing like-for-like costs across contractors.
Full roof replacements in Hopewell typically require a permit through the city's building department. The process is not something to overlook, because the permit ties together the work scope, materials, and safety standards with the local code framework. As a homeowner, you should anticipate a formal application that outlines the roof type, square footage, and the expected work timeline, and you should understand that the city's review can catch issues before shingles go on. This is especially true near the river confluence, where storm-driven wear and moisture exposure influence every detail of installation.
Hopewell's process generally includes application review, inspections during and after installation, and a final inspection to confirm code compliance and proper installation. Scheduling inspections at key milestones-before shingles are set, at mid-project if required, and after a complete installation-helps avoid delays. It is not uncommon for inspectors to check flashing, ventilation, drip edge, and attic insulation as part of the plan review. Since the local climate pushes moisture into vulnerable seams and valleys, expect questions about roof ventilation and condensation control. Having a detailed contractor's workmanship narrative ready for the inspector can smooth the path.
Because the city performs a final inspection, homeowners should make sure the contractor closes out the permit rather than leaving the project without final approval. If the permit is left open, you risk a future citation or trouble when you try to sell the house, and the municipality may require visible corrective work. Verify with the contractor that the final inspection is scheduled promptly after completion, and request copies of the inspector's notes. A clean closeout confirms the roof meets code, protects the investment against storms, and keeps insurance documentation straightforward for the years ahead.
The James-Appomattox confluence brings humid river air and quick-moving storm systems that can stress roofs in ways that local shingles, flashing, and underlayment aren't always ready for. Spring storms and tropical-system remnants can trigger claim activity in a way that's different from inland areas, so understanding how insurers respond is essential for homeowners with aging or recently repaired roofs. When weather patterns shift, carriers tend to re-evaluate risk, and that evaluation can influence how quickly a claim is processed and what is considered repair versus replacement.
Virginia insurers commonly handle wind and hail roof claims, which is highly relevant in this area. Carriers often want photos of pre-existing conditions and a detailed scope of work, so documentation before a storm season is a practical safeguard. Take clear, dated pictures of shingles, flashing around vents and chimneys, ridge lines, gutters, and any signs of moisture intrusion in the attic. Keep a simple log of recent roof work, flashing upgrades, or patches. This not only speeds up claims processing but helps avoid disputes about what existed before the storm.
Storms can bring rapid changes in how a roof is treated by insurers. In years when hurricane activity is a concern, adjustments to coverage or premium calculations may appear, which can subtly influence whether a repair, replacement, or upgrade makes the most sense for your home. When a claim is filed, expect requests for documentation, including detailed scope of work and product materials. Responding thoroughly and promptly helps prevent extended delays and reduces the risk of misunderstandings about the scope of repairs.
If damage is obvious, document it from multiple angles and within the broader context of the roof's condition. Keep samples of any temporary repairs or tarping, and note how long a leak has been present. For the unexpected heavy wind or hail events, consider scheduling a professional roof inspection soon after the storm to identify hidden damage that might not be visible from ground level. A proactive, thorough approach now helps avoid expensive surprises later in the claim process.
In older neighborhoods, flashing details can be the first line of defense that wears out. Step flashing along walls and at intersections with chimneys, dormers, and vent pipes often battle years of humidity and storm-driven wind. When repeated wetting occurs, these metal seams corrode or pull away from the deck edge, creating small leaks that feel isolated but may be feeding water into concealed decking or underlayment. Pay attention to any staining along interior ceilings near wall-to-roof transitions, and inspect the metal where it meets masonry for gaps or bent corners. In Hopewell's river air, a tiny crease in the flashing can let in a surprising amount of moisture after a heavy rain or hail event.
Chimneys, roof penetrations, and vent stacks in older homes often carry the burden of decades of stack movement and flashing repairs. Poor sealing around a chimney chase or at pipe boots can allow water to wick under shingles even when the surface looks sound. Look for hairline cracks in sealant, loose counter-flashing, or torn shingle tabs at the base of the chimney. Moisture exposure in a humid river climate accelerates rot in boards beneath the surface, so a leak may appear far from the penetration itself. If staining appears far from the apex, check the surrounding decking for soft spots or delamination that signal hidden damage.
Valleys take the brunt of rain and storm runoff, especially on older roofs where valley metal may be sunken, cracked, or clogged with debris. Repeated wetting in Hopewell increases the risk of mineral granule loss at valleys and accelerated wear on roof decking. If the roof has multiple layers from prior reroofs, the underlying deck may be thinner or bowed, allowing leaks to travel laterally before they show up as a drip. Inspect for moss, damp patches, or spongy decking near valleys and along wall intersections. A cautious check of interior ceilings near these points can reveal whether the concern is isolated or signals broader deck damage beneath an aging roof system.