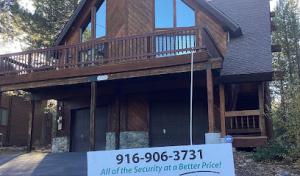
Last updated: Apr 19, 2026
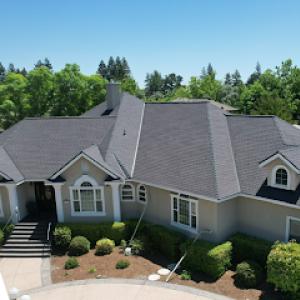
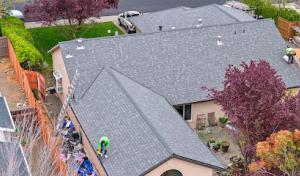
Shingle Springs sits in the Sierra foothill zone of El Dorado County, where wildfire risk strongly affects roofing material choice and insurer scrutiny. The hot, dry summers here create a long window for embers to travel and ignite vulnerable roofs, and the proximity of wildland brush means a quick-path to flames if a roof isn't up to the fire standards that insurers now expect. This is not optional risk management-it's about protecting your home, your neighbors, and your peace of mind when the fire season hardens every year.
When insurers review a policy or consider renewal, they often need clear documentation of roof age, roof covering type, and proof of fire-rated underlayment. In wildfire-prone counties, underwriters are vigilant about how your roof handles radiant and embers-driven exposure. If a roof ages out or uses a low-resistance covering, coverage can tighten or premiums can rise. The framing of the roof system often becomes a focal point: what sits atop the deck, how well it resists ignition, and how it integrates with ember shields and eave detailing. The bottom line is that your roof is a first line of defense-and the paper trail matters as much as the shingles themselves.
In this market, metal, tile, and other higher-fire-resistance roof systems compete directly with asphalt because homeowners are balancing upfront cost against wildfire exposure and insurability. A metal panel, clay or concrete tile, or a synthetic substitute can dramatically improve your home's survivability in a wildfire event. These options typically resist ignition more effectively than standard asphalt shingles, especially when paired with proper underlayment and flashings. If you're repairing or reroofing, this is not a choice you want to defer, because the fire season in the foothills doesn't wait for your schedule. Planning for a fire-season-ready roof means prioritizing materials with proven performance in ember-dominated exposure and heat.
Start by evaluating your current roof's vulnerabilities in the Sierra foothill climate. Look for gaps around penetrations, exposed fasteners, and the edge details where embers love to lodge. If you're mid-project or considering a full replacement, prioritize a system that includes a fire-rated underlayment and ignition-resistant coverings. For metal roofs, ensure panels are properly lapped and sealed to resist embers blown under the edges; for tiles, confirm that the underlayment and deck protection can handle radiant heat and that roof-to-wall transitions are fire-sound. Synthetic or composite options can offer a compromise between traditional tile and asphalt, delivering fire resistance with more moderate weight and installation requirements.
Neighborhood choices matter too. In this portion of the foothills, many homes have existing asphalt that has aged beyond its best performance in ember-prone conditions. Upgrading to a higher-fire-resistance system can be a practical way to improve your home's resilience without changing the house footprint. Talk with local roofing contractors who understand the unique wind, heat, and ember patterns of this zone, and ask for tested assemblies that carry credible fire-resistance ratings. In addition, coordinate with your insurer on documentation packages you'll need during underwriting or renewal so you're not surprised by last-minute paperwork needs.
The fire reality here is not theoretical. A roof that prioritizes ember resistance, appropriate underlayment, and durable edge details can translate into real, measurable protection during the fire season-and smoother insurer conversations when moments of high risk arrive. Stay ahead by selecting a system that aligns with both fire resilience and the practical, hot-season demands of this Sierra foothill environment.
When winter rain moves through the Sierra foothills, roofs in this area can start with a trickle and suddenly reveal a much larger issue as underlayment and flashing come under pressure. In Shingle Springs, a small leak after a heavy rain is not just a stain on the ceiling-it's a sign that valleys, drip edges, and penetrations may be compromised. Spring winds can then drive that moisture into attic sheathing and rafters, creating the kind of seepage that expands from a quick fix into a full-scale repair once the wet layer is exposed. A sharp eye on roof seams, vent flashing, and chimney connections is essential after every storm, especially when you notice moisture around light fixtures or softened insulation in the attic.
Wet-season work in El Dorado County is more vulnerable to stoppages, so temporary dry-in and tarping matter more here than in climates with predictable dry winters. If a leak is detected during a storm or a cold snap, your first move is proactive tarping to keep more rain from wicking into the decking. Fast, secure tarps should cover the affected area, with boards or weighted edges to hold them in place and multiple tie-ins to prevent wind displacement. Beneath that tarp, prioritize securing flashing laps and ensuring the roof-to-wall transitions stay sealed. Temporary dry-in isn't a substitute for a full repair, but it buys you precious time to protect the interior and prevent further structural damage while you coordinate the next steps.
Wildfire season and smoke can also disrupt access, scheduling, and material handling on some project days in this foothill corridor. Smoke can obscure visibility and complicate chemical odors from sealants, while ash and debris can contaminate the work area. Plan for realistic access windows and create a simple, flexible schedule that can shift around wind patterns, smoke days, or road closures. If a crew arrives and access is blocked or conditions feel unsafe, have a clear backup plan for securing the site and protecting the interior until conditions improve.
Key practical steps you can take now: identify a trusted local roofer who understands how snow, rain, wind, and hail stress foothill roofs, and reserve priority response for detected leaks. Keep a readily accessible ladder, perimeter tarps, and a basic repair kit for temporary sealing. After a storm, inspect and document the affected areas-photos of flashing, vents, and fascia can speed up the repair process. Finally, when choosing materials, lean toward assemblies that resist wind-driven rain and maintain integrity under intermittent cold and heat, so a small leak doesn't escalate into a full roof replacement.
When you can't wait, these contractors offer fast response times to stop leaks and prevent further damage.

American Eagle Roofing
4261 Sunset Ln Suite 102, Shingle Springs, California
4.9 from 325 reviews

Roof Geeks
(916) 888-7663 www.roofgeeksca.com
4261 Sunset Ln Suite 100, Shingle Springs, California
5.0 from 67 reviews
Roof Geeks is your trusted roofing contractor in Shingle Springs, CA, proudly serving homeowners throughout the Greater Sacramento region. From complete roof replacements and expert repairs to standing seam metal roofing and gutter installations, we deliver quality solutions backed by three generations of local experience. When you need dependable roofing done right, we're the team that answers, day or night. Our dedication to superior craftsmanship and honest service has made us a top choice for families across Sacramento. Reach out today.
American Eagle Roofing
4261 Sunset Ln Suite 102, Shingle Springs, California
4.9 from 325 reviews
Your local choice for standing seam metal, tile, slate, composition roofing, gutters, and flat roofing systems. American Eagle Roofing is family owned and had an A+ Rating with the Bbb for over 17 years. We take pride in our work and love what we do, from mild to wild we treat every project with the same attention to detail that has built our reputation of quality. No two companies are built the same, so perhaps let a tailored company take care of your largest investment. From start to finish Let Our Family Help Yours! -AER
HOA Roofing
(916) 975-5095 www.hoaroofinginc.com
Shingle Springs, California
5.0 from 11 reviews
Welcome to HOA Roofing, DBA Sierra Hills Roofing. At Sierra Hills Roofing, we offer comprehensive roofing services, including asphalt shingles, composition, tile, metal roofing, roof replacement, gutter replacement, gutter guards, chimney saddles, ventilation, dry rot replacement, and insurance claims assistance. We provide third-party financing. Woman-owned and family-operated, we serve single-family, multi-family, and commercial properties. Certified with GAF and an Owens Corning Preferred Contractor. Our mission is to provide top-tier roofing solutions while upholding the core values that define our family. With every project, we strive to not only protect your home but also to strengthen the bonds of trust within our community.
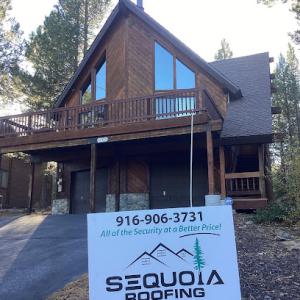
Sequoia Roofing & Construction
(916) 226-5106 www.trustsequoia.com
3867 Dividend Dr C, Shingle Springs, California
4.8 from 17 reviews
Sequoia Roofing & Construction provides residential and commercial roofing and general construction services in the Sacramento, CA area.
Elite Roofing
(916) 933-9609 www.eliteroofingca.com
Shingle Springs, California
4.0 from 4 reviews
Elite Roofing Provides Roofing Repairs, Re-Roofs, Roof Tile Repairs Including Difficult Tile Repairs, Mobile Home Composition, Free Estimates and More to the Shingle Springs, CA and Surrounding Area.
Solarado Roofing & Solar
(916) 413-7376 solarado-ca.com
Serving
4.9 from 67 reviews
Your Premier Roofing and Solar Solution in the Greater Sacramento Valley and Foothill Areas! We specialize in commercial and residential roofing, solar installations, and home battery backup. With coverage across Sacramento and surrounding foothills, our top priorities are customer service, product quality, and workmanship excellence. Trust Solarado to care for your home or business as if it were our own. Elevate your property with unparalleled service and quality. #SolaradoRoofing #SolarServices #RoofingSolutions #SacramentoValley
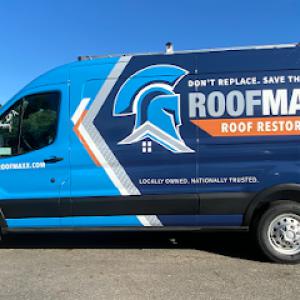
Roof Maxx of Sacramento, CA
Serving
4.9 from 119 reviews
Roof Maxx® offers a revolutionary roof restoration service, providing an eco-friendly, cost-effective solution for extending your roof's life. Specializing in roof rejuvenation, our innovative treatment revitalizes aging shingles, ensuring they remain flexible and waterproof. Ideal for roofs over 7 years old, Roof Maxx's unique formula penetrates deep into shingles, restoring their original functionality. This process not only enhances roof durability but also postpones the need for expensive replacements. Our professional roof maintenance services further protect your investment, keeping your roof in top condition. Trust Roof Maxx for sustainable, efficient roofing solutions. CLSB#1127410
Ark Roofing & Construction Sacramento
(916) 236-4551 arkroofingco.com
Serving
5.0 from 34 reviews
Ark Roofing and Construction is Sacramento’s go-to Roofer for high-quality Roof Replacements, Roof Repairs, and long-lasting Roofing Systems. We specialize in Asphalt Roofs, Tile Roofs, and Flat or Pitched Roofing solutions that protect your home and boost long-term value. As experienced roofers serving the Sacramento region, we know how shifting weather, heavy rains, and seasonal heat impact your home. That’s why we focus on durable roofing systems designed to last. Whether you need a Shingle Roof Replacement, a new Tile Roof installation, or Flat Roof service, we handle every project with professionalism and precision.
Skyline Roofing Solutions
(916) 545-7668 eldoradohillscaroofing.com
Serving
5.0 from 21 reviews
Skyline Roofing Solutions is your trusted roofing contractor in El Dorado Hills, CA, offering top-notch services tailored to meet your needs. Specializing in roof installation, roof replacement, and roof repair, we ensure your home or business stays protected year-round. Our expertise extends to metal roofing, asphalt shingle roofing, and commercial TPO roofing, providing durable and energy-efficient solutions. Whether you're planning a new construction roofing project or need reliable flat roofing services, our skilled team delivers superior craftsmanship and exceptional customer service. At Skyline Roofing Solutions, we are committed to enhancing your property with long-lasting, high-quality roofs that combine functionality and style.

Roseville Roofing
(916) 791-7348 rsvlroofing.com
Serving
4.9 from 43 reviews
Centrally located and serving Placer, El Dorado and Sacramento Counties. Roseville Roofing has provided professional residential and commercial roofing services to the surrounding areas since 1989. We continually update and improve our skills in the roofing industry to provide the latest in roofing systems and types and promise real value and quality workmanship.
Valley Roofing
(530) 668-9314 valleyroofing.net
Serving
5.0 from 4 reviews
Valley Roofing offers comprehensive services for both residential and commercial roofing applications and is dedicated to quality above all else. We are one of Woodland, California's, roofing experts, providing all our customers with top-quality craftsmanship at the right price. Need roofing? Whether you need a new roof or re-roofing, please give us a call today for a FREE ESTIMATE.
Richard Hockett Roofing
(530) 334-0651 richardhockettroofing.com
Serving
4.9 from 112 reviews
"Our roofing company stands out for its exceptional service and expertise, holding numerous certifications with various manufacturers. We specialize in a wide range of roofing solutions, catering to both residential and commercial clients. Our skilled team is equipped to handle projects of all sizes, ensuring each job is treated with the utmost care and professionalism. Trust us for reliable, high-quality roofing tailored to your unique needs."
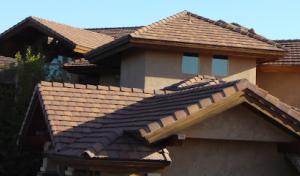
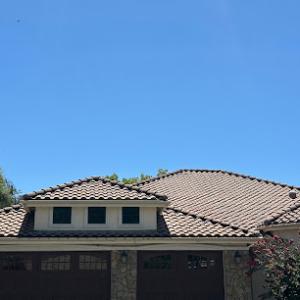
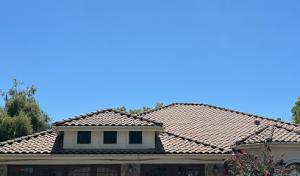
In this area, hot, dry summers accelerate aging on lower-end roof systems, and homeowners often weigh fire performance as part of choosing a roof. Tile and metal respond to that combination by offering longer service life in sun-baked façades and stronger resistance to embers when installed with the right details. The local material mix includes clay tile, concrete tile, metal, asphalt shingles, synthetic/composite shingles, and slate, with tile and metal standing out as common upgrade paths in this market. When heat is intense and winter moisture cycles are real, a roof that handles both radiant heat and moisture movement without warping or leaks becomes a practical choice.
Clay tile and concrete tile bring longevity and a fire-aware reputation, but they require careful selecting of underlayment and battens to perform well under foothill sun. Metal roofs resist surface aging and can shed embers more readily, yet installation quality matters just as much as the panel profile. In many homes, these two options are paired with proper ventilation strategies to prevent heat buildup in the attic and to temper condensation during seasonal swings. Asphalt and synthetic/composite shingles remain common as baseline choices, but their durability under prolonged exposure differs from tile and metal. Slate, while appealing for long-term aesthetics, demands precise framing and specialized fasteners to avoid cracking in sharp temperature shifts. The key is matching the panel shape and color to the home's exposure and aligning with the roof's existing geometry.
Foothill homes stress transitions where roof planes meet walls, chimneys, or skylights. Pay special attention to flashing around penetrations and along eaves, as heat cycles and winter wetness can stress these areas. Choose fasteners and clips rated for high-heat environments, and align them with the manufacturer's guidelines for pitch and exposure. Ventilation details matter more here than on a milder climate; ensure soffit and ridge vents are balanced to pull hot air from the attic without inviting condensation. With tile, verify mortar or sealant joints at hips and rakes stay watertight through seasonal cycles. For metal, inspect panel seams and supporting clips for corrosion resistance and wind resistance, particularly in storms that bring windy gusts plus embers.
In this market, a roof that ages gracefully under intense sun and occasional winter wetness reduces future maintenance surprises. Regular inspections after the dry season and before the first winter rains help catch solvent issues with flashing, fasteners, and underlayment. If choosing tile or metal, plan for periodic resealing of flashing joints and confirmation that ventilation paths remain unobstructed by debris. When a homeowner considers reroofing, the fire performance of tile or metal, paired with diligent detailing, becomes a defensible choice that aligns with local expectations and the evolving insurance landscape.
Find contractors who specialize in clay and concrete tile roofs, known for their durability and curb appeal.

Roof Geeks
(916) 888-7663 www.roofgeeksca.com
4261 Sunset Ln Suite 100, Shingle Springs, California
5.0 from 67 reviews
American Eagle Roofing
4261 Sunset Ln Suite 102, Shingle Springs, California
4.9 from 325 reviews
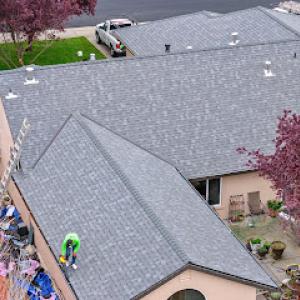
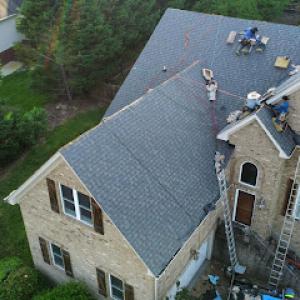
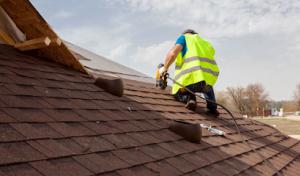
Many reroof projects in Shingle Springs are planned from late spring through early fall so crews can avoid winter rainfall and allow materials to cure properly. If you have a rigid schedule tied to school calendars or month-to-month insurance expectations, aim for window dates that keep you out of the rainy season and provide a dry stretch long enough for temporary protections. Start conversations with your installer early, and pin down a tentative sequence of days rather than a single target date. In practice, this means a front-loaded plan for deck prep, underlayment, and temporary covers, followed by a firm push to complete critical weatherproofing before the first cold spell.
Hot summer installation conditions in this area require handling precautions because extreme dry heat can affect worker safety and material performance during install. Plan for midday heat breaks, shade for crews, and hydration logistics so work can progress steadily without compromising quality. Materials that resist deformation in heat-like certain underlayment choices and fasteners with high heat tolerance-help avoid late-stage callbacks. If your roof has southern exposure, discuss staging and ventilation strategies with the crew to minimize heat buildup in attic spaces and to protect interior finishes during install.
Spring wind and occasional hail can change project scope unexpectedly, so homeowners here benefit from inspections before locking in final replacement timing. Schedule a preliminary walkaround with the installer to identify venting needs, edge protection, and potential debris risks from gusts. A mid-project inspection after rough-in work can confirm fascia conditions, alignment, and membrane security, ensuring that a late-season hail event won't undo weeks of labor. Keep a flexible plan for temporary weatherproofing if a storm system pushes materials off-site or requires urgent repairs prior to completion.
Fire-rated assemblies increasingly drive material choices here. When evaluating shingles, tiles, or metal options, consider how each system contributes to ignition resistance and ember exposure. In practice, you'll benefit from choosing products with tested fire performance and compatible underlayment, plus detailing around vents and skylights to maintain a firebreak. A well-coordinated sequence-from tear-off to final sealant-protects your home and keeps the reroof on track through variable Sierra foothill weather.
Get a clear picture of your project costs upfront - no commitment required.
Roof Geeks
(916) 888-7663 www.roofgeeksca.com
4261 Sunset Ln Suite 100, Shingle Springs, California
5.0 from 67 reviews
In this region, a full reroof typically follows the El Dorado County permitting workflow rather than a separate city process. The county framework guides the project from plan review through inspections, with the expectation that the home's roof replacement aligns with current code and wildfire-ready guidelines. Expect that the permit packet requires details on the chosen roofing assembly, ventilation strategy, underlayment, and flashing method. Since the area is unincorporated, the county's magnifying glass covers the entire project footprint, including roof penetrations for venting, plumbing, and attic access. Preparing clear, complete documentation helps avoid delays once the site is opened for review.
County inspections are commonly scheduled at rough-in and final stages. At rough-in, reviewers verify that underlayment is properly installed, fastener patterns are correct for the selected material, flashing around chimneys, skylines, vents, and transitions is installed to code, and attic ventilation is planned and implemented as required. The final inspection confirms that the installed assembly meets air and water barriers as well as fire-safety expectations for wildfire exposure. For homeowners in this Sierra foothill environment, the inspector will also check that any vent stacks and soffits are integrated with a fire-safe detailing, since heat and embers can exploit weak junctions.
Because Shingle Springs is an unincorporated community, homeowners should expect county-level permitting workflow and inspection scheduling to govern reroof timing. Plan for permit review timelines that consider weather windows and wildfire-season considerations. Dry-season scheduling often aligns with lower rain risk and hotter months that support asphalt, metal, or tile installation without rain disruption. Coordinate with the contractor to ensure all required materials and details-such as underlayment type, fastener length, and flashing configurations-are on site before inspections are requested.
Communicate early with the county inspector about any unique roof features, such as multiple transitions or venting layouts, to prevent last-minute repairs that could stall the final inspection. Have a clear plan for edge detailing, chimney and skylight flashings, and eave ventilation, since these are common failure points under wildfire-ready design. Ensure that contractor crews understand the specific county expectations for documentation tied to fire-rated assemblies and wildfire risk considerations, so the reroof proceeds without unnecessary delays.
In this foothill market, you'll notice asphalt shingles priced roughly from $400 to $800 per square, with metal around $700 to $1200, clay tile $900 to $1600, concrete tile $700 to $1200, synthetic/composite shingles $500 to $850, and slate $2500 to $5200 per square. Those numbers are your baseline for planning, and the spread reflects material choice, labor, and local access to crews.
Costs can rise when wildfire-driven insurance decisions push homeowners toward premium fire-conscious materials like metal or tile rather than basic asphalt. In fire-prone months, you may see more demand for Class A assemblies, extended warranties, and ignition-resistant underlayments. If insurance incentives favor non-asphalt options, expect a noticeable shift in bid values and material mix compared to quieter years.
Seasonal demand spikes before winter rains and after storm damage events can tighten scheduling and push reroof pricing higher in this foothill market. If a contractor's calendar fills up after a big wind or hail event, you may pay a premium for earlier start times or preferred crews. Planning a dry-season reroof when possible helps lock in lower prices and reduces the risk of weather-related delays.
Don't let upfront costs delay a critical repair - these contractors offer payment plans to fit your budget.

Wildfire exposure across the Sierra foothills has tightened the screws on roof conditions as a key underwriting factor. In higher-risk pockets, carriers may limit options or push higher premiums for reroofing projects, especially when the roof is older or spans vulnerable venting and attic assemblies. The consequence is that the right timing and material choice can influence both coverage stability and renewal terms, even before any storm hits.
When you review your roof, document age, material type, and the underlayment, plus any storm-related damage you've observed. Keep photos dated over the years, and note prior repairs or upgrades. This dossier helps when an adjuster evaluates wear versus damage from a claim and informs any conversations about future renewals. A clear record can also support discussions about fire-rated assemblies and how your roof aligns with insurer expectations.
Wind and occasional hail are common concerns that investors notice, but wildfire exposure is the bigger background factor shaping reroof timing and insurer expectations. A roof that meets wildfire-resilient standards-whether through fire-rated assemblies or durable materials-tends to fare better in risk assessments. The most practical move is to view any reroof as an opportunity to bolster fire resistance and improve overall resilience, not just address a single season's weather.
As you approach renewal, frame your roof project as a risk-management step that supports long-term stability. Emphasize improvements that reduce ember intrusion and exposure to radiant heat, and be prepared to discuss the anticipated lifespan of the chosen assembly. Honest documentation and proactive upgrades can smooth conversations with insurers and contribute to steadier coverage in a climate where wildfire risk is a persistent backdrop.
Connect with contractors who help homeowners navigate the claims process from damage assessment to final approval.
Roof Geeks
(916) 888-7663 www.roofgeeksca.com
4261 Sunset Ln Suite 100, Shingle Springs, California
5.0 from 67 reviews
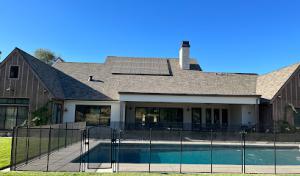
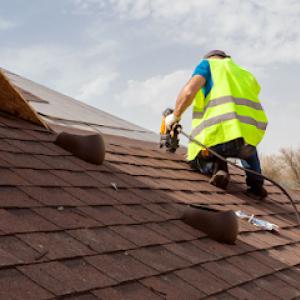
In Shingle Springs, roof penetrations deserve extra scrutiny because winter rain exposes flashing weaknesses while summer heat stresses sealants and surrounding materials. When evaluating skylights or solar penetrations, inspect the flashing at the base for signs of past movement or sealant deterioration. Plan for corrosion-resistant flashing materials and a continuous weatherproof layer that can handle both dry-season expansion and winter wetting. A tight, properly bedded boot and a backer dam where applicable help manage runoff toward the shingle line rather than under it.
The local contractor signal mix shows recurring demand for both skylight work and solar-related roofing coordination, indicating penetration detailing is a real homeowner concern here. If adding a skylight or rooftop solar array, verify that the chosen flashing system is compatible with the roofing type (asphalt, metal, tile, or others) and that flashing transitions are designed to maintain wind uplift resistance in Sierra foothill gusts. Request a step-down sequence: first secure the primary roof plane, then install penetrations, and finally address any minor deck or underlayment repairs that become apparent once materials are exposed.
When reroofing in this area, penetration work should be coordinated with county inspection expectations around flashing and final weatherproofing. Ensure that sealing compounds, gaskets, and sealants used around skylights and solar penetrations are rated for long-term exposure to hot afternoons and seasonal cold. Have the contractor document the exact flashing details and test a modest rain simulation if feasible before final edge finishing. In cold, dry, windy periods, pay attention to the sealant cure times to avoid gaps that could invite moisture intrusion during first winter rains.
Find contractors experienced in skylight installation, flashing, and leak repairs to bring natural light into your home.
Roof Geeks
(916) 888-7663 www.roofgeeksca.com
4261 Sunset Ln Suite 100, Shingle Springs, California
5.0 from 67 reviews
Sequoia Roofing & Construction
(916) 226-5106 www.trustsequoia.com
3867 Dividend Dr C, Shingle Springs, California
4.8 from 17 reviews
In the Sierra foothills, local contractor signals show cleanup included is a common expectation in the Shingle Springs market, which matters on reroof projects where tear-off debris and nails can spread across larger foothill lots and driveways. When a crew finishes, verify that a thorough sweep of the roof line, driveway, and any yard debris is part of the service agreement. Ask specifically about nail-strike checks and magnet sweeps, since missed fasteners can pose a hazard for vehicles and pets lingering on steep driveways after a burn-prone summer. Request a written cleanup checklist and a final walk-through so nothing is left behind after a long tear-off day.
Warranty-offered contractors are present but not dominant here, so homeowners should verify what is actually covered on workmanship versus manufacturer materials. A solid approach is to compare the longest workmanship guarantee with the material warranty, and to confirm what conditions would void either. In foothill homes, where heat spikes and potential ember exposure matter, confirm coverage for wind-driven debris and fire-resistance performance of the chosen assembly. Also clarify whether feathering edges, fastener security, and underlayment integrity are included in workmanship coverage, especially for older structures that may require more extensive prep work to meet modern standards.
Because reroofing is a major share of local contractor activity, homeowners should ask how warranty terms interact with repair-versus-replacement recommendations after storm or leak discovery. If a leak is found, determine whether the warranty supports a full replacement when the existing roof demonstrates widespread age or damage, or if it covers only patch repairs. Get clear timelines for claim processing, required diagnostics, and what documentation the contractor expects on-site. A transparent warranty discussion helps ensure that a future storm or ember event won't undermine the protection already purchased.