Last updated: Apr 19, 2026
Louisville sits along Colorado's Front Range, where spring and summer hail events are a primary driver of roof replacement demand and can compress contractor schedules across Boulder County. When a hailstorm rolls through, the ripple effects aren't limited to your shingles. Distant hail spots can trigger a flood of claims, pushing crews into tight windows and increasing the risk of scheduling conflicts for homeowners who need to plan their reroof around work, school, and weather. The moment you see hail damage, you're not just dealing with a roof issue-you're coordinating with neighbors, adjusters, and your contractor to lock in a window before the storm cycle tightens the calendar.
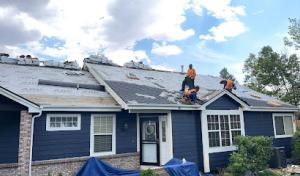
The most favorable reroof window in Louisville is typically late spring through early fall, but that same period overlaps with hail season, so homeowners often have to balance urgent claim work against weather delays. In practice, you want to strike while the weather is stable enough to complete the teardown and installation in one solid push, not in weak weather windows. That means you may need to act quickly after a storm to initiate the claim, secure temporary protection, and align a contractor who can commit to a dense stretch of good days. If a storm rolls through and you delay, you risk losing your preferred crew to another critical job and facing a postponement backlog that stretches into the shoulder seasons.
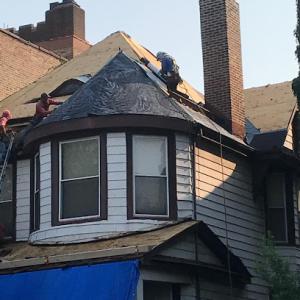
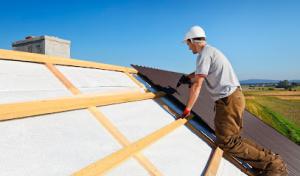
Because Louisville sees both hail and winter snow loading, roofs may show mixed damage patterns such as impact bruising plus edge and underlayment stress from freeze-thaw cycles. Hail can mar the visible surface and compromise shingle granules, while repeated freezing and thawing can pushSheathing and underlayment toward premature wear. When you're assessing the roof, don't rely on a single symptom. Bruising on asphalt shingles may be subtle, and the adjacent fascia, drip edge, and valleys can harbor hidden damage. The combination of hail impact and freeze-thaw cycles means a comprehensive inspection is worth hiring a roofer who understands how to test for moisture beneath shingles and how to evaluate edge damage that could lead to leaks in heavy snow years.
In practice, rapid documentation matters more in Louisville than in milder markets. Start by photographing the entire roof from multiple angles within a day or two after a hail event, focusing on bruising patterns, granule loss, and any obvious penetration around vents and chimneys. Include close-ups of the edges, valleys, and any dark staining that could indicate moisture intrusion. Gather weather reports for the days surrounding the storm to demonstrate the severity and timing, because this helps an adjuster distinguish between incidental wear and storm-driven damage. If your roof is older or has a history of prior damage, flag potential pre-existing conditions so a contractor can explain why a full replacement, rather than a patch, is the most reliable option for long-term performance.
With schedules tightening during Front Range storm cycles, securing a commitment from a contractor is essential. Reach out to at least two reputable Louisville-area roofers who regularly work Boulder County projects and understand the local climate patterns. Ask for a written project timeline that includes start date, anticipated progress milestones, and rain-day contingencies. If an adjuster visit is pending, prepare a concise summary of observed damage and a plan for temporary protection until permanent repairs can be completed. When a contractor provides a phased plan, prioritize the chunk of work that covers venting and sheathing details under review during full replacements, so the project can move forward without repeated hold-ups at permit review stages. The objective is to minimize the time your home is exposed to wind-driven rain and subsequent interior damage, while keeping the project on a predictable path through Louisville's volatile spring and summer weather.
If hail bruising is visible on multiple roof faces, or if you notice water stains inside the attic after a thaw, treat it as urgent. Delays in authorization, scheduling, or material delivery can escalate quickly as demand peaks after a storm. If your contractor warns that the window is closing due to forecasted storms or crew availability, don't hesitate to move forward with a plan that prioritizes a full, proactive replacement rather than delaying for later in the season. In this market, the difference between a timely reroof and a rushed, compromised job often comes down to your speed in documenting damage, initiating the claim, and locking in a capable local crew who can navigate Front Range scheduling pressures with you.
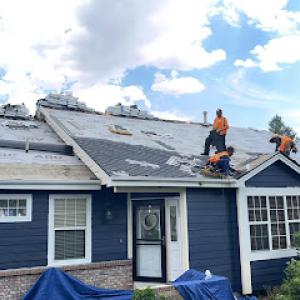
When a major hail event hits the Front Range, Louisville typically sees a quick surge in demand for reroofing. Local pricing can spike as crews and materials shift to the western communities, tightening labor availability and stretching lead times. In practical terms, this means that the window to schedule a replacement can tighten in the weeks following a storm, and price quotes may reflect shorter supplier pipelines and higher crew mobilization costs. Plan for a longer wait if the storm hits during peak season and be prepared for price movement as your project window narrows.
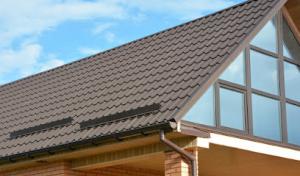
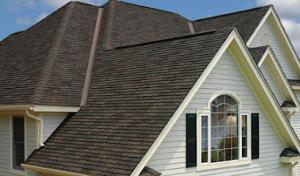
Louisville's housing mix supports a wide spread of material choices, from standard asphalt shingles to tile, metal, wood shake, and synthetic products. That variety creates large cost differences depending on structural needs and detailing. Asphalt shingles remain a common baseline, but a hail-damaged roof with deeper repairs or underlayment concerns can push you toward higher-end options. Synthetic or composite shingles typically sit between basic asphalt and more premium products, while metal, clay tile, and concrete tile each bring distinct installation nuances that affect per-square pricing. In a typical scenario, the posted ranges-such as Asphalt Shingles from about 350 to 700 USD per square, Metal from 700 to 1100, Clay Tile 900 to 1500, Concrete Tile 850 to 1300, Wood Shingles 600 to 1100, and Synthetic 550 to 950-still apply, but expect deviations during post-storm spikes.
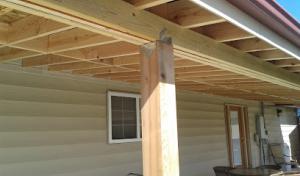
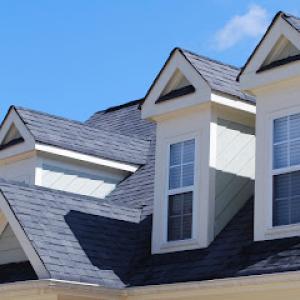
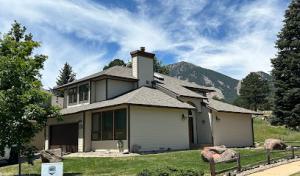
Steeper residential rooflines are common in Colorado suburbs, which adds safety and access considerations that translate into higher labor hours and sometimes more flashing material. Extra features like skylights, solar penetrations, and venting details can elevate both the time on the roof and the complexity of detailing around penetrations. In practice, this means a straightforward replacement can become notably more expensive if the roofline demands additional knee walls, venting changes, or upgraded underlayment. A practical approach is to inventory all penetrations and plan for a comprehensive flashing and ventilation review during the bid so that surprises don't hit mid-project.
Hail damage tends to cluster around visible denting, bruising on shingles, and possible granule loss, but the full severity is often hidden beneath the surface. A thorough inspection should document hail impact across multiple elevations, with close-ups of damaged shingles, edging, and any compromised underlayment. Insurance documentation becomes part of the process to secure coverage for the more durable options when warranted. Expect that some insurers prefer to fund a full replacement rather than cosmetic repairs, especially after a widespread hail event, so clarity in scope and preferred materials matters.
Front Range storm cycles can compress replacement timelines if the project starts during peak months. Work with a contractor who can forecast potential lead times for materials, particularly if choosing tile or metal options that require longer procurement. Scheduling in a window that avoids the height of winter freeze-thaw stress can reduce risk of installation delays and provide a more predictable project pace. If weather turns hostile mid-project, be prepared for temporary protection needs and a staged approach to flashing and vent detailing to keep the roof weather-tight.

Reel Roofing
(720) 590-1262 www.reelroofingco.com
1040 Lafarge Avenue, Louisville, Colorado
4.2 from 26 reviews
Reel Roofing provides expert roofing, gutters, siding, & exterior services based out of Louisville, Colorado. We service both residential and commercial roofing projects, offering everything from repairs to full roof replacements. Choose Reel Roofing for our commitment to quality workmanship, transparent pricing, and reliable service. We are hail storm damage and insurance claim experts. We have in-house insurance claim specialists to help homeowners navigate the insurance claims process. We take pride in being the roofing company who always prioritizes the customer. We proudly service Boulder, Denver, Colorado Springs, Fort Collins, Northern Colorado, and surrounding areas. Reach out today for a free roof inspection/Free drone inspection!
Lincoln Contracting
357 McCaslin Blvd Suite 200, Louisville, Colorado
4.4 from 7 reviews
With over 20 years of experience, over 300 new home builds and hundreds of roof installs we can assist with any construction needs. Our fair pricing, commitment to quality work and promise to our customers separate us from other residential roofing and commercial roofing companies. STORM Damage experts specializing in insurance claims, settlements and free inspections.
Arrow Roofing & Exteriors
(303) 648-4075 arrowroofco.com
Serving
5.0 from 227 reviews
Homeowners TRUST our locally owned and operated roofing and exterior services! We specialize in working with all insurance carriers and homeowner claims caused by storm damage. Call us today for a Free roof inspection. We are currently serving the entire Front Range of Colorado. If you want to make your roof last as long as possible, it is vital that you never put off a roof repair. Small issues with roofing become big issues in a hurry. No matter how major or minor the repair you need, we are here to help. Whether you need help with your roof, gutters, siding or paint, we would love to help with your project!
Axe Roofing
(303) 276-7663 www.axeroofing.com
Serving
5.0 from 64 reviews
Axe Roofing proudly offers roof repairs and replacements for residential, commercial, and multi-family structures in the Broomfield, Colorado area.

C&M Roof Services
Serving
5.0 from 22 reviews
Reliable Roofing Contractors, Top Notch Roof Professionals, Storm & Hail Experts and Highly Skilled Roof Service Technicians Available 24/7. C&M is your locally owned and operated full service roofing company based out of Northern CO, specializing in flat roofs and roofing services such as roof restorations, roof leaks, roof repairs, roof maintenance, roof coatings, and roof inspections. Whether you have a commercial or residential roof that is leaking or in need of maintenance such as tree debris removal, drain and gutter cleaning, we offer roofing repair and services at competitive rates with quality workmanship, high quality roofing materials and top notch professionalism. We service many all of CO. Highly Insured and BBB accredited.
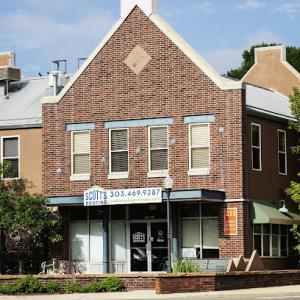
Scott's Roofing
(303) 469-9287 www.scottsroofingcolorado.com
Serving
4.8 from 216 reviews
For more than ten years, Scott’s Roofing has steadfastly served Colorado’s roofing needs. Through hailstorms and sunny weather, we’ve been here and we’re going to be here with you where we all live, work and play. Scott’s Roofing, founded by Gary Nickell, is a permanent fixture in our community and we’re here to go above and beyond for our neighbors with first-class quality and unbeatable value.
SafetyPlus Roofing Lafayette
(720) 927-8855 safetyplusroofinglafayette.click
Serving
5.0 from 29 reviews
Looking for the best roofing company in Lafayette CO? SafetyPlus Roofing Lafayette is here for you. We specialize in residential and commercial roofing services, backed by years of experience and dedication to excellence. Our free roof inspections identify potential issues before they escalate, ensuring the longevity of your roof. From minor repairs to complete roof replacements, our skilled roofers handle it all with precision and expertise. In the event of storm damage, you can count on us for swift and reliable repairs. We provide prompt assistance to restore your home. Trust SafetyPlus Roofing Lafayette to protect your property and keep you safe for years to come. Our commitment to quality sets us apart from other roofing contractors.
Alvarez Roofing & Construction
(773) 398-6216 alvarezroofingandconstructioninc.com
Serving
4.9 from 41 reviews
Alvarez Roofing And Construction embodies a legacy of excellence, forged over ten years of hard work, innovation, and a relentless pursuit of perfection. Based in Northlake, IL, our company was founded on the principles of integrity, quality, and customer satisfaction. Our team, a collective of highly skilled professionals, brings together a wealth of experience and a shared passion for transforming homes and businesses. Each project we undertake is more than a job; it's an opportunity to showcase our expertise and contribute to the community we proudly serve. We specialize in a comprehensive range of roofing and construction services, meticulously designed to meet the evolving needs of our clients.
FP Roofing & Construction
(720) 675-3484 www.fproofingandconstruction.com
Serving
4.9 from 35 reviews
FP Roofing and Construction is your go-to roofing contractor near 10994 Arapahoe Rd, delivering top-tier roof repair, roof replacement, and roof installation services in Lafayette, CO, and beyond. Specializing in emergency roof repair, storm damage repair, hail damage roof repair, and leak repair, our expert team ensures your home or business remains secure against the elements. We also offer comprehensive roof maintenance and roof inspection services to prolong your roof's lifespan. With years of experience and a strong customer-first approach, we commit to quality, transparency, and competitive pricing. Contact us for a tailored experience and a free estimate today!
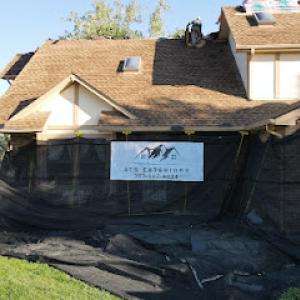
ATS Exteriors Roofing & Siding
(303) 997-9024 www.atsroofingdenver.com
Serving
5.0 from 75 reviews
ATS Exteriors serves Broomfield, Westminster, Aurora, Thornton, and Boulder County with roofing and siding services that don't cut corners on the details that matter. We specialize in insurance claim assistance, storm damage restoration, roof replacement, and siding installation - focusing on community relationships over storm chasing across the state. You'll work directly with Rebecca and Jeff Stakes, not get passed off to different people throughout your project. We've been serving Colorado homeowners for over 7 years with Owens Corning certified roofing, LP SmartSide, fiber cement, and composite siding installations. When hail hits or your roof fails, we respond fast with honest assessments and proper documentation for insurance claims.
Sagas Roofing Company Broomfield
(720) 902-9160 sagasroofing.com
Serving
5.0 from 23 reviews
Looking for a reliable roofing contractor in Broomfield, CO? Then Sagas Roofing Company Broomfield is the one you're need. We provide commercial and residential roofs and repairs to meet your unique needs. We have the best equipment and our roofers have decades of experience to be sure that your home stays safe and dry. We offer free roof inspections to ensure that your roof is sustained at optimal levels. Our main priority is to take care of our great clients. Whether you need a new roof or need help picking the right shingles, we are always here to help. We also provide gutter repairs and servicing. You will be able to rest well knowing that Sagas Roofing Company Broomfield is there for you so you to enjoy your house or office year round.
Green Shield Construction
(303) 550-6865 www.greenshieldconstruction.net
Serving
5.0 from 7 reviews
Green Shield Construction's owners have reroofed the Rockies for over 30 years. We emphasize strict compliance with the building code and manufacturer specifications. We utilize industry best practices to ensure quality at every step. We are Haag certified hail & wind inspection experts. We work with your insurance company to insure your property is made whole again. We take the hassle out of the claim process. Green Shield Construction will negotiate with your insurance company, so you don't have to.
Asphalt shingles remain a common choice in Louisville, but repeated hail exposure along the Front Range makes impact resistance and granule-loss performance especially important in replacement decisions. If you opt for asphalt, look for impact-resistant (IR) or specially rated shingles, and confirm the shingle warranty covers hail damage with a clear claim path. In climates with strong sun and freeze-thaw cycles, selecting a nontab or granule-retentive shingle helps minimize long-term granule loss, which can affect roof aesthetics and UV protection. Pay attention to color selections; lighter shades reflect more of the summer sun, reducing surface heat buildup, while darker options can absorb heat and affect attic temperatures if ventilation isn't adequate. A well-sealed underlayment paired with properly vented soffits and ridge lines is essential in a Front Range cycle where sudden storms can force rapid moisture changes. When a hail event occurs, documenting damage with dated photos and noting exposed decking is crucial for a smooth insurance review and timely repairs.
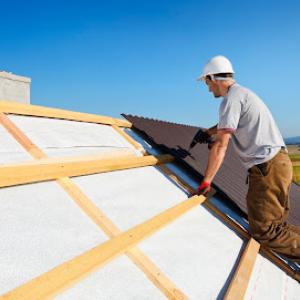
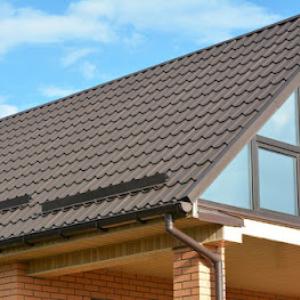
Metal roofing is relevant locally because Louisville gets intense summer sun, winter snow, and hail, so homeowners often compare long-term durability and snow-shedding behavior against higher upfront cost. Metal panels can shed snow more reliably, reducing ice dam risk on colder days, but proper installation matters: choose a profile with sufficient slope, integrated snow guards where appropriate, and panels that resist denting from hail at the typical impact sizes seen in Front Range storms. A metal roof also tends to maintain color and reflectivity better over time, which helps with energy performance in hot summers. However, chewing through metal panels during hail events or dealing with penetrations around vents and skylights can complicate repairs, so ensure the underlayment and deck are inspected after every major storm. Regular inspections should focus on fasteners, panel seams, and any denting that could compromise waterproofing. If you anticipate frequent hail exposure, metal can offer a favorable balance of longevity and performance, provided installation is meticulous and matched to the existing roof geometry.
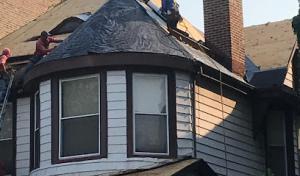
Tile, wood shake, and synthetic roofs appear in the local market, but heavier tile systems and specialty profiles can complicate repairs after storm events and may require closer attention to underlayment and deck condition. Clay and concrete tiles are durable in hot sun but are more fragile under hail impacts; local crews sometimes report cracked tiles after severe hailstorms, which can lead to leaks if not addressed promptly. Wood shingles or shakes bring natural beauty and good insulation, yet they can suffer from hail cuts, mildew under damp winter conditions, and costly repairs if the underlayment remains exposed. Synthetic shingles offer a wide range of durability and impact resistance, with some products designed to mimic the look of slate or wood while delivering improved hail tolerance and lighter weight. When considering any tile or shake system, verify that the deck is solid and that the roof-to-wall connections accommodate the roof's weight and wind exposure. Venting, underlayment quality, and a robust installation detail become even more critical in a Front Range climate with winter freeze-thaw cycles and storm-driven loading. In all cases, plan for targeted inspections after storms to identify hail-induced gaps or accelerated wear, and coordinate with a trusted local roof pro who understands how to manage these materials during repairs and replacements.
In this market, a building permit is typically required for a full roof replacement, and the review is handled by the City of Louisville Building and Zoning Department. The permit process is not a mere formality; it shapes the scope of work, especially when the storm season or hail damage has already nudged a roof toward replacement. A permit application will usually ask for details on attic ventilation, underlayment, roof vent placement, and sheathing condition. Expect a short review window, followed by a list of notes or conditions you must address before the permit can be issued. Having the prior work history and a dated set of contractor drawings ready helps keep the process moving.
Contractors must schedule inspections at required milestones, and a final inspection is typically needed to verify proper installation and venting before the job is fully closed out. In practice, that means a mid-project inspection to confirm underlayment, attic ventilation, and nailing patterns meet code, followed by a rough-in inspection if there are any changes to venting or roof sheathing. A final inspection confirms that the venting strategy and sheathing details align with the permit plan and code expectations. The inspector will often look for proper attic ventilation balance, eave and soffit vents, and the presence of code-compliant solid sheathing or approved alternatives in places where the roof deck was compromised. Scheduling ahead, coordinating with the roofer, and ensuring access for the inspector are essential to avoid delays.
Local review can require updated venting or sheathing details during reroof projects, so homeowners should expect permit comments to affect scope even when replacing an existing roof. If the plan calls for ridge vents, soffit-to-ridge balance, or updated underlayment to address Front Range freeze-thaw cycles and hail exposure, those details may be added as permit conditions. When the permit comments arrive, treat them as a concrete checklist: confirm that the vent layout matches the approved drawing, verify that any required starvent or turbine vent updates are installed, and confirm sheathing upgrades or repairs where there is visible deterioration. If the permit notes a venting or sheathing alteration, discuss the rationale with the contractor and request a written step-by-step update to the scope and a revised timeline. The goal is to complete the project with a compliant, properly vented, and weather-ready roof that stands up to Louisville's storm cycle and winter conditions.
Louisville's cold winters and snow accumulation can stress eaves, valleys, and edge metal, especially when daytime melt is followed by overnight refreezing. When sun-warmed roof profiles shed moisture and temps drop, that moisture can freeze at vulnerable transitions, pushing on underlayment, drip edge, and exposed fasteners. The result is micro-cracks in flashing, slight shifts in edge metal alignment, and a cascade of tiny leaks that arrive as the snow melts unevenly and refreezes. The edge areas are not just cosmetic concerns; they drive long-term durability if left unchecked.
Freeze-thaw cycling can turn small installation defects into recurring leaks during snow season. In a typical home, a well-sewn underlayment and properly sealed flashing around valleys and penetrations act as the first line of defense. If those components were marginal at installation, the same spots tend to leak first after a winter of freeze-thaw pulses. In practice, this means that what looks like a minor seam or a slightly misaligned drip edge can become a leak path after a couple of storms. Paying attention to the continuity of the underlayment, proper reseal around vent stacks, and the integrity of valley flashings is a time-saver when winter weather tightens.
Late fall wind events along the Front Range can loosen vulnerable shingles and edge components just before winter weather makes repairs harder to complete. A few lifted corners or unsecured edge shingles can turn into larger problems once snow accumulates. If you see edges curling, fasteners working loose, or flashing that shifts after a strong wind, address it promptly. Delaying repairs means more ice buildup, more stress during freeze-thaw cycles, and a greater chance of moisture penetrating the roof deck.
Inspect eaves and edge metal for loose pieces after strong wind days. Look for gaps where flashing overlaps joints, and note any signs of curling shingles near the edges. When snow piles up, be mindful of areas where meltwater pools and refreezes; those are the spots most prone to ice dam effects. If concerns arise, plan a targeted repair that reinforces edge components, ensures flashing continuity, and improves drainage to minimize ongoing freeze-thaw damage.
When you can't wait, these contractors offer fast response times to stop leaks and prevent further damage.
FP Roofing & Construction
(720) 675-3484 www.fproofingandconstruction.com
Serving
4.9 from 35 reviews
Louisville's sunny climate makes solar-related roof work locally relevant, and reroof planning should account for penetrations, mounting points, and sequencing if panels are present or planned. When a crew knows there will be solar arrays, map every mounting point, cable path, and inverter location on the roof before any tear-off starts. Staging the removal of shingles and flashings around existing or planned racking helps avoid rework and water intrusion. If panels are installed later, ensure there is a clean, continuous seal at all penetrations and that flashing transitions between panels and shingles are integrated with the roof's flashing plan.
Skylights are a recurring specialty in the local contractor market, which matters because hail, snow, and UV exposure can all accelerate flashing and seal failures around roof openings. Inspect seals, boot flashings, and curb connections during reroofing, not just at the surface shingles. If a skylight is being replaced or upgraded, verify that the new flashing base matches the existing roof pitch and that the pan or curb is properly aligned and sealed to prevent ice buildup and water backup in winter storms.
Homes with multiple penetrations often need more careful leak tracing after storms because impact damage, flashing movement, and ice-related backup can overlap in the same roof area. During a replacement, document each penetration area with notes on prior damage and flashing condition. After a storm, recheck these zones first, and validate that sealants and step/counter flashing have remained secure where multiple lines converge. Use a systematic test-gentle water run-off from each penetration path-to confirm there are no unseen gaps.
Find contractors experienced in skylight installation, flashing, and leak repairs to bring natural light into your home.


Louisville sits in a Front Range weather pattern where hail and wind losses drive insurers to tighten scrutiny on pre- and post-work documentation. Colorado carriers may adjust coverage expectations based on a roof's weather history and the replacement material selected, especially when homeowners move to products marketed for better storm resilience. That means every claim file hinges on clear, consistent records that show what existed before the storm and what was done after. If the storm history is documented poorly, the path to settlement can stall or shrink, even when damage is real.
Before any tear-off starts, gather and organize a thorough scope of loss. Take wide and close-up photos of every roof facet-shingles, flashing, vents, skylights, gutters, and any visible hail chips or granule loss. Note attic conditions if accessible: signs of water intrusion, staining, or insulation compression. Insist on written inspection notes from a qualified roofer that describe elevation-specific vulnerabilities common in the area, such as wind-driven uplift points and sheltered valleys. Keep a dated log of observed damage and linking observations to weather events. This pre-work dossier helps prevent later disputes about what existed prior to the claim.
During and after replacement, maintain consistent, timestamped records: final scope of work, material selections, and any deviations from the original plan with justifications. Save all contractor communications, bid comparisons, and purchase invoices. Photographs of tear-off progress, installation details, and post-install inspections are essential, especially for hail-season claim cycles when claim activity is high. If a discrepancy arises about storm-related damage, these materials act as the clearest, most defensible trail of evidence.
Connect with contractors who help homeowners navigate the claims process from damage assessment to final approval.
Reel Roofing
(720) 590-1262 www.reelroofingco.com
1040 Lafarge Avenue, Louisville, Colorado
4.2 from 26 reviews
Lincoln Contracting
357 McCaslin Blvd Suite 200, Louisville, Colorado
4.4 from 7 reviews
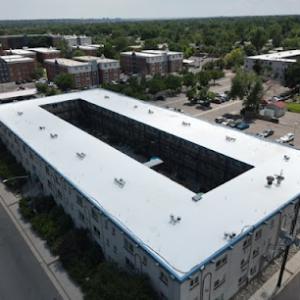
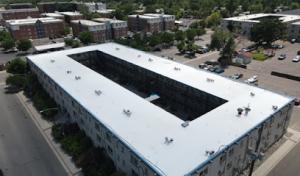
While pitched residential roofs dominate Louisville, local contractor signals show a meaningful low-slope segment that likely applies to additions, porches, garages, and some commercial properties. These sections often blend into the existing roof deck, which means matching fasteners, flashing, and edge details becomes a careful dialogue with the surrounding structure. In practice, expect a careful evaluation of transitions where the new low-slope area meets the old roof, with emphasis on compatibility and wind-driven uplift resistance for the entire system.
Low-slope sections still face the same hail exposure and freeze-thaw cycling as steep-slope roofs, so drainage and membrane condition can become weak points after storms. In this climate, standing water on a porch or garage roof isn't just a nuisance-it can accelerate wear on the underlayment and edge details. The key is ensuring proper slope and reliable outlet points, plus robust edging at change-of-plane interfaces to minimize water infiltration in storm bursts.
Coating and restoration are present but not dominant in this market, suggesting they are niche solutions rather than the default recommendation for most homeowners. For additions and low-slope sections, sustained membrane integrity matters more than a quick cosmetic fix. A high-quality root of underlayment, correctly lapped seams, and appropriate flashing details at penetrations help preserve long-term performance without leaning heavily on coatings that may offer only temporary relief after severe hail events.
When planning a low-slope reroof, prioritize a seamless integration with existing roof planes and ensure the chosen membrane system can handle typical Front Range hail impulses. Pay particular attention to fastener patterns, edge flashing, and penetration sealing around vents and drains. Schedule inspections to verify the condition of the existing deck and insulation interface, since these hidden layers influence drainage, insulation efficiency, and long-term durability after a damaging storm season.
Find specialists in TPO, EPDM, and built-up flat roofing systems for residential and commercial properties.
Alvarez Roofing & Construction
(773) 398-6216 alvarezroofingandconstructioninc.com
Serving
4.9 from 41 reviews