Last updated: Apr 19, 2026
Frequent freeze-thaw cycles in the long, icy Norwich winters do more than chill you at the curb. Those cycles widen even tiny roof defects, which means edge wear on shingles accelerates and flashing can start to loosen. When water sneaks under edges or past worn seams, the next freeze traps moisture against decking, pushing deterioration deeper than a simple surface flake. This city's climate makes every small gap a potential channel for dangerous, ice-laden leakage during the hardest weeks of winter.
Many homes in established neighborhoods are built with aging decking and multi-layered reroofs. That layering can disguise soft spots, and chimney intersections are especially prone to trouble where two concrete planes meet a flue or cap flashing. In winter, moisture can travel along those intersections and hide in attic corners until a rapid freeze makes everything crack in place. The combination of aged decking and crowded roof lines means that a small, quiet leak can become a loud, costly repair fast once moisture invades the wrong moment.
Sitting at the confluence of the Thames, Shetucket, and Yantic rivers, the area experiences damp conditions that linger around shaded and low-sun exposures. North-facing slopes, overhanging trees, and deeply shaded sections hold moisture longer, slowing drying times after storms. That persistent wetness is a prime setup for edge wear and flashing movement to become active problems through multiple cycles, not a single incident. If you have a shaded ridge, a stubborn drip from the eaves, or a moistened solar panel of a roof deck, it's a red flag that winter could expose weak points quickly.
First, perform a careful exterior walk-around after the worst thaws. Look for lifted or curled shingles, obvious edge wear, and any flashing that looks loose or sunken around chimneys and vents. Inspect the attic on a dry day for signs of moisture on decking, dark staining along rafters, or compressed insulation, which can indicate hidden leaks. Pay special attention to joints where two roof planes meet, and where a chimney flue intersects the roof line.
Second, address suspect areas promptly. If a flashing corner bulges, or if you notice repeating damp patches near eaves and valleys after a thaw, call a professional to re-seat flashing and secure any edge seams before another freeze. In older homes, even small moisture trails can multiply through another winter cycle, so speedy intervention reduces long-term damage.
Third, consider proactive maintenance that targets winter moisture. A targeted, professional inspection in late fall can catch aging decking or compromised underlayment that a casual glance misses. Enhancing attic ventilation to improve drying, and ensuring proper insulation to limit warm air condensing on cold roof surfaces, can cut the progression of moisture damage across successive winters.
If you notice persistent dampness, repeated stains, or recurring ice dam formation near the eaves, treat it as a warning sign. Early, decisive action now can prevent a larger, more invasive repair later when the freeze-thaw calendar flips again.
Spring and early summer storms in Norwich can bring wind and hail that damage shingles, ridge caps, and metal flashings just as the main roofing season begins. The combination of pounding rain and gusty days tests roofs that have endured long winters, especially on older homes with mixed roofing materials. A damaged ridge line or loose flashing acts like a target for more water intrusion the moment a storm passes, and in this climate, small vulnerabilities can turn into active leaks overnight. If a storm rattles your soffits or pelts the roof with hail, treat the moment as a roof emergency rather than a cosmetic issue.
Moderate to high annual precipitation means even small storm-created openings can turn into active leaks quickly in this market. After a storm, walk the attic with a flashlight to look for damp insulation or staining on sheathing, and check exterior walls for damp spots that line up with roof penetrations. On the roof, pay attention to lifted shingles, damaged ridge caps, and any dislodged metal flashings around chimneys, vents, and skylights. If you notice granule loss in patches or a spongy feel underfoot, that's a sign the deck and underlayment may be compromised and needs professional evaluation. In Norwich, the fastest path from assessment to control is decisive action-tarping the exposed area and securing urgent temporary repairs to slow down leaks while a contractor arrives.
Local contractor signals show unusually strong demand for emergency repair and storm damage response, indicating homeowners here often need rapid tarping and short-notice leak control after weather events. When a storm hits, a qualified roofer will prioritize securing the site: temporary tarps anchored with weighted or fastened materials, reseal of obvious penetrations, and coverage of any exposed decking. Expect a contractor to arrive quickly with a plan to size up the damage, identify compromised flashing or vent seals, and outline a short-term fix to keep interior water intrusion at bay while longer-term repairs are scheduled. If you encounter delayed responses after a significant storm, escalate by documenting damage with photos and keeping a log of weather conditions and dates-this helps a responder prioritize your call when demand spikes.
As the thaw cycle begins, prompt pre-season checks matter, especially on roofs with older shingles or historic profiles common near the river confluence areas. Prioritize resealing chimney and vent flashings, replacing brittle ridge caps, and ensuring metal flashing sits firmly against the roof plane. In Norwich, a swift, targeted inspection after the first round of spring storms can catch freeze-thaw induced damage before it compounds. If a storm has recently passed, and you notice sudden dampness or daylight seeping near ridge lines, treat it as actionable damage that needs immediate professional attention to prevent widespread interior water intrusion during the next rain event.
Find local contractors experienced in assessing and restoring roofs after hail, wind, and severe weather events.

Christopher Home Improvement
(860) 381-9336 christopherimprovement.com
16 A Winchester St, Norwich, Connecticut
4.9 from 143 reviews
Scepanski Roofing
(860) 886-0892 scepanskiroofing.com
85 Cliff St, Norwich, Connecticut
5.0 from 6 reviews
SkyShield Roofing of New England
(860) 726-4727 www.skyshieldroofing.com
Serving
5.0 from 132 reviews

Christopher Home Improvement
(860) 381-9336 christopherimprovement.com
16 A Winchester St, Norwich, Connecticut
4.9 from 143 reviews
Christopher Home Improvement is proud to provide quality roof installations and repairs in Connecticut and Rhode Island. You can trust that your roof is in good hands when our highly trained staff takes on your project. Whether your roof simply needs to be repaired, or you need an entirely new roof, we will install every shingle to exacting standards to ensure that you receive the full benefit and longevity that was intended. From the moment you call Christopher Home Improvement, you will find our staff to be courteous and respectful, and we will go the extra mile to make you a very satisfied customer.
JS & R Roofing Company | Roofer | Siding | Gutters Contractor
(860) 822-1204 jsandroofing.com
21 Briar Hill Rd, Norwich, Connecticut
4.8 from 49 reviews
JS and R Roofing is one of the most reliable roofing companies in Norwich, CT with over 20 years of experience, specializing in all residential and commercial roofing aspects. We offer new roofs, roof inspections, roofing repairs, vinyl siding replacement, and a variety of other services to cater to the needs of every customer in Connecticut. As a trusted roofing contractor, we deliver top-quality workmanship and maintain strong relationships with our clients. Whether it's a small repair or a large-scale project, we take pride in ensuring our customers receive the highest level of service. Combining years of experience with a dedication to client satisfaction, JS and R Roofing has established itself as the local leader in roofing services.
Scepanski Roofing
(860) 886-0892 scepanskiroofing.com
85 Cliff St, Norwich, Connecticut
5.0 from 6 reviews
Residential and Commercial roofing company serving Eastern Connecticut. Established 1971
SkyShield Roofing of New England
(860) 726-4727 www.skyshieldroofing.com
Serving
5.0 from 132 reviews
SkyShield Roofing of New England is your trusted residential roofing contractor serving homeowners across eastern Connecticut and Rhode Island. Based in Lisbon, CT, we specialize in roof replacements, repairs, and inspections using high-quality TAMKO Titan XT shingles backed by Diamond Pro Enhanced Warranties. Our local team combines expert craftsmanship with honest pricing and clear communication to ensure every roof protects your home for decades. From storm damage to full replacements, SkyShield delivers reliable, long-lasting roofing solutions built for New England weather.
Strong Roofing
(860) 248-6730 www.roofcontractorct.com
Serving
4.9 from 58 reviews
At Strong Roofing, our roofing company takes pride in creating long-term relationships with our clients by always meeting demands and surpassing expectations. When you need expert repairs or exceptional installation service, we're the dependable team you can rely on. Whether you want a shingle roof or metal roofing, give us a call to start your roofing project!
McClintock Roofing
(860) 222-2157 www.mcclintockroofing.com
Serving
4.8 from 75 reviews
McClintock Roofing provides roof installations and repairs, specialty roof repairs, gutter and skylight services, and chimney flashing and repairs to Eastern Connecticut.
Harts Roofing
(860) 334-3849 www.hartsroofing.com
Serving
5.0 from 26 reviews
Hart’s Roofing is a family‑owned roofing contractor serving Canterbury, Windham County, and surrounding Connecticut for over 25 years. Our licensed and insured team specializes in roof installation, replacement, repair, and inspections using asphalt shingles, metal, flat/EPDM, cedar/wood shakes, slate, and tile. We also handle storm damage, insurance claims, ice dams, chimney flashings, skylights, and roof ventilation. Count on us for quality workmanship, tidy job sites, and up‑front pricing—call today for a free estimate.
Guaranteed Roofing
(860) 407-5496 guaranteedroofingct.com
Serving
4.9 from 253 reviews
Guaranteed Roofing offers a wide range of custom roofing installation and repair services for residential and commercial roofing clients. We bring the same lofty standards of workmanship to every job. Our dedication to excellence in everything we do, unmatched service to every customer and our pledge to use only the best materials has made us one of Eastern Connecticut’s most respected roofing contractors for over 25 years. You can rest assured that we bring the same commitment to every job we do regardless of size.
CR3 American Exteriors-Windham
(860) 254-1569 www.cr3america.com
Serving
5.0 from 22 reviews
We are a full service roofing and siding company. We can handle any size roofing replacement and siding replacement needed. We offer a wide assortment of quality products, back with some of the best industry warranties. Backed by a certified installers , you'll be rest assured your gettimg the best job done. We offer a wide assortment of financing options. We also can handle storm damage insurance claims. We are here to support you in every step of the re- roofing or siding project ! Talk to us about our other exterior services like gutters, windows and doors ect.
River Valley Roofing
(860) 532-4453 www.rivervalleyroofingct.com
Serving
5.0 from 83 reviews
Premier Roofing in Colchester, Manchester, Norwich, & Glastonbury, CT River Valley Roofing is your top choice in Connecticut for outstanding roofing services. Our commitment to excellence has solidified our reputation as the preferred roofing contractor in Southeastern Connecticut. Why us? Over 20 years of expertise in both residential & commercial roofing. High-Quality Materials ensuring roof longevity. 5-Star Google Rating reflects our commitment to satisfaction. Veteran-Owned: Our US Marine background ensures discipline & perfection. Competitive Prices with smart planning & low overhead. Trust in our blend of experience, value, and excellence. Give us a call for a free inspection and Quote!
Jfk Roofing
(860) 230-0853 www.jfkroofing.com
Serving
5.0 from 377 reviews
JFK Roofing is an owner-operated exterior remodeling company established in 2007, proudly serving Connecticut, with additional service coverage throughout Rhode Island and Massachusetts. We specialize in roofing, siding, windows, doors and gutter systems. As a GAF Master Elite Contractor, we are fully licensed and insured and known for quality workmanship, clear communication, and clean job sites. Homeowners trust us for their storm damage inspections and full exterior upgrades completed by experienced crews. We offer free inspections, detailed written estimates and flexible financing options. From the first call to final cleanup, you work directly with the owner and a local team focused on long-term value and protecting your home.
Brennan Roofing & Contracting
(860) 710-2506 brennanroofingandcontracting.com
Serving
5.0 from 74 reviews
Family-owned veteran owned business. Looking to serve Connecticut residents with reliable service quality products warranties. We here to put all your worries aside with our top-rated roofing services. Our services range from roof installation to roof repair replacement that are tailored to your budget and the property's needs. We use premium quality materials for your roofs to make them damage and weather-resistant bringing back their optimal performance within no time. Call now and get a free quote.
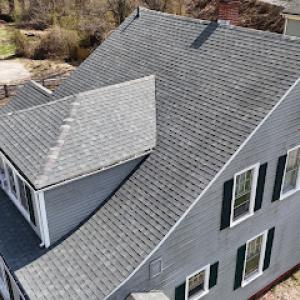
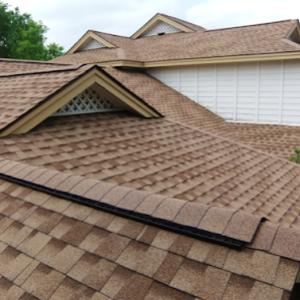
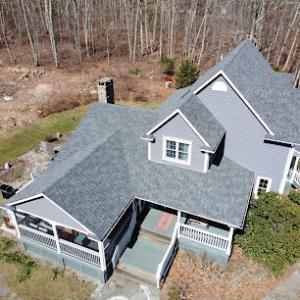
Asphalt shingles are the most practical fit for much of Norwich's housing stock because they align with the area's common re-roofing market and moderate replacement budgets. In a climate with frequent freeze-thaw cycles, this material handles the cycling better than some ultra-lightweight options, and you can choose granule patterns that help with UV protection and aging. When planning for a re-roof, focus on a reinforced underlayment and a careful installation that accommodates attic ventilation and drip edge details. The neighborhood mix-from older, deeper eaves to newer ranch styles-benefits from shingles that lay flat, shed moisture reliably, and blend with historic textures when pairing with matching browns or grays. Consider undertakings like improved ridge venting and attic sealing to reduce moisture migration during heavy late-winter rain and early spring thaws. If you anticipate long service life with reasonable upkeep, asphalt remains the steady, predictable choice for most homes.
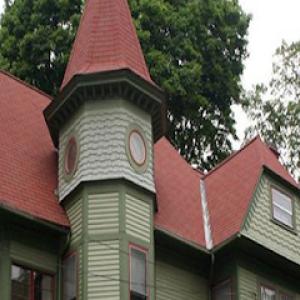
Slate remains locally relevant because Norwich has older homes where original or replacement slate may still be present, but repairs require attention to weight, flashing, and matching details. When slate shows its age, replacement decisions should account for weight impact on existing roof structures, especially over historic dormers and steep pitches common in older neighborhoods near the river confluence. If targeting slate repair, verify that the roof deck and supporting structure can carry the load and that matching slates are available for precise color and texture continuity. Flashing around chimneys, skylights, and valley transitions deserves careful attention-these are typical leak paths in wintry wet seasons. For slate, plan a maintenance rhythm that prioritizes loose or cracked pieces, and pair replacements with compatible underlayment and sealants to maintain a watertight seal through freeze-thaw cycles.
Metal roofing is a meaningful niche in Norwich and can be attractive for snow shedding and long service life, while tile options are less common and may be limited by structural load and architectural fit on many local homes. If considering metal, weigh the pitch and overhangs of the roof since a steeper slope improves shedding during heavy snows, a frequent late-winter challenge. Metal panels offer a clean look on modern-adjacent homes and can be paired with traditional trim details to respect older streetscapes. Be mindful of attic insulation and ventilation, as metal roofs can conduct temperature changes differently than asphalt, influencing condensation risks in colder months. Local crews often favor standing-seam or corrugated profiles for durable performance, with corrosion-resistant finishes that hold up to coastal humidity and winter fog.
Tile options are less common and may be limited by structural load and architectural fit on many local homes. Clay and concrete tiles provide long-term durability in dry periods, but Norwich winters demand careful consideration of weight and winter maintenance. Tiles can be appealing on select homes with compatible roof framing and historic detailing, yet require meticulous flashing, edge work, and snow management strategies. If a tile choice is contemplated, conduct a detailed assessment of roof framing, potential retrofit needs, and the feasibility of ongoing maintenance to preserve the aesthetic while mitigating moisture intrusion during freeze-thaw cycles.
Late spring through early fall is typically the preferred installation window in this area because winter freeze-thaw conditions and spring storm interruptions can complicate scheduling. If a Nor'easter rolls through late April or a heavy storm season hits in late summer, you may see crews push back start dates or run longer days to finish before the next round of weather. Plan with a two- to four-week buffer if your roof is visible from neighboring streets or you rely on a narrow driveway for material staging. The goal is to avoid the peak heat of midsummer, which can stress adhesives and sealants on certain shingle types, especially if you're dealing with an older roof underlayment.
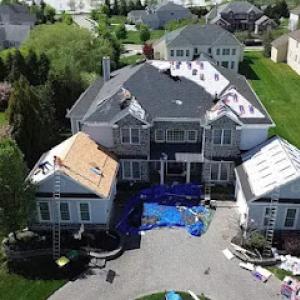
Costs in this market can rise on older homes where tear-off reveals deteriorated sheathing, chimney flashing problems, or complex rooflines common in established neighborhoods. In Norwich, labor and disposal fees tend to spike when sheathing needs replacement or when flashing around dormers, chimneys, or skylights requires extra detailing. If there are multiple valleys, steep pitches, or wraparound porches, anticipate additional days of ladder time and safety equipment, which translates into higher line-item costs. Look for a contractor who bagged and labeled full tear-off versus overlay options, as a full removal often reveals hidden rot that drives up both material and labor.
Material choice matters in cost terms. Asphalt shingles sit on the lower end, roughly 450-850 USD per square, while metal can run 800-1500 USD per square. For homes with historic character or heavy moisture challenges, slate or concrete/tile options rise quickly in price, and clay tile can push per-square costs well above 1000 USD. Synthetic or composite shingles offer a middle ground at about 600-1100 USD per square. When a tear-off uncovers damaged sheathing, expect the total to climb beyond the base material price due to replacement plywood, waterproofing upgrades, and upgraded flashing details around chimneys or wall lines.
Demand spikes after regional storm events can tighten scheduling and labor availability, especially in a market where quick-response re-roofing contractors are heavily advertised. If a recent Nor'easter or strong summer storm has increased requests in your neighborhood, lock in a firm start date with a written timeline and a clear payment schedule. Ask for a midpoint inspection to catch moisture backup or hidden rot early, reducing the risk of delays later in the project.
Get a clear picture of your project costs upfront - no commitment required.
JS & R Roofing Company | Roofer | Siding | Gutters Contractor
(860) 822-1204 jsandroofing.com
21 Briar Hill Rd, Norwich, Connecticut
4.8 from 49 reviews

In Norwich, a full roof replacement is typically treated as a permit-ready project rather than informal maintenance. That means you can't simply start tearing off shingles and laying new material without confirming the process with the town. The permit ensures that the work meets local building codes, moisture management standards, and safety requirements specific to the area's freeze-thaw cycle. For older homes near historic neighborhoods and river-facing blocks, the town often pays closer attention to how venting, insulation, and attic moisture controls are addressed during a full replacement.
Before any nails fly, you'll need to submit project details to the Norwich building department. Expect to provide a scope of work, roof square footage, venting plans, and a timeline. Importantly, include your contractor's license information and any sub-trade licenses if you're using specialty crews (for example, slate or tile specialists). If your home has distinctive architectural features or historic materials, be prepared to note how the new roof will preserve or carefully adapt those elements. The review process helps ensure that your proposed materials and installation methods will stand up to the local climate, especially the repeated freeze-thaw cycles that can stress older roofs.
Inspections typically occur during key milestones and again after the job concludes. An initial inspection may verify permit compliance before the first shingle is removed, ensuring that temporary protections and safety measures are in place. Mid-project inspections may focus on roof deck integrity, underlayment installation, and proper ventilation to mitigate moisture buildup in damp spring months. A final inspection is required to close the permit, confirming that roofing work is complete, that all penetrations are properly flashed, and that the roof meets current code requirements for wind uplift and weather resistance. If any rain delays occur, coordinate with both your contractor and the building department to adjust inspection timelines without compromising code compliance.
Older Norwich structures often feature slightly varied roof lines, interconnected eaves, or dormers that demand careful flashing detail. When planning inspections, keep a detailed record of material specifications, warranty documents, and installation notes from the contractor. If you're in a historic district, ask about any additional local approvals or design review considerations that might affect material choice or mitigation strategies for moisture intrusion. Scheduling inspections with a clear communication plan reduces delays, especially after heavy precipitation events common in the area. Remember, the permit's final inspection is not just a formality-it's the step that confirms your roof replacement will endure Norwich winters for years to come.
After major storms, roof claims activity tends to rise in this inland southeastern Connecticut area, but the community does not sit in a severe insurer pullback market compared with some coastal catastrophe zones. The mix of older homes near the river confluence and newer houses in suburbs means moisture management and timely repairs matter more than ever when frost cycles bite. A roof that shows signs of age or prior imperfect work can become a liability once a storm hits, and carriers scrutinize how damage is documented.
Carriers commonly want several key items: the roof's age, its current condition, date-stamped photos from before and after the event, and a detailed repair or replacement estimate. In Norwich, many claims involve moderate storm damage rather than total-loss scenarios, so the quality and specificity of what you submit can drive whether a repair is approved or limited. Focus on clear, chronological evidence that ties damage to the storm and not to preexisting wear.
Prepare a simple timeline: when the storm began, the peak impact times, and the first signs you noticed damage. Photograph from multiple angles, including attic and interior exposures where water intrusion is visible. Include close-ups of shingle lift, granule loss, flashing defects, and any interior staining. Keep copies of contractor estimates or notes from any quick temporary repairs. If possible, have a dated, professional assessment that confirms moisture intrusion and potential for further damage if left unaddressed.
If damage is detected, prioritize safety and avoid delaying documentation. Lay out a repair plan with a licensed contractor, ensure photos are date-stamped, and present a concise, organized packet to the insurer. When the claim involves moderate damage, well-documented evidence can make the difference between an approved repair and a more limited settlement, reducing the risk of lingering leaks during another freeze-thaw cycle.
Connect with contractors who help homeowners navigate the claims process from damage assessment to final approval.
JS & R Roofing Company | Roofer | Siding | Gutters Contractor
(860) 822-1204 jsandroofing.com
21 Briar Hill Rd, Norwich, Connecticut
4.8 from 49 reviews
SkyShield Roofing of New England
(860) 726-4727 www.skyshieldroofing.com
Serving
5.0 from 132 reviews

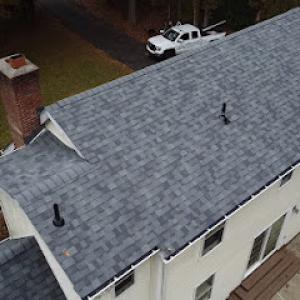
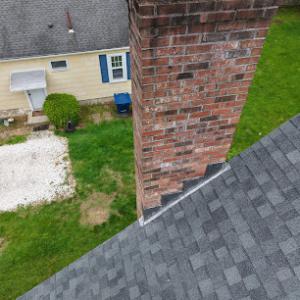
Chimney work and skylight penetrations are among the most frequent leak sources found on Norwich roofs, reflecting the city's older housing stock and frequent intersections of masonry with roof planes. In the mix of historic homes and additions, chimney flashings and chimney-to-roof transitions endure a lot of freeze-thaw cycle stress, especially where the brick and mortar meet asphalt or metal roofing. A careful eye on these areas pays off long before a drip becomes a stain.
Chimneys that rise through the roofline create multiple potential failure points. Starter flashing at the base can corrode, while step flashing along the sides can fail if the mortar joints pull apart with seasonal movement. The most common issue is concrete or metal cap and crown deterioration that lets water travel down the flue and into the roof deck. In Norwich, the risk is higher where roof planes meet the chimney at oblique angles or where older masonry has settled. If there's a visible gap around the chimney or loose shingles adjacent to it, schedule a check before winter's freeze-thaw cycles intensify the problem. A practical approach is to inspect the flashing from the attic after a heavy rain or thaw, looking for damp spots that trace to the chimney line.
Skylights in this market often involve curb flashing that bears the brunt of wind-driven rain and thaw cycles. Seal failures tend to show up first along the curb seams or where the glass meets the frame. In older homes, skylight installations may sit on low-slope sections that don't shed water as readily as a steeper roof, inviting slow leaks that intrude at the interior edge of the curb. For homeowners, a routine around the skylight is to check the sealant at the curb and the interior side for condensation patterns that don't match exterior rain. If moisture pools around the skylight on a flat or low-slope roof, consider re-flashing and resealing the curb with materials compatible with the existing roof assembly to keep drainage honest.
Parts of the Norwich market include additions, porches, and mixed residential-commercial buildings where drainage details are less forgiving. Flat edges or low-slope transitions around chimneys and skylights can trap moisture, making leaks more likely during freezing cycles. In those spots, prioritize ensuring proper drainage away from penetrations and confirm that any parapet or edge flashing stays sealed. A practical habit is to run a quick check after storms to verify water isn't pooling near these penetrations, and to address any sudden wet spots on the ceiling below promptly.
Find contractors experienced in skylight installation, flashing, and leak repairs to bring natural light into your home.
JS & R Roofing Company | Roofer | Siding | Gutters Contractor
(860) 822-1204 jsandroofing.com
21 Briar Hill Rd, Norwich, Connecticut
4.8 from 49 reviews
Evaluate tear-off experience and problem-solving on older roofs. In this city, many homes have decades of wear under freeze-thaw cycles, so a crew that can forecast trouble spots and address them without delaying the job is valuable. Ask about how they handle multiple layers, decking damage, and ventilation adaptations for aging roofs.
Look for a crew that has practiced on steep pitches, existing shingles with embedded nails, and historically mixed materials. Request specifics on a typical tear-off sequence, how they protect interior spaces during removal, and how they verify decking integrity before laying new material. Require clear milestones: roof removal, flashing replacement, underlayment, venting checks, and final sealant steps.
Quick response matters in blustery spring storms and sudden rain events. Confirm a realistic schedule window and a plan for weather delays that keeps interior disruption minimal. A Norwich-oriented crew should present a tight, truck-friendly cleanup plan, tarps on openings, and a disposal strategy that minimizes yard and driveway residue.
Long-established and family-owned firms are common here and often offer steadier warranty follow-through. Inquire about who will be reachable for post-install questions, and whether the primary installer remains assigned to the project through completion. Check references for neighborhood projects and any notes on performance during freeze-thaw cycles.
Rather than price alone, compare tear-off methods, material warranties, and aftercare options. A reliable crew will explain their inspection checklist after installation and outline any recommended maintenance for the first few winters.