Last updated: Apr 19, 2026
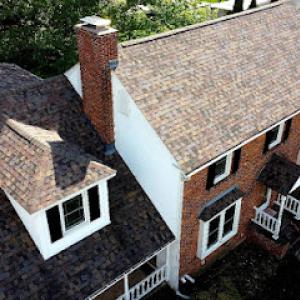
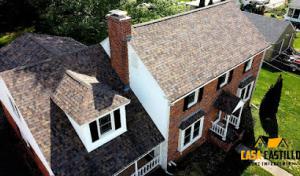
Cold winters here drive repeated freeze-thaw cycles that relentlessly stress shingles, flashing joints, and roof penetrations. In steep-slope roofs common to area homes, the edges and valleys take the brunt-where water can seep under shingles as ice forms and expands during subfreezing nights. Small irregularities become big leaks, and once ice builds up at eave lines, the problem compounds as meltwater pools and refreezes at night. If you see cracked shingle edges, lifted tabs, or granular loss along the rake and eave zones, treat it as a warning sign that the roof is near a turning point. Delays in addressing these symptoms can turn a small, affordable repair into a costly full-coverage problem after a heavy storm.
South Windsor experiences snow events that load the roof and then melt during the day only to refreeze overnight. This pattern creates ice backups at the eaves that block drainage and press on the underside of the roof deck. When meltwater cannot escape properly, it finds pathways through flashing and around penetrations-vent stacks, chimneys, and skylights-inviting staining, mildew, and hidden rot. If you notice ice buildups, frequent dripping at the soffits, or ice dams forming along gutters, act quickly. The longer the dam persists, the more likely heat loss from the attic is contributing to the cycle, which elevates energy costs and accelerates deck deterioration.
Flashing joints are a common failure point in regions with long winter seasons and variable temperatures. Caulking cracks, loose step flashing, and poorly sealed penetrations allow moisture to wend its way into the roof deck and interior walls. In this climate, even small gaps at chimney collars, vent pipes, and skylight bases can become major leaks after a heavy freeze-thaw event. Inspect these joints after significant snowfall, and test for soft spots in the decking around penetrations during spring thaw. If you hear your attic groan during the first warm days, that's a sign heat is driving moisture toward vulnerable seams.
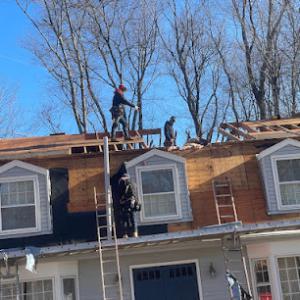
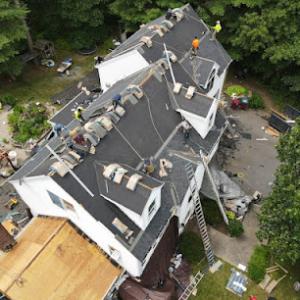
The typical replacement season runs from late spring through early fall because winter snow cover and icy conditions can delay tear-offs and inspections. That means even urgent repairs must be scheduled with weather windows in mind, which can extend risk if a major thaw creates new leaks before a contractor can reach the site. Plan proactive, targeted reinforcement of problem areas now: reseal suspect flashing, reseat fasteners along ridge and hip lines, and address visible sagging or soft spots before a storm-charged season arrives. When a heavy snowfall ends and temperatures swing above freezing, arrange an adjacent roof inspection to verify that meltwater can drain freely and that eave insulation remains intact.
If snow is on the ground, limit exposure of vulnerable areas by clearing around vents, gutters, and flashings with a cautious approach-never chisel ice near the roof edge. Use a roof rake from ground level to remove heavy accumulations on the lower sections without stepping onto the roof. Maintain continuous clearance along the eaves to reduce dam formation, and keep gutters free of ice plugs that trap water. If you observe recurring ice build-up at the eaves after snow events, call in a local roofing professional for a targeted assessment of shingle edges, flashing joints, and penetrations. Early intervention preserves the roof structure and reduces the risk of interior damage when the next round of freeze-thaw cycles hits.
In Connecticut, wind, hail, and storm-related roof claims are active enough that carriers often want dated photos, permit records, and inspection documentation before approving full replacement. After a damaging event, assemble clear photos that show the extent of damage on all roof planes, any interior staining, and damage to nearby structures or vents. Keep a dated log of when the storm occurred, when damages were noticed, and any temporary measures taken, such as tarping. A homeowner in this market should have those records ready before contacting the insurer or a contractor to avoid delays.
South Windsor homeowners replacing a storm-damaged roof should expect the permit and inspection trail to matter because local inspections verify installation and ventilation after work begins and at completion. Your project will likely require inspections that confirm proper attic ventilation, roof venting, and shingle or panel installation alignment with the balance of the home. Contractors who are familiar with the town's inspection cadence will time materials delivery and access to minimize the risk of rework. If a claim covers a full replacement, the insurer may cross-check the sequence of work, weather exposure, and ventilation changes against the claim narrative.
High-deductible insurance plans are common in this market, which changes whether you pursue spot repair, emergency tarping, or full replacement after a storm. If the damage is localized to one section of the roof, a careful assessment of the risk of leaks versus the cost of a partial repair may be warranted. Conversely, significant wind or hail impact near ridge lines and eaves tends to justify more extensive remediation. Weigh the potential long-term savings of a proper ventilation and insulation update against the out-of-pocket exposure when a deductible is a primary consideration.
After a storm, prioritize immediate protection to prevent water intrusion. Temporary tarps should cover any open areas, with edges secured to resist wind uplift. Keep access clear for the adjuster's visit and for inspectors. Document temporary measures with dated photos to show the condition before permanent work begins. This minimizes disputes about pre-existing conditions and demonstrates proactive risk management.
Choose a contractor who understands how South Windsor's seasonal freeze-thaw cycles stress roof assemblies. Emphasize proper attic ventilation, ridge and soffit balance, and underlayment compatibility with the chosen roofing system. If a full replacement is pursued, insist on a plan that aligns with the expected climate pattern, ensuring the vented attic and moisture-control strategy are integrated into the final installation. A well-coordinated crew will synchronize material delivery, scaffold placement, and inspection readiness to minimize weather-related setbacks.
Expect a sequence that starts with claim validation, followed by temporary protection, then removal of the damaged roof section, installation of new roofing, and final inspections. The timeline will hinge on weather windows and the insurer's documentation review. Clear communication about the inspection milestones helps prevent back-and-forth requests that can stretch the process. A steady, documented record with dated photos and professional attestations supports a smooth path from assessment to completion.
Connect with contractors who help homeowners navigate the claims process from damage assessment to final approval.
Rising Star Roofing
(860) 796-5668 www.risingstarroofing.com
12 Sea Pave Rd, South Windsor, Connecticut
4.9 from 268 reviews
Harmony Home Improvement
(860) 847-7455 www.harmonyhomeimprovement.com
225 Oakland Rd Suite 304, South Windsor, Connecticut
4.3 from 65 reviews
Rising Star Roofing
(860) 796-5668 www.risingstarroofing.com
12 Sea Pave Rd, South Windsor, Connecticut
4.9 from 268 reviews
Whether you need urgent repairs, help with an insurance claim, or you’re looking for the best and most reliable roof replacement, we can gladly help. With offices in South Windsor, CT, Lake Worth Beach, FL and Bonita Springs, FL, our experts are seasoned professionals in both commercial and residential roof replacement and repair. We handle all types of roofing systems including concrete, title shingle, flat, metal and more. We have gathered the most experienced team of professionals available to service any and all your needs year-round. We’re here to help you deal with the insurance restoration process, repairs, inspections, and installation of a new roof.
CT Homes & Roofing
South Windsor, Connecticut
5.0 from 24 reviews
Your home remodel and roofing specialists! 20+ years of experience in the field. Fully licensed and insured contractor. Roofing, siding, flooring, door and window installation, kitchen remodels, bathroom remodels, trim work, and more!
JT home improvement
730 Sullivan Ave, South Windsor, Connecticut
5.0 from 10 reviews
Commercial and Residential roofing and siding company.

Harmony Home Improvement
(860) 847-7455 www.harmonyhomeimprovement.com
225 Oakland Rd Suite 304, South Windsor, Connecticut
4.3 from 65 reviews
Harmony Home Improvement is a veteran-owned exterior remodeling company specializing in roofing, siding, windows, doors, gutters, and deck building. We value the relationships we build with our customers. Our superior craftsmanship, access to manufacturer-backed materials, and dedication to customer service are why we're "The Most Trusted Name in Connecticut"!
Donewell Services
(631) 428-3997 www.donewellservicesllc.com
Donewell Services LLC, 115 Beldon Rd, South Windsor, Connecticut
5.0 from 7 reviews
At Donewell Services we’re redefining roofing excellence in Connecticut with cutting-edge technology, unmatched craftsmanship, and a customer-first approach. As a forward-thinking roofing company, we combine years of expertise with innovative solutions to deliver durability, aesthetics, and peace of mind for every project—residential or commercial. Why Choose Us Donewell? ✔ Premium Materials ✔ Uncompromising Quality ✔ Transparent & Hassle-Free Service ✔ Local Expertise, Nationwide Standards Whether it’s storm damage restoration, energy-efficient roofing, or a sleek modern design, we bring a fresh, dynamic approach to protect and enhance your property. Trust Donewell Services where innovation meets integrity.

Safe Roof Cleaning
(860) 810-0019 saferoofcleaningllc.com
Serving
4.2 from 74 reviews
Safe Roof Cleaning is Connecticut’s industry leader in roof and exterior cleaning. We have been helping people beautify their houses for over the last 10 years. As a company we are proud to use all biodegradable cleaning solutions that are safe for your home and property. As the industry grows, new equipment and cleaning solutions are designed. Safe Roof Cleaning’s owner Joshua Scavetta bring his company the best cleaning techniques, equipment and cleaning solutions by attending seminars all over the USA.
Built by Burgiano
(860) 308-0022 www.builtbyburgiano.com
Serving
5.0 from 32 reviews
At Built by Burgiano, we believe your home deserves the best. That’s why we approach every project with the same care and dedication as if it were our own. As specialists in roofing, siding, gutters, windows, and chimney services, we ensure your home remains strong, beautiful, and built to last. From minor repairs to full-scale installations, our team is committed to quality craftsmanship, transparent communication, and honest service. No shortcuts, no hidden surprises—just dependable work from a team that truly cares. Looking for a contractor you can trust? Let’s make your vision a reality. Built strong. Built right. Built by Burgiano.
Casa Castillo Home Improvement
(860) 997-7948 castillohomepro.com
Serving
5.0 from 63 reviews
With over 14 Years of experience in the home improvement industry and our commitment to offering the best materials on the market with equally matched workmanship; homeowners can trust in Casa Castillo for their Roofing and Vinyl Siding needs.
Atlantic Roofing & Siding
(860) 808-9762 atlanticroofco.com
Serving
5.0 from 20 reviews
We are a full service roofing and siding contractor serving the central Connecticut area. We specialize in residential roof replacements and vinyl siding installation. If you are looking for a trusted professional to handle a roofing or siding project, then look no further than Atlantic Roofing and Siding. With over 10 years of industry experience, you can count on us to provide you with top notch solutions, quality of workmanship, and fantastic service.

Olympus Home Improvement
Serving
5.0 from 38 reviews
Our company is a small yet mighty force in the roofing, siding, and gutter industry. Our unique approach to providing exceptional service and unparalleled quality sets us apart from the competition. We go above and beyond to ensure that every aspect of our work meets and exceeds our customers' expectations. Our unwavering dedication to excellence shines through in everything we do, whether it's installing a new roof, repairing a gutter system, or replacing siding. We take pride in our personalized approach to customer care, as we believe that every job is unique and requires individualized attention to detail. With us, you can trust that your home's exterior is in good hands. We are here to provide you with the peace of mind that comes with
CT Eastern Builders
(860) 810-0765 cteasternbuilders.com
Serving
5.0 from 7 reviews
CT Eastern Builders is committed to delivering high-quality construction and remodeling services in Stafford, CT, and surrounding areas. Our skilled team of professionals takes pride in transforming visions into reality, ensuring customer satisfaction every step of the way. Trust us to bring your dream home or renovation project to life.
John's Roofing Siding & Windows
(860) 490-8952 www.johnsrsw.com
Serving
4.7 from 78 reviews
John's Roofing Siding & Windows provides roofing, siding, windows, doors, and gutters to the Tolland and Hartford counties of Connecticut.
Asphalt shingles are the dominant roofing material in this area, and they typically sit in the local range of 350 to 650 USD per square. For most suburban replacements, this makes asphalt the practical baseline you'll compare other options against. When you're budgeting after a cold winter, think of asphalt as the "common ground" that helps you gauge value, expected labor, and crew availability when storms have leftovers in the market.
Metal roofing shows up in the market, but at a much higher local range of 700 to 1100 USD per square. That reflects specialized labor and a smaller pool of installers who routinely handle metal on steep, snow-prone roofs. If you're weighing long-term durability, metal can perform well against freeze-thaw cycles, but be prepared for a steeper upfront check. Other materials-clay tile, concrete tile, wood shingles/shakes, and synthetic/composite shingles-linger in higher price brackets driven by weight, insulation considerations, and installation complexity. In practice, you'll see their costs drift above asphalt, with concrete and clay often landing toward the top end of the spectrum.
Costs in South Windsor can rise when replacement demand spikes after winter storm damage. Heavy snows weave in with a tighter local labor market, so you may see longer lead times and price sensitivity from crew availability. After a blowout winter, expect crews to factor in additional safety measures on steep slopes and extra attention to ice dam assessment during the job. When replacement projects stack up, scheduling can push you into busier windows, subtly lifting labor components into the higher end of the per-square range.
Ventilation corrections are not uncommon when replacing a roof in this area. If your system needs attic venting adjustments or baffle upgrades to satisfy inspection expectations, you'll see incremental costs beyond the basic material and labor. Factor in the possibility that addressing ventilation now can prevent ice dam problems later, especially given the freeze-thaw cycles that stress roofs here. The goal is to pair a durable surface with adequate attic airflow, so you're minimizing future edge-case repairs and reducing the chance of premature wear from trapped heat and moisture.
Use asphalt as your baseline: 350 to 650 USD per square. If you're leaning to metal, plan for 700 to 1100 USD per square and weigh the potential savings from longer life and reduced maintenance against the higher upfront price. Keep an eye on winter-driven demand and potential ventilation work, as those factors can nudge the final number beyond the simple material card.
A full roof replacement requires a building permit rather than informal contractor-only scheduling. In practice, the contractor typically submits the permit application with the project scope and any necessary drawings or details, such as updated venting plans or attic insulation notes. The review timing depends on the current building department workload, so approvals can vary week to week. The process can take longer if the project scope changes or if the drawings need refinement to meet local code interpretations. Having a clear, written scope helps prevent back-and-forth delays that can occur when the plan is incomplete or vague.
Inspections occur during and after the work to verify installation details and ventilation. A common sticking point in this climate is ensuring the roof system meets ventilation requirements for freeze-thaw cycles and ice dam prevention. The inspection will check nailing patterns, underlayment, drip edge, shut-off flashings, valley protection, and attic ventilation routes. Do not treat ventilation upgrades as optional; inspectors expect appropriate soffit and ridge or other venting to be in place and functional before the project can be signed off. If the existing ventilation system needs a facelift to work with a new roof, plan for that as part of the permit-not as a separate afterthought.
Coordinate closely with the contractor to provide all requested drawings and product specifications upfront. If the project involves roof-to-attic ventilation changes, have those details documented in the permit package so inspection checks align with installed components. Schedule enough lead time for the building department to process the permit before work begins, and keep a clear line of communication for any required amendments. On inspection days, have access ready to the attic and eave areas so inspectors can verify airflow paths and eave closures. Finally, document any ventilation upgrades with photos or notes, so both you and the inspector can confirm that the system is designed to handle the cycle-heavy winters and prevent ice dam-related stress.
Asphalt shingles are the dominant choice for the typical South Windsor home because they fit common residential roof forms and replacement budgets better than tile-heavy systems. For a steep-slope 3-tab or architectural shingle setup, asphalt delivers reliable performance through freeze-thaw cycles and mid-winter snow loads. When choosing asphalt, look for higher-quality laminated options with good granule adhesion and a silica or mineral surface that helps resist shedding in the freeze-thaw cycle. A practical approach is to align shingle color and profile with the existing roofing lines on your house, so the roof sheds snow predictably rather than creating ice dams at the eaves.
Metal roofing has a meaningful but smaller specialist presence locally, making it a realistic upgrade option for owners prioritizing snow shedding and long-term durability. Metal panels or standing-seam systems shed snow more readily than asphalt and can reduce roof-load concerns during heavy storms. If you expect frequent rapid temperature swings, a metal roof with proper underlayment and venting helps minimize ice dam formation. Installation should account for compatibility with existing fascia, gutters, and attic ventilation to avoid cold spots that promote condensation or ice buildup.
Clay tile, concrete tile, wood shakes, and synthetic shingles exist in the market data but appear far less central to the local contractor mix than asphalt and storm-repair work. Clay or concrete tiles can be attractive on certain architectural styles but demand a stronger roof structure to handle heavier loads and are less forgiving with sharp winter freezes. Wood shakes bring a distinctive look but require careful maintenance to resist moisture and decay under winter wind-driven rain. Synthetic shingles can mimic others while offering some impact resistance, yet they are not the primary choice for the typical South Windsor home. If choosing these options, plan for appropriate decking reinforcement, ventilation, and budget for more frequent inspections after winter storms.
When evaluating materials, start with compatibility to your roof's slope, existing structure, and the typical snow profile you see on peak days. Prioritize systems with robust underlayment and reliable flashing around chimneys and skylights to curb ice dam risks. For homes facing heavier storm repair activity, consult a local installer who understands how South Windsor freezes and thaws influence shingle lifespans and panel seams. A balanced choice considers the house form, wind exposure, and how the roof moves with seasonal temperature shifts, ensuring a durable, snow-resilient result.
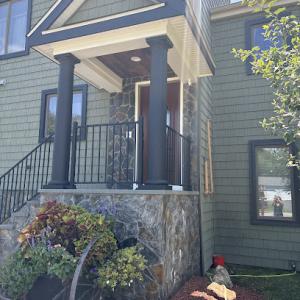
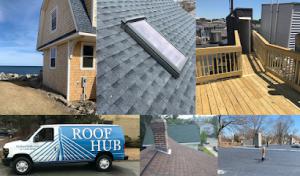
Skylights are a hotspot for leaks in this market, and the pattern is well understood by local crews. The combination of morning sun on a cold pane and deep winter freezes can stress the flashing around skylights more than the surrounding shingles. In a neighborhood with steep slopes and a mix of old and newer rests, you'll see drainage paths around skylights that are less forgiving than the rest of the roof. If you notice condensation near the inside edge, or an intermittent drip after a thaw followed by a return freeze, the culprit is often a seam or seal that has seen repeated thermal cycling. Immediate attention is prudent, because small leaks here can creep along the rafter tails and wind up behind interior trim or drywall.
Chimney flashing is a common add-on point during roof replacements, and it shows up often enough to be a recurring homeowner concern. The South Windsor climate makes these transitions work especially hard-mortar joints can deteriorate and the metal flashing may warp with freeze-thaw cycles. If you see staining on interior ceilings near a chimney, or you notice spatter of blackened streaks along the brick line after a storm, those are signals that the flashings and counter-flashings need attention. Homeowners should expect that chimney work is frequently needed to seal the transition where brick or stone meets the roof, not just the shingles themselves.
Vent pipes and attic exhausts are small by appearance but large by consequence when their seals falter. Snow-driven wind and freezing temperatures stress the collars and sealants around these penetrations. A slow, creeping leak here might show up as wet spots along the attic insulation or a damp ceiling near the vent area after a heavy snowfall. Given the local tendency to combine storm-driven roof work with flashings, prioritizing these penetrations during any replacement plan helps prevent a larger, recurring issue.
For homeowners, a targeted post-winter inspection focusing on skylight seals, chimney flashings, and vent penetrations pays dividends. Look for loosened flashing, lifted shingle tabs near these openings, or staining along interior ceilings. If work is needed, address the flashing transitions with enough overlap and corrosion-resistant materials to withstand Connecticut's freeze-thaw cycles. Proactive attention here reduces the risk of water bypassing the field shingles and finding a path into the attic.
Find contractors experienced in skylight installation, flashing, and leak repairs to bring natural light into your home.
Harmony Home Improvement
(860) 847-7455 www.harmonyhomeimprovement.com
225 Oakland Rd Suite 304, South Windsor, Connecticut
4.3 from 65 reviews

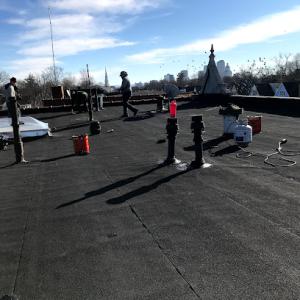
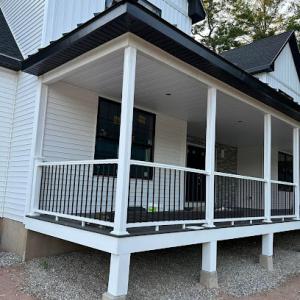
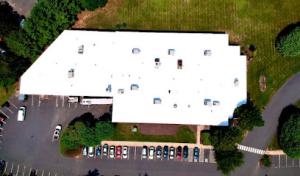
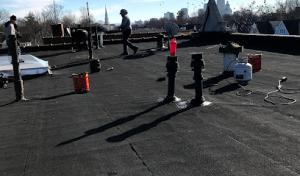
Flat-roof specialization exists but is secondary, so low-slope sections are most often attached garages, porches, additions, or small commercial buildings rather than the dominant home type. When planning a project, expect a contractor skilled in both steep-slope repairs and these smaller, flatter zones. Drainage patterns matter: water sits longer on low-slope surfaces, especially after winter thaws, so a well-detailed edge plan and proper termination details are essential.
Spring thaw and frequent rain mean membranes must resist standing water and ice buildup during edge thaw cycles. Prioritize a thorough inspection of the flashing transitions between any low-slope area and adjacent steep roofs. Look for deck integrity beneath the membrane, seam tapes, and drain connections. If your low-slope area ties into a larger roof, confirm the contractor matches flashing metal and fastener profiles to the surrounding roof system to avoid micro-leaks that mimic bigger problems.
Owners with mixed rooflines often need a contractor comfortable handling both standard re-roofing and smaller low-slope tie-ins during one project. Expect coordinated work from two crews or a single crew that can sequence tasks without compromising the steeper portions. Communication about material compatibility, insulation continuity, and drainage swales around the tie-in is crucial. Ask for a written plan that shows how the low-slope area connects to the main roof and any addition of temporary containment during installation.
Regular maintenance becomes a habit in this area. Schedule semiannual inspections that focus on edge membranes, fastener corrosion, and debris accumulation near scuppers or perimeter drains. With the climate and housing stock, proactive care reduces the risk of slow leaks that materialize after winter and spring storms.
Find specialists in TPO, EPDM, and built-up flat roofing systems for residential and commercial properties.
Rising Star Roofing
(860) 796-5668 www.risingstarroofing.com
12 Sea Pave Rd, South Windsor, Connecticut
4.9 from 268 reviews
Four Seasons Construction
(860) 680-6678 www.fourseasonsconstructionct.com
Serving
5.0 from 4 reviews
In this market, solar roofing shows up in the contractor mix but does not dominate most projects. That makes replacement planning particularly important: the roof itself remains the driver, with solar considerations folded in as a future enhancement. When a contractor frames a replacement, you should treat the solar aspect as a long-term planning step rather than a last-minute add-on. This means choosing a roof system and attachment method that can support future solar hardware without compromising the primary goal of a durable, weather-tight shell.
Because a full roof replacement in town involves a permitting step and inspections that verify installation quality and ventilation, the sequence matters. Align the roof work first, then layer any solar plans after the new assembly is sound. If solar is envisioned later, the roof should be prepared to receive attachments without reworking the deck, underlayment, or flashing. In practice, that means selecting compatible penetrations, a robust underlayment system, and flashing details that can accommodate mounting rails or racking without creating additional leaks potential.
South Windsor experiences warm summers and cold winters, so the underlayment and flashing deserve careful selection and detailing. A well-chosen underlayment remains essential for temperature swings that can drive ice dam activity and freeze-thaw stress. Plan for flashing around chimneys, vents, and any skylights with extra attention to sealant compatibility and drainage paths. When solar might be added later, anticipate conduit routes and rafter spacing that minimize new penetrations or retrofit complexity. The goal is to keep the roof airtight under heavy snow loads while preserving flexible, corrosion-resistant flashing details that can accommodate solar hardware without compromising the roof's defensive edge.
Steep-slope asphalt dominates the local housing stock, but material choice still matters for solar readiness. If a project contemplates later solar attachments, consider how the chosen roof surface and its fasteners will interact with mounting systems. A roof that stands up to freeze-thaw cycles and snow load, with proven, well-sealed penetrations, provides a stable platform for solar conversion down the line. This practical foresight reduces the complexity and potential disruption when solar plans become concrete later, keeping the roof resilient through Connecticut winters and hot summers alike.
Find contractors who integrate solar panels or solar shingles into your roof for long-term energy savings.

In South Windsor, Connecticut's winter weather and the surrounding wind and hail claim environment mean you should keep a complete set of roof records in one accessible place. Before trouble hits, gather pre-loss roof photos, contractor scopes, and any existing permit paperwork, plus a final inspection record if a previous project was completed. This routine helps you verify the roof's condition and the scope of any further work later on. Store digital copies in a cloud folder and back up a physical file in a dedicated box at home. The goal is to have a clear, chronological trail that shows what existed before a loss and what was approved for replacement or repair.
Adjusters in this market may request inspection reports and proof of a compliant replacement, so organized documentation pays off. When a claim is filed, have your contractor's scope of work, including materials used and installation notes, ready to share. Expect questions about any deviations from the original plan and be prepared to provide final inspection results from the replacement work. A well-documented packet reduces back-and-forth, speeds review, and helps ensure the claim reflects the actual work performed rather than a verbal summary from a contractor.
Stable carrier availability does not eliminate scrutiny; high deductibles still push you to compare claim value against out-of-pocket replacement cost. After completion, store the final contractor invoice, warranty documents, and any post-installation inspection notes alongside the pre-loss materials. Regularly update the file with any future work or repairs, so when the next winter season arrives, the history is ready to stand up to questions from adjusters or insurers.