Last updated: Apr 19, 2026
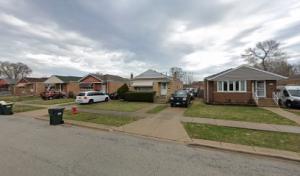
Storm-related claims are common in this part of the south Chicago suburbs, making post-storm roof assessments a first-order concern for homeowners. The combination of steep residential roofs and pockets of low-slope sections in the older stock means that water can hide in valleys, soffits, and interior attic spaces long before any visible staining appears on ceilings. When a storm hits, you should assume that hidden damage is possible even if the surface looks fine. Rapid assessment and early action protect the roof deck, attic insulation, and interior rooms from accelerated deterioration and mold growth.
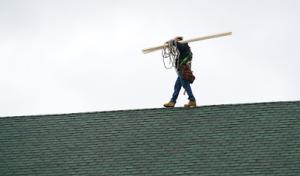
Spring storms and hail are a known scheduling bottleneck locally, so homeowners in Blue Island often compete for inspections and repair slots after regional weather events. If you experience a severe storm, start with immediate damage triage at the roof edge, gutters, and penetrations around vents and chimneys. Photograph all angles from ground level and, if safe, from a ladder or balcony to document hail patterns, lifted or curled shingles, and missing granules. Do not delay reporting leaks that appear in ceilings or walls; early documentation helps prioritize your claim when slots fill quickly. Keep a log of storm dates, wind speeds if known, and any interior water intrusion you observe, because insurers will ask for those details to validate the timing of damage.
Insurers in this market commonly want photos, roof-age documentation, estimates, and attic access, which directly affects how Blue Island residents should respond after visible or suspected storm damage. Have clear photos of damaged shingles, lifted edges, and any sagging in roof lines. Provide attics access so adjusters can evaluate ridge and soffit ventilation, insulation moisture, and potential hidden leaks. If you have old roof records, gather them as a baseline for age and prior repairs. A concise timeline that ties the storm date to observed leaks and interior damage helps the claim flow and reduces back-and-forth delays.
Because inspection slots fill quickly, contact your insurer or your chosen contractor promptly after a storm, but do not authorize major work before you have a written estimate and an approved scope. If you notice every afternoon rain dripping through the attic during a storm, call for an emergency temporary mitigation. Use tarps or boards only if you know how to place them safely to avoid further damage or personal injury. When a contractor arrives, walk them through known trouble spots: chimney flashing, skylight seals, vent boots, and any valley intersections where ice damming has historically caused problems. Clear communication about what you want documented-photos of the damage, the attic condition, and the exterior roof surface-streamlines the process and reduces back-and-forth. In this neighborhood, timely documentation paired with decisive, cautious mitigation is the best defense against ongoing water intrusion and escalating interior damage.

Nombach Roofing & Tuckpointing
3344 W 127th St, Blue Island, Illinois
4.6 from 209 reviews
For over 50 years, Nombach Home Exteriors has been dedicated to serving Chicago and surrounding communities. As a family-owned and operated business since 1969, Nombach takes pride in providing quality home exterior services. From roofing and siding to brickwork, gutters, concrete and windows, Nombach offers comprehensive solutions to enhance and protect your home. Discover the Nombach difference and experience the care and craftsmanship that have been their hallmark for generations.
A-Abel Roofing
(708) 316-1433 aabelroofing.com
Serving
4.8 from 153 reviews
Need roofing in South & West Suburbs of Chicago? Look no further than A-Abel, a professional team with over 20 years experience providing fast and reliable services. From complete one day replacements to reroofs, repairs or insurance claims for hail damage - we do it all! With hundreds of 5 star reviews across the web plus an A+ BBB rating, you can trust us for quality service every time. Need help financing a larger project? We offer flexible payment plans too making sure nothing stands between your home's transformation and you. Gutter repair is also available so don't hesitate to give us a call today!
SFC Roofing
Serving
4.9 from 29 reviews
We are your premier experienced, committed, consistent roofers in the Chicagoland Area. Call us for your roofing needs. We are your contractors that have integrity… Residential/Commercial/Industrial
Heritage Contractors
(773) 887-0268 www.heritagecontractors.net
Serving
5.0 from 112 reviews
Heritage Contractors is a family owned business, servicing the Chicagoland area. We specialize in roofing, gutter, siding, and window replacement. Heritage Contractors incorporated 20+ years ago and at the time focused on building new homes and additions as well as interior remodeling. After a decade, our focus shifted to exterior construction when we saw a need for homeowners to work with an honest and fair company to help maintain the exterior of their homes. Our team strives to make the process of maintaining your home stress free and affordable. Please feel free to ask us for references of previous clients we have worked with. Take a look at our website which includes Google reviews to see what past clients have stated about our service
Extreme Storm Solutions
(708) 371-9000 www.extremestormsolutions.com
Serving
4.7 from 106 reviews
Roofing
Barry Roofing
Serving
3.7 from 143 reviews
We have been serving property professionals for over 60 years. We have been an industry leader in roofing, siding and repair service needs for Chicagoland Property Associations.
NSS Exteriors
(708) 385-5815 www.nss-exteriors.com
Serving
4.8 from 41 reviews
Established in 1966, NSS Exteriors is one of the Chicagoland's oldest and most respected skylight and architectural sheet metal contracting firms. We specialize in sales and installation of daylighting (skylights, sun tunnels), architectural sheet metal, windows, architectural/metal siding, gutters, flashings, panel walls, ventilation systems and more. Our services are available for residential, commercial and industrial applications. Browse through our website to read more about the services we offer, view pictures of our work and contact us online or by phone. If you have any questions regarding products, services or if you need technical advice.
Odin’s Construction Group Roofing Siding Gutters
(708) 261-1634 www.odinsconstruction.com
Serving
5.0 from 170 reviews
We are a family owned company, Specializing in roofing siding and gutters. Chicagoland suburbs and entire Illinois we are dedicated to delivering results that stand the test of time. We work with all insurance companies also when you have sustained storm damage. Unmatched Attention to Detail: From the initial comprehensive inspection to the final nail and clean-up, every step of our process is executed with meticulous precision. We believe true quality is found in the details others overlook.Superior Materials Only: We partner with industry-leading manufacturers GAF, Owens Corning, CertainTeed, James Hardie) to source and install the highest-grade material. We have a proven track record of satisfied customers just look at our reviews.
Curtis Roofing & Construction
(708) 849-1279 www.curtisroofingandconstruction.com
Serving
4.1 from 29 reviews
A Reputation for Roofing Excellence in Chicago IL property owners have come to rely on us for all of their roofing needs, and once you’ve contacted us you’ll understand why. Our professional and courteous staff understands your schedule and your needs and will work with you to set up an appointment that accommodates your schedule. Our team will show up on time, assess your needs, answer all of your questions and explain the entire process in a way that is easy to understand. We’ll prepare a quote that works for your budget and once you’ve chosen us we’ll do the job using quality materials and providing you with craftsman quality work that will last for years and years.
Style Exteriors by Corley
(708) 292-0410 styleexteriorsbc.com
Serving
4.9 from 165 reviews
Style Exteriors By Corley is your trusted partner for residential roofing and exterior home solutions in the Chicagoland area. We specialize in all-things roofing, siding, and gutters. From roofing installations and repairs to exterior siding and gutter replacements, we know how to enhance the beauty and functionality of any property. Our team is dedicated to delivering exceptional craftsmanship and customer service, ensuring your home receives the attention it deserves. Contact us today to learn how we can help.


Total Roofing & Construction Services
(708) 201-7550 totalroofingandconstruction.com
Serving
4.7 from 244 reviews
Total Roofing & Construction Services, Inc. is a licensed, insured, and trusted roofing contractor. We've been servicing the Chicagoland region and Northwest Indiana for over 30 years. We specialize in both residential and commerical projects. In addition, we are certified siding, gutters, windows, and door installers. We are a family run and operated organization.
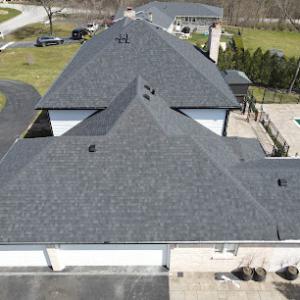
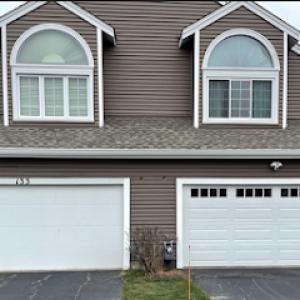
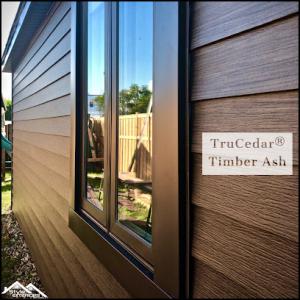
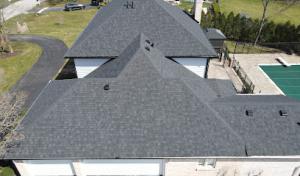
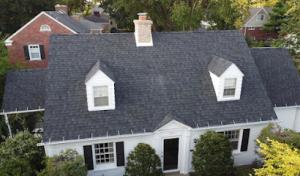
In Blue Island, the dominant residential materials span asphalt shingles, metal, wood shakes, slate, clay tile, and concrete tile-a broader mix than many nearby suburbs. This variety changes repair strategy by home type and complicates decisions after a storm. Steep-slope re-roofs sit alongside flat-roof work, so a single solution rarely fits all homes. When planning a fix, identify the primary roofing form on the house and match material-specific repair steps to that profile, not a one-size-fits-all approach.
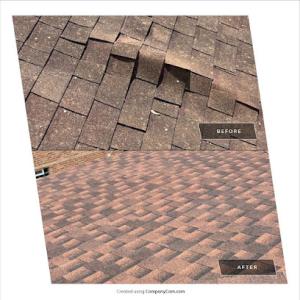
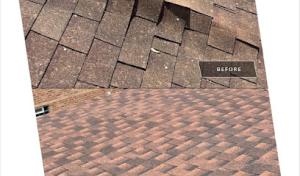
Asphalt shingles are common and typically the first line of defense, but older systems can suffer from wind uplift, lifted tabs, and moisture intrusion at fascia and valleys. Metal roofs offer durability but can develop loose panels or fastener corrosion if snow loads or freeze-thaw cycles loosen clips. Wood shakes bring character and good insulation, yet they are prone to splitting, cupping, and moisture absorption if a storm pushes water into gaps. Slate is revered for longevity but is brittle and vulnerable to impact and freeze-thaw cycling, making a single cracked tile a potential indicator of more extensive substructure movement. Clay and concrete tiles handle sun well but are heavy and fragile to impact; a single broken tile can expose underlayment and roof deck to water. Concrete tiles combine weight and porosity, so freeze-thaw seams can widen over time. In practice, that mix means you must tailor leak response to material behavior: brittle and heavy tiles require careful removal and replacement to avoid cracking neighbors; asphalt and wood demand prompt moisture mitigation before further damage.
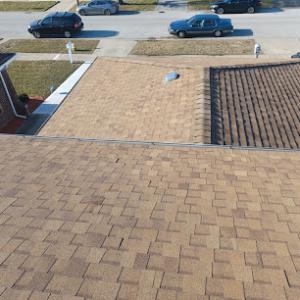
After a spring or summer storm, prioritize where water enters and how the roof intercepts it. On steep slopes with asphalt or metal, look for lifted edges, missing granules, or fasteners that have backed out. For wood shakes, inspect for moisture staining, soft spots, or splitting near eaves and valleys. Slate, clay tile, and concrete tile require careful stepping and removal to prevent shattering intact neighbors; use a roof ladder and non-marring tools to isolate the damaged unit and prevent cascading breakage. Where flat sections coexist with steep slopes, verify the transition flashing between conditions is intact and not allowing water to run toward vulnerable joints.
Freeze-thaw cycles in this area stress heavier brittle materials most: slate, clay tile, and concrete tile. When inspecting after a storm, pay special attention to sudden changes in roofline relationships, chimney/vent flashing, and dormer intersections where water can pool and then force entry during a thaw. For older wood and asphalt systems, look for moisture staining along eaves, small leaks at penetrations, and any vent boot deterioration. If a portion of the roof shows repeated leakage after thaw cycles, map a path of moisture intrusion from entry point to attic to exterior for targeted repairs.
After a storm, document damage with photos from both ground level and with a ladder for top-down views. Note the material type, location of damaged areas, and any visually compromised flashing or sealant. Create a simple sketch of affected sections and mark the attic or ceiling spots showing water traces. This documentation supports a straightforward insurance conversation and helps a contractor quickly plan the repair sequence for a mixed Blue Island roof system. If multiple materials appear damaged, prioritize temporary tarping on exposed sections while awaiting a contractor who understands handling different materials without causing new damage.
Spring and early fall are the windows that tend to work best for roof work here, because they dodge the harshest winter freezes and the peak summer heat. Snow and freeze-thaw cycles in the colder months can push tear-offs and installations into unpredictable schedules, so lining up work for milder shoulder seasons helps you avoid weather-induced delays. If you have a tight spring storm season, plan for a modest buffer in the calendar to account for lingering moisture on the roof and in the attic between rain events.
Winter brings predictable challenges: snow loads, ice dams, and long stretches of brittle, cold air. A high-pitched roof on older homes can shed snow slowly, while low-slope sections trap moisture longer. When a project spans mid-winter, expect slower progress and potential rescheduling due to frost on underlayment or decks. If a tear-off slips into winter, ensure the crew has a plan to manage safe access and temporary coverings for exposed sections to minimize interior moisture intrusion during thaw cycles.
Autumn leaf buildup is a local maintenance issue because debris can hold moisture at valleys and drainage paths just before winter weather arrives. This makes pre-season inspections crucial: clear gullies, check for blocked outlets, and verify that downspouts drain away from foundations. A focused fall pass helps identify prematurely worn shingles, damaged flashings, and potential gutter overflow points before storms push moisture toward the interior. In Blue Island, clearing debris from valleys and steps in the flashing line is a practical step that reduces the risk of weather-related leaks once temperatures drop.
Spring storms bring wind-driven debris and sudden downpours that test vulnerable areas. After a loud storm or hail event, conduct a quick exterior check from the ground and, if safe, from the ladder. Look for loose shingles, lifted edges, and any granule loss in gutters or valleys. If a leak shows up after a rain event, prioritize interior documentation and a quick assessment of attic signs such as damp insulation or staining on the sheathing. Having a plan to stage temporary protection, like tarping exposed roof sections, can buy time while arranging a professional assessment.
Coordinate replacement windows in shoulder seasons when possible to reduce exposure to the extremes. If a project must occur in winter, select an experienced contractor with a plan for cold-weather work and reliable moisture control. For autumn, align timing with leaf cleanup and pre-winter water shedding to minimize valley moisture retention. A steady, methodical approach in these conditions tends to yield fewer surprises and a more durable finish.
When you're planning a roof project in the area, know that a full roof replacement typically requires a building permit, and the permit is usually pulled by the licensed contractor rather than you as the homeowner. This matters because the contractor coordinates the submittals, timelines, and any village reviews you'll face. The timing matters, too: a permit delay can push the entire project back, especially when spring thaw or summer storms intensify the review calendar. If you're working with an established Blue Island contractor, expect them to handle the initial paperwork and to keep you informed about what the village needs to move forward.
Blue Island inspections commonly include a rough-in stage before underlayment and shingles are fully installed, followed by a final completion inspection. The rough-in is the village's early checkpoint: it confirms framing integrity, attic ventilation, and flashings are properly planned before the roof goes on. If the rough-in looks good, you'll still have to pass the final check once everything is completed. This staged process means you should plan for potential adjustments after the first inspection, not just at the end of the project. Communication with the contractor during this window is critical to avoid delays that ripple into the storm season or summer repair windows.
The village may require proof of insurance and compliance with wind and ventilation standards as part of the roofing permit process. Ensure your contractor provides current liability insurance and worker's compensation coverage, and verify that the policy remains in force during the project. Ventilation standards are not cosmetic details here; improper venting can lead to attic moisture, ice damming, and premature shingle failure under freeze-thaw cycles. Wind-resistance requirements align with local expectations for the calmed-down, but occasionally windy, spring and summer days. Missteps on these points can trigger permit holds or rework, so treat them as non-negotiables.
A final completion inspection confirms that the installation conforms to code, the workmanship is sound, and all components meet public safety standards. Common pitfalls to avoid include starting work without a permit, skipping the rough-in inspection, and neglecting documentation that proves compliance with wind and ventilation requirements. Keep a clean line of communication with the contractor about permit status, inspection appointments, and any village notes. If a deficiency is found, address it promptly to prevent project delays and to avoid a protracted back-and-forth that can leave you exposed to weather while the roof is partially open. In Blue Island, staying organized around these steps is your best defense against post-storm repair surprises.
In this area, asphalt shingles generally run from about 320 to 560 USD per square. If you're considering something more durable or with a distinct look, metal can land between 700 and 1200 USD per square, while clay tile sits in a wide 900 to 1600 USD range and concrete tile from 800 to 1500 USD per square. Wood shingles or shakes typically fall around 450 to 900 USD per square, and slate can push from 1400 to 3200 USD per square. The unusually wide mix of materials in town means your project price can swing widely depending on your choice and the existing roof assembly.
Storm demand spikes across the south suburban market-especially after hail or wind events-can push prices higher. When crews and inspectors face backlogs, you'll see longer waits and potentially higher labor surcharges. It's common to encounter tighter windows for tear-off, disposal, and re-roof scheduling after a severe weather pulse. If a storm hits, expect both material and labor costs to trend upward temporarily, and plan for a tighter timeline than in dry seasons.
Projects that mix steep-slope and low-slope sections, or that sit atop older, heavier materials, tend to require additional coordination and potentially more crew hours. Mixed roof designs can necessitate more flashing, transitions, and edge details, which adds to both material and labor costs. Legacy materials like slate or concrete tile are substantial to replace and may involve heavier handling and additional safety measures, contributing to higher per-square pricing. If your house combines high-pitch sections with flat or low-slope areas, prepare for a stepped pricing approach rather than a single flat rate.
Start with a realistic target by aligning your choice of material with the roof's current state and climate stress exposure. Budget a cushion for storm-season volatility, especially if hail or high winds are in the forecast or recently happened. For renovations that involve complex geometry or heavier materials, factor in extra time for inspection during and after work, since Blue Island often sees oversight activity tied to project scope and material choice. When you estimate, compare multiple bids that break out tear-off, disposal, underlayment, flashing, and attachment methods, so you're not surprised by hidden add-ons once work begins.
Get a clear picture of your project costs upfront - no commitment required.
Odin’s Construction Group Roofing Siding Gutters
(708) 261-1634 www.odinsconstruction.com
Serving
5.0 from 170 reviews

Blue Island sits in a storm-claim environment where carriers commonly scrutinize roof age and pre-existing wear before approving full replacement. When a claim is filed after spring or summer weather, adjusters will look closely at the roof's current condition against its age and known maintenance history. Expect a careful review of the attic and interior signs of water intrusion, as those details help establish the scope of damage. Photos, contractor estimates, and documented timelines dramatically shape the claim outcome, so gathering these elements promptly is a practical priority.
Homeowners should expect adjusters to request a clean set of photos that capture the roof from multiple angles, interior evidence of leaks, and any prior repairs. Attic access is commonly requested to inspect for insulation issues or hidden moisture. Having a concise record that traces weather events to observed damage helps prevent slower or disputed evaluations. Contractor estimates that break down the repair or replacement needs by area and material type provide a transparent baseline for review. Keeping a dated file, organized by event and repair step, reduces back-and-forth during the claim process.
Coverage availability remains stable in this market, but wind or hail endorsements and depreciation schedules can materially reduce what homeowners recover. A carrier may reference the roof's age and observed wear to justify a partial payout or to deny a full replacement in favor of repairs. Understanding these potential outcomes helps set realistic expectations and encourages timely, thorough documentation to support the claim.
Connect with contractors who help homeowners navigate the claims process from damage assessment to final approval.

Nombach Roofing & Tuckpointing
3344 W 127th St, Blue Island, Illinois
4.6 from 209 reviews
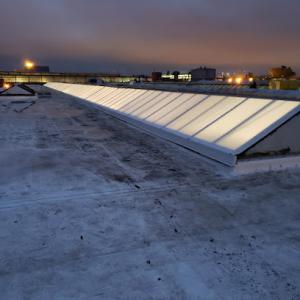
Flat-roof specialization is meaningfully present in the Blue Island contractor market, signaling that low-slope roof sections are a real local service need rather than an edge case. Homeowners with older brick-and-frame homes often encounter flat stands on porches, additions, or apartment flats, and these crews understand the unique fastening, flashing, and drainage details that come with them.
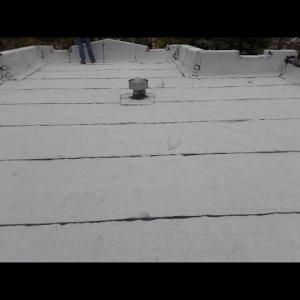
Blue Island's winter freeze-thaw pattern makes standing water and drainage performance more consequential on low-slope roofs than in drier or warmer climates. When gutters and scuppers backlog, water can sit long enough to creep into seam joints or vent openings. In spring, thaw cycles plus heavy rain can produce sudden leaks at transitions between roof surfaces and adjoining walls. Expect more repetitive minor issues after storms, and plan for proactive checks in late winter and post-storm weeks.
Inspect flat sections for scuffs, blisters, or evidence of ponding within a 2-3 inch depth. Clear debris from edge channels and verify that internal drains or scuppers aren't obstructed. If you notice persistent wet spots after rain, test the drainage path by observing water flow during a controlled run-off test. Keep flashings clean and check the condition of sealants around penetrations; these are common leakage points on a practical, budget-minded flat roof.
After a storm, photograph affected areas with time-stamped shots, focusing on seams, flashings, and transitions to walls. Track interior signs like discolored ceilings or damp drywall, and note any changes in attic ventilation or insulation conditions. Quick, thorough documentation helps a local flat-roof contractor assess whether patching or a more thorough repair is warranted and supports timely insurance communication.
Find specialists in TPO, EPDM, and built-up flat roofing systems for residential and commercial properties.
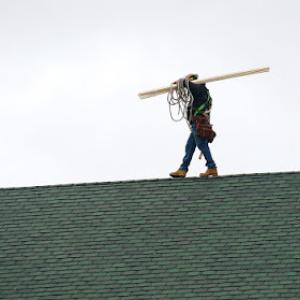
Blue Island's contractor market strongly signals re-roofing, quick response, cleanup included, and affordable pricing, so homeowners here are clearly screening for execution and service logistics. When you call after a storm or a leak, you want a crew that can be on site promptly, secure loose shingles, tarp vulnerable areas, and set up a plan that minimizes exposure to further damage. Ask for a concrete timeline from the first roof walk-through to the final cleanup. Look for crews that bring a complete crew and materials on day one, and that outline who will handle debris and power-washing of the property afterward. In neighborhoods with older, steeper roofs, you should expect a focused approach to safety, fall protection, and ladders that won't damage masonry or siding.
Long-established and family-owned firms are common in this market, which suggests local trust is often built through tenure and neighborhood reputation rather than premium branding. When you're screening, prioritize companies that can document years of local projects and references from nearby blocks. A readable portfolio of Blue Island jobs can be more telling than flashy marketing. Look for consistency: crews returning to the same streets, familiar patterns of repairs, and a willingness to address touch-ups after the initial work without arguing about small fixes. This reliability is especially valuable on older homes that present unique details and demand respectful, meticulous workmanship.
Because permits are typically contractor-pulled in Blue Island, homeowners should verify that the roofer is prepared to handle village paperwork, inspections, and proof-of-insurance requirements. Confirm that the contractor will supply all necessary documents, including lien waivers and a detailed scope of work. Ask who will be the point of contact for the village inspector and how the crew will coordinate with city staff on any required adjustments. Clear communication about documentation helps prevent delays and keeps the project on track, especially through the spring and summer storm seasons.