Last updated: Apr 19, 2026
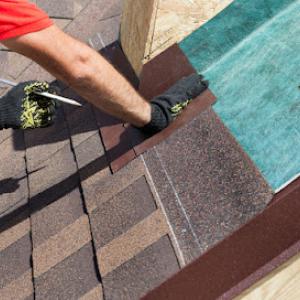
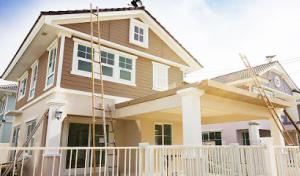
After a Northwest Indiana thunderstorm rolls through, the first 24 to 48 hours are critical. Hammond homeowners routinely face spring hail, heavy rain, and sudden wind events that jeopardize roofing layers and attic seals. If you notice new staining on ceilings, unusual attic heat, or damp spots along interior walls, treat these as urgent indicators of potential leaks. Rapid inspection is essential because even small breaches can expand with ongoing rain and fluctuating temperatures. In this market, delaying a professional assessment compounds damage and complicates insurance documentation later.
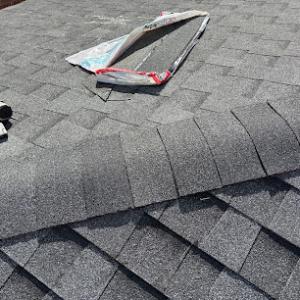
Hail events and high-velocity winds tend to leave irregular denting, lifting, or granule loss on asphalt shingles, or, with metal and tile roofs, noticeable panel distortion and edge separations. In older Calumet Region homes, roof decks may be closer to the weather surface, increasing exposure to wind-driven moisture. If the roof shows any lift, curling, or visible daylight through attic openings, treat it as an emergency cue. Do not wait for a routine inspection window when a storm is fresh; fast action preserves the roof's remaining life and helps support a cleaner insurance narrative.
In this market, the claim process hinges on solid documentation. Prepare clear, timestamped photos of all visible damage from multiple angles, both on the exterior and from the attic if accessible. Record roof age, visible wear, and any prior repairs that might influence the replacement decision. Secure a contractor estimate early-preferably from a local roofer with a track record of storm and insurance work-so the claim file includes a professional scope of work. Be aware that carriers frequently require independent adjuster input before approving a full replacement, so anticipate a review step beyond the initial homeowner-reported damage. Maintain a detailed log of storm dates, meteorological notes, and communication with the insurer.
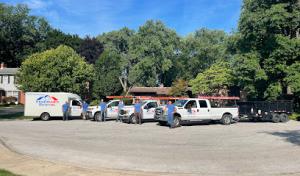
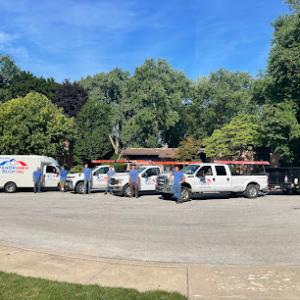
The signal mix in this region heavily favors storm-damage and emergency-repair work, followed by insurance-claims projects. When choosing a contractor, prioritize nearby firms with 24/7 response capability, ability to document damage for an insurer, and established relationships with adjusters. A prompt, professional inspection helps lock in a credible scope of work and reduces back-and-forth with the insurer. Ask for references from neighbors who recently navigated a hail-related claim, and verify the contractor's licenses, insurance, and any manufacturer certifications. A fast, coordinated response minimizes lingering leaks and reduces secondary damage to interior spaces.
Time is of the essence after a significant storm. Coordinate an inspection within 48 hours of the event if possible, especially when you've observed active leaks or ceiling staining. Have your notes, photos, and preferred contractor contact ready so the insurer-facing documentation can be assembled quickly. If an adjuster visit is scheduled, request a joint inspection whenever possible to ensure the scope reflects actual conditions and to deter under-scoped damage. Maintain ongoing communication with your roofer and insurer, confirming every step: assessment, scope, and anticipated project timeline for mitigation, replacement, and any interim temporary repairs.
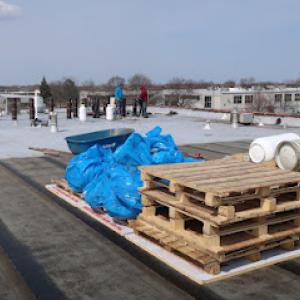
To limit further damage while the claim is being processed, cover exposed roof openings with sturdy, weatherproof tarps or boards, especially over any visibly compromised sections. Secure loose debris from the eaves and downspouts to prevent storm debris from causing interior leaks or creating hazards on the ground. Ensure access paths for the contractor are clear and safe, reducing delays caused by weather or yard obstacles. A proactive, organized approach reduces risk and accelerates the window from inspection to restoration.
Rogers Roofing
(219) 400-7079 www.rogersroofing.com
3023 169th Pl, Hammond, Indiana
4.8 from 1283 reviews
With a proud heritage dating back to 1968, Rogers Roofing has built a legacy of excellence as the trusted choice for roofing and exterior remodeling among Chicagoland and Northwest Indiana homeowners. Our long track record of successful projects from roof replacements to gutter installations and more, has earned us a sterling reputation and helped us become one of the most referred roofing contractors serving Wood Dale, IL, Hammond, IN, and the surrounding areas. We invite you to experience home improvement the way it should be, from the hands of specialists whose mission is to enhance your home, your comfort, and quality of life.

Sanchez Roofing & Construction
(219) 937-7727 sanchezroof.com
852 Hoffman St #1833, Hammond, Indiana
4.7 from 160 reviews
Sanchez Roofing & Construction in Hammond, IN, is your go-to source for reliable roofing services, gutter cleaning, and construction needs. With our skilled team and dedication to quality workmanship, we ensure your home is protected and looking its best. Trust us for all your roofing and construction projects!
Ivan's Roofing & Remodeling
(219) 308-7784 www.ivansroofingandremodeling.com
7325 Kennedy Ave, Hammond, Indiana
4.7 from 117 reviews
At Ivan's Roofing, we understand how stressful roof damage can be, especially when your home’s safety is at stake. That’s why our dedicated roofing repair specialists are here to provide swift, reliable solutions that bring you peace of mind. Whether it’s a minor issue or extensive damage, we’ve got you covered with expertise and care.
New Roof & Restoration
(219) 289-7972 www.newroofrestoration.com
6833 Grand Ave, Hammond, Indiana
4.8 from 56 reviews
New Roof & Restoration has been proudly serving Hammond, IN and surrounding areas, with top-notch roofing, gutter, siding, and construction services. We utilize high-quality materials and a team of skilled professionals to provide great results. Whether you are tackling a major home improvement project or require reliable roof maintenance, our commitment to exceptional craftsmanship and customer satisfaction will provide you with the peace of mind and impressive results you deserve.
Gluth Brothers Roofing
(219) 844-5536 gluthbrothersroofing.com
6701 Osborn Ave, Hammond, Indiana
4.6 from 72 reviews
Gluth Brothers Roofing Inc., in Hammond, Indiana is the area's leading roofing company serving Lake, Porter, and surrounding counties since 1886. We specialize in tear offs, repairs, gutters, shingles, windows, siding, and more. For all your roofing needs, contact Gluth Brothers Roofing Inc. in Hammond.
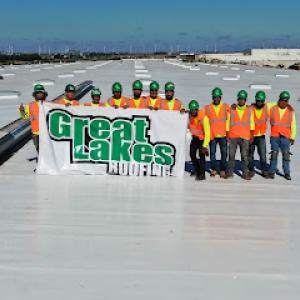
Great Lakes Roofing
(219) 695-6561 greatlakesroof.com
1334 Field St, Hammond, Indiana
4.3 from 18 reviews
Since 1989, the Chicago and Northwest Indiana commercial roofing company Great Lakes Roofing has been helping businesses protect their buildings from leaks, weather damage, and costly downtime. Property managers and building owners across the Midwest count on their team for dependable roofing work backed by decades of experience. Across Chicago, Northwest Indiana, and surrounding Midwest communities, clients get a skilled crew focused on the full lifespan of their commercial roofs. Their services cover roof repairs, full replacements, preventative maintenance, storm damage response, detailed inspections, and work on major roofing systems including TPO, EPDM, modified bitumen, and metal. Contact Great Lakes Roofing today.
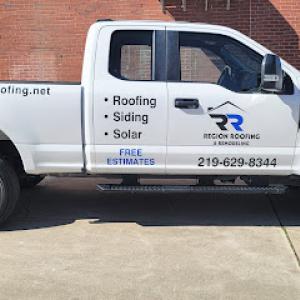
Region Roofing & Remodeling
(219) 629-8344 regionroofing.net
Serving
4.8 from 169 reviews
General contracting company dedicated to fighting for homeowners when they need us most. We advocate for families impacted by storm events, working tirelessly to ensure insurance claims are approved and homeowners receive the coverage they deserve. Specializing in roofing restoration, we're your complete home improvement partner offering storm damage restoration, insurance claim advocacy, water remediation, full remodels, and solar solutions. We don't just fix homes – we restore peace of mind.
Indiana Roofing Company
(219) 629-6405 www.indianaroofingcompany.com
7324 Calumet Ave, Hammond, Indiana
3.9 from 11 reviews
Indiana Roofing Company has been serving Commercial, Industrial and Residential customers throughout Northwest Indiana for over 25 years. We pride ourselves on attention to detail and an “above and beyond” approach to customer service. Over the years we have built a base of loyal roofing clients because of the respect we treat our clients with. Our skilled flat roofing professionals and proven methods are the best in Northwest Indiana. We are so confident in our work that we offer a satisfaction guarantee on all of our roofing projects.
Interstate Roofing
(219) 853-0041 interstateroof.com
2028 Sherman St, Hammond, Indiana
4.7 from 3 reviews
Welcome to Interstate Roofing! We are here to assist all residential and commercial clients with their roofing problems. We specialize in roof replacements and roof repairs. We also have minor siding services as well. Our services are reliable and at an affordable price for your convenience. With 44 years of experience, we are trained to make the best decision and perform any job to our customers' satisfaction. Call in today and schedule an appointment or stop by our office and speak with a representative about a roofing problem you may have encountered. We are more than happy to assist you!
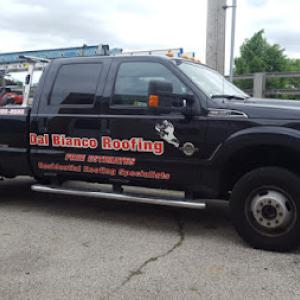
Dal Bianco Roofing
(219) 513-8239 www.dalbiancoroofing.com
Serving
4.9 from 80 reviews
Dal Bianco Roofing, based in Munster, IN, has been the top choice for roofing services in Lake, Cook, and Will counties since 1966. We specialize in residential roofing, storm damage repairs, and more. Reach out to Dal Bianco Roofing in Munster for all your roofing requirements.
Van Drunen Roofing
(219) 836-1788 vandrunenroofing.com
Serving
5.0 from 60 reviews
Located in the heart of Northwest Indiana, Van Drunen Roofing stands tall as the premier residential roofing contractor, providing superior craftsmanship and unparalleled customer service. We don't have commissioned salespeople. Owners, Jed and Sarah Van Drunen work with each customer from the beginning to final stages of each project. Our company has its own highly trained, full-time, year-round employees who utilize quality materials to ensure that every roof we install exudes both beauty and durability. With a passion for perfection, Van Drunen Roofing has become the trusted choice for homeowners seeking peace of mind and a stunning visual statement for their most valuable asset - their home.
Royal Storm Restoration
(219) 895-3447 royalstormrestorationinc.com
Serving
4.6 from 47 reviews
Royal Storm Restoration is a premier roofing contractor based in Munster, IN, serving Hammond, Dyer, Schererville, Hobart, Hebron, and surrounding areas. Founded in 2022, our team specializes in gutters, roofing, siding, and storm damage repair, with expertise in residential and commercial roofing and insurance claims. With a focus on wind damage and industrial roofing, we also offer services in siding, gutters, soffits and fascia, and flat roofs, and provide free estimates and inspections. Trust Royal Storm Restoration for top-quality work and reliable service in maintaining and improving your property.
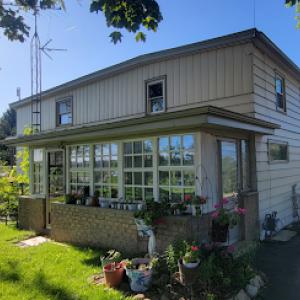
Cold, snowy winters in Hammond create recurring ice-dam risk at eaves, especially where attic heat loss melts snow that refreezes at roof edges. When melted material refreezes, it traps water behind the dam and can back up into soffits, fascia, and even attic spaces. In practical terms, ice dams can push through imperfect roof edges and leaks into ceilings long after the storm has passed. This isn't just an inconvenience; it can damage insulation, drywall, and interior finishes, and it often shows up as a slow drip that complicates quick storm-response claims.
Winter snow loads and edge ice can stress decking and roof perimeters, making edge details and ventilation especially important on reroof projects. Edge material, underlayment, and flashing bear the brunt of repeated freeze-thaw cycles. If soffit vents aren't providing adequate air flow, or if insulation isn't sealing the attic gap by gap, heat will work its way to the eaves, feeding the very dam formation that headaches your home after a thaw. Expect to see more careful attention to drip edges, shingles with proper overhangs, and properly sealed penetrations along the roof-to-wall junctions during replacement.
Replacement timing in Hammond is typically pushed to late spring through early fall because winter conditions complicate tear-off, drying, and inspection sequencing. Waiting for better weather reduces the risk of moisture getting trapped during the installation window and helps ensure that ventilation and insulation changes can be verified before a new roof faces another season of ice and snow. For homes that already show edge-dam symptoms, delaying a full edge-to-edge evaluation can prolong exposure to recurrent damage, especially if attic heat loss isn't addressed in tandem with the roof update.
After a thunderstorm or a heavy snow event, perform a cautious onsite check for visible ice buildup along eaves and around penetrations. If leaks appear, mending the interior path can be as critical as fixing the roof surface: address ceiling stains, slow drips, and ensure attic access is safe for any temporary mitigation. When planning a reroof, prioritize edge and ventilation details-proper overhangs, sealed eave gaps, and balanced attic intake and exhaust-to reduce the chance of new ice dams forming in future winters. In high-risk periods, a temporary, well-ventilated cover over vulnerable edge areas can provide a buffer while longer-term repairs are coordinated.
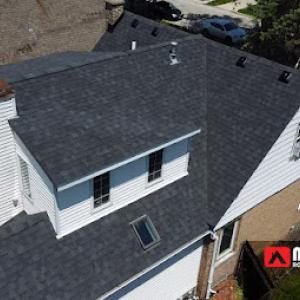
In Hammond, the roof you choose needs to stand up to Lake Michigan winter ice, rapid summer thunderstorms, and the steady drumbeat of freeze-thaw cycles. Asphalt shingles are the dominant practical choice, but hot humid summers and winter freeze-thaw cycles accelerate granule loss, sealant aging, and flashing wear. The result is more frequent sealant touch-ups, faster wear on flashing details around chimneys and vents, and a willingness to plan for more proactive maintenance after heavy storms. When you look at shingle options, prioritize impact resistance ratings and longer-term granule retention, and be ready to inspect the ridge and valley areas after hail or frequent wind events.
Asphalt shingles are the easiest to install and most familiar to local crews, with a broad dealer network and straightforward warranties. In Hammond, attention to underlayment and proper attic ventilation pays dividends because moisture and heat fluctuations can magnify aging of the sealant and the shingle edges. If your roof has steep pitches or multiple vents, be prepared for careful flashing around penetrations to minimize leaks after thunderstorms. Regular inspection after severe weather is a practical habit-look for curling edges, lifted tabs, and granule wash-down along gutters and downspouts. For many homeowners, this remains the most reliable balance of performance and cost, provided you stay on top of rapid storm response and routine maintenance.
Metal roofing is present in the market and can perform well against snow shedding and storm exposure, but non-standard systems may draw closer plan review attention during permitting. In roofs with existing framing or older attic spaces, ensure the structure can handle the roof's weight distribution and potential snow load. Metal panels can shed water quickly and resist impact better than some shingles, but fastening patterns and flashing around vents, skylights, and chimneys matter a lot in the long term. If a metal roof is chosen, a careful installation plan that coordinates with proper ventilation and drainage will help prevent condensation and ice dam-related concerns inside the attic.
Clay tile, concrete tile, wood shakes, and synthetic products exist in the local material mix, but Hammond's winter loading and older framing conditions can make structural suitability a real project variable. Clay and concrete tiles bring durability, but their weight demands a thorough framing assessment and sometimes reinforcing members. Wood shakes offer a traditional look and strong resistance to some weather events, yet they require diligent maintenance to prevent rot and insect exposure in harsh winters. Synthetics can blend weight savings with some resilience, but ensure compatibility with existing rafters and the local climate impact. In all cases, a careful evaluation of roof orientation, existing insulation, and attic ventilation will guide whether a given system will perform well for years to come.
In a reroof project in Hammond, a permit issued by the City of Hammond Building Department is required for a full roof replacement. This authority governs when and how the work can begin, and it anchors the timeline for your project. The permit ensures that the chosen roofing method meets local code, including venting, underlayment, and flashing details that protect against winter ice and summer thunderstorms.
The local process typically includes mid-progress and final inspections. During the mid-progress check, inspectors look at decking condition, ventilation adequacy, flashing around chimneys and intersections, and the installation of underlayment. This checkpoint helps catch issues early, such as inadequate attic venting or gaps in the underlayment that could trap moisture. The final inspection focuses on completing all components to code, confirming proper nailing patterns, alignment of shingles or other coverings, and the integrity of valleys and ridge lines. If any part of the job doesn't conform, the inspector will require corrections before the permit can be closed out.
Plan review may be triggered for non-standard materials or roof configurations, which matters more in Hammond when homeowners move beyond basic shingle replacements. If proposing metal, clay tile, or wood shingles, or if there's a unique roof shape, a plan review may be necessary. This review assesses compatibility with existing structure, attic space, and eave details. For multi-angled hips, dormers, or unusual vent truncations, expect additional scrutiny. The goal is to prevent layering errors that could compromise weatherproofing amid Lake Michigan's freeze-thaw cycles and the heavy summer storms.
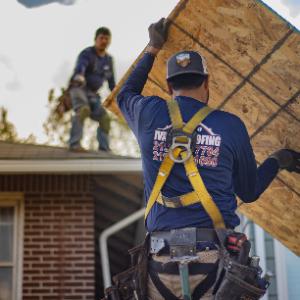
Begin by securing the permit through the Building Department, with a clear project scope and material list. Have the contractor submit deck condition notes, ventilation plan, flashing details, and underlayment type as part of the permit package. Schedule the mid-progress inspection at a logical milestone-after decking and underlayment but before final shingle installation-to align with inspector availability and weather windows. Prepare for the final inspection by ensuring all penetrations are flashed and sealed, ventilation baffles are in place, and valley and ridge lines are properly sealed and fastened. Keep a detailed record of material specifications and any deviations from standard shingle replacement, as this can expedite any questions raised during plan review or inspections. By aligning with the city's permit and inspection cadence, homeowners can minimize delays and ensure the reroof remains resilient through Hammond's seasonal extremes.
In Hammond, roofing costs are best understood per 100 square feet (a "square"). Asphalt shingles sit at the low end of the range, roughly 350 to 750 USD per square. Metal roofing sits higher, typically 700 to 1,100 USD per square. Clay tile can run from 1,200 up to 2,500 USD per square, while concrete tile sits around 900 to 1,600 USD per square. Wood shingles and shakes usually land between 800 and 1,500 USD per square, and synthetic or composite shingles fall in the 600 to 1,100 USD per square band. A general rule in this market: asphalt is the most economical choice, and tile systems are the most expensive, with the rest spread in between.
Storms drive spikes in demand after hail and thunderstorm events, and that tightening shows up in scheduling and labor pricing. When a Northwest Indiana thunderstorm season hits, you may see crews booked weeks out. That pressure can push labor costs higher and compress the time window for material delivery. If you're facing a fast-leak scenario after a hail event, it helps to secure estimates quickly and confirm crew availability as part of your plan, understanding that price swings can accompany peak storm windows.
Older homes in the area often require more than a straight roof replacement. Expect price bumps if decking requires replacement, or if ventilation components need correction to meet attic performance. Chimney flashing work adds another line item, especially on homes with multiple chimney details or complex flashing transitions. Some inspections identify upgrade needs tied to the structure or roof system, and those upgrades can shift your project from a clean, per-square replacement into a higher-cost, multi-component reroof. In Hammond, planning for these possible add-ons up front helps avoid sticker-shock once crews open the roof.
Get a clear picture of your project costs upfront - no commitment required.

Ivan's Roofing & Remodeling
(219) 308-7784 www.ivansroofingandremodeling.com
7325 Kennedy Ave, Hammond, Indiana
4.7 from 117 reviews
Hammond sits in a regular hail-and-wind claim environment, so insurance considerations often influence whether a homeowner repairs, patches, or fully replaces a roof after a thunderstorm. When a storm rolls through Lake Michigan-adjacent neighborhoods, the path from impact to payout can hinge on how quickly damage is documented and how it's presented to the carrier. Quick, obvious leaks are easier to justify for replacement decisions, while cosmetic or minor damage can get pushed toward patches or denial if not framed correctly.
Carriers in this region may tighten endorsements for certain roof types or replacement scenarios, making policy review part of the roofing decision before work starts. Metal, clay, or concrete tile, in particular, can trigger different coverage rules than asphalt or synthetic shingles. If a hail event affects more than one section of the roof, the adjustment process may ride on how the roof is described in the claim-so the language in the policy and the scope of work matter just as much as the damage itself.
Because claim support often depends on documentation quality, Hammond homeowners benefit from dated photos, maintenance records, and written contractor scopes immediately after storms. Photos that show the progression from initial impact through to temporary fixes and final replacement can prevent a later dispute over what was or wasn't damaged. A clear, itemized scope from a trusted contractor helps insurers see exactly what work is needed, reducing the risk of post-storm delays or partial denials.
Keep a log of storm dates, note wind speeds when possible, and capture both exterior and interior signs of water intrusion. Open lines of communication with the insurer early, and ensure every repair step is documented with receipts and contractor notes. If a patch is chosen as a temporary measure, document its nature and why a full replacement becomes the prudent, long-term solution.
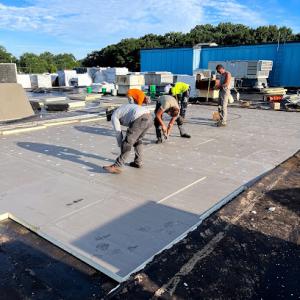
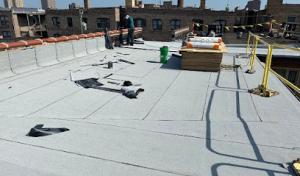
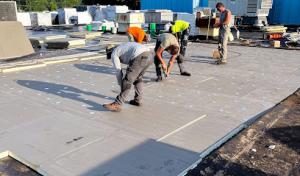
Flat and low-slope roofing appears often enough in the Hammond contractor market to merit separate attention, especially for drainage, membrane transitions, and leak tracing. Start by inspecting for narrowing drainage paths around scuppers, edge flashing, and any perimeter parapet. In winter, ice buildup can push against transitions and lift edges; during spring storms, pooled water can sit on a failed membrane and trigger leaks. If you notice standing water that doesn't drain within 48 hours after a rain, map the high spots and plan for a targeted reflash or patch. When tracing leaks, work from the interior toward the exterior, following the path of water intrusion to pinpoint a compromised seam or drain connection. For repairs, use high-quality, compatible membrane caulk and ensure any penetrations-vents, skylight curbs, and HVAC boots-have continuous, fully seated seals. In older homes with built-up systems, expect potential cap sheet or torch-down vulnerabilities where membranes meet wall interfaces or transitions to steeper sections.
Skylight-related repair demand is active locally, which matters in a city with freeze-thaw movement and storm-driven flashing failures. Inspect skylight curb joints for hairline cracks, especially after heavy thunderstorms or rapid temperature swings. Flashing should extend several inches under shingles or membrane, with clear sealant beads visible and intact. If the skylight leaks, verify interior flashing around the curb and the seal between the skylight and curb. Replace deteriorated flashing boot layers first, then reseal the glazing mite to limit moisture ingress. In cold months, remove any ice buildup around skylight flanges and ensure drainage channels remain clear to prevent ice dams from forming along the skylight perimeter.
Chimney work is a common contractor signal in Hammond, indicating that masonry-to-roof flashing intersections are a frequent source of repair scope on older homes. Start by inspecting the base and step flashing where the brick meets the roof deck; look for cracked mortar joints, loose bricks, and corroded metal. Replace or reseal any warped or lifted metal flashing, and ensure the chimney cricket or saddle directs water away from the wall-flashing intersection. Repointing mortar around the chimney may be required to restore a solid seal. If you see rust stains, blown shingles at the chimney line, or recurring damp spots along interior ceilings near the chimney, treat as a priority leak path and address both flashing and masonry integrity in the same visit.
Find specialists in TPO, EPDM, and built-up flat roofing systems for residential and commercial properties.
Sanchez Roofing & Construction
(219) 937-7727 sanchezroof.com
852 Hoffman St #1833, Hammond, Indiana
4.7 from 160 reviews
Gluth Brothers Roofing
(219) 844-5536 gluthbrothersroofing.com
6701 Osborn Ave, Hammond, Indiana
4.6 from 72 reviews