Last updated: Apr 19, 2026
Burbank sits in the Chicago metro hail and wind corridor, so spring and fall storm events are a primary trigger for roof inspections and sudden replacement decisions. The pace of weather highs and freeze-thaw cycles here drives rapid shingle wear, granule loss, and exposed flashing. When a storm hits, the window to catch damage before it compounds is tight: wind-driven hail can puncture and bruise surface shingles, while subfreezing nights after a hail event can magnify micro-cracks into leaks. Homeowners in this market commonly face a pattern of urgent post-storm assessments followed by swift decision-making, especially when a garage or front roof line is already showing age. If a storm rolls through and a few days later rain leaks into the attic, that is a strong signal to mobilize a careful damage review and plan for a documented claim rather than waiting for a routine replacement cycle.
The local contractor market strongly skews toward storm damage, emergency repair, and insurance-claim work, indicating that homeowners here commonly need help documenting weather losses rather than only planning elective replacements. In practice, that means you will encounter many firms who are skilled at emergency tarping, temporary leak control, and rapid contractor scope development for claims. The risk is that some outfits push to lock in a quick fix rather than a thorough, claim-ready repair plan. Seek out contractors with proven track records in hail/wail damage assessments and a clear method for documenting preexisting conditions alongside storm-induced conditions. A reliable team will walk you through what changes are necessary to support an insurance claim, not just what looks easiest to complete.
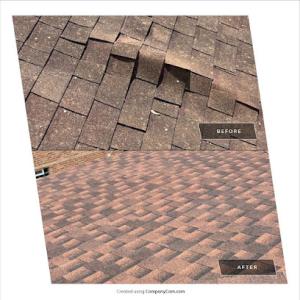
Because claim activity is high across the Chicago area, carriers commonly expect detailed photo sets, contractor scope notes, and adjuster updates before approving roof-related work. A simple before-and-after photo album often isn't enough; carriers look for a coherent narrative that ties the damage to a weather event, paired with an itemized scope showing what was damaged, what was replaced, and why. Expect to provide photos of exterior roof slopes, gutters, vents, and attic signs of water intrusion, plus close-ups of granule loss, curling shingles, and dented flashing. A well-organized diary of the storm date, the time of observed leaks, and any temporary repairs helps reduce back-and-forth with the insurer and speeds up approvals. In short, the more structured the documentation, the smoother the claim process.
Start with a dated, timestamped record the moment a noticeable issue appears. Take wide-angle roof shots to establish the overall condition, then zoom in on suspect areas like shingle edges, hail marks, and flashing around chimneys or vents. Create a simple, consistent file naming system so an adjuster can follow the damage trail without guesswork. For each damaged area, attach a brief contractor note describing observed impact, recommended repair or replacement scope, and why that scope aligns with weather-related damage rather than preexisting wear. Maintain a running log of every contact with the contractor and insurer, including names, dates, and promised response times. If a temporary repair is necessary to stop a leak, photograph the progress and retreat plan, then secure written consent from the insurer before committing to permanent work. The aim is to present a clear, auditable claim file that supports the need for replacement or repair based on storm-driven damage rather than routine aging.
In Chicago-area storms, a fast leak response matters more than cosmetic fixes. If water is actively entering the living space, prioritize tarping or boarding to protect interior areas, then coordinate with a licensed roofer to establish a temporary water-shield plan. This buys time for your claim pack to be assembled and reviewed without allowing secondary damage to escalate. The right approach combines immediate mitigation with disciplined documentation and a claim-focused scope that aligns with weather-driven damage. When the storm season intensifies, treat every heavy rain event as a potential trigger for an insurance-driven decision, and keep your documentation ready to present within the insurer's required timelines.
JV Roofing & Construction Solution LLC | Roof repair | Roof replacement | Commercial roofing | Gutters |
(773) 824-5280 jvroofingandconstruction.com
8026 McVicker Ave, Burbank, Illinois
5.0 from 25 reviews
At JV Roofing, we provide top-rated residential and commercial roofing services in the southwest suburbs of Chicago, including Orland Park, Joliet, Bolingbrook, Oak Lawn, and surrounding areas. With over 10 years of experience, our licensed roofers specialize in roof repairs, roof replacements, inspections, and storm damage restoration. We use only high-quality materials to ensure long-lasting results and customer satisfaction. Whether you need asphalt shingles, flat roofing, or emergency roof repair, JV Roofing is the trusted local roofing company you can count on. Call today for a free estimate and experience the difference with reliable, affordable roofing in your neighborhood!
Illinois Affordable Roofing & Tuckpointing
(312) 890-7969 www.illinoisaffordableroof.com
8010 Oak Park Ave, Burbank, Illinois
4.7 from 52 reviews
We service Commercial, Residential, and Industrial, we are family owned and operated since 1989. We specialize in Flat roofs, shingle roofs, EPDM Rubber roofs & TPO Rubber roofs, Tear off and overlay, facial and soffit repairs, aluminum roof coating, chimney, skylight repairs, siding, gutter repair, new gutters, metal roofs, roof tarping, concrete repairs, Masonry tuckpointing, and waterproof split face Brick. We are offering 24 Hour emergency repair service, we are licensed, bonded and insured & all materials come with a warranty.
Eddie's Roofing & Exteriors
(708) 774-5628 www.eddiesexteriors.net
7803 S Lockwood Ave, Burbank, Illinois
4.9 from 19 reviews
Eddie's Exteriors is a roofing contractor in Burbank, IL that services Cook County, Chicago, Burbank and nearby areas. Our roofing company offers residential roofing, commercial roofing, roof repair, siding installation, gutter installation and many more. If you want to experience your most trusted Chicago roofing company's excellent services, call us now for free estimate!

Prusak Roofing
(708) 422-2624 www.prusakroofing.com
Serving
4.8 from 189 reviews
For over 55 years, Prusak Roofing has been the trusted choice for home and business owners in Chicagoland. As a family-owned and operated roofing company, we prioritize exceptional customer service. Our commitment to perfection is evident in every job we undertake. Whether it's asphalt shingles, EPDM roofs, or new metal roofing, we deliver outstanding results. Our comprehensive range of services includes roof leak and water damage repair, shingle replacement, flashing and gutter repair, emergency tarping, and temporary repairs, as well as ventilation system repair and maintenance. Trust Prusak Roofing for all your roofing needs and experience the difference of our dedicated service and expertise.
Feliciano Roofing
(708) 529-7048 www.felicianoroofing.com
Serving
4.5 from 23 reviews
Feliciano Roofing has proudly served Evergreen Park, IL, and surrounding communities since 1980. As a trusted local roofing contractor, we specialize in residential and commercial roofing, siding, gutters, and insurance claim assistance. Our experienced team is dedicated to delivering superior craftsmanship, dependable service, and long-lasting results. Whether you need a roof repair, full replacement, or exterior upgrades, we’re here to protect your home or business. Contact us today for a free estimate and discover the Feliciano Roofing difference!

Storm Restoration Services
(312) 312-6785 www.roofrescuer.com
Serving
4.6 from 31 reviews
Storm Restoration Services Weather events such is Hails Storms, Wind Storms or Snow Storms can potentially damage our properties. Our Company is designed to prevent more damage to our roofs or siding. Let us do a free Inspection on your Home and let you know if we can help having the insurance pay you for full replacement on your house. we also work outside of insurance. is no job to small or too big to repair please call us 312.312.6785 or visit us
Style Exteriors by Corley
(708) 292-0410 styleexteriorsbc.com
Serving
4.9 from 165 reviews
Style Exteriors By Corley is your trusted partner for residential roofing and exterior home solutions in the Chicagoland area. We specialize in all-things roofing, siding, and gutters. From roofing installations and repairs to exterior siding and gutter replacements, we know how to enhance the beauty and functionality of any property. Our team is dedicated to delivering exceptional craftsmanship and customer service, ensuring your home receives the attention it deserves. Contact us today to learn how we can help.
Odin’s Construction Group Roofing Siding Gutters
(708) 261-1634 www.odinsconstruction.com
Serving
5.0 from 170 reviews
We are a family owned company, Specializing in roofing siding and gutters. Chicagoland suburbs and entire Illinois we are dedicated to delivering results that stand the test of time. We work with all insurance companies also when you have sustained storm damage. Unmatched Attention to Detail: From the initial comprehensive inspection to the final nail and clean-up, every step of our process is executed with meticulous precision. We believe true quality is found in the details others overlook.Superior Materials Only: We partner with industry-leading manufacturers GAF, Owens Corning, CertainTeed, James Hardie) to source and install the highest-grade material. We have a proven track record of satisfied customers just look at our reviews.
Roofing caguana
(773) 630-4622 www.caguanaroofing.com
Serving
5.0 from 57 reviews
Roofing contractor
New Generation Exteriors
(630) 256-0369 www.newgenerationexteriorscorp.com
Serving
4.8 from 23 reviews
NEW GENERATION EXTERIORS CORP. provides quality and Affordable Prices service for Chicago-land. As specialists in COMMERCIAL & RESIDENTIAL roofing projects, we are highly qualified in the installation of all major roofing systems. Choosing the right contractor to install your new Roof, Gutters, Siding, Soffit, Fascia & Repairs is just as important as selecting quality materials. NEW GENERATION EXTERIORS CORP Keeps Your Family Safe with a New Roof for Your Home Don't let a damaged or a leaking roof spoil the beautiful interiors of your home. Turn to the professionals at NEW GENERATION EXTERIORS CORP. of Chicagoland as Roofing services & Inspections. *******FREE Estimates****
Montes Roofing
(708) 790-2507 montesroofingsystems.com
Serving
4.7 from 38 reviews
Montes Roofing is a trusted, family-owned and operated roofing company proudly serving the Chicagoland area since 1972. With over 50 years of experience, we specialize in delivering top-quality roofing solutions tailored to both residential and commercial clients. Our licensed and insured team provides expert roof repair, installation, maintenance, and restoration services. Known for our free, no-obligation estimates and commitment to excellence, Montes Roofing is dedicated to ensuring customer satisfaction on every project.
Heritage Contractors
(773) 887-0268 www.heritagecontractors.net
Serving
5.0 from 112 reviews
Heritage Contractors is a family owned business, servicing the Chicagoland area. We specialize in roofing, gutter, siding, and window replacement. Heritage Contractors incorporated 20+ years ago and at the time focused on building new homes and additions as well as interior remodeling. After a decade, our focus shifted to exterior construction when we saw a need for homeowners to work with an honest and fair company to help maintain the exterior of their homes. Our team strives to make the process of maintaining your home stress free and affordable. Please feel free to ask us for references of previous clients we have worked with. Take a look at our website which includes Google reviews to see what past clients have stated about our service
Burbank roofs endure repeated winter freeze-thaw cycling that other parts of the Chicago area just don't see as consistently. Each cycle-water seeping into small gaps, then freezing and expanding-acts like a tiny wedge over time, stressing shingles, flashings, and the roof deck after moisture intrusion. The result is micro-cracks that can grow into leaks if left unchecked. In practice, you'll notice that areas around penetrations, corners of the roof, and along the eaves tend to show wear first, especially after a season with several freeze-thaw events. The moisture-retaining nature of the snow and ice means these spots stay damp longer, which accelerates aging of the shingle granules and any caulk or sealant used around vents and chimneys. After a cold snap, check for a dull surface or small, dark specks where granules have shed.
Snow load and ice retention in winter are followed by hot, humid summers, creating large seasonal expansion-and-contraction swings that shorten service life for underlayment and exposed roofing components. You may notice anticipation of this in the form of loose flashing around chimneys or vents, where repeated heating and cooling pull at the seams. In Burbank, it's common for underlayment to begin showing signs of drying or cracking sooner than expected if the roof has had prolonged moisture exposure. Watch for hairline cracks along the hips and ridges, and pay attention to any granule loss on asphalt shingles after winter or early spring follow-up storms. The combination of moisture and heat stress also makes synthetic underlayments and sealants more susceptible to UV degradation, so stored, aged products may fail sooner than you'd anticipate. Where gutters are full or partially blocked, ice dams can form and push water behind the drip edge, promoting wood deck moisture buildup and rot if not caught promptly.
Replacement timing in this market is often driven by avoiding deep-winter installation conditions and by scheduling before summer heat accelerates aging on already brittle roofs. If there's a known cycle of heavy winter weather ahead, plan a mid-to-late spring or early fall project window to minimize live-roof exposure during peak cold or heat. Before replacing, perform a targeted inspection focusing on flashings, valleys, and the deck around penetrations; identify any moisture intrusion paths that could compromise the new roofing system. For any signs of active leaks, address those promptly to prevent water intrusion into the attic and along ceiling planes. Keep a weather-aware calendar, so the roof project can ride out the coldest part of winter and avoid the most punishing heat of summer during installation. This pragmatic timing helps ensure the new roof develops a longer, more resilient service life under Chicago-area winter and summer cycles.
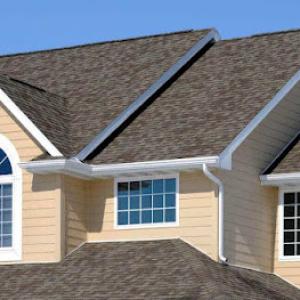
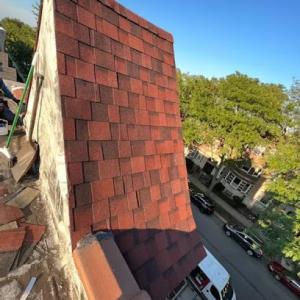
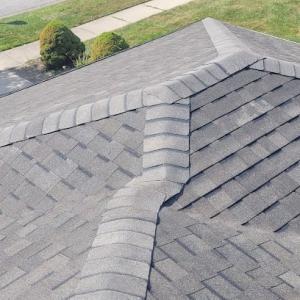
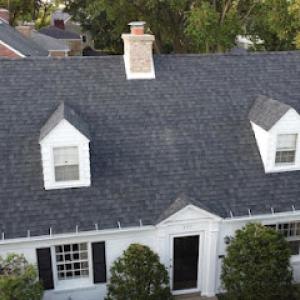
Asphalt shingles remain the dominant practical choice for the typical modest-pitch homes that populate the dense postwar neighborhoods in this market. They pair well with the common roof decks found on many Chicago-area homes, and they are supported by a large, reachable network of local crews who can perform rapid re-roofs after hail events or wind damage. If your goal is a reliable, cost-effective upgrade that can be completed quickly by a crew familiar with local weather patterns, asphalt shingles are the most straightforward path. In Burbank, the practical mix leans toward durability under frequent freeze-thaw cycles and a need for prompt leak response, so choose a premium or mid-range shingle with good wind resistance and a robust nailing pattern to maximize performance through the region's seasonal stresses. Shingle systems also facilitate easier inspection and maintenance after hail impacts, since damaged areas are more readily identified and addressed without specialized equipment.
Metal roofing is present in the market and offers strong resistance to hail and wind, with a long service life when properly installed. For older homes with lighter decks or marginal attic ventilation, metal can still be a viable upgrade, but structural suitability should be confirmed before replacement proceeds. In storms, metal's load distribution and rapid shedding of hailballs can reduce interior leakage, yet heavier systems demand careful assessment of roof framing, gutters, and snow/ice loads common to this climate. If metal is considered, prioritize a standing-seam design or a concealed-fastener option installed by a contractor experienced with the region's freeze-thaw cycles. Expect a careful assessment of attic space, overhead clearance, and peripheral components to ensure that the system integrates smoothly with existing ventilation and drainage details.
Clay tile and concrete tile bring a distinctive appearance and a long-term performance profile, but they are distinctly heavier than asphalt or most synthetic options. Heavier roofing must be matched to an appropriately reinforced structure, and many older Chicago-area homes require structural verification before a tile replacement proceeds. If clay or concrete is pursued, work with a contractor who can document structural compatibility, specify underlayment choices tuned to local moisture and temperature swings, and design a layout that minimizes potential points of water intrusion around chimneys, vents, and skylights. Tile systems perform well against wind-driven impacts and can offer excellent longevity when installed with proper fasteners and sealants, but the upfront weight and potential retrofit work should be weighed against the existing framing and deck condition.
Wood shingles or shakes deliver classic curb appeal, but they demand careful attention to maintenance and fire considerations. In storm-heavy markets, wood systems require regular treatment and inspection for splitting or cupping, particularly after harsh winters and hail exposure. If choosing wood, select a durable species and a fire-retardant or treated finish, and plan for routine refinements after severe weather events. Ensure that the underlayment and ventilation are compatible with wood-based coverings to reduce moisture-related issues.
Synthetic or composite shingles blend resilience with lower maintenance in heavy-use neighborhoods. They can mimic the look of wood or slate while offering improved impact resistance and often lighter weight than real tiles. This option complements houses with complex rooflines and multiple penetrations where a lighter yet durable solution helps simplify installation and leak mitigation. When evaluating synthetics, verify warranty coverage that addresses hail impact and freeze-thaw cycling, and ensure the installation crew follows best practices for sealing joints and flashing around vents, skylights, and chimneys.
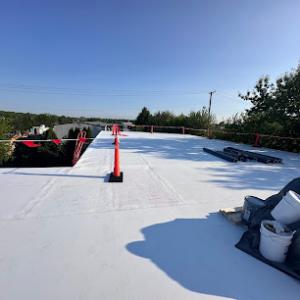
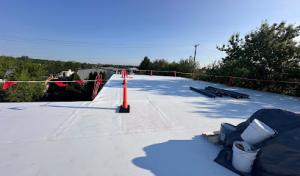
Flat-roof specialization is meaningfully active in the Burbank market, reflecting the presence of low-slope sections on garages, additions, porches, and some commercial buildings common in inner-ring Chicago suburbs. Those low pitches tolerate a stiff Chicago winter, but they also demand thoughtful drainage and reliable seam protection. In this climate, snow, freezing cycles, and mid-winter thawing create standing water that can stress aging coatings and flashing. The goal is to keep water moving toward the drains and away from vulnerable edges and transitions.
On a low-slope roof, drainage performance is the defining factor for long-term leaks. Start with the shape and condition of the roof deck and the primary drains or scuppers. Make sure there are no sharp sags or areas where water pools longer than 48 hours after a storm. Clean and clear the roof surface of debris before the next freeze, and verify that any snow guards or parapet edges are in good repair so that meltwater isn't trapped near the edges. If water sits visibly for more than a day, plan a quick inspection of the internal roof edges, since those spots often reveal the first signs of aging or improper flashing.
Most low-slope leak complaints here center on seams and flashing transitions. Inspect all joints around transitions from roof to parapet walls, around penetrations, and at any skylight or equipment curb. Pay particular attention to the sealants and any mechanically fastened flashing that may have opened up after winter. If you see hairline cracks, splitting sealant, or corroded metal, plan targeted maintenance rather than a full replacement. For garages and additions with metal edge flashing, ensure that the metal is not crimped or bent, which can trap water and promote corrosion.
Given freeze-thaw cycles, coatings on flat roofs can degrade faster than on steep-slope systems. Coatings should be evaluated for uniform film thickness and adhesion. Peeling, blistering, or spots where the coating has separated from the substrate indicate an underlying moisture issue or aging that may require preparation work before re-coating. For sustained performance, coordinate coating schedules with the heaviest rainfall periods and after major winter thaw events.
Establish a regular walk-around after significant storms, focusing on seams, penetrations, and edge details. Keep a simple leak-response plan: identify the nearest interior access point, place a tarp if you detect active intrusion, and photograph the affected area for insurance and contractor reference. In a neighborhood where quick leak response matters, having a few trusted flat-roof specialists lined up can save days of waiting after a hail event or a heavy melt. Remember that timely attention to ponding and torn seals often prevents larger repairs later.
Find specialists in TPO, EPDM, and built-up flat roofing systems for residential and commercial properties.
JV Roofing & Construction Solution LLC | Roof repair | Roof replacement | Commercial roofing | Gutters |
(773) 824-5280 jvroofingandconstruction.com
8026 McVicker Ave, Burbank, Illinois
5.0 from 25 reviews
Illinois Affordable Roofing & Tuckpointing
(312) 890-7969 www.illinoisaffordableroof.com
8010 Oak Park Ave, Burbank, Illinois
4.7 from 52 reviews
Eddie's Roofing & Exteriors
(708) 774-5628 www.eddiesexteriors.net
7803 S Lockwood Ave, Burbank, Illinois
4.9 from 19 reviews
In this market, the cost you see on paper reflects Chicago-area labor rates, seasonal demand spikes after hail and wind events, and the reality that crews are often stretched during peak storm-repair periods. Asphalt shingles are usually the most available and quickest to mobilize, which helps keep project timelines tight even when weather adds pressure. If you're eyeing premium options such as tile or metal, expect pricing to drift upward not just for materials but for the sourcing and scheduling friction that comes with those crews.
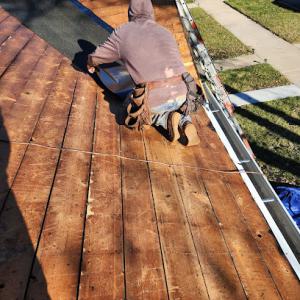
Burbank housing stock tends toward straightforward residential re-roofs, but several factors can push the price toward the high end of the ranges. A tear-off of one or more old layers adds disposal costs and labor; low-slope sections demand careful flashing and drainage work; detached garages often require separate pitches or roof lines; and decking repairs can emerge if above-average hail damage or freeze-thaw cycles have affected the structure. These elements are common in the area and should be factored into a prepared, line-by-line estimate rather than a single "ballpark" figure.
Material costs in this market vary by how common the system is locally. Asphalt shingles are generally easier to source and staff for, keeping them closer to the lower end of the price range. Specialty tile, cedar, or premium metal installations face tighter material supply and scheduling challenges, which can push costs higher and slow the turnaround. When ordering, verify current material availability and lead times, especially after a big hail season when demand spikes.
Plan for a two-stage approach: initial quick-repair or tear-off, followed by full replacement if damage assessment warrants it. Have a clear understanding of whether your project will need a complete tear-off or if a re-roof over existing layers is feasible, as this decision materially shifts both labor and disposal costs. In practice, prepare for the high end of the typical ranges if the house includes detached garages, multiple roof lines, or decking work, and confirm exact square-footage-based pricing with your contractor to avoid surprises.
Get a clear picture of your project costs upfront - no commitment required.
JV Roofing & Construction Solution LLC | Roof repair | Roof replacement | Commercial roofing | Gutters |
(773) 824-5280 jvroofingandconstruction.com
8026 McVicker Ave, Burbank, Illinois
5.0 from 25 reviews
Eddie's Roofing & Exteriors
(708) 774-5628 www.eddiesexteriors.net
7803 S Lockwood Ave, Burbank, Illinois
4.9 from 19 reviews
A full re-roof in Burbank typically requires a building permit issued through the local building department rather than being handled as permit-free maintenance. That means your project will be tied to specific code requirements, inspection checkpoints, and a defined review process. Treat the permit as part of the project plan, not an afterthought, because skipping steps can trigger delays, fines, or a stop-work order that complicates the timeline after a storm event. The emphasis here is accountability and ensuring the work aligns with local standards designed to protect homeowners in the dense postwar housing landscape.
Burbank inspections commonly occur at underlayment and final completion stages, so homeowners should expect scheduling checkpoints instead of a single end-of-job signoff. The underlayment visit confirms proper moisture barriers and alignment with the roof deck, while the final inspection verifies that flashing, vent connections, and roof coverings meet code. If a contractor pushes toward a quick, one-and-done finish, you may face rework or a second round of inspections. Build in time for these staged checks when you plan for storms season and post-storm repair work.
Permit turnaround in Burbank can vary with seasonal backlog and whether plan review or updated local code compliance questions are triggered by the scope of work. High-claim storm periods can extend processing times, especially if the plan requires wind load or drainage clarifications. Coordinate closely with the contractor to secure provisional scheduling windows that anticipate inspection dates, material deliveries, and potential weather-driven delays. Being proactive about documentation helps move the process along and reduces the risk of hold-ups that can affect leak responsiveness after hail or wind events.
Burbank sits inside a Chicago metro insurance environment with frequent hail and wind claims, making roof losses more heavily documented and sometimes more closely scrutinized than in lower-claim regions. That means every dent, granule loss, and shingle edge can be part of a larger file that insurers review with heightened attention. The consequence is a tighter clock on how quickly work moves from assessment to payment, and a higher tendency for adjusters to request precise, corroborated details rather than general impressions.
Homeowners should expect insurers to ask for date-of-loss details, elevation photos, and contractor-prepared scope information after major storms. Elevation views help verify what the roof looked like before and after the event, and the date of loss anchors the claim in the storm season when claims spike. A detailed scope from the contractor isn't vanity-it's a way to show exactly what was damaged, what was replaced, and why. In fast-moving, high-claim markets, delays or mismatches between a contractor's scope and the insurer's expectations can stall progress.
Prompt, organized documentation matters. Take time-stamped photos from multiple angles, including attic photos showing any interior leaks or ceiling staining. Keep a simple, consistent record of all communications with the insurer and the contractor, and preserve any temporary protections you install. In severe regional weather, claim processing can tighten, so having a clear paper trail and orderly records reduces the risk of gaps that slow reimbursement or compel additional rounds of inspection.
Prompt temporary protection minimizes further damage and supports a smoother claim. Secure tarps or plywood to cover exposed areas quickly, and share those action photos with the insurer and the contractor. Clear, timely communication helps prevent misunderstandings and keeps the project on a steadier pace despite the pressure of frequent hail and wind events.
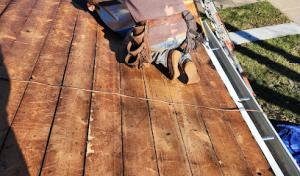
Skylight service is notably active in the local contractor market, suggesting that flashing and curb details around roof penetrations are a recurring homeowner concern locally. Start with a cautious exterior check after a wind-driven rain: look where the skylight meets the curb, the fasteners, and the surrounding shingles. If water appears inside, check the interior ceiling directly under the skylight for staining and any visible condensation on the skylight glass during a dry afternoon. The curb flashing, not just the skylight glazing, bears the storm load; inspect seams, fasteners, and caulk lines. In older Chicago-area stock, skylight installations can ride on aging seals and warped curbs, so plan for resealing or curtain flashing upgrades where the curb sits on an uneven roof deck.
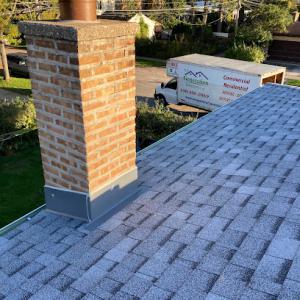
Chimney-related work also appears regularly among local contractors, which fits the older Chicago-area housing stock where masonry penetrations often intersect aging roof systems. Start by examining the chimney base where flashing should overlap the chimney mortar and the roofing material. Look for rusted or loose counterflashing, mortar cracks along the saddle, and gaps where shingle tabs tuck under the chimney flashing. In winter weather, freeze-thaw stresses can widen those gaps. If you notice staining or dampness along the chimney course after a rain, prioritize resealing or reworking the flashing to maintain a continuous seal from the chimney to the roof field.
In Burbank, leak tracing often needs to distinguish between field shingle damage and failures at penetrations after wind-driven rain or winter weather. Begin by inspecting two-to-three shingles adjacent to the skylight or chimney for lifted edges or missing tabs, then trace moisture paths inward. If the leak aligns with a flashing seam or a visible gap at the flashing, focus repair there while checking surrounding shingles for wind uplift damage. Document the sequence of the storm and any prior repairs to inform the next fix and future seasonal maintenance.
Find contractors experienced in skylight installation, flashing, and leak repairs to bring natural light into your home.
JV Roofing & Construction Solution LLC | Roof repair | Roof replacement | Commercial roofing | Gutters |
(773) 824-5280 jvroofingandconstruction.com
8026 McVicker Ave, Burbank, Illinois
5.0 from 25 reviews
Illinois Affordable Roofing & Tuckpointing
(312) 890-7969 www.illinoisaffordableroof.com
8010 Oak Park Ave, Burbank, Illinois
4.7 from 52 reviews
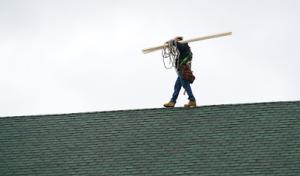
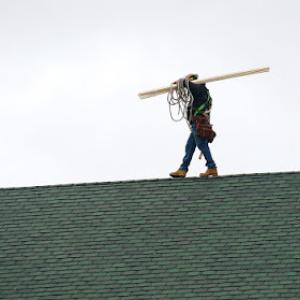
When a hail event hits, you'll notice a line of roofers able to respond within hours versus days. In this market, stabilization of leaks and a clean site matter as much as the finished roof. Look for contractors who describe a rapid emergency visit, tarp-and-tait stabilization, and a crew that can seal and remove debris quickly so you can start drying out indoor spaces without delay.
Re-roofing dominates the local service mix, so many crews are built around full replacement projects. That strength can be a benefit if your roof is near or past its life. It also means you'll want to confirm they have the equipment, crew size, and project management practices to handle a full roof install without lingering on site. If a contractor leans heavily on patchwork, question how they handle long-term warranty and weather resistance.
Established, family-owned, residential-focused firms are well represented, offering a contrast to storm-driven production crews. You'll likely find longer-term relationships, predictable scheduling, and clearer communication from a familiar team. Seek references from neighbors with similar homes and a track record of dependable cleanup, punctual arrivals, and polite, responsible job sites.
During the decision process, verify the crew's liability coverage, the logistics for debris containment, and the plan for protecting landscaping and driveways. Ask for a written timeline that covers stabilization, tear-off if needed, and a final clean-up sweep. In this fast-response market, a contractor's ability to coordinate with you and your insurer often proves as crucial as the roof itself.