Last updated: Apr 19, 2026
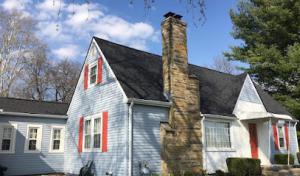
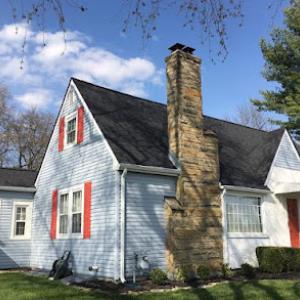
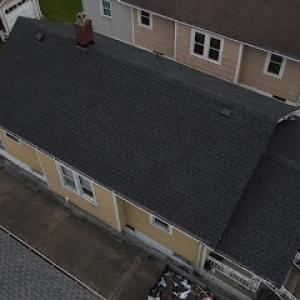
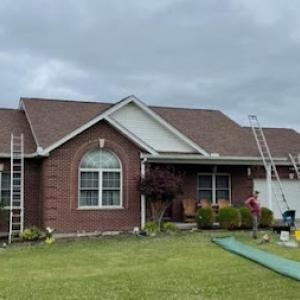
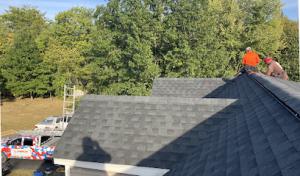
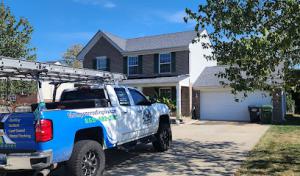
Spring wind and hail can hit fast and leave unseen damage behind. In this corner of northern Kentucky, a sudden wind gust can peel shingles, lift edges, or crack underlayment without an obvious telltale sign from the ground. The result is a small leak that worsens overnight. Your first move after a storm should be to inspect the most exposed areas: ridge caps, edges, valleys, and around vents or chimneys. If you see lifted shingle tabs, granule loss, or darkened stains on ceilings, treat it as urgent. A delayed response invites interior water damage, ruined insulation, and escalating repair bills. In this market, quick triage is not a luxury-it's a shelf-life decision for your roof's future.
Given the local pattern of spring lines and hail, you should act within hours, not days. If a tree limb or debris is resting on the roof, remove it only if it's safe to do so; otherwise, leave it in place and document it. Photograph from multiple angles, including the ground and from the attic if you can safely access it. Capture close-ups of any lifted shingles, cracked seals, or granule loss, and do not crop the images-the detail matters for claims. Temporary tarping may be needed to stop ongoing water intrusion, but it should be done by a contractor or trusted professional who can apply a sturdy, properly sealed tarp and prevent wind-driven flap that can cause further damage. The key is to maintain a clear chain of evidence for what happened and when, so the insurance process doesn't stall on missing visuals.
Insurance providers in Kentucky expect photo evidence, contractor estimates, and an adjuster review for wind or hail losses. Prepare a concise damage narrative that matches your photos: when the storm occurred, what areas were affected, and how the damage progressed over the following days. Gather any previous roof-related paperwork you may have-quotes, prior repairs, and maintenance notes-so you can show a continuous history. Keep a dated log of when you first noticed leaks, when tarping was installed, and when a contractor first inspected the roof. If you have a temporary repair, such as a tarp or boarding, photograph it in place and again after it's secured, to prove the step-by-step response and urgency.
In this climate, adjusters often review claims with a careful eye on exterior and interior impact. When you meet the adjuster, walk them through the roof's vulnerable areas: edges, valleys, penetrations, and any prior weak spots. Have a written list of questions ready about coverage for tarping, debris removal, and the scope of repair versus replacement. Choose a contractor who understands the claim process and can provide detailed, itemized estimates that align with the photos and narrative you've prepared. Avoid allowing temporary repairs to be the final solution; insist on a documented plan for permanent work once the claim is reviewed. Time is of the essence: swift, accurate documentation accelerates approvals and reduces the risk of claim denial due to missing information.
Secure your interior spaces by placing buckets under potential leaks, protect valuables from water exposure, and keep a log of all communications with insurers and contractors. If you suspect widespread damage after a wind event, don't delay the initial inspection. A fast, documented response increases your chances of a smooth claim and a reliable, lasting repair path. In this market, homeowners benefit from a local pro who can navigate the claim path, coordinate tarp work, and deliver a thorough, photos-backed estimate that aligns with the adjuster's review.
Find local contractors experienced in assessing and restoring roofs after hail, wind, and severe weather events.
Alpha Home Pros
(859) 251-8893 www.alphahomepros.com
Union, KY
4.9 from 23 reviews
One of the most common concerns for homeowners and business owners is whether they can find a roof contractor they can truly trust. At Alpha Home Pros, we understand the importance of reliable roofing services. Since 2019, we have been providing top-notch roofing and exterior solutions for residential and commercial properties in Florence, KY and the surrounding area. Our team, backed by over 25 years of experience, is committed to delivering quality workmanship and unparalleled customer care. As a licensed and insured roofing contractor, we take pride in giving our customers peace of mind from start to finish. Our expertise spans a range of services tailored to meet your unique needs
Seymour Roofing
Serving
5.0 from 5 reviews
SEYMOUR ROOFING, a veteran-owned and family-operated business founded in 2024, offers residential roofing services based out of Florence, Kentucky. Their expertise covers both roof repair and replacement, and they assist homeowners in navigating the insurance claim process for roof repairs.
NGM Exterior House Mechanics
(859) 359-0640 www.ngmexteriors.com
Serving
4.9 from 55 reviews
NGM Exterior House Mechanics is locally owned and specializes in Roofing, Siding, Gutter, Pressure Washing & Chimney repairs in Kenton County, KY, Campbell County, KY, Boone County, KY, Covington, KY, Independence, KY, Florence, KY, Burlington, KY, Union, KY, and surrounding Northern KY area. Call us at (859) 359-0640 to discuss your roofing or exterior home repair needs. Our company is also a Certified Master Craftsman, Preferred Roofing Applicator and Certified Siding, Soffit and Trim Applicators by VSI ( Vinyl Siding Institution). We are a BBB accredited business. We are committed to providing the highest quality products, SUPERIOR WORKMANSHIP, and professional services to all our customers.
Thompson Roofing
(859) 462-0181 thompsonroofingnky.com
Serving
5.0 from 146 reviews
Searching for the best roofing contractors in Northern Kentucky? Look no further because, at Thompson Roofing, we are committed to delivering top-notch services tailored to meet all your roofing needs in Campbell County, Kenton County, and Boone County in KY. Our team of experts is dedicated to ensuring your satisfaction with every project. Whether you require residential roof installation service, efficient roof repair service in your area, attic venting installation, or gutter installation, we've got you covered. We guarantee solutions for your needs. Choose us as we are one of the best roofing companies in Florence, KY and surrounding areas. Call us today for a detailed consultation and receive a free quote for your roofing projec...
Northern KY Roofing & Siding.
(859) 414-2705 www.northern-ky-roofing.com
Serving
4.9 from 294 reviews
Established in 1998, NKY Roofing & Siding Contractor offers residential and commercial roofing and siding services throughout Northern Kentucky. Their team of experienced professionals specializes in repairs, replacements, and installations using high-quality materials. NKY Roofing & Siding Contractor is committed to providing superior craftsmanship and customer satisfaction, ensuring your property is protected and looks its best. We only want the absolute best for you and your family, so please don't hesitate to call us to get a free quote!
Better Homes Exteriors
(859) 206-2615 www.betterhomesexteriors.com
Serving
5.0 from 5 reviews
Better Homes Exteriors is a Northern Kentucky/Cincinnati roofing, siding, gutters, and window company. Better Homes Exteriors is locally owned and fully insured. Call for roofing repairs, roof replacement, siding, gutters, or window services.
Reyes Remodeling
(859) 777-4057 www.reyesremodelingnky.com
Serving
5.0 from 9 reviews
Reyes Remodeling is a family-owned business with more than twenty years of experience in the roofing industry. We are focused on providing the highest quality remodeling/roofing services, and we treat every project as if it were our own.
Fortress Solutions
(859) 328-6338 www.gowithfortress.com
Serving
5.0 from 172 reviews
Fortress Solutions is a trusted roofing contractor based in Elsmere, KY, specializing in roof repairs, replacements, gutters, siding, and storm damage restoration. We proudly serve Elsmere, Erlanger, Florence, Independence, Covington, Cincinnati, Edgewood, Fort Mitchell, Fort Wright, Crestview Hills, Villa Hills, Newport, Fort Thomas, Taylor Mill, Norwood, Blue Ash, Reading, Finneytown, Union, and Burlington. With 20+ years of experience and easy financing options, we deliver expert service with integrity. Contact us today for a free estimate and 100% no-leak guarantee!
American Home Tech
(859) 869-4101 www.americanhometech.com
Serving
4.7 from 892 reviews
At American Home Tech, we are the best full-service contractor for your commercial and residential roofing, siding, windows, gutters, decks, and interior remodeling projects, including doors, kitchen remodels, bath remodels, and painting, throughout Florence, KY, Northern Kentucky, and Cincinnati, OH. We provide expert services at any budget and specialize in insurance claim replacements. We proudly offer free estimates and inspections on your project with a no-obligation guarantee. American Home Tech strives to stand behind our motto of “trust is just one thing we build well” with every project we complete.
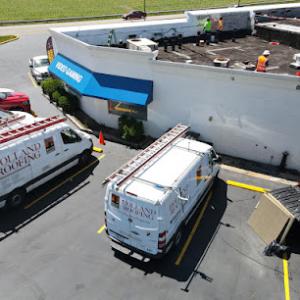
Holland Roofing
(859) 525-0887 www.hollandroofing.com
Serving
4.3 from 18 reviews
Holland Roofing serving Cincinnati, OH is fully-staffed to provide you with prompt, reliable service for all facets of the commercial roofing and industrial roofing markets. Regardless of the specific commercial roofing demands of your Cincinnati facility, the experts at Holland Roofing can provide effective, worry-free solutions. New Constructions, roof repair and maintenance services in Cincinnati, Ohio and Northern Kentucky The commercial roofers at Holland also provide emergency roofing repair to our Cincinnati customers to ensure that any roofing issues you experienced are addressed before they significantly disrupt your business.
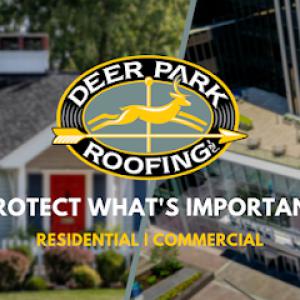
Deer Park Roofing
(859) 681-8809 www.deerparkroofing.com
Serving
4.7 from 102 reviews
Deer Park Roofing, an award-winning roofing company, proudly serves all of Northern Kentucky, including Walton, Florence, Independence, and other major areas. We offer a comprehensive range of residential and commercial roofing services, such as roof repair, roof replacements, flat roofs, box gutters, and more. With industry-leading training, expert attention to detail, and responsive service, Deer Park Roofing is your trusted partner in protecting what’s important. Visit our showroom, open Monday through Friday from 8 AM to 5 PM. Our phone lines are available 24/7
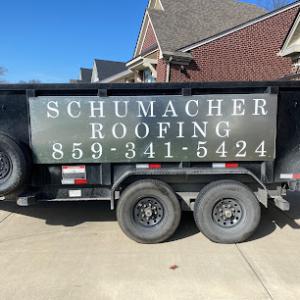
Schumacher Roofing
(859) 341-5424 www.schumacher-roofing.com
Serving
5.0 from 677 reviews
Schumacher Roofing is your local roofing contractor serving Northern Kentucky and Cincinnati. Our family owned roofing company works on residential roofs installing shingle roofs and asphalt roofs. We also work on roofs with wind, storm, and hail damage and will work with your insurance. We do roof repairs and roof replacements to make sure the roof above you is saving you money on heating and cooling costs. Call us today for your estimate today!
Spring in this area brings wind-driven hail and sudden downpours that test sealant and underlayment. Replacement timing hinges on whether shingles can seal properly after a storm and whether the underlying underlayment stayed dry during the worst events. If a wind event leaves exposed roof areas, plan a rapid inspection and triage approach: identify damaged zones, cover with temporary tarps if needed, and get a roofing crew scheduled before rains resume. In this climate, crews often face backlog after back-to-back storms, so coordination with an insurer-approved contractor who can document hail patterns and wind zones becomes part of a fast, credible claim. Expect some days to be spent drying out overhangs and attic spaces before tearing off, since persistent moisture slows membrane adhesion and can complicate flashing repairs. After a storm, a careful interior check for condensation or staining in the attic should be done promptly, because small leaks can escalate quickly when high winds re-opened gaps meet driving rain.
Winter ice dams and freezing temperatures can slow tear-offs and affect material performance. Snow load and wet conditions push crews to schedule careful, staged work rather than aggressive, full-roof replacements in single runs. Cold snaps often follow wet weather, turning minor drainage issues into interior leak events if not addressed promptly. When a roof is being replaced in cold weather, ensure the crew uses appropriate temporary insulation and heat methods to prevent rapid shingle setting that could trap moisture. The timing takeaway is to resist rushing through tear-offs when temperatures flirt with single digits or damp air lingers; the combination of moisture and cold can compromise asphalt seals and top-edge metal flashing. If a winter delay interrupts a project, keep a clear plan for the next stretch of dry days and verify that venting and ridge wrap are ready to go so the project can resume without reopening sealed areas.
Summer heat and humidity in northern Kentucky can impact worker productivity and installation pace. Heat waves may slow access to upper elevations and require more frequent breaks to prevent heat-related issues, extending the calendar for a complete replacement. Humidity affects adhesive cure times and the flexibility of underlayment, so scheduling should align with forecast low humidity periods when possible. Autumn wind and debris create a narrower but often desirable scheduling window before winter, so aim to finish critical sealant work, flashing, and attic ventilation checks prior to the first frost.
Autumn wind can move debris across roofs and overdue maintenance backlogs into tight slots. This period often offers a compressed but workable window to complete roofing before winter storms begin to roll in again. Plan ahead by staging materials for efficient seating, trimming nearby trees to reduce limb damage, and confirming that gutters and downspouts are clear so drainage won't force a rework after initial installation. In this season, careful inspection for hail-driven granule loss and shingle lifting from earlier storms helps determine whether a full replacement is necessary or a targeted repair will suffice.
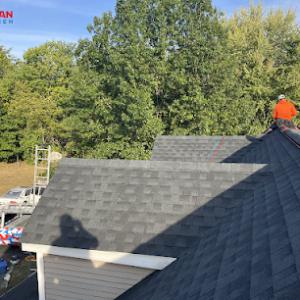
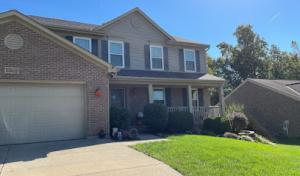
Asphalt shingles dominate the Union market, matching the area's large stock of suburban single-family homes and the prevalence of insurance-funded re-roofing after wind and hail events. Their popularity isn't accidental: they're familiar to most local crews, responsive to the seasonal swings from humid summers to freezing winters, and relatively straightforward to replace after spring storms. When you're evaluating replacement options, consider the long track record of asphalt in our climate-good wind resistance with a properly sealed ridge and valley configuration, solid esthetics for typical Union architecture, and compatibility with standard attic ventilation to manage moisture and heat buildup during those hot Kentucky summers.
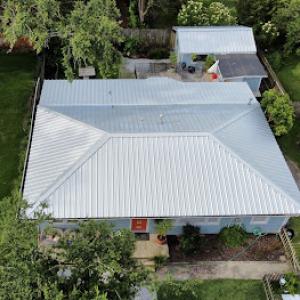
Metal roofing has a meaningful local presence, making it a realistic upgrade path for homeowners prioritizing wind resistance, longevity, and lower maintenance over lower upfront cost. In practice, metal shines when you've experienced high-wind events or frequent hail, because it resists denting and tends to shed rain and snow efficiently. A metal installation can also improve attic temperature dynamics if combined with well-planned ventilation. If you're weighing metal, think about the roof pitch and the existing decking, since some older structures here may require strengthening to support the weight and attachment method. For many households, metal is less about saving money on day one and more about decades of dependable performance and reduced ongoing maintenance.
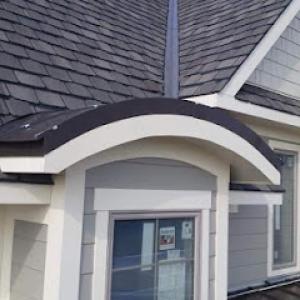
Tile and wood products exist in the market but are far less common than asphalt, so homeowners considering clay, concrete, wood, or synthetic products need to confirm installer familiarity and structural suitability rather than assume every local roofer handles them routinely. Clay and concrete tiles bring a distinctive look and strong durability in dry climates, but in Union they must be assessed for weight on existing framing and for how well the decking and flashing handle freezes and thaws. Wood shingles or shakes offer character but require careful maintenance and are more sensitive to moisture and insects; in our climate that means more attention to attic ventilation and proper sealing at transitions. If you're drawn to these options, verify that the contractor has completed projects of similar scale and that the roof structure and underlayment are up to the task.
Regardless of material, the right local installer understands the seasonal demand after wind and hail events and the insurance documentation those claims often require. Look for contractors who can document hail impact, provide a clear post-storm inspection protocol, and align with your insurer's expectations for evidence of damage and scope of repairs. Because Union's housing stock is varied, from traditional ranches to two-story homes with complex ridge lines, ensure the team can handle detail work around skylights, chimneys, and vents without compromising ventilation. A strong finishing job depends on precise sealing at edges, proper shingle or panel alignment, and a ventilation plan that accommodates both humid summers and cold snaps.
The most popular roofing material in the US. Find pros who install, repair, and replace asphalt shingles.


Typical local pricing runs about $350 to $700 per square for asphalt shingles, $700 to $1100 for metal, $1000 to $1800 for clay tile, $900 to $1500 for concrete tile, $450 to $900 for wood shingles or shakes, and $500 to $900 for synthetic or composite shingles. In practical terms, a homeowner replacing a standard asphalt roof in Union will likely see pricing clustered around the lower end of that range if the project is straightforward and the contractor's crew is familiar with the weather cycle and jobsite setup after spring storms. If the project includes features like skylights, multiple roof planes, or a low-slope section, expect adjustments that push costs toward the upper end of the range.
After severe spring weather, scheduling can become tight and pricing pressure can rise, especially for fast-turnaround re-roofing and emergency dry-in work. When wind and hail hit, crews are in demand, and the ability to seal a roof quickly to keep water out matters. Costs can shift not just with material selection but with how cleanly the jobsite is managed, how well the contractor handles insurance documentation, and how ventilation corrections are integrated into the replacement. If a roof includes architectural elements like vented soffits, ridge vents, or oversized attic spaces, or if the existing deck requires replacement, numbers move accordingly. In Union, this dynamic is amplified by the seasonal swing between humid summers and freezing winters, which makes proper ventilation and shingle sealing more critical.
Spring storms can cluster prompting rapid dry-in needs, sometimes with temporary tarps or quick-cover solutions to minimize interior damage while waiting for a full replacement. Fast response not only limits interior moisture risk but also strengthens the insurance timeline by reducing the chance of disputed leaks. Expect some contractors to offer expedited slots, but be mindful that higher-priority storm work may leave longer waits for standard roofing projects. If a claim is involved, having a contractor who can coordinate documentation, photos, and a clear scope of work helps keep the process aligned with the insurer's expectations.
Ventilation corrections required at replacement, and the decision to upgrade ventilation components, can add to the bill but improve long-term comfort and roof life. The presence of skylights or complex roof geometry increases labor, waste handling, and flashing complexity, all of which influence total pricing. Additionally, the cleanup standard matters: a thorough debris haul-off and site restoration can affect the final invoice, especially when storm debris or insurance-related cleanup is involved.
Get a clear picture of your project costs upfront - no commitment required.
Northern KY Roofing & Siding.
(859) 414-2705 www.northern-ky-roofing.com
Serving
4.9 from 294 reviews
A full roof replacement in Union typically requires a building permit filed with the local building department serving this Boone County jurisdiction. The permit is not just a formality; it anchors the project in a documented process that helps protect your home during storm season and ensures proper ventilation and installation practices are followed. If a contractor suggests skipping this step, pause and verify the permit status before work begins. The permitting authority will want to see project details, including the proposed underlayment, venting plan, and material selection, to prevent downstream issues when storms roll in again.
Inspections are generally scheduled at rough-in and final stages to verify installation details, ventilation, and approved materials rather than treating roofing as a no-review trade. At rough-in, expect checks on eave flashing, ridge vent strategy, attic ventilation, and proper nailing patterns. The final inspection confirms that the completed roof matches the approved plan and that ventilation remains adequate for Kentucky's humid summers and freezing winters. Delays can occur if the contractor switches materials mid-stream or misses required documentation, so keep a close eye on the inspection appointment windows.
Homeowners should expect jurisdiction-specific review timelines and documentation requirements, so permit handling can affect project start dates in a fast-growing community like Union. Budgeting for potential back-and-forth with the building department is prudent, especially after a spring storm when damage-driven demand spikes. Your contractor should supply stamped diagrams, material lists, and any wind or uplift calculations the department requests. If a competing contractor promises a faster path by bypassing reviews, remember that missing steps can halt work at a critical moment and complicate insurance coordination after a wind or hail event.
Hail and wind drive most roof damage in this area, and that tends to be the focus after spring storms. In Union's market, adjusters often home in on visible hail pocks, creased shingles, lifted tabs, and wind-driven gaps where flashing or edges failed. This reality shapes how quickly a claim gets filed, how the insurer scopes the work, and how fast replacement can begin. Understanding that pattern helps you prepare for the process rather than react to it.
Immediately after a hail or wind event, take thorough photos of every affected area: shingle creases, lifted tabs, metal impacts, flashing damage, attic moisture spots, and any interior leaks. Note the date and time from weather alerts or a trusted camera timestamp. Keep a simple record of where damage is located on the roof and inside the attic, so the adjuster can follow your trail. If you can, sketch a quick map of targeted sections and make note of any temporary leaks or staining as soon as they appear.
A common part of Union roof claims is an adjuster request for an independent estimate. Have a current, clearly labeled set of photos and a concise damage summary ready. If you've had temporary repairs, keep those receipts and document what was done to mitigate further damage. Providing a straightforward damage narrative plus visuals helps an independent estimator align with the adjuster's assessment, reducing back-and-forth.
The Kentucky market tends to stay stable, but severe storm periods can temporarily affect coverage availability or underwriting approaches with some carriers. That can influence replacement timing and the amount of out-of-pocket cost before a policy condition shifts. Maintain steady communication with the insurer and coordinate with the chosen contractor to prevent delays in stabilization and scheduling.
Start the season with a pre-storm check: look for loose fasteners, worn granules, and vulnerable vent openings. After a storm, compare the adjuster's scope to visible roof and interior damage, and address discrepancies quickly. If a disagreement arises about the scope or cost, pursue a second opinion promptly to keep the process moving.
In Union, repeated wind exposure and spring storm cycles make lifted asphalt tabs, missing shingles, and flashing separation more relevant than purely age-based cosmetic wear. If a shingle edge peels back during a gust, that small gap becomes a highway for water intrusion and freeze-thaw damage. You should inspect after each strong wind event and look for loose tabs along rake edges and at corners. Addressing these promptly can prevent leaks that quietly travel along underlayment to attic spaces.
The flashing around vents, edges, and transitions is a common fault when storms push through quickly and contractors focus on quick coverage rather than full system integrity. Where a chimney, skylight, or vent flashing has been disturbed, moisture can work its way into the deck and into the attic. Check the overlap between flashing and shingles, and pay attention to any bubbling or lifted metal at metal-to-roof interfaces. If you see sealant deterioration or loose step-flashing, plan a careful reseal or flashing reconfiguration rather than a temporary patch.
Freeze-thaw conditions and ice-dam risk in winter increase the importance of attic ventilation and edge details, especially where prior re-roofing focused on speed after storms rather than full system correction. Poor ventilation can trap humidity that weakens fastened shingles and soaks through the underlayment during warm spells. Ensure soffit vents are clear, attic baffles are in place, and attic insulation is sufficient to keep cold roof planes from melting and refreezing at the eave.
The local contractor market includes notable activity around skylights and chimneys, signaling that penetrations and transition flashing are recurring trouble spots for homeowners in this area. Inspect around skylights for lagging sealant, cracked glazing beads, and degraded backer rod; around chimneys, verify step-flashing continuity and caulk integrity. If you notice cracking or pooled water near these points, plan targeted repairs rather than broad surface fixes.
Find contractors experienced in skylight installation, flashing, and leak repairs to bring natural light into your home.

Although this market is dominated by pitched-roof homes, flat-roof specialists mean many houses include low-slope porch, garage, or rear-section roofs. These areas respond differently to spring storms, and drainage or membrane details can be the weak link when a main roof is replaced. In this climate, heavy spring rains push water toward transitions, so the low-slope portions often reveal leaks sooner than the main field.
These low-slope areas are more vulnerable during heavy spring rains because drainage and membrane details matter more than shingle appearance. Improper slope, clogged scuppers, or worn flashing around skylights and edge details can allow water to track under masonry or trim. When a storm hits, you may notice damp rafters or staining near the door to the addition, not just on the main roof area.
Homeowners replacing the main roof should verify whether attached low-slope areas are being addressed under the same scope. Since they often leak first during storm seasons, ask the contractor to review the entire envelope at transitions, flashing, and edge penetrations. Have the scope include membrane details, fastening patterns, and adequate drainage for the porch, garage, and rear sections.
Before the project begins, walk the attic or riser space to identify any seepage paths from the low-slope zones. Check for inconsistent sealant at parapet edges, failed or aged membrane, and any delamination around vents or skylines. During project planning, insist on a cohesive approach that treats the low-slope areas as integral to the roof system, not as afterthought add-ons. This helps ensure spring rains won't overwhelm the envelope in Union.
Find specialists in TPO, EPDM, and built-up flat roofing systems for residential and commercial properties.
In this market, crews rush to start, finish, and move on to the next job after wind or hail. The fastest work can leave gaps in debris control and weather protection, which translates to more leaks during the next storm. Look for a firm that slows down enough to safeguard your home: tarping, interior protection, and a clear plan for debris containment. A reliable crew will document their workflow and leave a tidy site, not just a shiny new roof.
Union's contractor market emphasizes quick response and cleanup. When you call for an estimate or after a claim, ask how the crew handles storm flow from arrival to punch list. A solid answer includes staged work, daily site protection, a written cleanup plan, and a predictable schedule. Request a point person for coordination who can explain access controls, material storage, and what happens if weather delays push the project.
Because many local jobs are insurance-related, require a roofer who can produce photo documentation, scope notes, and inspection-ready paperwork. Confirm that the contractor can generate before-and-after photos, a detailed scope narrative, and a daily progress log with timestamps. The paperwork should align with what local adjusters expect and be usable for your permit and inspection process when needed. If the firm hesitates or cannot provide this, continue shopping.
Signals such as long-established presence, manufacturer certification, licensing, and insured status matter more after storm surges. Fast-moving crews may appear to offer bargain timelines, but solid credentials protect you from liability and ensure proper material handling. Check that the roofer carries current liability and workers' compensation coverage and can verify manufacturer certifications for the products you choose. Ask for references from recent storm jobs and contact those homeowners about the workflow and cleanup.
Start with a request for written scope notes and a guaranteed work timeline, plus a sample site-protection plan. Compare not just the bottom line, but how each firm plans to protect the interior, manage waste, and communicate daily progress. In a market where responsive service is critical, the right contractor is the one who can prove a repeatable, safety-focused storm workflow and solid documentation ready for insurance and inspections.