Last updated: Apr 19, 2026
Belmont's cold winters and repeated freeze-thaw cycles put roof edges, eaves, and flashing under recurring stress. In neighborhoods with steep sloped designs and traditional materials, snow tends to linger near the eaves and refreeze at the edge, creating ice dams that push meltwater under shingles and behind flashing. This pattern is especially dangerous for older homes whose roofing, gutters, and soffits have seen years of weathering. When ice dams form, the resulting leaks often appear first at eaves or around skylights and chimneys, then creep inward through ceilings and wall cavities. The stress from repeated cycles is not cosmetic-it accelerates rot, mold, and structural damage if left unchecked.
On older Belmont roofs, the telltale signs are stubborn. Darkened staining along interior ceilings below the attic, paint peeling near soffits, and damp rafters after a thaw signal where ice dams are pushing water back into the eaves. You may notice icicles that grow unusually large or eddies of melting water that flow down brickwork or siding in a way that seems to pool. If the attic hatch feels cold or you can see frost patterns on the underside of the roof sheathing during the winter, it's a red flag that ventilation and insulation are not keeping pace with the freezer-thaw cycle. These symptoms warrant immediate professional assessment before moisture creep becomes hidden structural damage.
If you're seeing ice dams forming, safety first: clear snow from the roof with caution and never stand directly under a working edge. Use a roof rake with an extendable handle from ground level to remove the snow atop the eaves and overhangs, reducing the weight and the potential for refreezing at the edge. Safely clear gutters to improve meltwater drainage, but avoid forcing ice with metal tools that can scratch or pierce flashing. Inside, check ceilings and walls for new stains after heavy thaws, and keep attic vents open and vents free of insulation blocks. If you have access to the attic, ensure there is adequate insulation between the living space and the attic. A well-sealed attic reduces the heat that escapes to the roof deck and feeds ice dam formation.
Given Belmont's older stock and steep slopes, targeted attention to edge details is crucial. Have copper or slate edges checked for loose or corroded flashing; even small gaps can become major leaks during freeze-thaw cycles. For sloped roofs with visible snow retention, inspect the condition of soffits and drip edges annually, and consider upgrading edge flashing to withstand cold-season stress. In colder years, a proactive plan to address insulation deficiencies in the attic helps curb heat loss that fuels dam formation. Ventilation should strike a balance between preventing condensation and avoiding overcooling near the roof deck. For homes with slate or copper, scheduling regular inspections in late winter and early spring helps detect hidden damage early, before it spreads to the interior.
Most full replacements are timed for late spring through early fall in Belmont to reduce moisture exposure and weather delays after winter damage is identified. If a roof reveals extensive freeze-thaw injury, readying a replacement during these windows minimizes the risk of further water intrusion and expedites installation when conditions are favorable. Work closely with a local roofer who understands historic materials and flashing configurations unique to Belmont homes to ensure the new roof integrates with existing chimneys, dormers, and cornices while delivering durable edge protection against future ice dam cycles.
Belmont's dominant material mix includes asphalt shingles but also a notable presence of slate, copper roofing, clay tile, concrete tile, and synthetic/composite shingles. When addressing ice dams and freeze-thaw damage, the practical path is to recognize how these materials behave differently from standard shingles and how that shapes repair and replacement decisions.
Older homes with slate or copper details require repair planning that preserves adjacent flashing, valleys, and architectural character rather than treating the roof like a standard shingle tear-off. Slate units are brittle and may crack during removal if adjacent slates aren't carefully protected; copper flashing around hips, chimneys, and transitions can oxidize and become brittle with age. Clay and concrete tiles are heavy and can transfer more load to underlying decks; when cracked or displaced, they demand precise staging to prevent deck damage and ensure proper reseating. Synthetic/composite shingles can offer easier handling, but in Belmont they often sit atop existing underlay that may not have aged well. The result is a replacement process that prioritizes preserving existing joints, flashings, and mating surfaces while upgrading the roof assembly.
Belmont's winter season brings freeze-thaw cycles that drive ice dam formation, especially on sloped roofs with older underlay or compromised attic ventilation. Begin with a thorough attic inspection to verify insulation and ventilation alignment, since cold attic spaces intensify dam formation. Pay particular attention to valleys and along roof-to-wall transitions where slate, copper, or tile meet the structure. If flashing shows signs of movement or corrosion, plan for careful resynthesis rather than a blunt spoiler of the entire roof. In many cases, addressing condensation and ventilation first can reduce subsequent ice-dam stress on delicate edge details.
Tile and slate systems in Belmont can raise replacement complexity because heavier materials and brittle units demand careful tear-off, staging, and deck evaluation. When slate or clay tile is involved, a staged removal approach limits risk to surrounding units and preserves the integrity of the roof deck. The deck should be inspected for rot or framing loosening, especially under hips and valleys where stress concentrates. Copper and lead-heavy flashing demands meticulous handling; damaged sections should be replaced with matching profile to avoid abrupt transitions that foster leaks. In some cases, upgrading to a compatible underlayment and refreshed venting will extend the roof's life without forcing a full tear-off of these high-character surfaces.
Maintenance in this climate is about proactive care. Keep gutters clear of shingle offcuts and ice melt debris, and verify that snow guards or small snow stops are appropriately placed on slate or tile roofs to prevent heavy blockages. For copper, inspect for verdigris and early corrosion at joints, and service the nearby flashing to maintain a watertight seam. Regular inspections after winter thaws help catch subtle shifts in tile or slate alignment before they develop into more significant leaks, preserving the roof's historic detail while protecting interior spaces.
Find contractors who specialize in clay and concrete tile roofs, known for their durability and curb appeal.

Storm Works Roofing & Restoration
(844) 786-7696 www.stormworksroofing.com
295 Belmont St, Belmont, Massachusetts
4.8 from 143 reviews


In this market, the number you see on price tags reflects both the material chosen and the realities of a New England roof on aging stock. For asphalt shingles, Belmont-area costs run from about 420 to 800 USD per square. Clay tile sits higher, typically 900 to 1700 USD per square, with concrete tile near 850 to 1500. Synthetic or composite shingles bridge the gap at roughly 420 to 750 per square. If slate is in play, expect 1200 to 2800 USD per square, and copper roofing climbs substantially, from 2000 to 5000 USD per square. These ranges assume standard substitution without major structural changes and give a practical baseline for planning.
Older homes in established neighborhoods often require careful tear-off work around chimneys, flashing transitions, and specialty materials that aren't found on newer houses. In Belmont, that means extra labor time to protect historic details and to integrate flashing with existing masonry or copper accents. When a tear-off is needed, the old layer must be removed before new material goes on, and that step adds both labor and waste disposal costs. Repairing or reworking a chimney crown, step flashing, or transitions to a copper box gutter can add a noticeable premium on top of the base material price.
Seasonal demand can tilt pricing and availability, especially after harsh winter conditions and during spring storms. Scheduling late spring through early fall tends to see more competition for crews, which can push timelines and pricing upward if the window fills before you commit. Planning ahead to secure a contractor during a shoulder season can help stabilize both schedule and cost, avoiding premium charges tied to peak repair rushes.
Slate and copper stand out for longevity and historical compatibility with older homes, but they come with high upfront costs and extended installation timelines. Clay and concrete tiles offer durable options with distinct aesthetics, yet require a roof deck that can support their weight. Asphalt continues to be the most cost-efficient and widely available option, especially for replacements on midcentury homes. Synthetic or composite shingles provide a middle ground-lower weight and cost than slate or copper, with reasonable durability for freeze-thaw cycles.
When budgeting, account for potential upgrades to flashing, chimney areas, and transitions, as well as waste disposal and any necessary underlayment refresh. It's prudent to set aside a contingency for weather-related delays during thaw-to-spring repair windows, which are common in Belmont. Given the cost ranges, a clear comparison of material life expectancy, maintenance needs, and visual compatibility with the house's character will help align the project with long-term performance and curb appeal.
Get a clear picture of your project costs upfront - no commitment required.
Storm Works Roofing & Restoration
(844) 786-7696 www.stormworksroofing.com
295 Belmont St, Belmont, Massachusetts
4.8 from 143 reviews

Storm Works Roofing & Restoration
(844) 786-7696 www.stormworksroofing.com
295 Belmont St, Belmont, Massachusetts
4.8 from 143 reviews
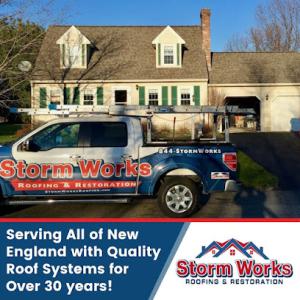
Belmont, MA, boasts of various roofing contractors that offer an array of services but none parallel the experience and quality provided by Storm Works Roofing & Restoration As a premier roofing contractor in the area, we have set the benchmark for excellence in both residential and commercial roofing projects. While there are many who provide roofing services, what sets Storm Works Roofing & Restoration apart is our sheer dedication to every project. Whether it's a new roof or a repair job, our team ensures that every home is treated with utmost care and precision. Serving all of New England with quality roof repair services for over 30 years! Schedule a free estimate with the expert roofers at Storm Works Roofing & Restoration today.
Rain & Shine Masonry, Foundation Waterproofing, Chimney Repairs, Boston
(617) 370-5212 www.rainandshinemasonryandconstruction.com
385 Concord Ave, Belmont, Massachusetts
4.7 from 21 reviews
Rain and Shine Masonry and Construction provides roofing services, foundation repair, waterproofing, and masonry services in Boston, MA, and the surrounding areas.
Fowler Brothers Roofing
(617) 474-6189 fowlerroofmargate.com
Serving
5.0 from 41 reviews
Fowler Brothers Roofing is known for going the extra mile to protect your home or business. Our team brings a family tradition of craftsmanship and integrity to every project, whether you need a small repair or a full roof replacement. We start with a thorough inspection, walk you through your options, and handle every detail so you feel confident at each step. Customers appreciate our clear communication, tidy work, and the respect we show for every property. When you call Fowler Brothers Roofing, you get experienced professionals who care about lasting quality and your peace of mind.
Premiere Roofing & Remodeling
(781) 646-0051 premiereroofing.com
Serving
4.8 from 24 reviews
Premiere Roofing & Remodeling, LLC is a fully licensed and insured roofing company, based in Arlington, MA. We have been providing residential roofing services to Massachusetts homeowners since 2005, with over twenty years of experience to take on any size residential roofing project. Each project has the owner on-site, making certain that each project is completed efficiently. Our mission is to provide our valued customers with quality service on each project. Owner, Jim, takes pride in always being available for his customers for each and every job the team completes. Jim answers your phone calls, comes to the site for an estimate, and is onsite for each job from beginning to end. Call the Massachusetts roofing experts today!

Ranch Roofing
(866) 298-4393 ranchroofing.com
Serving
5.0 from 114 reviews
When Ranch Roofing was born, with four employees two decades ago, the mission was to provide residential roofing services to home owners with only Ranch-Style homes. Bob O’Sullivan, President and founder, had the idea that if he could perfect a roofing system on one single style home, he could build customer relationships with consistent quality installs. Today, Ranch Roofing has grown to a trusted expert in the Boston roofing community that provides roofing installation on all styles of houses in Arlington, Cambridge, Lexington, Newton, Belmont and surrounding communities in the greater Boston area. We are proud to be known for quality work.
OneGuard Roofing
(781) 999-1745 oneguardroofing.com
Serving
5.0 from 25 reviews
OneGuard Roofing is Roof Repair and Replacement Contractor in Lexington MA and surrounding cities. We specialize in Asphalt roof shingle repair replacement, Flat Roof repair replacement, EPDM Rubber roof repair, metal roofing, Chimney flashing repair, skylight repair and replacement and gutter installation. We do fix roofs right from first time.

RB Farina Roofing
(781) 648-5446 www.farinaroof.com
Serving
4.8 from 524 reviews
RB Farina Roofing has been providing top-quality roofing services in Arlington, Massachusetts, for over 41 years. As a trusted roofing company, we specialize in roof installation, repair, and maintenance for both residential and commercial properties. In addition to roofing, we offer expert gutter services, including gutter cleaning and siding solutions to enhance your home’s protection and curb appeal. Our experienced team is committed to delivering reliable, long-lasting results with exceptional customer service. Whether you're in need of roof repair or a complete roof replacement, choose RB Farina Roofing—your trusted roofing contractor in Arlington, Massachusetts.
Newton Roofing Residential
(617) 244-9901 www.newtonroofingresidential.com
Serving
4.4 from 21 reviews
I founded Newton Roofing Residential on two principals, treat our customers with respect and stand behind our work. Whether its a new roof, a simple repair, or just would like to deal with an honest, professional, quality-orientated roofing company. You’ve found your roofer. Newton Roofing Is a woman owned, professional roofing contractor serving our neighborhood area with a hands on approach and over 32 years of roofing management experience. Consider hiring Newton Roofing for all your roofing project. When you support a local business, you are supporting your neighbors and your local economy. Thank you for your business. Founder and CEO Toni Bryan Newton Roofing Residential 69 Howard Street Watertown, MA, 02472 Tel: 617- 244-9901

FRS Roofing + Gutters
Serving
4.9 from 663 reviews
FRS Roofing is the trusted roofer in Medford MA by property owners like you. Whether you need residential roof installation for your home, or simply a flat roof repair for your business you can always turn to us for help. We have been a reliable roofing company in Medford MA for two decades now and counting! Since our inception, we have managed to provide roofing, skylight and gutter services that are not only of high-quality but also of great value and seamless completion. When it comes to your roofing services, asphalt shingles, rubber roof (EPDM), slate roof, and other in the Medford MA area, you should only trust a licensed and accredited roofing company like FRS Roofing. Connect with us today at (781)-322-6252.
Mike Leary Contracting
(781) 862-1108 www.mikelearycontracting.com
Serving
5.0 from 19 reviews
Your Complete Roofing & Exterior Solution in Lexington. Since 1975, our family has been providing top-quality service for all your residential and commercial exterior needs, big & small. From expert roofing and seamless gutter installations to beautiful new windows, skylights, durable siding, and meticulous carpentry – plus reliable snow removal – we're licensed, insured, and proud to serve Lexington and surrounding towns. Experience the peace of mind that comes with over 50 years of local excellence.

Go Pro Roofing & Construction
(781) 500-5185 goproroofingconstruction.com
Serving
4.8 from 22 reviews
If You’re Looking To Update Or Upgrade Your Roofing And Gutters, We’ve Got You Covered. Book A Free Consultation To Discuss Our Six Different Types Of Roofing Composition And Environmentally Friendly Options! Go Pro Roofing And Construction Offers The Exterior Services That Come Along With A New Roof Including New Gutters, Siding, Windows And Doors As These Parts Of Your Home Help Secure A Good Roof. Contact Us Today! We Take Pride In Every Job And Will Not Ask For Payment Until You Are Completely SatisfiedRoofing and Construction services for the surrounding Lexington, Massachussetts area within a 40 mile radius.
Visocchi Roofing
(781) 953-1508 visocchiroofing.com
Serving
5.0 from 26 reviews
Visocchi Roofing, your most trusted roofing company in Waltham, specializes in residential and commercial roof installations and repairs. We are a family-operated business since 1982 that services all of southern Middlesex County. Clients love us because of our 30 Year Product Warranty for GAF Shingles. Moreover, we also offer Free Gutter Cleaning On Roof Replacements and have exceptional roofing service to guarantee 100% customer satisfaction. Contact your most trusted Waltham roofing contractor today for a free estimate.
In Belmont, a full roof replacement triggers a building permit, so planning ahead saves time and reduces the risk of work stopping mid-project. The town's permitting process is designed to ensure that roof work aligns with local historic character where applicable, as well as with modern safety standards. Before any nails go into new decking or shingles, the permit needs to be active and up-to-date. That means coordinating timing with the permitting office so the project can proceed without delay. Having the permit in hand also aids in future property transfers, since inspections and approvals are documented as part of the record.
When applying, the project scope should clearly describe the roof replacement, including the specific materials being installed and the overall square footage covered. The application requires contractor information, so verify licenses, insurance, and any recent compliance history before submitting. Material details must be precise: the brand, shingle type or tile, underlayment, vents, and any attic insulation work planned as part of the replacement. In Belmont, accuracy matters; mismatches between what is proposed and what is installed can trigger corrections or permit holds. If remodeling or reconfiguring ventilation or skylights, include those changes in the submission to avoid later inspection issues.
Inspections occur during tear-off and again after installation. The tear-off inspection confirms that the roof is being removed safely, that exposed decking is intact, and that waste containment and project site safety meet code expectations. The post-installation inspection verifies compliance with the Massachusetts State Building Code, including attachment methods, flashing details around chimneys and valleys, proper ventilation, and the integrity of underlayment and drip edges. Expect questions about attic access, insulation, and any wind-resistance requirements relevant to Belmont's climate. Final completion is confirmed after the final inspection, meaning the project is formally approved as meeting all applicable standards. It is essential to coordinate with the inspector to address any deficiencies promptly, minimizing the chance of delays.
Prepare for the process by compiling all permit-related documents in advance: project scope, contractor contact information, and exact material specifications. Communicate clearly with the contractor about the sequence of tear-off and installation, so the permit can be instantiated for the correct work window and to prevent backtracking. On the inspection day, have the site clean and accessible, with clear ventilation and attic access areas unobstructed. If any weather-related delays are anticipated, inform the building department early, since frozen or ice-dam risk periods can affect scheduling and approval timing. Knowing the inspection milestones helps homeowners stay aligned with winter ice-dam stress periods characteristic of the local climate.
You navigate a spring season that can throw off tear-off progress when wind and rain arrive on short notice. In this climate, roofs that are already vulnerable from winter freeze-thaw cycles may need extra time for dry-in, since crews must ensure sheathing protection and proper ventilation before shingles go down. Expect occasional pauses as gusty Nor'easters sweep through, delivering sudden shifts in wind direction and visibility. Plan for a few flexible installation windows and clear access paths to lanes and driveways, because even a single heavy rain can push work back by a day or two. Consider long-lead tasks like skylight flashing or copper gutter integration that benefit from dry conditions early in the season, so you're not scrambling when a storm rolls in mid-project.
Autumn in this area brings a thick layer of leaves that can complicate cleanup and debris management during installation. Debris from nearby trees accumulates rapidly, and wind-driven branches can ding exposed flashing or loosen temporary protective tarps. You'll save headaches by coordinating a mid-project cleanout day and ensuring equipment and waste bins are placed where they won't trap fallen leaves. Dry-in timing becomes more delicate as temperatures cool; crews will be mindful of maintaining a tidy workspace to prevent moisture trapping in gutters and valleys. Have a designated drop-off area for pine needles and leaves to minimize material tracking into living spaces after each shift.
Belmont's summer heat and humidity affect material handling and crew scheduling even though June through August remains a preferred replacement window. Intense sun on hot days can shorten daily progress for safety and material performance, particularly with asphalt and synthetic shingles. Heat and humidity also influence adhesive and sealant cure times, making it essential to keep schedules adaptable for afternoon heat spikes. Plan for earlier starts when possible and secure shaded staging zones to reduce glare and heat exposure. Be prepared for occasional afternoon delays if heat triggers fatigue or moisture from humid air disrupts curb-edge work.
When you can't wait, these contractors offer fast response times to stop leaks and prevent further damage.
Storm Works Roofing & Restoration
(844) 786-7696 www.stormworksroofing.com
295 Belmont St, Belmont, Massachusetts
4.8 from 143 reviews

Newton Roofing Residential
(617) 244-9901 www.newtonroofingresidential.com
Serving
4.4 from 21 reviews

Go Pro Roofing & Construction
(781) 500-5185 goproroofingconstruction.com
Serving
4.8 from 22 reviews
Massachusetts homeowners insurers generally show stable coverage patterns, but this area tends to require clear documentation of roof age, material type, and current condition. In this market, carriers will want to see a direct link between the loss and the cause, not a general description of wear. For Belmont homeowners, expect questions that tie your claim to a documented timeline of freeze-thaw cycles and the manner in which a storm or seasonal ice dam contributed to damage.
Claims in this market commonly depend on detailed photos, contractor estimates, and adjuster site visits rather than homeowner descriptions alone. When preparing, gather comprehensive images that show the affected area from multiple angles, the underlayment or decking where visible, and any ice dam symptoms along eaves. Include independent estimates from a qualified local roofer who can speak to both the replacement needs and the roof's age and material type. An adjuster visit should be anticipated to verify causation and scope before any settlement.
Belmont's weather pattern of winter freeze damage and seasonal storm exposure affects how condition and causation are documented during claim review. Tie the loss to specific freeze-thaw events and identify how ice dams formed, such as gutter blockages or compromised attic ventilation, rather than attributing it to age alone. Keep a record of recent freeze events and any rapid thaw periods that preceded visible damage, as these details help establish a clear line from incident to repair.
Older homes in this area often feature slate, copper, or asphalt in mixed configurations. Indicate material type and any known prior repairs when submitting claims, since insurers compare current damage to expected performance for those materials. If slate or copper components show intermittent cracking or copper flashing corrosion, document those findings with close-up shots and notes, as these details influence causation and replacement decisions.
Connect with contractors who help homeowners navigate the claims process from damage assessment to final approval.
Storm Works Roofing & Restoration
(844) 786-7696 www.stormworksroofing.com
295 Belmont St, Belmont, Massachusetts
4.8 from 143 reviews
Belmont's contractor market shows meaningful demand for both flat-roof work and skylight-related roofing service, indicating many homes need attention at these leak-prone transitions. Expect more than a quick patch to be required when flat sections or skylights age, especially where previous layering or poor edge detailing exists. A practical approach is to flag flat or low-slope areas during routine roof evaluations and plan targeted repairs before winter settles in again.
On older estate-like homes, low-slope rear sections, additions, and penetrations can age differently from the main steep roof and should be evaluated separately during replacement planning. The rear or addition areas may show moisture intrusion or membrane wear sooner than the primary roof surface, driven by sun exposure, venting patterns, or drainage differences. When planning a replacement, measure and document material condition separately for these sections, and consider staged work if labor windows and material cycles favor it.
Skylight tie-ins in Belmont need close review after winter edge stress and spring rain because flashing failures often show up before the surrounding field roofing fully fails. Examine flashings, curb seals, and sealant joints around each skylight, paying special attention to attic condensation patterns above them. If a skylight is notably loose or cloudy around the edge, treat it as a leak risk area. A proactive check during a mild spring lull can catch failures early and reduce the chance of widespread interior damage.
Start with a visual sweep of all flat or low-slope zones, then move to any recent additions or penetrations. From there, inspect skylight flashes and curbs, tracing moisture back to the source rather than assuming the skylight is the sole culprit. Document findings with photos and note any edge detailing that looks prone to ice dam formation. Plan repairs that restore continuous, two-layer protection at transitions and ensure proper drainage away from the structure.
Find specialists in TPO, EPDM, and built-up flat roofing systems for residential and commercial properties.
Storm Works Roofing & Restoration
(844) 786-7696 www.stormworksroofing.com
295 Belmont St, Belmont, Massachusetts
4.8 from 143 reviews

Belmont's roof clock often runs on freeze-thaw cycles that trigger ice dams, plus active leaks during storms and busy occupied homes during repairs. A contractor who emphasizes rapid response and thorough cleanup can prevent a small leak from turning into a long occupancy disruption. In practice, look for crews that arrive with a focused plan to protect interior living spaces, contain debris, and secure the worksite at the end of each day. That attentiveness is a hallmark of the Belmont market's practical, neighborly approach to problem-solving.
The typical Belmont roofscape blends older stock with occasional slate, copper, and durable asphalt or synthetic shingles. Long-established companies often carry a depth of local weathering knowledge, including how this climate's freeze-thaw cycles interact with steep pitches and historic rafters. Prioritize contractors who can reference local installations similar to your roof style-especially if your home features slate-adjacent details, copper accents, or premium shingle layers. An informed contractor will discuss how your specific roof geometry affects ice dam risk and how to stage repairs without compromising existing copper flashings or slate trims.
In this market, you'll find contractor teams that carry manufacturer certifications and offer warranty options on premium systems. This matters when you are considering upgrades or high-end materials, where legitimate warranties can cover workmanship and material integrity for decades. Ask for specific certifications tied to the roof types you're considering-slate-adjacent products, metal accents, or advanced asphalt or synthetic alternatives-and verify how those credentials translate into service support if a problem arises years later.
When comparing bids, value the clarity of the project plan: how the contractor will address ice-dam prevention, gutter and downspout protection, and ventilation to reduce future damage. Request references with similar homes and winter concerns, and confirm the proposed sequence for repair or replacement so occupants can plan around active leaks. In Belmont, a balanced mix of company size and local familiarity often yields the best outcomes for a durable, leak-conscious re-roofing approach.