Last updated: Apr 19, 2026
In the inland Greater Boston climate zone, repeated winter freeze-thaw cycles are the primary force aging your roof. That means every winter day where water freezes, expands, and then thaws puts stress on shingles, flashing, and underlayment. Heavy snow followed by sudden melt can push water under vents and along eaves, turning small vulnerabilities into costly leaks. This isn't about heat or blazing sun; it's about sustained cold, moisture, and the way Lexington's older homes tackle those cycles. The edge you're watching most closely is the eaves, valleys, and any flashing transitions where ice dams form and force water to back up under shingles.
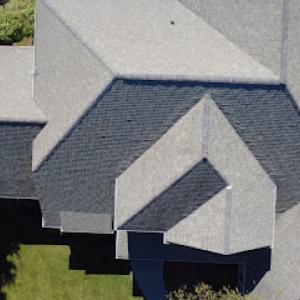
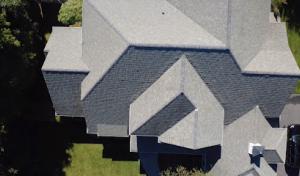
Older Lexington homes often feature complex roof lines, multiple chimney stacks, and crowded vent runs. Those features create more joints, fewer straight channelings for water, and more places for ice to accumulate. When temperatures swing, shimmying ice dams ride up beneath shingles at the eave, lift soft wood or underlayment, and slow drainage. Valley intersections can become pressure points as ice forms along tight angles, while flashing around chimneys and roof penetrations can separate if sealants get stressed by cold cycles. If your attic is under-ventilated or your soffit vents are blocked by insulation, you compound the problem: warm attic air meets a cold roof surface, accelerating snow melt that refreezes at the eaves.
If you see dark, wet patches along the eave line in late winter or early spring, suspect ice damming. Listen for creaks or pops in the roofing underlayment during very cold spells-it's the sound of shingles and flashing flexing under stress. Cracked or missing shingles near the edges, loose flashing at chimneys, or staining on interior ceilings below roof lines are warning signs of moisture intrusion. Pay attention to older chimneys or roof vents with worn boot flashings; those joints are frequent failure points when freeze-thaw cycles intensify. If you notice condensation or frost buildup in the attic after a cold night, it signals ventilation gaps that need attention before the next freeze.
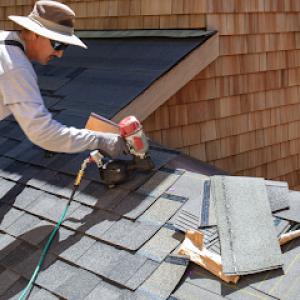
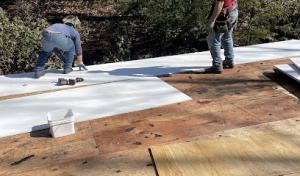
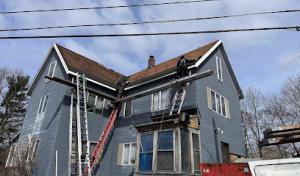
Begin with a meticulous exterior inspection after the worst of a winter thaw but before the next cold snap. Look for lifted shingles at the edges, degraded flashing around penetrations, and any ice dam-related staining along interior walls. Clear snow thoughtfully from the roof with a plastic scoop, avoiding aggressive scrapers that can gouge shingles or flashing. Ensure attic soffit and ridge vents are unobstructed; even modest airflow can dramatically reduce ice dam risk by keeping roof temperatures closer to equilibrium. If you have a steep, complex roof, consider hiring a qualified local roofer to evaluate flashing transitions around the chimney, dormers, and valley intersections-these are common failure points in Lexington's older stock.
Winter installation complicates sealing and workmanship quality, so in Lexington, full roof replacements are commonly scheduled for late spring through fall. Cold-weather work can inhibit proper shingle sealing, wetting conditions hinder flashing workmanship, and freezing temperatures slow adhesive cures. If you're facing significant damage that threatens interior humidity and insulation performance, plan with a reputable contractor to stage repairs that guard against further moisture intrusion during the tail end of winter, then complete a full replacement in the milder months when conditions support durable sealing and long-term performance.
If ice dam buildup repeats season after season, or you notice recurring leaks at the same flashing points, you need a hands-on evaluation. A local roofer will assess attic ventilation, inspect flashing transitions around the chimney and dormers, and determine whether insulation adjustments are warranted to curb warm attic air that aggravates freeze-thaw damage. In Lexington, proactive, targeted fixes now save water damage later, especially on homes with intricate roof geometry. Don't delay: each thaw cycle is a reminder that winter's stress is actively aging your roof, and timely action is your best defense.
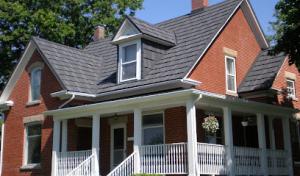
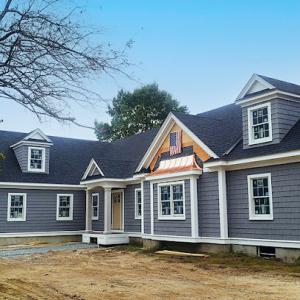
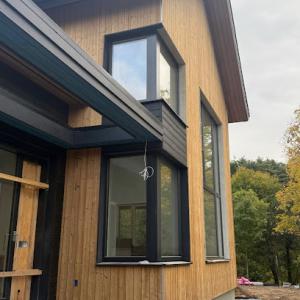
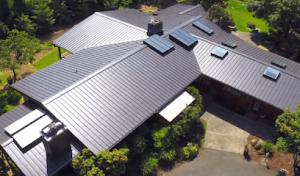
The dominant roofing mix here blends asphalt shingles, metal, clay tile, wood shingles or shakes, synthetic composites, and slate. That variety reflects the older high-character homes alongside standard suburban houses, all of which face harsh New England winters with freeze-thaw cycles. In practice, the choice hinges not only on cost but on how the material behaves under repeated ice build-up, rapid warming, and wind-driven debris. Roofs with steep pitches and detailed eaves common to older houses require materials that tolerate intricate flashing and precise edge work.
Slate and wood shingles or shakes remain locally relevant in Lexington in a way they are not in many newer suburbs, because older New England architecture still drives repair-versus-replacement decisions. Slate offers excellent durability when the roof decking and flashing are sound, but its weight and the need for specialized installation make long-term compatibility critical on aging structures. Wood shingles or shakes provide a traditional look but can suffer from splitting or rot if ventilation and moisture management are not attentive. When these materials are considered, plan for a structural assessment to ensure the supporting roof frame can bear the load and that soffit and attic spaces provide adequate drying and airflow during winter months.
Material choice in Lexington is not only about price; weight, flashing detail, and compatibility with older roof structures matter more when replacing slate, tile, or wood on aging homes. Heavier roofs demand proper fasteners, solid underlayment, and reinforced edges, especially where chimneys, skylights, or dormers intersect the roof plane. For clay tile or slate, the surrounding flashing must be matched to the material's expansion and contraction behavior, or risk ice dam development along ledges and valleys. Vinyl or metal detailing should be examined for fit with existing rake boards and crown moldings to avoid ice accumulation at vulnerable seams.
Winter freeze-thaw damage thrives where attic ventilation is insufficient and where flashing sits at inappropriate angles relative to the roof's slope and eave line. Metal roofs can shed ice more readily, but improper installation creates ice dam leaks around penetrations. Asphalt shingles, if underlayment, proper sealing, and attic venting are optimized, can perform well through multiple seasons, yet aging decking beneath may influence performance. Synthetic composites offer a balanced option, combining resilience with lighter weight and easier detailing on uneven historic framing.
A seasoned approach emphasizes proactive inspection before the heaviest winter loads arrive. Focus on flashings around chimneys, skylights, and dormers; assess gutter lines for ice dam control; and verify that attic baffles or soffit vents provide continuous airflow from eaves to peak. If a roof shows signs of previous patching or water staining on sheathing, plan for a careful evaluation of whether a full replacement or strategic repair supports long-term habitability and energy performance.
Local cost planning should use these ranges per square: asphalt shingles 350 to 650, metal 700 to 1200, clay tile 900 to 1700, wood shingles or shakes 600 to 1000, synthetic or composite shingles 550 to 1000, and slate 1000 to 1800. Costs in Lexington can rise on older homes with steep pitches, multiple dormers, chimney flashing work, and tear-offs involving heavier legacy materials such as slate or wood. Seasonal demand pressure can affect pricing and scheduling in Lexington because the practical replacement window is concentrated from late spring through fall.
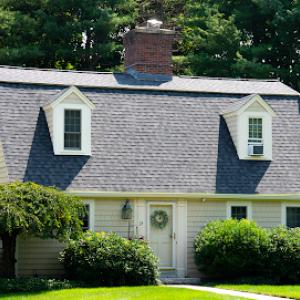
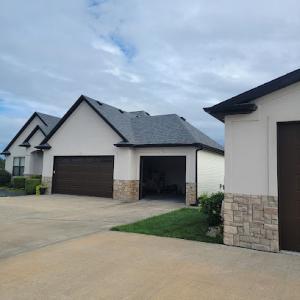
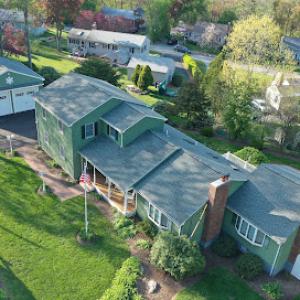
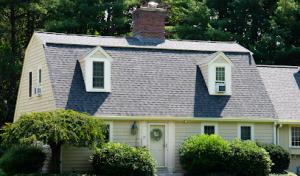
For typical Lexington-style roofs, asphalt shingles remain the most common choice when planning a replacement, especially on aging two-story houses with modest dormers. Expect pricing to land toward the middle of the stated range if the roof is fairly standard in pitch and doesn't require extensive flashing work. However, in older homes with steep slopes, tight eaves, or complex transitions around chimneys, costs can drift higher. The winter freeze-thaw cycle means any shingle installation should maximize attic ventilation and ensure proper underlayment staging to prevent future ice-related leaks or wind-driven lift after the first thaw.
Metal roofs offer durability in Massachusetts winters and can help with long-term ice dam risk by shedding snow more efficiently. In Lexington, metal can run toward the upper end of the range when the roof presents multiple slopes, intricate ridges, or requires extensive flashing where chimneys tie in. If there are existing dormers or a tall peak, expect extra labor for precise panel alignment and sealing. Seasonal demand drives scheduling pressure; metal projects may be stepped into late spring to early summer to avoid the peak fall window.
Clay tile stands out for homes with historic detail or a more pronounced roof silhouette, but Lexington's climate and the patched, heavier legacy transitions can push costs higher. Clay tile replacement often involves added tear-off complexity and careful handling under historic eaves, bringing per-square prices toward the top of the range. Steep pitches, multiple dormers, and the need to match old lath or sheathing can extend installation time. Tile roofs also demand meticulous chimney and valley flashing to protect against freeze-thaw stress.
Wood shingles or shakes evoke classic New England charm but require attentive maintenance in freeze-thaw cycles. For Lexington homes, expect costs around the middle to higher portion of the range if the roof is steep, has several dormers, or uses heavier legacy materials that must be removed carefully. Tear-offs with old wood shake remnants can add labor and disposal costs. Proper ventilation and moisture protection are crucial to minimize future warping and ice-related failures.
Synthetic or composite shingles offer versatility for older stock with irregular roof lines. In Lexington, these can provide a favorable balance between aesthetics and durability, especially where weight is a concern or where several dormers complicate a full tear-off. Prices typically sit mid-range, but extra flashing or transitions around chimneys can nudge costs upward. The winter season still governs scheduling, so plan for a spring-to-fall window.
Slate roofs are a hallmark of many Lexington homes but come with substantial weight and fragility considerations. Replacement or major repairs involving slate often push costs toward the upper end of the spectrum, driven by the need for skilled slate installers, careful removal of heavy legacy materials, and precise matching of color and thickness. Dormer work and extensive chimney flashing increase both duration and expense. Schedule early in the season to align with dry conditions and avoid peak winter demand.
Don't let upfront costs delay a critical repair - these contractors offer payment plans to fit your budget.

Golden Group Roofing & Solar
(508) 318-8160 goldengrouproofing.com
76 Bedford St STE 11, Lexington, Massachusetts
4.9 from 85 reviews
We’re your award-winning local roofing company specializing in quality roof replacement, roof repairs, home siding replacement, home siding repairs, skylights, Solar Roofing . As a certified roofer, we provide the best roofing systems in Greater Boston and Central Massachusetts. You’ll love your new roof so much, you’ll call us the top local roofing company too! Our team approaches each solar panel installation project with a roofer’s eye. The integrity of your roof and the structure under it is our top concern. While we want you to benefit from solar panels, we want to make sure your roof can integrate the Solar PV System.
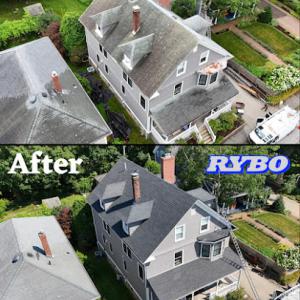
RYBO Construction & Roofing
(781) 244-8456 www.ryboconstruction.com
Lexington, Massachusetts
5.0 from 49 reviews
We are home builders and exterior renovation specialists (roofing/siding/windows/trim/decks). We can take your dreams and turn them into a reality, whether it’s making your house look like new, or working with you to build your dream home from the ground up. Call us or send a message to see if we can help you!

Wisdom Roofing
(617) 461-7450 wisdomroofing.com
Lexington, Massachusetts
4.9 from 89 reviews
Wisdom Roofing has been in this industry for the past many years and offering clients with numerous repairing and installation services including roof shingles and rubber roof throughout Medford. Shingle roofing is no doubt is the most common types of roofing that are used in the US today. Shingle roof is one of the types of roofing that is stress-free to install and last with you for years. That is why we at Wisdom Roofing offer repair and installation of shingle roofs with great level of craftsmanship and dedicate customer service. Our business is situated in Malden, US and we work to serve our customers throughout Malden and its surrounding areas.
OneGuard Roofing
(781) 999-1745 oneguardroofing.com
7008 Main Campus Dr, Lexington, Massachusetts
5.0 from 25 reviews
OneGuard Roofing is Roof Repair and Replacement Contractor in Lexington MA and surrounding cities. We specialize in Asphalt roof shingle repair replacement, Flat Roof repair replacement, EPDM Rubber roof repair, metal roofing, Chimney flashing repair, skylight repair and replacement and gutter installation. We do fix roofs right from first time.
Mike Leary Contracting
(781) 862-1108 www.mikelearycontracting.com
251 Worthen Rd E, Lexington, Massachusetts
5.0 from 19 reviews
Your Complete Roofing & Exterior Solution in Lexington. Since 1975, our family has been providing top-quality service for all your residential and commercial exterior needs, big & small. From expert roofing and seamless gutter installations to beautiful new windows, skylights, durable siding, and meticulous carpentry – plus reliable snow removal – we're licensed, insured, and proud to serve Lexington and surrounding towns. Experience the peace of mind that comes with over 50 years of local excellence.
Boston Roofing
(857) 420-6025 www.bostonroofingco.com
Lexington, Massachusetts
4.9 from 30 reviews
Your Top Choice Among Roofing Contractors Boston. Boston Roofing is your go-to choice for roofing services in Boston, MA. We understand the importance of selecting the right roofing company because it can affect how long your roof lasts. That is why we stand out among roofers Boston, by providing top-quality work and excellent customer service. Our customers' high praises are a testament to our unwavering commitment to quality. Our expertise in Boston roofing has earned us the trust of our clients. If you take a moment to peruse our satisfied customers' reviews and testimonials, you will see why we are so highly rated. Our certified roofing Boston have comprehensive expertise in commercial and residential roof replacement and repair.
Skyline Roofing & Siding
(401) 425-3995 lexingtonroofingsolution.com
291 Wood St, Lexington, Massachusetts
4.8 from 38 reviews
Skyline Roofing & Siding, the premier contractor in Lexington, MA, offers a comprehensive range of top-quality services to protect and enhance your home or business. Specializing in Roof Installation, Replacement, and Repair, we provide expert solutions in Metal and Asphalt Shingle Roofing, as well as Commercial TPO and Flat Roofing for new constructions. Our Siding services include Installation, Replacement, and Removal, featuring Vinyl, Wooden, James Hardie, Cement, and Metal options to beautify and fortify your property. With a commitment to excellence and customer satisfaction, Skyline Roofing & Siding ensures durable, weather-resistant solutions tailored to meet your needs. Trust us for reliability, expertise, and a superior finish.

Go Pro Roofing & Construction
(781) 500-5185 goproroofingconstruction.com
38 Taft Ave, Lexington, Massachusetts
4.8 from 22 reviews
If You’re Looking To Update Or Upgrade Your Roofing And Gutters, We’ve Got You Covered. Book A Free Consultation To Discuss Our Six Different Types Of Roofing Composition And Environmentally Friendly Options! Go Pro Roofing And Construction Offers The Exterior Services That Come Along With A New Roof Including New Gutters, Siding, Windows And Doors As These Parts Of Your Home Help Secure A Good Roof. Contact Us Today! We Take Pride In Every Job And Will Not Ask For Payment Until You Are Completely SatisfiedRoofing and Construction services for the surrounding Lexington, Massachussetts area within a 40 mile radius.
Arya Roofing & Contracting
(617) 605-6667 www.aryaroofing.com
5 Wright St, Lexington, Massachusetts
4.7 from 32 reviews
We offer roofing siding, decks and gutter services. Please visit Aryaroofing on IG for our daily updates

AC Roofing
(781) 629-9558 acroofing05.wixsite.com
Lexington, Massachusetts
4.1 from 64 reviews
Ac Roofing are Flat Roof Repair Experts. We specialize in all types of roof installations and repairs - whether you have a flat rubber roof , shingle roof or metal roof, even tar & gravel - we have the knowledge & experience to get it done right the first time. We offer different options depending on the situation of the roof. Our team our experts & highly trained on only roofing. We are so confident in our work we back it with written warranty, even on repairs! Other roofing companies don't do this. We take great pride with every flat roofing project, 24 hour emergency services storm repairs, snow removal.
Universal Roofing Solutions
(781) 901-1203 universalroofingsolutions.com
Serving
5.0 from 88 reviews
Universal Roofing Solutions is a family-owned and locally operated roofing company with a reputation built on trust, quality, and integrity. For over 25 years, we’ve been providing top-tier roofing services to homeowners and businesses in our community, combining expert craftsmanship with a personal touch. As a proud local business, we treat every project like it’s for our own home—delivering dependable, long-lasting roofing solutions backed by decades of experience. Whether it’s repairs, replacements, or new installations, we’re here to protect what matters most—your home, your business, and your peace of mind.
D&G Roofing & Siding
(781) 265-2435 dandgexteriors.com
Serving
5.0 from 73 reviews
D&G Exteriors is a residential and commercial roofing contractor, gutter installer, siding contractor, window and door installer and deck builder. We specialize in full replacements and large residential projects. Proudly serving the greater Boston area with the best in customer service, integrity and professionalism, from the North Shore to the South Shore. Insured and licensed.
The Building Department generally requires a permit for a full re-roof rather than treating it as informal maintenance. This means your project is reviewed more like a major renovation than a quick patch, which is a reflection of how freeze-thaw cycles and old, detail-heavy rooflines perform when they're fully replaced. A permit signals to the town that every nail and seam is accounted for, and it helps ensure the re-roof stands up to Lexington's harsh winters. If a permit is pursued after work has begun, expect delays or work stoppages while the department reviews what's already been done and what remains. The permit application is a formal record you'll want to keep as long as the roof lasts.
Before any tear-off starts, you must have a clear project scope on file. That scope should spell out the extent of the replacement, the exact roofing material type, and the structural implications if any-especially important for steeper pitches and older framing common on local homes. The department also requires contractor licensing information to confirm the person on site is authorized to perform the work. Missing documents or mismatches between the scope and the actual installation trigger back-and-forth that can push your schedule out by days or weeks. Having these details lined up in advance keeps the process smooth and helps prevent a disruption to your containment of interior cold and moisture during the job.
Inspections in this area are generally conducted at rough-in and final stages. That means you should confirm inspection timing with your contractor and the Building Department before any tear-off begins. If rough-in is skipped or rescheduled, the job can't move forward, and you may face costly pauses. The final inspection verifies that the completed system meets code, including proper ventilation, underlayment, ice dam protection, and flashing details around dormers, chimneys, and valleys that are particularly relevant on older homes with intricate rooflines. Plan for a window of availability when the inspector can arrive, and coordinate access for attic spaces where ventilation and ventilation channels will be scrutinized as part of freeze-thaw resilience. Failing a required inspection isn't a mere paperwork hurdle; it can leave you with a roof that technically isn't compliant and could complicate future resale or insurance reviews.
When a storm rolls through and the wind does its worst on an old slate or shingle roof, the claim hinges on solid records. Massachusetts sees wind- and storm-related roofing claims, but Lexington homeowners are not dealing with a statewide insurer pullback environment. Start with a simple, organized file: photos of the roof from ground level and from attic views, a dated notebook of any hail hits or curling shingles, and a map of where leaks first appeared. If interior water spots show up, note the date and weather conditions. This isn't about fearmongering; it's about having a clear trail that helps a adjuster see the problem quickly.
Insurers serving this market may ask for documentation of existing damage and may look favorably on wind-rated materials and permit-compliant installation records. If a roof is due for a replacement after a freeze-thaw cycle, consider materials with proven wind resistance. In older houses with steep, detail-heavy roofs, a wind-rated option that fits the roofline can reduce future claim friction. Keep samples or spec sheets on hand to show the adjuster how the chosen roof stands up to Lexington's typical wind gusts and storm tracks. If the existing roof uses lighter or less durable materials, be prepared to discuss why a stronger option is appropriate for the structure and local climate.
In Lexington, keeping permit paperwork, inspection sign-offs, and dated photos can make claim handling smoother after wind or storm events. Create a simple timeline: a photo log dated before the storm (if possible), during the storm's impact, and after temporary repairs. Store receipts for any temporary tarping or emergency fixes. After the claim is filed, share the log with the insurer or their appraiser, and reference key dates against the storm's calendar. If a contractor notes wind-related damage in the estimate, attach that note to the file. When the adjuster visits, you'll have a straightforward path to show the sequence of damage and the rationale for the recommended repair or replacement.
Connect with contractors who help homeowners navigate the claims process from damage assessment to final approval.
Storm Works Roofing & Restoration
(844) 786-7696 www.stormworksroofing.com
Serving
4.8 from 143 reviews
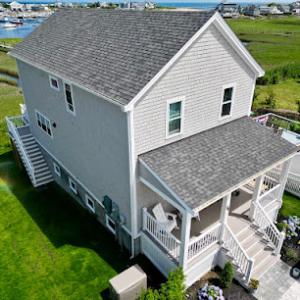
Flat and low-slope roofing is an active specialty in this city, reflecting demand on additions, porches, and some multifamily or commercial structures. The blend of older, detail-heavy homes with modern additions means you'll frequently see flatter sections stitched onto steeper main roofs. In this climate, successful flat roofing hinges on careful detailing where water can test seams and edges after heavy snows and spring rain.
Lexington's winter-to-spring pattern magnifies the importance of drainage on low-slope sections. Plan for effective positive drainage away from walls and into a defined gutter or scupper system. Roofs of this type should feature continuous membrane protection, with properly lapped seams and kick-out details at transitions to steeper roofs. Ensure edge metal is installed with a tight seal to resist ice-related uplift and wind-driven water. A properly flashed parapet or mechanical curb helps keep meltwater from pooling and penetrating beneath the membrane.
Homeowners should evaluate low-slope sections separately from the main roof because aging additions often fail earlier than the primary shingle or slate roof. Look for signs of blisters, seam splits, or ridge leaks where the addition ties into the original structure. Ice dam presence on the lower roof line can indicate that drainage paths are compromised. Track any squeaking or ridge settlement as these may point to fastener fatigue or membrane movement that invites water intrusion.
Create a simple maintenance plan that focuses on the low-slope areas after heavy storms. Clear debris from drains, inspect internal gutters for clogs, and monitor membrane edges for signs of wear after freeze-thaw cycles. If the addition uses a different roofing system than the main roof, plan staggered inspections to catch early failures before they affect the primary structure. Remember that small issues in these sections can escalate quickly under Massachusetts freeze-thaw conditions.
Find specialists in TPO, EPDM, and built-up flat roofing systems for residential and commercial properties.
Golden Group Roofing & Solar
(508) 318-8160 goldengrouproofing.com
76 Bedford St STE 11, Lexington, Massachusetts
4.9 from 85 reviews
OneGuard Roofing
(781) 999-1745 oneguardroofing.com
7008 Main Campus Dr, Lexington, Massachusetts
5.0 from 25 reviews
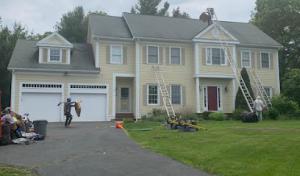
In this market, you measure value not only by reliability or price but by how quickly a crew can respond after a winter event, how efficiently they mobilize, and how thoroughly they clean up afterward. Homeowners here expect clear channels of communication, punctual site arrival, and a plan for snow and ice removal around the work area so daily routines aren't disrupted. A contractor who can keep driveways clear, protect landscaping, and maintain a tidy job site earns trust before a single shingle is lifted.
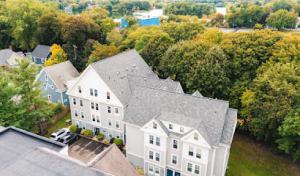
Re-roofing is far more prevalent than niche new-construction work, so prioritize crews with strong tear-off and replacement experience on existing homes. Steep, detail-heavy roofs and dormers require careful staging, precise edge work, and attention to staying within the existing eave lines. Look for a portfolio that features multiple Lexington-style homes, not just flat-slope or newly built structures. Ask bidders to describe how they handle ventilation, ice dam mitigation, and flashing around chimneys and skylights on older mass-built houses.
Long-established, family-owned firms and manufacturer-certified teams all have visible presences in this market, which matters when comparing warranty support and workmanship confidence. A family business often offers hands-on oversight and a predictable scheduling pattern, while manufacturer-certified crews can provide documented material warranties and standard installation practices. Check whether the company assigns a dedicated project supervisor and whether they carry manufacturer endorsements relevant to the shingle or membrane system you're considering.
Request three recent local projects with photos and client references, preferably on homes similar in age and style to yours. Verify that the crew has a proven record with ice-dam prevention methods and reliable ice-and-water shield installation. Confirm that the scheduling window aligns with anticipated winter melt cycles, so you aren't left vulnerable during thaw periods. Finally, ensure the company offers post-installation follow-up and a clear plan for addressing any warranty questions or concerns in the first year.
Get a clear picture of your project costs upfront - no commitment required.
Storm Works Roofing & Restoration
(844) 786-7696 www.stormworksroofing.com
Serving
4.8 from 143 reviews