Last updated: Apr 19, 2026
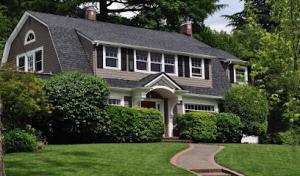
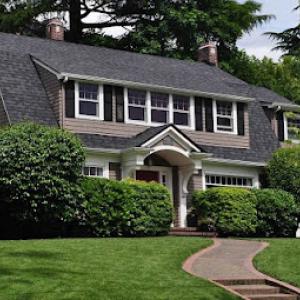
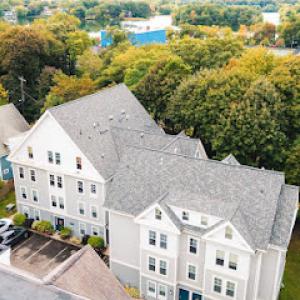
Arlington's dense, prewar housing stock often features roof assemblies that were never sealed to modern standards and may lack balanced attic ventilation. That combination creates a perfect setup for ice dams when the heat from living spaces migrates into the attic and melts roof snow. When temperatures drop again, that melt refreezes at the eaves, pushing moisture back under shingles and into the eaves and fascia. Left unchecked, ice dams can damage underlayment, loosen flashing, and infiltrate into soffits and interior ceilings. The result is not just water stains; it's accelerated wood rot, mold risk, and higher repair bills in the long run.
Cold winters with repeated freeze-thaw cycles in Greater Boston are a primary local roof-aging factor. Shingles become brittle, flashing can crack at transitions, gutters clog, and eaves pool meltwater. On houses where the attic isn't properly vented, heat buildup worsens dam formation and accelerates deterioration of roof edges. In this climate, modest maintenance becomes a high-stakes necessity each year. Snow and ice that sit on a poorly ventilated roof can push downward on the roofing materials, loosening fasteners and accelerating wear-especially along valleys and along the lower roof edge where meltwater concentrates.
Mature trees lining Arlington streets shed leaves and shade many roofs for long parts of the year. After a snowfall, fallen leaves can clog gutters and downspouts, delaying meltwater drainage. That delay keeps moisture sitting along eaves and in roof valleys longer, increasing the chance that ice dams form and linger into the next thaw. Tree-associated moisture retention compounds attic humidity when attic ventilation isn't balanced, so moisture can back up into the decking, framing, and even interior walls. This is not purely cosmetic: steady moisture exposure weakens roof structures over multiple winters and can shorten the life of shingles and underlayment.
Begin by inspecting the attic for signs of warmth leaking into the roof space: overheated soffits, stained insulation, or darkened areas on the attic ceiling. If you see light around penetrations or the attic feels particularly warm, address air leaks at the source-seal gaps around chimney chases, plumbing vents, and attic hatches with appropriate materials. Improve ventilation by ensuring an even balance of intake and exhaust vents, and consider adding intake vents where soffits are blocked or clogged by insulation. Remove leaves and debris from gutters and ensure downspouts discharge away from the foundation. When snow is on the roof, avoid walking on it to inspect shingles unless you're equipped and safe; call a local roofer with experience in freeze-thaw cycles to assess for damaged flashing, loose fasteners, or damaged underlayment at eaves and valleys. Consider a targeted maintenance plan that prioritizes sealing, vent balance, and gutter flow before the next deep freeze. In these neighborhoods, proactive attention to attic integrity and drainage is a first line of defense against seasonal ice dam damage and the cascading costs it invites.
Spring in Arlington brings wind-driven rain and occasional hail, which can turn minor shingle or flashing defects into active leaks in a hurry. On older steep-slope homes, a small gap at a chimney or a tired vent boot can become a stream when a stubborn squall rolls through Mystic River corridors or Spy Pond avenues. The moment weather shifts from light showers to a gusty downpour, the roof line exposes any loosened seam or compromised valley-areas that left untended can flood a sagging attic or corrode interior walls within hours. This is the season when reliable rapid-response matters most, especially for homes whose age and construction feature masonry transitions and aging flashing.
When a leak starts, time is your most valuable asset. Have a contractor on speed dial who can arrive within a few hours after a storm-particularly if the forecast predicted hail or heavy rain. If water is actively dripping from a chimney chase or flashing, prevent further intrusion by placing a sturdy tarp or leak-stop under the affected area, but do not walk on a compromised roof; risk of collapse or additional damage increases quickly with ice and wind exposure. Communicate clearly about urgency: you want a quick assessment, a temporary tarping if necessary, and a plan to restore a dry envelope before the next cold snap. In practice, look for crews that offer on-site triage within the same day, followed by a structured repair path that addresses drainage and envelope integrity.
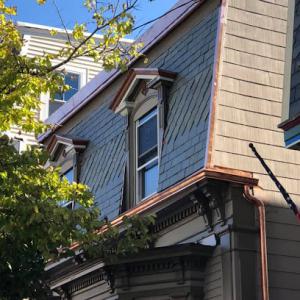
Chimneys are a notable local concern in contractor listings, which fits homes with older masonry transitions where flashing failures and mortar cracks are common leak points. A chimney's flashing should seal against both metal counter-flashing and the masonry detailing where brick or block meets the roof plane. If debris builds up in the chase or crown, water can shear down joints and into interior soffits. In Arlington, a swift assessment should verify that chimney flashing, step flashing along the sidewalls, and the top seal around the cap are intact, with particular attention to any spalling brickwork that can direct moisture toward the roof decking.
Once tarps are in place, document the damage with photos and notes that specify the leak source area, date, and any interior signs of damage. Keep the tarp secured during any remaining wind events to prevent it from lifting and creating additional exposure. A temporary shield buys time for a proper repair plan, but it should dovetail with a prompt repair window-ideally within 24 to 72 hours after the incident when weather allows. If multiple leaks surface in a single storm, prioritize the most active intrusion points first: chimney flashing, vent boots, and valley intersections, then address the broader envelope to prevent a repeat event during the next freeze-thaw cycle.
Find local contractors experienced in assessing and restoring roofs after hail, wind, and severe weather events.
Ranch Roofing
(866) 298-4393 ranchroofing.com
1191 Massachusetts Ave, Arlington, Massachusetts
5.0 from 114 reviews
RB Farina Roofing
(781) 648-5446 www.farinaroof.com
1319 Massachusetts Ave, Arlington, Massachusetts
4.8 from 524 reviews
Premiere Roofing & Remodeling
(781) 646-0051 premiereroofing.com
28 Spring St, Arlington, Massachusetts
4.8 from 24 reviews
Ranch Roofing
(866) 298-4393 ranchroofing.com
1191 Massachusetts Ave, Arlington, Massachusetts
5.0 from 114 reviews
When Ranch Roofing was born, with four employees two decades ago, the mission was to provide residential roofing services to home owners with only Ranch-Style homes. Bob O’Sullivan, President and founder, had the idea that if he could perfect a roofing system on one single style home, he could build customer relationships with consistent quality installs. Today, Ranch Roofing has grown to a trusted expert in the Boston roofing community that provides roofing installation on all styles of houses in Arlington, Cambridge, Lexington, Newton, Belmont and surrounding communities in the greater Boston area. We are proud to be known for quality work.
RB Farina Roofing
(781) 648-5446 www.farinaroof.com
1319 Massachusetts Ave, Arlington, Massachusetts
4.8 from 524 reviews
RB Farina Roofing has been providing top-quality roofing services in Arlington, Massachusetts, for over 41 years. As a trusted roofing company, we specialize in roof installation, repair, and maintenance for both residential and commercial properties. In addition to roofing, we offer expert gutter services, including gutter cleaning and siding solutions to enhance your home’s protection and curb appeal. Our experienced team is committed to delivering reliable, long-lasting results with exceptional customer service. Whether you're in need of roof repair or a complete roof replacement, choose RB Farina Roofing—your trusted roofing contractor in Arlington, Massachusetts.
Premiere Roofing & Remodeling
(781) 646-0051 premiereroofing.com
28 Spring St, Arlington, Massachusetts
4.8 from 24 reviews
Premiere Roofing & Remodeling, LLC is a fully licensed and insured roofing company, based in Arlington, MA. We have been providing residential roofing services to Massachusetts homeowners since 2005, with over twenty years of experience to take on any size residential roofing project. Each project has the owner on-site, making certain that each project is completed efficiently. Our mission is to provide our valued customers with quality service on each project. Owner, Jim, takes pride in always being available for his customers for each and every job the team completes. Jim answers your phone calls, comes to the site for an estimate, and is onsite for each job from beginning to end. Call the Massachusetts roofing experts today!

FRS Roofing + Gutters
Serving
4.9 from 663 reviews
FRS Roofing is the trusted roofer in Medford MA by property owners like you. Whether you need residential roof installation for your home, or simply a flat roof repair for your business you can always turn to us for help. We have been a reliable roofing company in Medford MA for two decades now and counting! Since our inception, we have managed to provide roofing, skylight and gutter services that are not only of high-quality but also of great value and seamless completion. When it comes to your roofing services, asphalt shingles, rubber roof (EPDM), slate roof, and other in the Medford MA area, you should only trust a licensed and accredited roofing company like FRS Roofing. Connect with us today at (781)-322-6252.
Joseph Savini Contracting
(781) 395-3954 www.josephsavini.com
Serving
4.6 from 31 reviews
Savini is a contracting company serving residential and commercial clients in the Boston area. Since 1977, we have specialized in exterior home improvement projects including roofing and gutter installation and repairs, chimney repairs, deck building and more. With over 40 years of experience, we are confident we'll offer exceptional workmanship and customer service on every project. Now Under new management! Savini is not part of the FRS Group!
Rain & Shine Masonry, Foundation Waterproofing, Chimney Repairs, Boston
(617) 370-5212 www.rainandshinemasonryandconstruction.com
Serving
4.7 from 21 reviews
Rain and Shine Masonry and Construction provides roofing services, foundation repair, waterproofing, and masonry services in Boston, MA, and the surrounding areas.
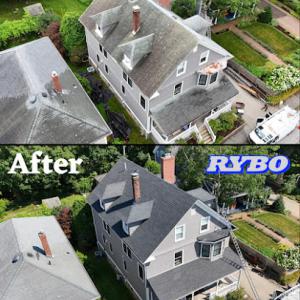
RYBO Construction & Roofing
(781) 244-8456 www.ryboconstruction.com
Serving
5.0 from 49 reviews
We are home builders and exterior renovation specialists (roofing/siding/windows/trim/decks). We can take your dreams and turn them into a reality, whether it’s making your house look like new, or working with you to build your dream home from the ground up. Call us or send a message to see if we can help you!

Wisdom Roofing
(617) 461-7450 wisdomroofing.com
Serving
4.9 from 89 reviews
Wisdom Roofing has been in this industry for the past many years and offering clients with numerous repairing and installation services including roof shingles and rubber roof throughout Medford. Shingle roofing is no doubt is the most common types of roofing that are used in the US today. Shingle roof is one of the types of roofing that is stress-free to install and last with you for years. That is why we at Wisdom Roofing offer repair and installation of shingle roofs with great level of craftsmanship and dedicate customer service. Our business is situated in Malden, US and we work to serve our customers throughout Malden and its surrounding areas.

Go Pro Roofing & Construction
(781) 500-5185 goproroofingconstruction.com
Serving
4.8 from 22 reviews
If You’re Looking To Update Or Upgrade Your Roofing And Gutters, We’ve Got You Covered. Book A Free Consultation To Discuss Our Six Different Types Of Roofing Composition And Environmentally Friendly Options! Go Pro Roofing And Construction Offers The Exterior Services That Come Along With A New Roof Including New Gutters, Siding, Windows And Doors As These Parts Of Your Home Help Secure A Good Roof. Contact Us Today! We Take Pride In Every Job And Will Not Ask For Payment Until You Are Completely SatisfiedRoofing and Construction services for the surrounding Lexington, Massachussetts area within a 40 mile radius.
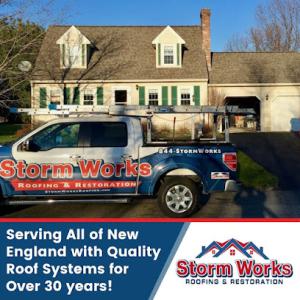
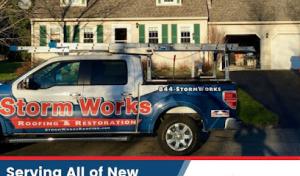
Storm Works Roofing & Restoration
(844) 786-7696 www.stormworksroofing.com
Serving
4.8 from 143 reviews
Belmont, MA, boasts of various roofing contractors that offer an array of services but none parallel the experience and quality provided by Storm Works Roofing & Restoration As a premier roofing contractor in the area, we have set the benchmark for excellence in both residential and commercial roofing projects. While there are many who provide roofing services, what sets Storm Works Roofing & Restoration apart is our sheer dedication to every project. Whether it's a new roof or a repair job, our team ensures that every home is treated with utmost care and precision. Serving all of New England with quality roof repair services for over 30 years! Schedule a free estimate with the expert roofers at Storm Works Roofing & Restoration today.
Boston Roofing
(857) 420-6025 www.bostonroofingco.com
Serving
4.9 from 30 reviews
Your Top Choice Among Roofing Contractors Boston. Boston Roofing is your go-to choice for roofing services in Boston, MA. We understand the importance of selecting the right roofing company because it can affect how long your roof lasts. That is why we stand out among roofers Boston, by providing top-quality work and excellent customer service. Our customers' high praises are a testament to our unwavering commitment to quality. Our expertise in Boston roofing has earned us the trust of our clients. If you take a moment to peruse our satisfied customers' reviews and testimonials, you will see why we are so highly rated. Our certified roofing Boston have comprehensive expertise in commercial and residential roof replacement and repair.
Hayes Roofers &
(781) 822-1209 hayesroofissaquah.com
Serving
5.0 from 27 reviews
Hayes Roofers provides roofing services that combine skilled workmanship with attentive customer care. The crew handles everything from small leak repairs to complete roof replacements, adapting their approach to fit the needs of each project. Before work begins, the team conducts a thorough inspection to understand the condition of the roof and to recommend the most effective solution. Clients often praise the clear communication, efficient scheduling, and the clean results that leave the property looking well cared for. Hayes Roofers is committed to delivering roofs that are built to last and add value to the home.
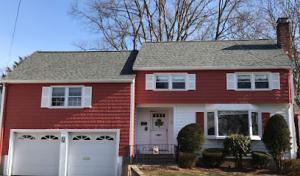
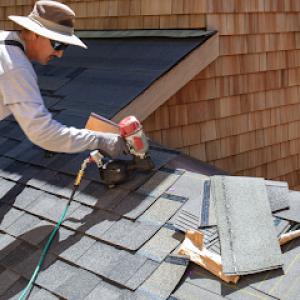
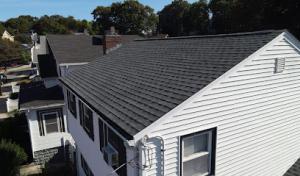
In Arlington, asphalt shingles are the dominant practical choice for traditional steep-slope residential roofs. They pair well with the town's dense prewar housing stock and steep pitches, offering a familiar look that handles freeze-thaw cycles reasonably well when paired with proper attic ventilation and ice dam protection. For homes that experience regular winter temperature swings, the key is quality underlayment, solid attic air sealing, and well-planned drainage to reduce the chance of water backing up under the shingles. This broad compatibility makes asphalt shingles a reliable baseline, especially on older houses where the roof structure and soffit conditions have survived decades of seasonal stress.
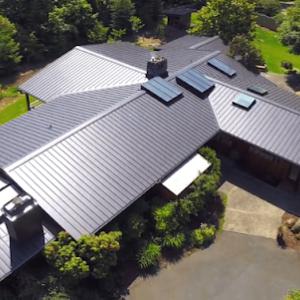
Metal roofing is present but more selective, typically considered where homeowners want longer service life and better snow-shedding performance in New England winters. If a property has a history of ice damming, metal can offer a decisive advantage because its smooth surface and fast drainage help minimize meltwater backing up under the roof deck. In neighborhoods with long eave runs or steeply pitched additions, metal can also reduce maintenance on those exposed sections. The higher upfront investment is often balanced by lower long-term maintenance needs and a reduced risk of freeze-thaw damage at critical joints, penetrations, and flashing details.
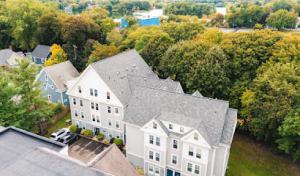
Flat-roof expertise matters locally because Arlington also has multifamily, porch, addition, and mixed-use roof areas that are low-slope even when the main house roof is pitched. Flat or low-slope sections require careful attention to flashing, drip edges, and transition details where they meet steeper main roofs. These areas are particularly susceptible to ice dam formation at parapets and at wall- and deck-line penetrations if drainage is restricted or if overhangs are insufficient. A well-sealed, grid-like drainage plan with periodic inspection of ballast, seams, and membrane edges helps prevent standing water from penetrating through to interior spaces after freeze-thaw cycles.
Wood shingles or shakes, clay and concrete tiles, and synthetic shingles each bring distinct performance traits and aesthetic effects. Wood can be more vulnerable to moisture and warping in freezing conditions and may demand closer inspection for grain splitting and fastener corrosion. Clay and concrete tiles offer durable exterior options but add significant weight and may require structural reassessment, especially on older foundations. Synthetic shingles can blend the look of traditional materials with improved moisture resistance and uniformity, yet they still require careful detailing at valleys, intersections, and penetrations. For historic or traditional homes, choosing a material that respects the roofline and neighborhood character while delivering dependable performance during harsh winters is the guiding principle.
Arlington's dominant material mix spans asphalt shingles, metal, tile, wood, and synthetic products, with asphalt remaining the baseline cost comparison for most homeowners. In practical terms, that means your replacement budget often starts with asphalt shingles as the most common option when evaluating options against specifics like attic ventilation, insulation, and existing roof deck condition. The cost ladder climbs quickly when comparing higher-end materials such as clay tile, concrete tile, or metal, but those choices are not rare in more recent renovations or larger homes.
Costs in Arlington are often pushed by tear-off complexity on older homes, chimney and flashing work, and access constraints on tighter in-town lots common in Greater Boston neighborhoods. Older steep-slope roofs may require more disposal due to damaged underlayment or decking, and chimney flashing often needs meticulous resealing or re-flashing. Tight driveways and limited staging space can complicate material handling, potentially extending project timelines and increasing labor hours. If the existing roof has multiple penetrations or venting changes, expect a higher materials bill and more precise flashing work to prevent future ice dam issues.
Seasonal demand can raise pricing and scheduling pressure from late spring through early fall, the preferred local replacement window because winter freeze-thaw and summer heat both complicate installation. In practical terms, that means pricing in Arlington tends to spike during peak demand months and lull a bit in late fall and winter. If a contractor offers a late-season start, confirm they plan to maintain ventilation and underlayment quality despite the compressed schedule. For older homes, coordination around chimneys, skylights, and dormers during peak months is essential to avoid misfires that lead to ice-dam risk next winter.
Asphalt shingles serve as the cost anchor for most households. If choosing metal roofing, expect higher upfront material and installation costs, with strong long-term durability and potential savings on attic temperature regulation. Tile options, both clay and concrete, bring substantial weight and need for structural evaluation, often increasing both decking prep and flashing work. Wood shingles or shakes add aesthetic value but demand careful maintenance to resist weather and ice dam formation. Synthetic or composite shingles typically sit between asphalt and high-end options in price, with practical durability in diverse weather. For precise budgeting, compare installed per-square costs across options, factoring in tear-off, flashing, ventilation, and any needed repairs to the decking.
Get a clear picture of your project costs upfront - no commitment required.
Storm Works Roofing & Restoration
(844) 786-7696 www.stormworksroofing.com
Serving
4.8 from 143 reviews
Arlington typically requires a building permit for re-roof projects through the local Building Department. The permit process is straightforward: the application can be submitted by the contractor or by you as the homeowner, depending on who will be handling the job. In single-family homes close to Mystic River or Spy Pond, where older steep-slope roofs are common, getting the permit in early helps avoid delays that can interrupt a mid-winter tear-off. Be prepared to provide basic project details, including the proposed roofing material, roof pitch, and work timeline.
Permit applications are commonly submitted by either the contractor or the homeowner, and normal processing often takes about 1 to 2 weeks. During peak construction seasons, expect a little slack in the schedule, especially if the plan requires adjustments for historic or site-specific constraints. If the home has mature trees or tight lot lines, an inspector may request minor clarifications about waste containment, flashing transitions, or ventilation provisions. Planning for the delay helps you coordinate access for crews and material deliveries, particularly when ice dam risk is highest in late winter.
Inspections are typically scheduled at rough tear-off and final installation to verify underlayment, ventilation, and overall code compliance. At rough tear-off, the inspector checks that the existing decking is sound, that a proper underlayment is in place, and that any ventilation baffles or soffit vents align with current code requirements. Because Arlington homes often sit under mature tree canopies, ensure roof vents and turbine or powered vents are positioned to maximize airflow without drawing in excessive leaves. The final inspection confirms that flashing at chimneys, dormers, and valley transitions is correctly installed, that the fastener pattern adheres to the chosen material, and that roof edges are sealed to resist freeze-thaw stress. If any issues are found, you will typically be given a reasonable period to correct them before a re-inspection.
Coordinate with the Building Department early to clarify any local quirks for steep-slope roofs or historic neighborhoods. Keep a clear record of all permit numbers, inspection dates, and approved plan sets. If the contractor handles the permit, request copies of submission materials and approval notes so you can reference required underlayment types and ventilation strategies during the project. Finally, in neighborhoods with dense housing or close setbacks, confirm whether any temporary street work or debris containment needs apply to avoid delays or complaints from neighbors.
Massachusetts is generally a competitive homeowners insurance market rather than an extreme roof-claim environment, and Arlington owners should expect scrutiny and documentation rather than automatic approvals. Insurance staff are trained to verify roof age, visible wear, and the condition of underlayment before writing or renewing policies, so be prepared for questions that go beyond a quick weather event.
After a storm, wind and hail claims are common enough that you should photograph shingles, flashing, gutters, and interior leak evidence immediately. A single driving rain can expose gaps you did not notice, and images taken at the moment help the adjuster understand the true scope. Store these files in the cloud so they survive a slow claim process.
Insurers may require detailed proof of roof condition and may factor underlayment and ventilation details into claim handling or coverage expectations in Massachusetts. Documentation should include attic access, ventilation baffles, and any signs of ice dam-related damage. If an appraisal or contractor report is requested, provide a clear, timestamped record of the roof's state over the past season.
As older steep-slope homes near Mystic River pockets, poor ventilation and mixed material flashing can complicate coverage decisions. Be ready to explain recent maintenance and any upgrades, such as improved underlayment or added insulation, that mitigate freeze-thaw damage. Honest, thorough reporting today can prevent later denial or reduced benefits after a winter storm.
Keep a forward-looking workflow: quick storm photo, notes on leaks, and a written record of shingles and flashing condition. By aligning your documentation with how Massachusetts insurers review claims, you stand a better chance of a fair outcome after winter storms.
Skylight service is a meaningful specialty in this market, reflecting how roof penetrations create recurring leak points on older Arlington homes. Start with a careful inspection of the curb or curb-mounted unit and the surrounding shingles for any ice dam-related staining or lift. In late winter, check for condensation puddles inside the opening-these signal sealant failure or poor flashing connections rather than a simple panel issue. When you plan repairs, prioritize resealing the perimeter with a compatible, flexible sealant and confirm the flashing sits flush against the roof deck. If the skylight is vented, verify the vent meet is sealed and that the flashing integrates with the vent stack without leaving a vertical seam exposed to freeze-thaw cycles. For ongoing prevention, consider a cap or cover system that sheds snow and reduces ice buildup, especially on steeper slopes near trees or overhangs where debris can accumulate and push water toward the seal.
Chimney-related work is unusually visible in local contractor signals, which aligns with Arlington's older residential architecture and frequent masonry roof intersections. Begin with a visual climb to inspect brick mortar joints, chimney cricket or saddle, and the transition to the roof deck. Look for cracked or missing mortar, spalling bricks, and deteriorated flashing where the chimney meets the roof. Freeze-thaw cycling accelerates failure at sealants, step flashing, and counterflashing long before the main field shingles wear out. If you see efflorescence on brick or moisture staining on the interior ceiling near the chimney, that points to slow leaks that may require flashing rework or repointing. When scheduling, insist on flashing that steps up with the chimney and wraps behind to shed water behind the parapet plane, not under shingles, to reduce future damage.
Flashing in this area must contend with rapid temperature swings and dense tree cover that deposits needles into joints. Prioritize a flashing plan that ties into ridge lines and into any valleys near the chimney or skylight chase. Counterflashing should be embedded and lapped to resist wind-driven rain and ice dam push. For older roofs, remove compromised sealant and replace with a high-performance, flexible product that accommodates movement from freeze-thaw cycles. Regular checks after snowmelt are essential to catch hairline gaps before they become active leaks. In practice, schedule a staged inspection after the first major melt of spring to verify that all penetrations remain watertight as the roof settles.
Find contractors experienced in skylight installation, flashing, and leak repairs to bring natural light into your home.
Ranch Roofing
(866) 298-4393 ranchroofing.com
1191 Massachusetts Ave, Arlington, Massachusetts
5.0 from 114 reviews
RB Farina Roofing
(781) 648-5446 www.farinaroof.com
1319 Massachusetts Ave, Arlington, Massachusetts
4.8 from 524 reviews
Premiere Roofing & Remodeling
(781) 646-0051 premiereroofing.com
28 Spring St, Arlington, Massachusetts
4.8 from 24 reviews
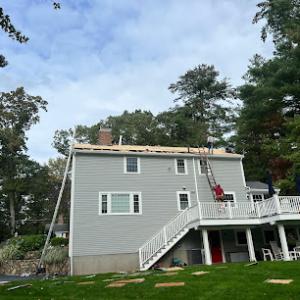
Late spring through early fall is the preferred replacement window for a typical home with steep-slope roofs and mature trees along Mystic River and Spy Pond corridors. In this window, the ground is workable, there's less winter moisture penetrating attic spaces, and the dramatic freeze-thaw cycles that shape ice dam and flashing wear are less active. For homes with older ventilation and steep pitches, this timing helps minimize the chance of trapped moisture and cycling temperatures that can stress underlayment and allow ice dams to form in colder stretches. Even when spring rains arrive, the bulk of outdoor work can proceed with careful scheduling and protection of interior spaces. The goal is to avoid the heart of winter where cold installs and moisture infiltration collide, and to reduce risk to prewar detailing and historic roof lines.
During the heat of summer, shingle adhesion and handling become important. In Arlington's sun-baked afternoons, crews benefit from starting earlier and finishing before the peak heat, protecting shingles from warping and loosening as they're laid. On aging homes with complex flashings and dormers, timely installation reduces the chance of lifting in the afternoon gusts and helps preserve attic ventilation integrity. If a summer window is chosen, ensure crews plan for midday shade, frequent hydration, and a careful sequence that protects vented spaces and interior finishes from heat-driven condensation.
Fall brings leaf drop and increased rain on tree-lined streets, which can complicate cleanup, gutter flow, and ventilation checks. Scheduling in this season requires clear access to eaves, careful debris management, and timely inspection of attic vents and turbine or box vents after leaf fall. A fall window benefits from proactive gutter and downspout safeguarding so winter moisture does not back up into the roof assembly, preserving the performance of flashing and preventing ice dam risk when temperatures swing.