Last updated: Apr 19, 2026
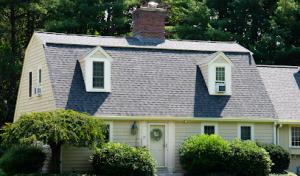
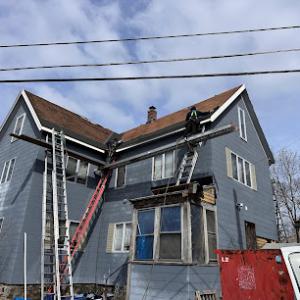
Burlington homeowners face repeated winter freeze-thaw cycling that can crack aging asphalt shingles and drive ice dam formation along eaves. When water from melting snow refreezes at the roof edge, it forms dams that back up under shingles, leaks into soffits, and can invade attic spaces. This isn't just a cosmetic issue-freeze-thaw cycles loosen fasteners, lift shingles, and accelerate aging of the roof deck. In this climate, even well-installed roofs can suffer if hatch spaces, attic baffles, or edge details aren't prepared for the seasonal onslaught. The result is a pattern of damage that compounds year after year when edge flashing and ventilation aren't doing their job.
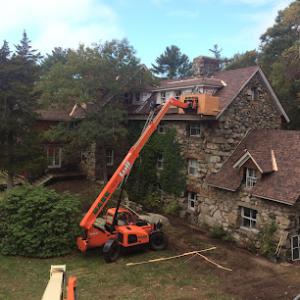
Cold winters shorten the safe installation window, so many Burlington replacements are pushed into late spring through early fall. That compression can increase the risk of mistakes if ventilation planning and flashing integration are rushed. A successful replacement here hinges on staging that allows proper attic ventilation during the roof's replacement, plus precise edge detailing to shed water away from the eaves before winter returns. If a roof is replaced at the tail end of winter or early spring, ensure crews are prepared for lingering freezing temperatures at night, which can affect underlayment performance and shingle sealant activation. Planning around the local climate means prioritizing a dry, snow-free period with reliable temperatures to allow shingles to seat and seal properly.
Attic ventilation and roof-edge detailing matter locally because inspections may review ventilation and attic access on full replacement projects. Poor intake or exhaust balance, blocked soffit vents, or insufficient attic baffles can trap heat and melt snow, feeding ice dam formation. Edge detailing-proper drip edges,Z-flashing, and consistent ice and water shield coverage up the roof edge-becomes a frontline defense against water intrusion. In Burlington, where the winter wind can drive moisture laterally, those details must be executed with precision to prevent later leaks in closets, ceilings, and along interior walls. Do not underestimate how attic access points, pull-down stairs, and hatch insulation affect ventilation calculations and the overall performance of a new roof.
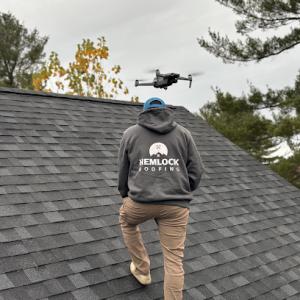
Start with a proactive inspection before the deep freeze settles in. Look for curling, curling edges, or missing granules on asphalt shingles; note any exposed or blistered underlayment along the eaves. If ice dams have appeared in the past, discuss with the contractor a plan that includes enhanced attic insulation, balanced ventilation, and a continuous ice and water shield along the eaves and at least 24 inches up the roof slope. During replacement, insist on thorough edge detailing: proper drip edge installation, continuous flashing at valleys and chimneys, and secure fasteners that won't back out in cold weather. After a storm, clear only the soft, accumulated snow at the roof edge if safe, but never attempt to remove ice dams yourself; call a pro to assess flashing integrity and potential membrane breaches. In this climate, a roof is an investment in long-term dry interiors; the focus must be on preventing dam-related leaks and ensuring the ventilation system works harmoniously with the new roof membrane.
When Burlington's spring storms roll in, heavy rain and gusty winds expose flashing weaknesses that were hidden through winter. Ice dams and freeze-thaw damage from the prior season can leave shingles and underlayment more vulnerable to wind-driven water. The combination of rapid temperature swings and wet wind events in this area creates a higher risk of moisture intrusion around skylights, chimneys, vents, and edge flashing. Homeowners often overlook small breaches until a sudden downpour reveals them, so staying alert during the first few strong storms is essential.
In this climate, soffit and vent penetrations are common failure points, followed by deteriorated step and counter-flashing at wall transitions. Look for warped or curled shingles, loose granules in gutters, and stained ceilings or attic rafters after a storm. Outdoors, inspect flashing at the rake edges, chimney, and vents for gaps or lift. If a roof edge sounds hollow when tapped, or if ice dam traces remain during a sunny day, those are red flags that water is finding its way in. A note for multi-story homes: wind-driven rain can reach roof valleys and ridge lines with less obvious exterior signs but significant interior impact.
If a storm just ended and you notice moisture spots or drips, get the attic inspected once the rain stops and it's safe to access the roof. Document any damage with clear, dated photos from multiple angles, including exterior flashings, penetrations, and interior leaks. Avoid climbing on a damaged roof during ongoing wind events; use binoculars from a safe ground vantage point to identify loose flashing or missing shingles. Contact a contractor who specializes in storm and wind damage to perform a prompt, thorough tarping or temporary protection if needed, especially over valleys and roof-to-wall transitions.
Massachusetts insurance is generally stable, but severe wind or hail events can still create local spikes in roofing claims activity. Insurers commonly want before-and-after photos, contractor documentation, and an adjuster site visit when storm damage is reported. Prepare a concise damage timeline, including dates of storms and when leaks were first observed, to streamline the claim process and improve the chances of timely coverage.
Choose a local roofing professional who understands Burlington's snow-driven setbacks and spring wind patterns. Ask for a detailed inspection report that highlights flashing deficiencies, suspected water intrusion zones, and a plan for restoring weather-tight flashing. If you're dealing with confirmed damage, have your contractor photograph all affected areas before and after any temporary repairs, so you can share a complete evidence trail with your insurer and expedite the repair decision.
Find local contractors experienced in assessing and restoring roofs after hail, wind, and severe weather events.
Universal Roofing Solutions
(781) 901-1203 universalroofingsolutions.com
29b Adams St, Burlington, Massachusetts
5.0 from 88 reviews
Universal Roofing Solutions
(781) 901-1203 universalroofingsolutions.com
29b Adams St, Burlington, Massachusetts
5.0 from 88 reviews
Universal Roofing Solutions is a family-owned and locally operated roofing company with a reputation built on trust, quality, and integrity. For over 25 years, we’ve been providing top-tier roofing services to homeowners and businesses in our community, combining expert craftsmanship with a personal touch. As a proud local business, we treat every project like it’s for our own home—delivering dependable, long-lasting roofing solutions backed by decades of experience. Whether it’s repairs, replacements, or new installations, we’re here to protect what matters most—your home, your business, and your peace of mind.
D&G Roofing & Siding
(781) 265-2435 dandgexteriors.com
1500 District Ave, Burlington, Massachusetts
5.0 from 73 reviews
D&G Exteriors is a residential and commercial roofing contractor, gutter installer, siding contractor, window and door installer and deck builder. We specialize in full replacements and large residential projects. Proudly serving the greater Boston area with the best in customer service, integrity and professionalism, from the North Shore to the South Shore. Insured and licensed.
Thomas Burke Roofing & Gutters
Burlington, Massachusetts
4.3 from 16 reviews
Thomas Burke & Sons – Roofing and Siding has been a family owned and operated business for over 65 years – a fact that we ‘wear’ with pride. Since our founding in 1941, the company has been in the forefront of innovation and reliability in the industry. Know by our customers and competitors alike as the ‘Premier Installer in Massachusetts’, we have gained recognition beyond our local geographic area. In addition to using only ‘top of the line’ products from CertainTeed, G.A.F., and Genflex, our installers use the more reliable hand held hammer versus ‘air gun’ equipment… a reason is that we want to be sure that our people are always paying close ‘attention to detail’.
Action Roofing
(978) 726-9709 www.theactionroofing.com
Serving
5.0 from 83 reviews
Since 2000, Action Roofing has provided Billerica MA homeowners with quality roofing maintenance repair, and replacement services. We take pride in our local reputation, and our customer-centered approach is the foundation of our business. At Action Roofing, all of our professionals are licensed by the State of Massachusetts and trained through GAF, a trusted leader in the roofing industry. We prioritize the timely and efficient completion of all projects, and we provide complete job site cleanup. With our 25-year non prorated GAF Golden Pledge installation warranty, you can be confident in the roofing services we provide. Contact us today at (978) 726-9709 for your free roofing estimate.

KMK Roofing
(781) 935-6484 www.kmkroofing.com
Serving
5.0 from 13 reviews
KMK Roofing provides residential and commercial roofing services across the Greater Boston and North Shore areas of MA.
Arya Roofing & Contracting
(617) 605-6667 www.aryaroofing.com
Serving
4.7 from 32 reviews
We offer roofing siding, decks and gutter services. Please visit Aryaroofing on IG for our daily updates
Hemlock Roofing
(413) 404-7036 hemlockroofingco.com
Serving
4.9 from 119 reviews
Hemlock Roofing is a reliable roofing company offering expert roof repairs, replacements, and installations. We serve both homeowners and businesses, delivering top-quality workmanship to ensure your property stays protected and durable. Committed to integrity and excellence in every project.
Golden Group Roofing & Solar
(508) 318-8160 goldengrouproofing.com
Serving
4.9 from 85 reviews
We’re your award-winning local roofing company specializing in quality roof replacement, roof repairs, home siding replacement, home siding repairs, skylights, Solar Roofing . As a certified roofer, we provide the best roofing systems in Greater Boston and Central Massachusetts. You’ll love your new roof so much, you’ll call us the top local roofing company too! Our team approaches each solar panel installation project with a roofer’s eye. The integrity of your roof and the structure under it is our top concern. While we want you to benefit from solar panels, we want to make sure your roof can integrate the Solar PV System.
USA Group Construction
(857) 991-2839 www.usagroupconstruction.com
Serving
4.8 from 21 reviews
USA Group Construction, INC is your premier roofing company in Woburn, MA, and we are the ones you go to when you need someone you can really trust. Our company has been in business for over 17 years, so we are assured to be the most qualified and knowledgeable in the roofing business. We currently have HIC and Construction Supervisor licenses. Our roofing services are of superior quality, and everything is handled within the scope and schedule of your budget. #roofingcontractor#roofing#roofer#homeimprovement
Quality Roofing by Larry
Serving
4.1 from 21 reviews
Specializing in roof related services in Woburn, Massachusetts. We have been continually trained by GAF Materials Corporation in the latest roofing techniques, installation, product knowledge, and awareness.
Johnny's Pro
(781) 519-9025 www.johnnyspro.com
Serving
5.0 from 30 reviews
Johnny’s Pro is a trusted roofing contractor serving MA, CT, RI, and NH. We specialize in full roof replacements, including homes with existing solar systems, as well as siding and gutter upgrades. With over 17 years of experience and 7,000+ homes completed, we’re known for quality, transparency, and results that last. As Owens Corning Preferred and CertainTeed Certified installers, we follow manufacturer standards and offer extended warranties. If you’re going solar and unsure about the roofer recommended by your provider, reach out to us. Our scopes are clean, our process is smooth, and our work is built to last.
Stella Roofing Services
(781) 999-1572 www.stellaroofingservices.com
Serving
5.0 from 62 reviews
Since 2008, Stella Roofing Services has been the premier choice for residential and commercial roofing solutions north of Boston. With over 60 years of combined experience the Stella team delivers unparalleled expertise and craftsmanship. Fully licensed and insured, Stella Roofing offers comprehensive roof services, including roof installation, repair, and replacement, installing top-quality materials like asphalt, rubber, and metal roofing from trusted brands like Owens Corning, GAF, and CertainTeed. Our commitment to excellence ensures long-lasting, low-maintenance roofing system solutions that stand the test of time and New England weather. Serving Greater Boston, Cambridge, Somerville, Medford as on of the top local roofing companies.
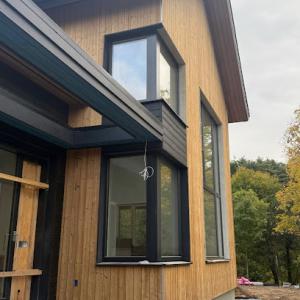
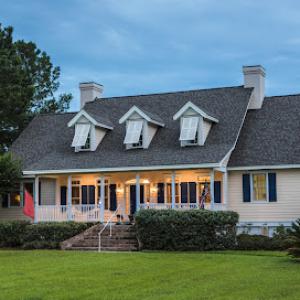
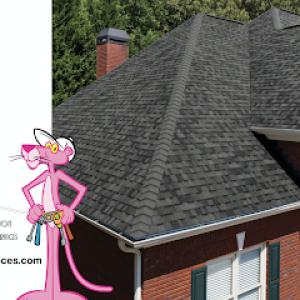
Asphalt shingles are the dominant practical choice in Burlington, but metal, tile, wood, and synthetic options are also present in the market. For most homes, they offer straightforward installation, familiar maintenance, and a familiar repair path when ice dams form or spring wind-rain events arrive. In this climate, choose a shingle with good granule retention and a mid-range to high fire rating, then pair it with a robust underlayment and properly integrated flashing to handle freeze-thaw cycles. Pay attention to uphill-to-downhill transitions such as valleys and roof-to-wall connections, where moisture can linger during cold snaps.
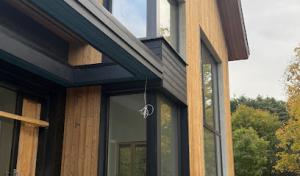
Metal roofing provides excellent snow shedding and durability, which can help with ice dam risk when paired with correct installation and eave ventilation. Tile options-clay or concrete-offer long life and strong performance in hot, humid summers, but require careful flashing detail at penetrations and near gutters to resist thermal movement. Wood shingles or shakes bring a traditional look but demand careful maintenance and rot resistance, especially in shaded sections where moisture lingers. Synthetic or composite shingles combine variable aesthetics with higher impact resistance and stable performance through temperature swings, but flashing compatibility and expansion gaps must be honored to prevent leaks.
Burlington's cold winters and humid summers make thermal movement, moisture management, and seasonal installation conditions important when comparing materials. Ensure the chosen system allows for movement without compromising seals at valleys, skylights, and chimney edges. Gutter compatibility matters: metal gutters must be matched to the roof's flashing plan and material to prevent ice-backups and overflow during heavy snow melts. Evaluate color and coating choices for UV exposure and potential thermal expansion, especially where roof planes meet soffits and ridge lines.
Winter cracking risk, summer expansion, and autumn debris stress make material-specific flashing and gutter compatibility especially relevant in this area. When scheduling installation windows, aim for a dry, moderate day to set up underlayment and flashing correctly before the first winter freeze. Consider ridge venting and soffit ventilation to maintain attic dryness through the season, reducing the chance of ice dam formation. For any large or complex roof, a detailed plan that maps flashings, gutters, and downspouts to seasonal drainage patterns helps avoid post-installation surprises during thaw cycles.
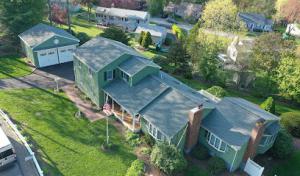
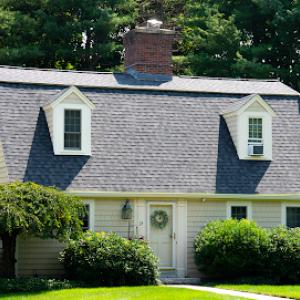
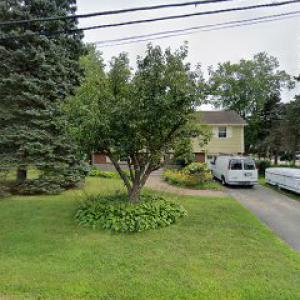
Typical Burlington pricing runs about $400 to $700 per square for asphalt shingles, $600 to $1300 for metal, $900 to $1800 for clay tile, $700 to $1400 for concrete tile, $850 to $1500 for wood shingles or shakes, and $400 to $750 for synthetic or composite shingles. These ranges reflect the mix of common suburban homes near Route 128/I-95, where roof planes vary from compact ranches to multi-angled capes that challenge ventilation and flashing details. When choosing materials, the long winter and spring wind-rain events in this area interact with existing roof geometry, so the lowest sticker price can end up costing more later if ventilation and flashing aren't addressed upfront.
Costs in Burlington can rise when winter damage compresses scheduling into the late spring through early fall replacement season. A tight window means crews are juggling projects, potentially increasing labor time per square due to limited daylight, winterization needs, and the rush to complete before the next freeze-thaw cycle. If snow or ice dam damage is present, expect additional costs for ice-damming mitigation and temporary protection during the delay. Planning ahead with a fall or early-spring start can help stabilize pricing and avoid peak-season surcharges.
Project pricing can also move based on ventilation corrections, flashing work, attic-access inspection readiness, and the material mix common in this market. In Burlington, proper attic ventilation matters for preventing ice dams and freeze-thaw damage, so expect adjustments if the existing system needs upgrading. Flashing around chimneys, dormers, and skylights is a frequent price driver, especially on older homes with asphalt or wood-shingle roofing decks. An inspection-focused approach that lists required venting, underlayment, and flashing upgrades often yields a more predictable estimate and a longer-lasting result.
Get a clear picture of your project costs upfront - no commitment required.
A full roof replacement in Burlington typically requires a building permit through the local Building Department. Before any shingles come off or new underlayment goes down, you should confirm permit requirements with the town to avoid delays or code issues that can disrupt winter work windows. The Building Department can clarify whether your project needs plan review, structural notes, or a simple permit of record. In practice, the permit process tends to move quickly when the contractor submits complete details and a clear scope, especially during non-peak seasons when inspections are not competing with peak construction cycles.
The Building Department reviews project details to verify proper installation and code compliance. During the permit review, expect questions about attic ventilation, eave and ridge venting plans, flashing details around valleys, chimneys, skylights, and transitions to walls. The department also checks deck and roof-line tie-ins, drip edge, and header support if structural members are exposed or modified. After work begins, inspections are scheduled to confirm that each stage meets code requirements and that the overall installation will hold up under Burlington's winter weather and freeze-thaw cycles.
Local inspections place particular emphasis on ventilation and attic access. Proper ventilation helps prevent ice damming and excessive attic moisture, which are common concerns in cold-season months. Expect the inspector to review the balance of intake and exhaust vents, as well as the condition and placement of attic hatches or scuttle access. Flashing around chimneys, vents, skylights, and transitions to siding must be integrated with the roof surface to resist wind-driven rain and snow load. If your roof includes multiple roof lines or large overhangs, the inspector will verify that flashing steps are continuous and secure across all connections.
Turnaround can be relatively short during non-peak seasons if the paperwork is ready and the contractor coordinates inspections promptly. Communicate with your contractor about any required inspections and ensure access routes to the attic and roof are clear for the inspector. Having a clear plan for ventilation, flashing details, and attic access ahead of the permit submission reduces the chance of rework or delays once the project begins. If winter weather threatens, ask about temporary measures or scheduling flexibility that preserves safety and keeps the inspection timeline intact.
When a roof issue arises after a snowstorm, take clear photos of all affected areas from multiple angles before any temporary repairs are made. In these suburban homes near Route 128, you'll often see mingled ice dam damage, gutter leaks, and patched valleys. Document the edge of shingles, flashing at the chimney and skylights, and any interior water intrusion around ceilings and walls. This left-to-right sequence helps a adjuster understand the scope before temporary fixes shift the appearance of the damage.
Massachusetts carriers in this market commonly rely on adjuster site visits and contractor scope details when evaluating roof claims. Because Burlington weather can produce sudden wind gusts and hail during springs and fast-moving storms, note where fibers or granules are missing, where shingles have curled, or where flashing has lifted in a pattern consistent with wind-driven impact. Photos that show a clear before-and-after contrast, plus any gaps along rake edges or eaves, strengthen the documentation for a claim review.
Local claim outcomes are influenced by whether damage patterns align with recent wind or hail events rather than simple age-related wear. If you can, gather neighborhood storm data or weather-verified timeframes that match the claim window. When the contractor steps in, insist on a scope that mirrors those patterns-especially around chimneys, vents, and valley flashings-so the claim reflects an activity that a weather event could plausibly cause rather than routine deterioration.
After repairs are completed, take additional photos from the same angles and at the same lighting. These images show the final workmanship and can help prevent disputes about what was finished or replaced. If there are color-matching or flashing-seal issues, the photos provide a timely reference point for discussions with the insurer.
Keep a simple, dated photo log of storm damage and repairs, and share it with the insurer early in the process. This neighborly approach helps ensure the claim reflects the real sequence of events and the roof's actual condition, rather than assumptions about age or generic wear.
Skylight penetrations are a recurring concern for Burlington homeowners. In this market, skylight installations and repairs emphasize careful flashing and precise seals because leak-prone penetrations tend to show up after the winter and during spring melt. When planning work, verify that the skylight curb is properly flashed with step and counterflashing, and that the surrounding roof deck is sound. Consider adding a low-profile flashing boot at the curb and ensuring the shingle laps shed water away from the skylight opening. A well-sealed skylight can prevent interior moisture issues that otherwise echo through nearby attic spaces during freeze-thaw cycles.
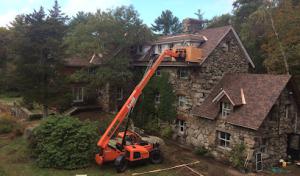
Chimney-related roofing work is common on older suburban homes, where flashing transitions are stretched by settling and seasonal temperature shifts. Step flashing around the chimney should weave with the roof shingles in a tight ladder pattern, with continuous counterflashing over the top edge to resist wind-driven rain. In Burlington's climate, each year's frost action can loosen fasteners and degrade sealants, so inspect mortar joints and ensure that the base flashing is integrated with the chrome or copper step pieces. If a chimney chase is present, verify that vent penetrations remain properly sealed and that damper-access flanges don't crowd the flashing stack.
Around skylights and chimneys, flashing transitions are the first line of defense against water intrusion. In autumn, windy days can lift edges and trap moisture near flashing-to-roof interfaces. Pay particular attention to the interlock between asphalt shingles and metal flashing at rake edges and valley locations. Confirm that sealants are compatible with Vermont-grade winters experienced in the corridor and that any existing flashing is continuous and undisturbed by shingle replacement.
Autumn leaves accumulate near flashing transitions and along gutters, creating drainage bottlenecks that stress surrounding seals. When inspecting edges, clear debris from near the chimney base and skylight apron, then check that downstream gutters and downspouts are aligned to promote gravity-driven flow away from the roof plane. A clean, well-vented attic space reduces condensation that can travel through flashing joints during thaws.
Do a seasonal walkthrough focusing on skylight frames, chimney flashings, and adjacent shingles. Look for lifted shingle tabs, rust spots on metal flashing, and hairline cracks in sealants. Test interior attic vents for proper operation, since ventilation helps limit ice dam formation at flashing crossings. If any flashing shows corrosion, gaps, or movement, address it promptly to protect the surrounding roof assembly through Burlington winters.
Find contractors experienced in skylight installation, flashing, and leak repairs to bring natural light into your home.
Universal Roofing Solutions
(781) 901-1203 universalroofingsolutions.com
29b Adams St, Burlington, Massachusetts
5.0 from 88 reviews
Flat-roof specialization is active in Burlington, reflecting demand beyond standard pitched residential shingle work. Homeowners often encounter low-slope additions, dormers, or sunrooms where proper drainage and reliable flashing determine long-term performance. The region's mix of older construction and newer upgrades means you'll see a range of materials and installation approaches, but the core challenges stay consistent: keeping water moving off the surface, preventing ice dam-related seepage, and avoiding hidden ponding that accelerates wear.
In Burlington, seasonal ponding is not rare on low-slope sections after heavy spring rains or rapid mid-summer downpours. Pay close attention to how the roof transitions to gutters, scuppers, or internal drains. Every transition point is a potential weak link if the membrane is not continuous or if slopes become uneven over time. When planning or evaluating a flat roof, confirm the primary drainage path is free of debris and that interior transitions align with the external drainage plan. A gradual, consistent slope toward the drainage outlets is preferable to sharp changes that create stagnant water zones.
Flashing around penetrations, at wall transitions, and where the roof meets parapets must be meticulous. Burlington winter conditions stress flashing seals during freeze-thaw cycles, so verify that metal edges, curb flashings, and counterflashing are integrated with a continuous waterproof layer. In areas with frequent wind-driven rain, ensure flashing is tied into the underlying membrane with proper fastener patterns and sealants that resist movement and thermal cycling. The goal is a seamless, uninterrupted seam from surface to flashing, with no reliance on temporary patches.
Spring rain delays and summer heat can complicate low-slope installation timing and moisture control in this market. Schedule critical steps to avoid exposure during peak warmth and when rain-impacted days are common. Ventilation and substrate dryness matter more here than on typical pitched roofs; if the underlying deck isn't dry and stable, moisture can migrate into the insulation and cause future delamination. Coordinate interior air barriers and roofing work so that moisture content is monitored and controlled throughout the project.
Find specialists in TPO, EPDM, and built-up flat roofing systems for residential and commercial properties.