Last updated: Apr 19, 2026
Chicopee's cold winters bring repeated freeze-thaw cycling that hits older sloped roofs hard. Water seeps into seams, shingle edges, and around protrusions, then freezes and expands. Over seasons, that repeated freezing action accelerates wear at shingles, flashing joints, and roof penetrations. The result is more hairline leaks, accelerated granule loss, and a higher chance of ice buildup along eaves when temperatures swing from freezing to above-freezing. This isn't just about a missing shingle; it's about structural areas that routinely face pressure from ice damming and moisture intrusion.
Replacement work in this area is concentrated from late spring through early fall because winter conditions and spring wet weather narrow safe installation windows. Cold snaps, frozen decking, and lingering snow depths disrupt both roof removal and new material installation, increasing risk of poor sealing and fastening. Planning a re-roof for a window with milder temperatures and dry days minimizes warranty disputes and helps ensure proper shingle seating, flashing integration, and attic venting. If you're scheduling work, target a calm stretch after thaw from late March into early June or after labor-day through October, when crews can work consistently and test-for-leak confidence can be established before the first heavy snows return.
Older homes common in this part of western Massachusetts are more likely to have ventilation and insulation imbalances that contribute to ice-dam formation along eaves. When warm attic air leaks toward the roof deck, it melts snow near the top of the roof while colder air below keeps lower sections frozen. That differential creates water backing up under shingles, leading to visible icicles, cracked shingles at eave lines, and interior staining. The fix isn't only patching the roof; it's addressing attic heat flow, sealing penetrations, and restoring a balanced ventilation plan to slow or prevent future damming. Expect the most durable results from coordinated work that includes attic detailing alongside the roof replacement.
If you're evaluating a roof for damage, look for darkened mineral granules, visible curling, or cupping of shingles near eaves, plus any staining or peeling paint inside upper rooms. Prioritize a replacement strategy that emphasizes high-quality flashing at valleys, chimney joints, and vent boots, as these are common failure points under freeze-thaw stress. Insist on a comprehensive attic assessment that checks insulation depth, air sealing around fixtures, and vent openings to promote a uniform roof temperature during winter. Finally, coordinate with your roofer to plan for a thorough ice-dam prevention approach, including improved attic venting and, where appropriate, upgrades to underlayment and edge detailing to resist repeated freeze-thaw cycles over many winters.
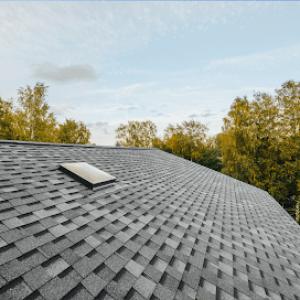
Asphalt shingles dominate the traditional pitched roofs found on the typical Chicopee home. They fit the common slope profiles you'll see on many neighborhoods, and they align with moderate replacement budgets compared to some premium materials. When considering a re-roof, plan for shingles that handle freeze-thaw cycles and seasonal temperature swings, plus the need for solid flashing around chimneys, dormers, and vent stacks. The local climate can make attic condensation and ice-damming a real concern, so pairing asphalt with proper underlayment and clean drainage improves long-term performance without complicating repairs. This option remains the most forgiving if you're dealing with a standard two-car garage or a modest Cape with a straightforward ridge line.
Slate and clay tile appear on a subset of older or architecturally distinctive homes, bringing a period look that many neighbors notice. These materials change how a roof behaves in winter-weight is a factor, and rigidity in cold spells can affect how tiles crack or shift. When you see these on a roof, expect more careful matching of repair materials and flashing details, especially around parapets, valleys, and intersections with gutters. The added weight also influences the underlying structure; if the roof isn't reinforced to bear tile, a upgrade to the supporting deck and framing may be necessary. Repairs are usually more specialized, and flashing detail around chimneys and vents needs to be precisely integrated to prevent leaks during thaws.
EPDM rubber roofing finds its place on the low-slope sections of homes where shingles aren't appropriate-think porches, additions, or certain multifamily or commercial-style layouts. On these surfaces, EPDM provides reliable seam integrity and good resistance to ponding water. The material's flexibility helps it handle seasonal temperature changes, but installations must be meticulous around edge details, penetrations, and transitions to higher-slope sections. If an addition shares a roof with a steep main house, ensure the transition is sealed and integrated so ice dams aren't drawn toward the junction during winter thaws. For a home with a mix of roof styles, EPDM can be a cost-effective way to extend long-term performance without reshaping the entire roof.
The best choice balances appearance with performance under New England winters. Asphalt gives broad compatibility with typical rafter spans and existing attic ventilation, while slate and clay tile offer distinctive curb appeal but demand structural awareness and careful detailing. EPDM serves well where shingles aren't viable due to slope or attachment points. In all cases, ensure flashing, drainage, and insulation strategies are aligned with freeze-thaw realities to reduce ice-dam risk and water intrusion.
Late spring through early fall is the main reroofing season for homes with older slope profiles. Cold snaps, snow buildup, and ice dam risk in the heart of winter can stall projects and complicate sealing, so winter work is generally avoided. For roofs that have already faced several freeze-thaw cycles, scheduling a tear-off and re-seal when temperatures are reliably above freezing reduces the chance of moisture being trapped in decking. This timing aligns with the practical realities of a climate that swings from cold, damp mornings to sun-baked afternoons and helps crews work more efficiently without weather-driven interruptions.
Spring rains in the Pioneer Valley can interrupt tear-off schedules and expose roof decking to moisture if projects are not tightly staged. In Chicopee, the transition from wet to warmer days matters for the sequencing of steps: tearing off, drying any exposed deck, and installing underlayment should be coordinated so there are no lingering open surfaces during a predicted shower window. If a project starts in late spring, plan for compressed phases and have tarps, temporary coverings, and a clear drainage plan ready to manage intermittent downpours. The goal is to minimize exposed decking time, especially on roofs with older sheathing.
Summer heat and humidity can affect material expansion and roof-deck moisture conditions, especially on darker roofs and low-slope sections. In Chicopee, heat accelerates the expansion of shingles and can push adhesive-backed components to set more quickly, which is helpful for install speed but requires careful alignment to prevent warping. Humidity can slow drying times for underlayment and sealants, so schedule the most sensitive tasks for cooler parts of the day and ensure proper ventilation of attic spaces during the process. For lower-slope areas, pay close attention to flashing integrity and deck dryness, as moisture at the deck surface can hinder proper adhesion and seal.
Coordinate with a contractor to map out a tight week-by-week plan that accounts for local weather patterns. Have a contingency day for unexpected rain but avoid letting multiple wet days stack up between tear-off and installation. Prioritize angles and vent layouts that reduce moisture entrapment and ensure proper attic ventilation during the re-roof to sustain long-term performance. In a town with strong seasonal shifts, aligning the work with predictable windows helps keep the project on track and reduces the risk of weather-related setbacks.
Beaulieu Home Improvement
(413) 592-1498 beaulieuhomeimprovement.com
217 Grattan St, Chicopee, Massachusetts
4.8 from 152 reviews
Beaulieu Home Improvement, the "exterior experts”, has been a Chicopee, MA family owned business for over 50 years. Our company is now the largest home improvement contractor in the area, installing roofing, vinyl siding, windows, doors, decks, porches, and creating custom detailed carpentry using vinyl for all of Western Massachusetts, Northern Connecticut, and its surrounding areas. Reach out today for more information about the other services we offer, like: vinyl and aluminum siding and trim repair, exterior home entryway remodels, rot repair and carpentry work, skylights, gutters, and so much more!
Kerry Enterprises
(413) 459-2091 kerryenterprise.com
Chicopee, Massachusetts
5.0 from 17 reviews
We offer comprehensive solutions to maintain and enhance the integrity of residential and commercial properties. From intricate repairs to custom installations, we are committed to delivering unparalleled craftsmanship and exceptional customer service.
Supreme Roofing
(413) 331-4490 www.supremeroofing.com
788 Sheridan St, Chicopee, Massachusetts
4.8 from 34 reviews
Located in our CEO’s hometown of Chicopee, Massachusetts, Supreme Roofing's New England office opened in 2012 and serves all the states in the New England area, including Massachusetts, New Hampshire, Connecticut, New York, Maine and Rhode Island. Supreme’s New England branch is locally owned and operated. Commercial Roofing Contractor managing repairs/maintenance, roof replacement, snow removal, roof restoration, custom copper fabrication, storm/disaster response projects, slate and copper repair, new construction and more. From small business offices to high rises to manufacturing plants, hospitals, hotels and distribution centers, we have the experience, training and know-how to address any commercial roofing needs. ROOFING.DONE.RIGHT
Tech Roofing Service
(413) 331-5667 techroofing.com
896 Sheridan St, Chicopee, Massachusetts
5.0 from 10 reviews
Since its founding in 1975, Tech Roofing has been installing, repairing, servicing, & maintaining commercial, industrial, & residential roofs throughout New England & New York. Fully staffed, Tech Roofing responds quickly to customers’ needs. Personnel are fully trained and experienced in all phases of roofing work. Ongoing training and education assures customers that the work will be completed by professional, knowledgable roofing personnel who are familiar with the latest techniques.
Klaus Roofing Systems by J Smegal
(413) 384-3200 www.jsmegalroofing.com
Serving
5.0 from 120 reviews
Does your home have a leaky roof, damaged flashing, missing shingles, or other roofing problems? Your roof plays a major part in preserving the look, feel, and value of your home. That is why you should trust the experts at Klaus Roofing Systems by J Smegal to help. We have been fixing Berkshire, Franklin, Hampden, & Hampshire County homeowner's roofing problems since 2010, providing reliable solutions, courteous service, and lasting results every time. Our roofers are highly trained and come equipped with generations of experience. We also have a construction supervisor license, home improvement license, and real estate license. Schedule a free estimate on any of our services to learn more.
Adam Quenneville Roofing & Siding
(413) 798-8117 1800newroof.net
Serving
4.9 from 1260 reviews
Adam Quenneville Roofing & Siding has proudly served over 25,000 satisfied customers in New England for 25+ years! As part of the top 3% of roofing contractors in North America with Master Elite™ status, we’re committed to excellence in sales, service, and installation. We offer 0% financing for 18 months and a full range of services, including residential and commercial roofing, siding, windows, gutters, roof cleaning, roof tune-ups, and Roof Maxx™ treatments. Trust us for the “best and safest choice” in roofing and siding solutions!
Dicky Matos Roofing
(860) 936-9446 www.dickymatosroofinginc.com
Serving
4.7 from 84 reviews
Fully licensed and insured roofing, gutter and siding contractor! FREE Estimates and we are happy to work with your insurance company directly - Call us today, (413)530-5335

Slate Roof Repair
(413) 262-3662 www.slateroofrepairllc.com
Serving
4.9 from 85 reviews
Serving New England for over 25 Years, Slate Roof Repair specializes in the installation, maintenance and repair of Natural Slate, Wood and Copper roofing systems. We also offer installation and repairs of Asphalt shingle, Composite Slate, EPDM and Metal roofing systems.
US Metal Roofing
(800) 232-0399 www.usmetalroofing.com
Serving
4.7 from 60 reviews
U.S. Metal Roofing is your source for professional metal roofing service and installation. For over 45 years we have brought the life-long benefits of metal roofing to individuals and organizations throughout Massachusetts, Connecticut and New York. From service to installation, we guarantee 100% customer satisfaction.
NRB Roof Pros
(413) 707-7663 www.roofpros413.com
Serving
4.9 from 49 reviews
Welcome to NRB Roof Pros, a division of NRB Exteriors, your premier choice for exterior home improvements in South Hadley, MA! Specializing in roofing, siding and gutter installation, we're fully licensed, bonded, and insured with decades of experience. Since 2003, we've delivered top-quality roof installations and repairs. Trust our skilled team of roofing contractors for lasting results on every project.
J. Sicard Construction
(413) 535-9908 www.jodysicardconstruction.com
Serving
4.9 from 29 reviews
J. Sicard Construction, Inc. is a trusted and reputable roofing and siding company proudly serving South Hadley, MA, and all surrounding areas within a 50-mile radius. As a family-owned business, we take immense pride in providing top-notch storm damage insurance claims and restoration services. Spearheaded by Jody Sicard, a seasoned professional with over 20 years of experience in the industry, our company specializes in handling storm damage, wind damage, roofing, siding, and slate repair.
Pro Builders Home Improvement
(413) 519-0902 probuildershomeimprovement.com
Serving
4.8 from 31 reviews
Pro Builders Home Improvement is a fully licensed and insured roofing contractor serving Springfield, MA and surrounding communities. We specialize in roof repair, roof replacement, and new roof installations for residential and commercial properties. Beyond roofing, our skilled team also provides siding installation, gutter repair and replacement, carpentry, and general home improvement services, all backed by years of hands-on experience and a commitment to quality workmanship. Whether you need to fix a roof leak, replace old shingles, or update your home’s exterior, we deliver reliable results with professional service and local expertise. We have 24-hour emergency roofing services
Typical Chicopee pricing ranges for asphalt shingles fall in the $450-$900 per square range. This material remains the most common on the older New England stock found in town, and it's usually the most budget-friendly option when a simple re-roof is on the table. If existing decking shows signs of wear after a tear-off, expect costs to tick up modestly due to additional deck repairs or reinforcements. Steep pitches common in the area can slow production and push labor time, which may increase price on a per-square basis.
Metal options are priced in a broader band, from $800-$1,500 per square. When a roof needs to stand up to freeze-thaw cycles and ice dam risk, metal can offer long-term durability, but the upfront cost is higher. In Chicopee, sections with older framing that require more structural attention or precise flashing detail around chimneys and skylights can add to total expense. If a roof has to be removed entirely, the labor intensity for metal installations on older structures can also influence final numbers.
Clay tile runs from $1,000 to $2,500 per square. Tile materials suit certain styles and climates, but in this climate the extra weight often requires structural assessment. In practice, some older homes may need more extensive decking or framing work to safely carry tile, especially where roof pitches and overhangs interact with dormers. Matching pieces and skilled tile labor can push costs higher than initial estimates.
Slate brings a higher range of $1,800-$3,500 per square. This material is favored for its longevity, but it is labor-intensive and requires specialized crews. In Chicopee, sourcing matching pieces and delivering careful_each-piece installation around existing features-like chimneys and gutters-can extend project timelines and raise price. Consider slate if the roof's condition and historical character warrant a premium finish.
Fiber cement shingles sit around $700-$1,100 per square. This option offers a balance between durability and cost, with easier handling than natural slate or tile and better freeze-thaw performance than traditional asphalt in some cases. For older structures, ensure the substrate is sound; deteriorated decking or mismatched underlayment can add a noticeable bump to the final bill.
EPDM rubber roofing is listed at $400-$650 per square foot and is most relevant where low-slope areas exist that require membrane systems. In practice, a Chicopee home with a flat or widely low-slope section might find EPDM to be a cost-effective membrane solution, particularly if a full tear-off isn't necessary or if the roof has existing flat sections that can accommodate a seamless membrane.
Costs in Chicopee can rise when older roof layers reveal deteriorated decking, when steep New England roof pitches slow production, and when specialty materials like slate or tile require harder-to-source matching pieces and more specialized labor. In planning, set aside a contingency for these scenarios, especially on homes dating from the early-mid 20th century where the structure and cedar sheathing may demand extra attention.
A building permit is typically required for a full re-roof, with plans and a project description submitted to the Chicopee Building Department. That process is not a formality to skip; it sets the stage for a structurally sound install and helps catch missteps before they become costly fixes. When you apply, expect to detail the scope of work, the roofing material brand and type, and any tear-off plans. Submitting clear, accurate information can prevent delays that linger through the middle of a New England winter. If the home sits in a neighborhood with a homeowner's association, there may be additional approval steps beyond the city permit. Those extra checks can change the timeline and influence your material choice, so coordinate early with the HOA to avoid a sudden hold-up after the permit is granted.
Chicopee inspections are commonly scheduled during tear-off and again after completion to verify installation details, flashing, ventilation, and overall code compliance. During tear-off, the inspector will confirm that the underlayment, deck integrity, and any necessary structural components are sound and prepared for the new roof system. After installation, the focus shifts to flashing around chimneys, vents, and valleys; the quality of ventilation to prevent moisture buildup; and adherence to the applicable code and manufacturer specifications. The checks are practical safeguards against ice dam formation and freeze-thaw stress, which are common concerns in this climate. If a deficiency is found, the contractor should be prepared to address it promptly to avoid a second round of inspections and potential rework.
Some Chicopee neighborhoods or HOA-governed properties may add approval requirements beyond the city permit process, which can affect material choice and project timing. For example, an HOA might restrict certain colors, profiles, or fastener methods, or require an alternate path for waste disposal and staging. Engage with the HOA early to understand their criteria, and keep the permit process informed of any HOA decisions. Delays here can compress weather windows and complicate coordination with tear-off schedules and final inspections. Planning ahead minimizes the risk of misaligned approvals and last-minute changes that could compromise the project timeline.
In Chicopee and across Massachusetts, insurers commonly request photo documentation and damage records after storm-related roof claims. You should photograph both the overall roof condition and close-ups of damaged areas, including shingles, flashing, vents, and any interior signs of water intrusion. Keep a dated album and preserve originals from the day you notice damage. A written log noting the date of each storm, wind speeds if known, and observed impact can help the insurer correlate the claim to a specific event.
The local insurance environment is not defined by a broad regional pullback in coverage, but roof age and material type continue to influence underwriting and claim scrutiny. Older roofs, particularly those with historically common sloped designs in the area, may undergo closer inspection for pre-existing wear or prior repairs. The material type matters too: different roof surfaces respond differently to freeze-thaw cycles and wind-driven debris, and adjusters will evaluate whether current damage aligns with expected wear versus sudden impact from a storm.
Because Chicopee roofs face snow, wind, and seasonal storm exposure rather than a single catastrophic peril pattern, homeowners benefit from documenting damage promptly after winter events and wind-driven storms. Frozen rain, ice dam events, and gusty winds can create a progression of small issues that escalate quickly if left unaddressed. Prompt reporting helps ensure repairs target the actual failure points rather than treating symptoms, such as interior staining that developed after a late-season thaw.
After a storm, perform a cautious exterior inspection as conditions permit, and note any lifted edges, granule loss, or displaced flashing. If shingles are blistered or curled, photograph from multiple angles and, if safe, capture the underside of the roof as visible from attic or exterior eaves. Contact the insurer promptly to understand the required documentation and scheduling of an adjuster, and consolidate all contractor estimates and repair notes tied to the storm event. Maintaining organized records tailored to Massachusetts' claim expectations can streamline the process and help ensure the claim reflects the storm's impact rather than preexisting conditions.
In the Chicopee area, freeze-thaw movement commonly shows up first at flashing transitions, chimney intersections, and other roof details rather than across the entire field of shingles. Those concentrated spots take the brunt of cyclical ice cycles, and a single compromised seal can channel water under shingles and into attic spaces. When a failure starts at a flashing lap or a step of a dormer, it can propagate quickly, especially after a few heavy storms. The practical reality is that small, recurring leaks often masquerade as cosmetic issues until they show up as ceiling stains or warped trim. Regular attention to these joints during seasonal checks helps catch failures before they invite rot or mold.
Fall wind events in western Massachusetts can loosen aging shingles and increase debris accumulation in valleys and drainage paths. Shingles that have already lost their bite from sun and freeze cycles become easier to lift, and sharpened wind gusts can pry up corners or blow out lift tabs. Debris in valleys creates a secondary dam effect, trapping water where it shouldn't sit. The consequence is not just a potential leak in storms, but accelerated wear along the roofing deck and underlayment. In practice, you'll notice more grit in gutters and a higher density of leaves and twigs in lower roof valleys as an indicator that wind-related stress is active.
Warm-season humidity can expose ventilation weaknesses in older Chicopee attics, contributing to deck stress and shortening the service life of roofing materials. When attic air doesn't vent properly, warm, moist air condenses on the underside of the deck and within insulation, accelerating rot and reducing shingle adhesion. Ventilated spaces that lag behind the climate's demands tend to sag or bow sooner, and that stress translates into faster granule loss, more frequent leaks, and a shorter timeline before a full re-roof becomes necessary. In practice, a routine check of soffit vents, baffle gaps, and attic fan operation during late spring can reveal creeping issues before they become visible on the roof itself.