Last updated: Apr 19, 2026
Milford's cold winters with repeated freeze-thaw cycling put extra stress on shingle tabs, flashing joints, and roof penetrations before spring rain arrives. The shifting ice and water cause hairline splits to widen, and weak tabs can crack or lift with a sudden temperature swing. Flashing around chimneys, vents, and skylights bears the brunt of that pressure, especially where sealants have aged or joints have settled. When a hidden gap exists, meltwater finds its way under the edge of the roof and begins to corrode the underlayment from the inside out. By the time the first warm snap hits, small leaks can masquerade as nothing more than a nuisance-until a spring downpour amplifies the damage.
The city's warm, humid summers accelerate asphalt aging after winter stress, making late spring through early fall the preferred replacement window locally. As storms roll in, wind-driven rain can exploit the weakest points created by repeated freeze-thaw damage. Shingle tabs may already be curled or lifted, allowing moisture to migrate beneath the surface and pool in valleys or around penetrations. If the roof deck has any soft spots from prior ice damage, drought-like conditions can make those areas more brittle, increasing the risk of de-lamination or hail-induced bruising during storm events. Valleys and edge metal are critical stress zones; neglect here translates quickly into roof-wide moisture intrusion.
Seasonal local risk patterns combine winter material stress, spring wind-driven rain, and fall leaf buildup that can slow drainage and trap moisture at roof edges and valleys. Leaves and needles accumulate at eaves and valleys, forming damp mats that hold moisture against shingle surfaces long after a storm passes. In spring, rising temperatures paired with residual moisture can trigger fast-moving edge corrosion and flashing failures, especially where sealants have aged past their prime. By fall, debris-laden gutters and clogged downspouts compound the problem, forcing water to back up and spill over onto the roofline. The result is a cycle of concentrated, high-stress events rather than isolated incidents.
Begin with a close inspection of skylight flanges and chimney flashing for any telltale gaps or loose fasteners. Examine shingle tabs at the eaves and rakes for curling, cracking, or blistering, particularly after a heavy freeze-thaw sequence. Look at the valleys for any dark staining or granule loss, which signals accelerated aging or moisture pooling. If winter damage is suspected, schedule a cautious, thorough roof assessment after the spring rains have softened the ground and allowed safe access to the roof line. Addressing issues promptly can prevent small leaks from turning into wood rot or insulation degradation that compromise home comfort and energy efficiency. In areas prone to wind-driven rain, reinforce vulnerable flashing and replace any aged sealants before the next storm cycle. This targeted vigilance helps protect roofing investments when the seasonal rhythm is most unforgiving.
Asphalt shingles are the dominant roofing material in Milford, shaping the everyday repair list you'll see from neighborhood crews. In the wake of freeze-thaw cycles, shingle blow-off and granule loss top the failure patterns, especially after a harsh winter and a spring storm. Flashing wear around chimneys, skylights, and vent stacks is another common hotspot, as thawing ice or heavy rain can push gaps open where water seeks to intrude. When you talk to your contractor, expect the most frequent calls to center on replacing loose or missing shingles, re-sealing worn flashing, and addressing granule-litter in gutters and downspouts after a big storm.
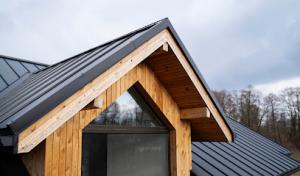
In this market, asphalt shingles stay the default choice because they align with typical Milford home ages, roof pitches, and the local climate. A metal roof is present but sits on a higher installed-cost shelf, so it's usually pursued as a durability-driven upgrade rather than the standard option. If you're weighing metal, plan for longer-term resilience against ice damming and wind uplift, but be aware that it comes with a noticeably higher upfront commitment. Clay or concrete tiles, wood shakes, and synthetic products exist in the local mix, yet they show up less often in contractor portfolios than asphalt, skylight work, and storm-related repairs. For most homeowners facing a typical Milford recovery from a spring storm, asphalt remains the practical الشهرhorse, with specialty options reserved for specific aesthetic goals, slate-like textures, or long-term durability strategies.
When you inspect after a freeze-thaw sequence or a heavy spring rain, start at the most vulnerable points: loose shingles at edges and around roof penetrations, compromised flashing where walls meet the roof, and any visible granule accumulation in gutters. If you notice bald patches on the roof surface or granules in the gutter downstream of a valley, plan for targeted maintenance or patching rather than a full replacement-especially if the underlying roof deck is still solid. Create a simple homeowner's maintenance schedule: twice-yearly quick inspections, with a more thorough check after spring storms, to catch minor issues before they become leaks. Keep an eye on skylight seals and vent flashings, which often take the first hits when wind-driven rain pours in during a late-season storm.
Milford homes experience a real freeze-thaw rhythm that stresses the asphalt layer over years of service. The benefit of sticking with asphalt is a predictable repair ecosystem: local crews are familiar with common deck quality, typical shingle patterns, and standard flashing details. If you decide to pursue upgrading beyond the default, use metal as a long-term investment rather than a momentary upgrade; understand the need for proper attic ventilation and careful substrate preparation, especially on older houses with mixed roof lines. Specialized materials can address limited high-end scenarios, but asphalt remains the most practical, repair-friendly choice for the bulk of Milford roofing projects, particularly when spring storms magnify existing wear patterns.
For the typical Milford housing stock dominated by asphalt, your upfront choice largely determines the price range you'll see on the quote. Asphalt shingles run about 350-600 USD per square here, which keeps re-roofing projects within reach for many homeowners. If you're eyeing metal, plan for 700-1200 USD per square, a step up that pays off in longevity and better resistance to harsh winter temps. Higher-end, specialty options like clay tile and concrete tile push costs to 900-1800 USD and 800-1500 USD per square respectively, while wood shingles or shakes typically run 700-1100 USD per square. Synthetic or composite shingles sit in the 500-900 USD per square range. The mix of snow, ice, and spring rain in this region makes the choice between lightweight composites and traditional shingles more than aesthetic-it's about how the roof will hold up through repeated freeze-thaw cycles.
Winter damage compounds spring need, especially after a season of freeze-thaw that can crack shingles, loosen fasteners, and stress underlayment. When a rapid thaw or a heavy rainstorm follows a cold snap, leak response and fast-turn re-roofs become a noticeable cost driver. In Milford, those spikes aren't rare; they cluster around late March to early May, coinciding with lingering snow melt and more frequent spring downpours. Expect prices to flex upward during these windows as crews sprint to secure vulnerable roofs and minimize interior damage. If you're planning a replacement after a winter event, budget a cushion for expedited scheduling and potential surge pricing from local crews who are in high demand.
The shape of the roof and the number of penetrations (vents, skylights, chimneys) directly affect installation time and waste. A simple, straight-run roof with few vents will quote closer to the base per-square price, while an intricate footprint with multiple skylights or valleys can push costs upward by a noticeable margin. Older roofs may require additional underlayment, ventilation upgrades, or furring adjustments to address moisture and insulation gaps that accumulate over years. Those add-ons are common in Milford and can tip a project from a straightforward replacement into a mid-range job, especially when paired with asphalt or metal options.
Spring and fall are the most active windows for roof work here, but the busy late spring to early fall installation season can affect scheduling timelines. A typical Milford project may face a 1-2 week window just to process the order and line up crews, depending on weather and contractor workload. If a tight timetable is essential-say, you're coordinating siding work or addressing interior moisture-plan ahead and confirm a firm installation start date early in the contract. The closer you are to peak season, the more you'll feel the impact of demand on both scheduling and labor availability.
Asphalt remains the most economical path, with 350-600 USD per square, ideal for homeowners prioritizing value and a straightforward replacement. If longevity and curb appeal matter, metal (700-1200 USD) or tile (900-1800 for clay, 800-1500 for concrete) might fit your long-term plan, especially for storm resilience. Wood and synthetic options offer their own trade-offs in looks, weight, and maintenance, typically 700-1100 USD and 500-900 USD per square, respectively. Anticipate higher costs when winter damage has ripples into spring, and when spring scheduling compresses, tightening labor timing and potentially peak-season pricing.
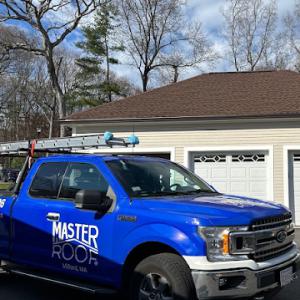
Master Roof
2 Main St, Milford, Massachusetts
4.9 from 162 reviews
At Master Roof, Inc., we take great pride in being a family-owned local roofing company rooted in eastern Massachusetts. With over 20 years of experience serving towns across MA, Master Roof specializes in roof replacement, roof repair, skylights leak repair and installations, and storm damage repair. We offer free estimates so you'll know just how much your roof will cost and our expert roofers stand by our workmanship and industry best roofing material brands, like GAF, Owens Corning and Velux. We are committed to delivering quality roofing services our customers can trust. Master Roof always offer rock solid warranties and flexible financing options for every homeowner. Let us help you protect your home for decades to come!

Yupa's Construction
(401) 302-6051 www.yupasconstruction.com
91 E Main St, Milford, Massachusetts
5.0 from 80 reviews
Roofing & Siding Construction Company. Local, Family Owned, 20 Yrs Experience, Licensed & Insured. Experience a different type of contractor. Honest, Professional, and Knowledgeable. Call YUPA’S for a CONSULTATION!

HomeXpert Construction
(508) 315-7210 homexpertconstruction.com
114 Beaver St, Milford, Massachusetts
5.0 from 76 reviews
We’re your trusted local roofing company specializing in quality roof replacements, roof repairs, home siding, windows and gutter installations. We provide the best roofing systems throughout the New England area and New Hampshire. The experienced and licensed crew at HomeXpert Construction guarantees your complete satisfaction. We’re a second generation, family-run business known for our commitment to outstanding quality and service so that the customer can be confident that our work meets and exceeds industry standards.
Extreme Roofing
(774) 586-8287 extremeroofing.me
20 Emmons St, Milford, Massachusetts
4.9 from 90 reviews
Extreme Roofing is a family owned business offering services such as ROOFING , SIDING and all kind of home maintenance and remodeling. We serve MA, NH, RI and CT areas .
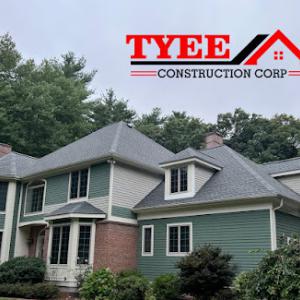
Tyee Construction
(978) 987-7286 tyeeconstruction.com
6-8 Otis St, Milford, Massachusetts
5.0 from 42 reviews
Tyee Construction provides trusted roofing, siding, chimney, and full exterior services across MA, NH, and RI. We specialize in roof replacement, roof repair, siding installation, chimney repair, gutter work, and exterior renovations for homes and businesses. Our licensed and insured team delivers durable craftsmanship, fast service, and solutions built for New England weather. Your reliable local contractor for quality exterior improvements.
Eternal Pros Construction
(508) 381-3018 eternalprosconstruction.com
40 Medway Rd, Milford, Massachusetts
5.0 from 40 reviews
Eternal Pros is a 2nd generation local roofing contractor that specializes in roof replacements and repairs. Our company is fully Licensed & Insured. We takes pride in providing an honest, professional, and affordable roofing system solution across N.E. Protect your family, home, and/or business with a roofing contractor that is trusted and stands behind their 100% customer satisfaction.
Same Day Roofing
(508) 514-0329 samedayroofingcorp.com
38 Congress St, Milford, Massachusetts
4.9 from 86 reviews
At SameDayRoofing, roofing is more than a trade — it's a commitment to quality, integrity, and customer-first service that spans over two decades. Our company has grown through a clear, unwavering principle: deliver exceptional results using only top-tier materials, and treat every home as if it were our own. With 20+ years of hands-on experience in the industry, we’ve earned the trust of thousands of homeowners who rely on us for dependable, long-lasting roofing solutions. Our team brings deep knowledge, precision craftsmanship, and a proactive approach to every job. At SameDayRoofing, customer satisfaction is not a goal — it's the foundation of our business. If Eligible for Solar roofs can be discounted half off or 100% off IF ELIGIBLE.

Above Brothers Construction
(508) 861-8291 abovebconstructioninc.com
42 Prospect St, Milford, Massachusetts
5.0 from 28 reviews
Above Brother's Construction specializes in delivering exceptional roofing and siding solutions designed to enhance your home's aesthetic appeal and structural integrity. Our commitment to quality and attention to detail sets us apart, ensuring every project reflects our dedication and craftsmanship. We offer a wide range of services, including roofing installation, repairs, and replacements. Whether you need a new roof, a leak fixed, or siding upgraded, our experienced team is ready to help. Our team is devoted to understanding your vision and making it a reality. Choose us for all your roofing and siding needs, and experience the exceptional service and results that will protect and beautify your home for years to come!
Betho Construction
(857) 310-8306 www.bethoconstructioninc.com
26 Jefferson St, Milford, Massachusetts
5.0 from 26 reviews
Bethos Home Experts provides professional roofing and exterior renovation services across MA, RI & NH. With 15+ years of experience, we specialize in roof replacements, repairs, siding, and gutters — delivering quality craftsmanship and reliable service. ✔️ Free Estimates ✔️ Emergency Services Available ✔️ Licensed & Fully Insured Legal business: Betho Construction
Kellys Construction
(888) 900-9579 kellysconstruction-ma.com
42 West St, Milford, Massachusetts
5.0 from 23 reviews
General Construction in Massachussetts, Conneticut, Rhode Island, Maine. Looking for honest, reliable, and on-time? Roofing or Winter services for your home or office? Do you want friendly, knowledgeable people to do the job? Would you like a 100% Work Guarantee and 24 Hour Emergency Service? Kellys Construction provides all this and more! We are fully licensed, trained and insured for your additional peace of mind . We bring more than 20 years of roofing and siding installation and repair experience. We know that your roof protects your family, property and pets, so we want it done right the first time. Your safety and comfort is our number one concern. We want to keep your home and/or business safe, dry and warm. Call us today
J P Construction
(774) 275-9830 jp-constructioninc.com
44 S Main St, Milford, Massachusetts
5.0 from 19 reviews
Construction services
LC General Construction
10 Allen Rd, Milford, Massachusetts
4.8 from 19 reviews
LC General Construction provides reliable roofing services in Milford, MA, and the surrounding areas. Don't hesitate to contact us now!
Residential roofing permits are typically required in Milford rather than treated as informal maintenance work. Because the city leans toward formal review for roof projects, skipping a permit can trigger enforcement actions, complicate insurance claims, and potentially nullify contractor warranties. If a storm or freeze-thaw event prompts a quick patch, remember that a full re-roof or major repair still falls under permit jurisdiction. The city's climate-with harsh winters and spring storms-often pushes homeowners to act quickly, but the permit gate keeps the work aligned with safety and structural standards that matter in our inland Worcester County climate.
The Milford Building Department generally expects a permit application that includes contractor details and a defined project scope before work proceeds. A complete package helps avoid delays that stall Mitigations after the fact. Have your contractor provide their license number, company contact, and a concise scope: roof type, material, square footage, and an estimated start and finish window. If skylights, metal sections, or specialty tiles are part of the plan, list them clearly so the review can verify flashing, ventilation, and drainage considerations specific to our humid summers and freeze-thaw cycles. Keep in mind that the department appreciates consistency between the proposal and the actual work as the project progresses.
Inspections are conducted during and after the roofing job in Milford, and permit processing commonly takes about 1-2 weeks depending on department workload. Scheduling matters, especially when weather windows compress after a harsh winter. An early inspection can catch improper venting, improper nail patterns, or inadequate ice barrier placement before the roof is sealed up. If a significant portion is already closed when an inspector arrives, you risk rescheduling and added delays. Communicate promptly with both your contractor and the Building Department about any weather-driven start date changes, so the inspection timeline stays aligned with the actual progress.
Begin the permit process as soon as you have a solid contractor and plan. Verify the scope matches the intended materials-especially if contemplating skylights or metal on a traditional asphalt base-so the inspector can move efficiently. Have a designated, accessible site contact for the department and ensure the contractor's license, insurance, and non-canceled permits are in order before work begins. Finally, keep a simple daily log during the job, noting any deviations from the approved scope, so inspections reflect an accurate record of work completed.
When a wind event rips through the Worcester County corridor, the harsh winter followed by spring rain can turn tiny leaks into real headaches for homeowners with asphalt-dominated roofs. Photos taken the day you notice damage, plus clear notes on any changes you see after a storm, help tell the story to an insurer. In Massachusetts, Milford homeowners usually need photos, contractor documentation, and adjuster review to support roof claims after covered wind or storm events. Keeping a dated trail shows when the problem first appeared and how it progressed, which matters if the claim hinges on timing or scope.
The way a claim is paid often hinges on the policy language you selected before trouble hits. Whether a Milford claim pays full replacement cost or a depreciated amount often depends on whether replacement cost coverage was specifically purchased. If depreciation applies, the insurer may reimburse only a portion of the replacement value, unless you have endorsements or riders that restore full value. Understanding this distinction before trouble arises helps set expectations and avoid surprises when the adjuster reviews the file.
Because Milford's common roof problems often develop from winter stress followed by spring rain intrusion, documenting the first visible signs of damage and any temporary mitigation is especially important. A small curl or lifted shingle edge after a thaw can portend a larger leak once rain returns. Take several close-up photos of any compromised areas, then capture wider shots showing how the damage sits on the roof and relative to vents, skylights, or dormers. If the attic reveals moisture or staining after a storm, note the exact location and the time of day. Temporary mitigation-such as tarping or plywood over vulnerable spots-should be described with dates and the names of anyone who performed the work. This step not only preserves evidence but also demonstrates proactive care, which can influence an adjuster's assessment of ongoing risk and responsibility.
When the adjuster arrives, coordinate with them to provide the contractor's notes, a roof scope, and any independent assessments. A transparent, well-documented file helps avoid delays or back-and-forth that can stall repairs during the shoulder seasons. If a contractor recommends temporary fixes, ensure those actions are logged with before-and-after photos. In this market, where the re-roof workflow is often permit-driven and weather windows are tight, timely cooperation between you, the insurer, and the contractor can keep the process on track and reduce the chance of further interior damage while the claim is processed.
Connect with contractors who help homeowners navigate the claims process from damage assessment to final approval.
Extreme Roofing
(774) 586-8287 extremeroofing.me
20 Emmons St, Milford, Massachusetts
4.9 from 90 reviews
J P Construction
(774) 275-9830 jp-constructioninc.com
44 S Main St, Milford, Massachusetts
5.0 from 19 reviews
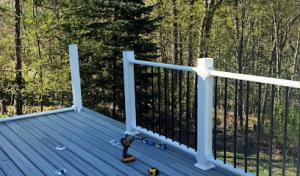
Skylight work is notably active in Milford's contractor market, indicating that leak-prone roof penetrations are a recurring local service need rather than a rare specialty. When inspecting a skylight, pay attention to the flashing where the skylight sits on the roof deck and the seal around the curb. Freeze-thaw cycles can pry shingles loose and widen gaps in the flashing, especially after a brutal winter followed by a heavy spring rain. Check for loose or lifted shingles on the up-slope side, and look for water staining around the skylight flange inside the attic. If condensation forms on the skylight glass during cold mornings, that can signal poor sealing or ventilation, not just a drip outside.
Chimney-related work is also common among area contractors, making chimney flashing transitions a practical local inspection point for homeowners. Start at the base where the chimney meets the roofing surface and follow the metal flashing up onto the chimney and onto the shingles. In Milford, mortar joints can crack from winter movement, allowing water to creep behind the flashing. Look for rusted or lifted flashing corners, deteriorating sealant, and moss growth along the chimney lead. The transition from flashing to shingles is a frequent failure point after thaws push water toward the roof edge, so a careful check around this zone is time well spent.
Freeze-thaw movement in winter followed by spring rain makes penetrations and flashing details more vulnerable in Milford than simple field shingle areas alone. Water tends to travel along the underside of flashing into attic spaces, even when the surface shingles appear intact. Inspect around roof penetrations, valley joints, and along any step flashing that seals the deck. In the attic, trace any staining or damp insulation toward the corresponding rooftop penetration to pinpoint the likely leak path.
In spring, perform a targeted walk-around after storms: test each skylight and chimney area for exterior movement, verify sealant integrity, and run a quick interior check for moisture signs near penetrations. If a drip persists after a recent rain, focus on the flashing transitions and the curb seal, not just the shingles above. For a lasting fix, prioritize flashing and sealant repairs before considering broader replacement work.
Find contractors experienced in skylight installation, flashing, and leak repairs to bring natural light into your home.

HomeXpert Construction
(508) 315-7210 homexpertconstruction.com
114 Beaver St, Milford, Massachusetts
5.0 from 76 reviews
Tyee Construction
(978) 987-7286 tyeeconstruction.com
6-8 Otis St, Milford, Massachusetts
5.0 from 42 reviews
In this market, warranty offerings are present but not universal in Milford's market, so homeowners should verify whether coverage is contractor-backed, manufacturer-backed, or both. Asphalt-heavy homes see most rooftop guarantees tied to the shingle maker, but the installer's workmanship warranty often makes the biggest difference in the first few years after a spring storm. When choosing between options, ask for a written description of what is covered, for how long, and what conditions void the warranty.
Manufacturer-certified contractors are active in Milford, which matters more on full replacements than on small patch repairs. A contractor with manufacturer backing typically follows stricter installation guidelines and may provide longer-term coverage on critical components. For small patch jobs, the presence of a certification can still influence material compatibility and flashing details, but evaluation should focus on the scope of the repair and the provider's track record.
In a market with many re-roofing crews and price-sensitive hiring, Milford homeowners need to confirm that warranty terms match the actual scope filed on the permit and installed on the roof. It helps to have the written scope reviewed by the warranty issuer or the manufacturer, ensuring that the warranty applies to the exact materials and labor performed. Keep a copy of the standard warranty card, installation manual, and any addenda that describe upgrades or allowances.
Finally, document issues promptly after a storm and photograph the roof and penetrations. Retain all contractor communications and keep warranties accessible. When storms loosen shingles or reveal flashing gaps, timely follow-up under warranty can save future headaches and prevent leaks in the coming freeze-thaw cycles. If a contractor offers both system coverage and a workmanship guarantee, request copies clearly naming the project.
Flat-roof work exists in Milford but is far less prevalent than standard residential re-roofing, so homeowners with flat or low-slope designs should seek contractors who list flat-roof experience as a core capability rather than a side project. In inland Worcester County, the combination of freeze-thaw cycles and spring storms can push edge details, patching, and drainage concerns to the forefront on low-slope surfaces. When evaluating bids, confirm that the contractor has recent flat-roof projects, a plan for puncture-resistant membranes, and a proven approach to handling field seams, edge metal, and parapet flashing. Ask for site photos of recent low-slope jobs and references from neighbors with similar roof configurations in Milford.
Solar roofing appears in the Milford market as a smaller specialty, meaning homeowners with roof-mounted systems or solar-integrated plans should not assume every roofer handles those details. If a solar array is present or planned, require explicit confirmation that the contractor can space panels, integrate racking with the underlying roof deck, and address penetrations without compromising the weather barrier. Have a solar installer or engineer participate in the planning discussions to align roof-to-system compatibility, flashing transitions, and microdrainage at the edges. For edge cases, insist on a written plan that covers panel mounting on parapets, skylight intersections, and any venting or plumbing stacks that intersect the module field.
Because Milford's main roofing market centers on residential re-roofing and emergency leak response, edge-case roof types require more careful contractor screening than standard asphalt replacements. Prioritize bidders who can demonstrate a methodical approach to membrane compatibility, seasonal hail and wind considerations, and robust attic ventilation to counter freeze-thaw stress. Verify warranties address low-slope specifics and any solar-related accessories, and request a detailed inspection protocol that includes flashing details, drip edge continuity, and drainage assessment across edge and corner intersections.
Find specialists in TPO, EPDM, and built-up flat roofing systems for residential and commercial properties.
LC General Construction
10 Allen Rd, Milford, Massachusetts
4.8 from 19 reviews
Rockland Renovation & Construction
(978) 201-3443 www.rocklandremodelingco.com
41 Sumner St, Milford, Massachusetts
5.0 from 9 reviews