Last updated: Apr 19, 2026
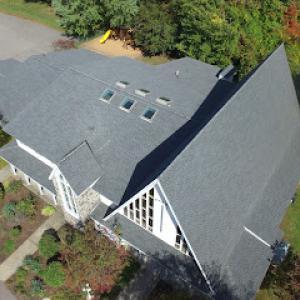
Natick's winter rhythm is not kind to roofs. Heavy snow followed by repeated freeze-thaw cycles gnaws at shingle tabs, edge seal areas, flashing, and gutters. When temperature swings latch onto a blanket of white, the surface sweeps through cycles of expansion and contraction that stress every visible seam and concealed joint. That pressure pushes on old nails, loose fasteners, and compromised sealants, turning a routine snowpack into a ticking clock for leaks and ice dam formation. When you pull back the blanket in late winter, you may find the signs of stress: curling tabs, granular loss, and small, dark stains creeping from the eaves. The danger is not only rising from above; it travels along the roof edge and into the attic if the envelope isn't doing its job.
The first leaks often appear where you'd expect: eaves, valleys, chimney intersections, and around older penetrations that predate modern detailing. Natick homes frequently bear the legacy of older flashing and vent configurations that weren't built to stand up to repeated freeze-thaw. Snowpack sitting on a roof edge refreezes into a solid dam, and any compromised seal turns into a channel for meltwater to work its way under shingles, then into the attic. You might notice a chilly drip along a ceiling joist or a sudden rise in interior moisture around a fireplace box or a vent stack after a thaw. The pattern is not random; it's the winter choreography of Natick's housing stock meeting harsh temperatures.
Many houses in this city predate modern ventilation and insulation standards, so winter roof problems aren't purely exterior. Attic heat loss can drive warm air toward the roof deck, warming and softening the snow from above while the cold exterior layer remains, creating a dam at the eaves. That same heat loss accelerates ice formation at joints and flashing, widening tiny gaps into real leaks. As snow melts and refreezes, imperfect decks and deteriorating underlayment amplify the problem. In short, exterior roofing defects and attic heat loss work in tandem, each amplifying the other through the season. The result is a cycle of damage that can escalate quickly during a prolonged cold snap followed by a warm day.
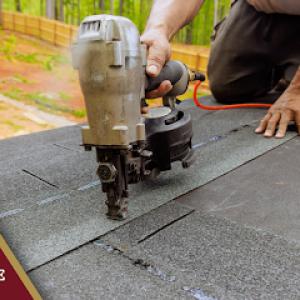
Begin with a careful roof and attic assessment focused on edge details and penetrations. Look for loose or missing shingles at the eaves, cracked flashing around chimneys, and gaps where valleys meet roofing material. Inspect gutters for ice buildup, since backed-up ice channels can push water into soffits and fascia. In the attic, check for daylight near vents, signs of warmth on the underside of the roof deck, and insulation gaps around kneewalls and hatch openings. If you detect evidence of ongoing heat loss, sealing leaks at the attic level and improving insulation should be prioritized, because reducing heat transfer curbs the seasonal ice dam cycle at its source.
Invest in targeted improvements that address both the exterior and the attic. Reinforce or replace compromised flashing, refresh valley coverings, and ensure chimney intersections are properly sealed with weatherproof detailing. Upgrade insulation and air sealing in the attic so warm air can't accumulate where it shouldn't. Consider reinforcing fascia and edge details to resist ice buildup and implement improved gutter management to handle peak snowmelt. By aligning exterior repairs with attic envelope improvements, you cut the chain reaction that ice dams set off, protecting interior spaces from the most disruptive leaks Natick homes face each winter.
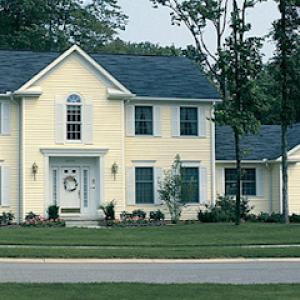
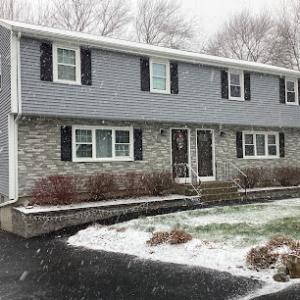
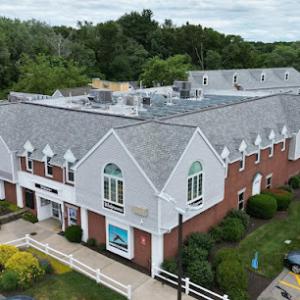
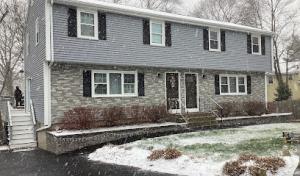
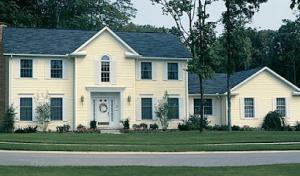
The housing stock around town features a wider-than-average spread of roof materials, with asphalt shingles still dominant but slate, wood shingles or shakes, clay tile, and concrete tile remaining relevant on older and higher-end properties. In neighborhoods with historic or distinctive architectural details, choosing a roof that respects the original character can help preserve curb appeal while delivering modern performance. Homeowners often encounter a blend of materials on a single street, making it important to coordinate color, texture, and slope to maintain architectural coherence.
Material choice is frequently constrained by existing roof structure and architectural style, especially when replacing heavier legacy roofs such as slate or tile. If the underlying rafters, decking, or trusses were built to support a lighter asphalt or metal roof, upgrading to heavier textures like slate or clay may require a structural assessment and possible reinforcements. Conversely, a well-proportioned older home with solid framing can accommodate a broader range of materials, provided the ridge and eave details align with the chosen system. The goal is to balance weight, span, and load distribution while preserving the home's original silhouette and proportion.
Ice dam pressure is a common seasonal concern in Natick, and roof type directly influences how that pressure is managed. Lighter materials such as asphalt shingles can work well when paired with effective insulation, ventilation, and water-shedding designs, but older homes with limited attic insulation may benefit from ventilation strategies that break the warm-air rise corridor responsible for ice dam formation. Heavier options like slate or tile create a distinct aesthetic and can offer durable performance, yet require careful structural consideration and proper underlayment and ventilation to prevent freeze-thaw damage at eave lines. The choice should reflect a practical assessment of attic temperature control, drainage plane integrity, and snow-load expectations for the local winter climate.
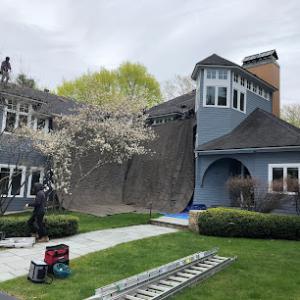
The local market clearly supports specialty work beyond basic shingles, including metal roofing, tile roofing, skylights, and some cedar shake projects. Metal roofing delivers a sharp edge for contemporary reads or steep pitches, with excellent wind and snow shedding characteristics. Tile and slate provide a period-appropriate, high-end appearance but demand precise substrate preparation, ongoing maintenance, and longer lead times for installation. Cedar shakes, when properly treated and installed with appropriate underlayment, can offer a warm, traditional texture that blends with older architecture, though they require vigilant maintenance to prevent moisture-related issues. In dense, permit-driven areas, coordination with a skilled contractor who understands both the material nuances and the climatic demands is essential for durable performance.
In Natick, most full replacements are best scheduled in spring or fall because dry, mild conditions reduce installation issues tied to winter cold and summer heat. The shoulder seasons help crews manage ice-dam risk on already-faltering roof edges while maintaining solid sealant performance around new flashings and hips. If spring work runs late due to lingering storms, aim for a firm completion date before leaf season begins; if fall timing slips, plan for a buffer that protects exposed sheathing and new underlayment from early winter moisture. This rhythm isn't just about comfort-it directly affects long-term performance against freeze-thaw cycles and moisture intrusion.
Spring precipitation in eastern Massachusetts can delay tear-offs and expose decking problems, so scheduling buffers matter more here than in drier regions. Before the crew arrives, have a clear plan for temporary tarping and safe access across any steep pitches or historic rooflines. Ask your contractor to verify that the new window flashing integrates with the roof edge and any existing dormers or skylights, since improper flashing is a common weak point as temperatures swing. During spring work, moisture can hide gaps; insist on a thorough inspection of the decking and underlayment before the new windows are installed, and require that any detected issues are repaired prior to final sealing.
Fall brings both favorable temperatures and wind-driven leaf debris, which can affect cleanup, staging, and final gutter and drainage performance on Natick properties. Coordinate with the crew to establish a dedicated staging area that minimizes tracked debris on sidewalks and driveways, and arrange daytime cleanup that aligns with peak leaf fall schedules. Ensure that the exterior window trim and roof edge are securely fastened to withstand autumn winds, and confirm that attic and soffit ventilation remains unobstructed after installation. A careful fall plan helps prevent debris accumulation that could clog gutters and downspouts, reducing the risk of ice dam buildup as temperatures swing toward winter.
When replacing roof windows, the choice of exterior cladding and the method of integrating with the roof deck matter more in this climate than in milder regions. Slate or historic wood properties require careful detailing around new skylights or vented casements to maintain water shedding paths. If asphalt or metal options are chosen for the main roof, verify that the window units have compatible thermal breaks and flashing kits to minimize thermal bridging. In all cases, insist on a continuous weather-resistant barrier around penetrations and a tested sealant system that remains flexible as temperatures fluctuate. Proper alignment of flashing with the roof edge and dormer surfaces is essential to resist ice dam formation and freeze-thaw damage.
After installation, perform a joint inspection with the crew to confirm that gutter alignment, downspout flow, and drainage paths accept autumn leaf loads and spring rains without backup. Schedule a follow-up visit to review any winter performance concerns, especially around eaves and valley flashing. A well-sealed, properly flashed roof window setup helps minimize ice dam risk and supports durable, long-lasting performance through Natick's distinctive seasonal cycles.
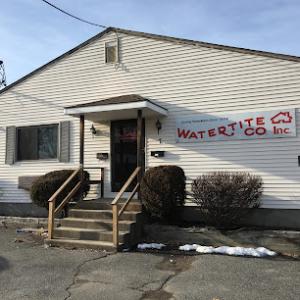
Watertite Company
(508) 655-5588 watertiteco.com
30 N Main St, Natick, Massachusetts
5.0 from 80 reviews
Serving the community since 1974! Watertite Company provides roofing repair, roof installation and skylights services. We are proudly serving Natick, Framingham, Wellesley, Needham, Southborough, Holliston, Sudbury And Surrounding Areas in Eastern Massachusetts. We are the premier residential roofing and skylights company in the area: - #1 Rated roofing, siding, deck and trim company in eastern Massachusetts - Watertite Coompany is a Certified VELUX® Installer, because we believe in using only quality products - Family Owned Local Business Connected with Community - Over 50 Years in Business - Served more than 15,000 satisfied customers - Free Inspection and Estimates Call Today For A Free Inspection And Estimate

New Stage Roofing & Home Improvement
(844) 616-0054 www.newstageroofing.com
232 Pond St, Natick, Massachusetts
4.9 from 124 reviews
New Stage Roofing & Home Improvement, formerly Power Construction Roofing & Siding, proudly serves homeowners across the Greater Boston area with reliable roofing and siding solutions. With more than 25 years of experience, our team delivers expert roof installations, repairs, replacements, and siding upgrades using premium materials from GAF and CertainTeed. As a GAF Master Elite Contractor, we provide exceptional craftsmanship backed by industry-leading warranties. Whether you’re restoring your home’s exterior or starting fresh, we bring professionalism, quality, and lasting protection to every project.
Natarelli & Son Roofing & Gutters
(508) 509-5128 www.natarelliandsonroofing.com
6 Austin Way, Natick, Massachusetts
5.0 from 51 reviews
Protect your largest investment with our reliable roofing services. We are a locally owned and operated roofing company currently serving Natick, MA and surrounding communities. We offer roofing contracting, roof installation, and roofing repairs, seamless gutters, and more!.
Roofers Edge & Siding
(774) 273-7595 www.roofersedgeinc.com
2 Summer St Ste 306, Natick, Massachusetts
4.6 from 91 reviews
Roofers Edge & Siding provides roofing, skylights, siding, windows, and winter services to the Metro West area. We are locally owned and operated for over 30 years. Our attention to detail and customer service is our top priority!
Shore Lock Homes
(800) 916-9438 www.justfixmyhome.com
2 Pumpkin Pine Rd, Natick, Massachusetts
4.1 from 111 reviews
Looking for professional roofing contractors in Natick, MA? Look no further than Shore Lock Homes. As a family-owned company with decades of experience, they offer top-quality roofing, window, gutter, and siding services for homeowners and businesses. Their skilled team delivers precise and proven workmanship using high-quality materials to deliver long-lasting and better-looking results. From detecting and repairing leaks to restoring gutters and downspouts, they are ready to take on virtually any job pertaining to a property’s exterior. With a commitment to customer satisfaction and a focus on transparency, Shore Lock Homes is the region’s trusted roofing partner. They also offer free estimates for most major products and services!
Roof Maxx of Framingham, MA
Serving
4.9 from 43 reviews
Roof Maxx® is a scientifically formulated, and 100% safe, plant-based roof rejuvenating spray treatment that was developed by renowned scientists at the world’s largest private research and development company.
Crestline Home
Serving
4.9 from 183 reviews
Crestline Home is a licensed and certified home service provider in Massachusetts, offering comprehensive roofing solutions for homes and businesses. They specialize in roofing services, providing repairs, installations, and maintenance. Crestline Home aims to deliver trusted, high-quality, and affordable roofing services, ensuring homes are safe, warm, and worry-free.
J&R Construction Roofing
(888) 914-7663 jrconstructionma.com
Serving
5.0 from 183 reviews
Are you looking for licensed and insured, one-stop roofing or snow plowing service? Turn to J&R Construction, the certified contractor in Framingham MA. Established in 1994, the family orientated company offers a myriad range of services including commercial and residential roofing, while it is also known for commercial snow plowing. We are GAF Master Elite Shingle Installers, and Mule-Hide Certified Rubber roof installers. Only 3 percent of roofing companies are certified installers in the US.

Ben's Construction
(508) 962-2417 www.bensroofingconstruction.com
Serving
5.0 from 24 reviews
Ben’s Construction is a family owned business. We specialize in roofing, siding, gutters and general construction services in Massachusetts. We offer residential and commercial construction services. Our commitment to our customers is our priority. We have established an outstanding reputation for delivering quality work, value and timely performance. We strive to build long-term relationships by providing services to fit our customer’s unique needs and requirements. I started working in construction and specializing in all types of roofing since 1999. I have personally been involved in every job I have done and have been dedicated in providing customers the highest standards of work. Our core values are Integrity and Quality.

H&R Roofing
(508) 348-4348 www.hr-roofing.com
Serving
4.9 from 166 reviews
Only 3% of all Roofing Installers in the US can claim to be certified, a requirement by Roof Manufacturers to provide a REAL Warranty versus one that, at worst, might end when the truck pulls out of your driveway. We stand by your roof for the long term by offering you a best-in-market 50-year limited warranty. Leveraging our 20 years of experience we will guide you to get the MOST reliable, affordable, energy-efficient roofing solution for your home. We do residential as well as commercial roofing projects throughout Massachusetts and Rhode Island.
ERC Inc. - Egama Roofing
(508) 808-3523 www.egamaroofing.net
Serving
5.0 from 133 reviews
Egama Roofing is locally operated business with 20+ years of experience that offers comprehensive roofing services such as roof installations with 25 years craftsmanship warranty and 50 years on materials. We also undertake roof related work such as gutter, skylight, and chimney rebuild and repairs. We offer free inspections along with a free estimate. Just give us a call , we’ll come to you.

Diamond Construction
(508) 320-1980 diamondconstructionma.com
Serving
4.3 from 60 reviews
The friendly professionals at Diamond Construction offer a full menu of services aimed at keeping your home safe when storms roll through. Servicing many in the New England area in Roof Installation, Gutters, Siding, Custom Windows, Gutter Installation, Residential and Commercial Remodeling, and more!
In Natick, homeowners commonly compare asphalt shingles at 350 to 700 USD per square with metal at 600 to 1100, wood at 700 to 1200, concrete tile at 800 to 1500, clay tile at 1100 to 1800, and slate at 1100 to 2300. Those figures cover the material itself and basic installation on a straightforward roof. If your roof has a simple one-story footprint and a clean square count, you'lloften land closer to the lower end, while complex geometry, multiple penetrations, or premium underlayments push costs higher. When slate or clay tile is chosen, remember that the weight requires an engineer's review and potential structural reinforcement, which adds to the price beyond the material bill.
Costs in Natick can rise when older roofs require deck repairs, flashing replacement around chimneys and skylights, or structural review before switching from lighter materials to slate or tile. An older home may have weakened decking, vent penetrations that need upgrading, or hidden rot that isn't visible until the old roofing comes off. In these cases, expect a noticeable jump from the baseline material price, and plan for more material waste and cleanup time as crews replace deteriorated framing or reseal around perimeters. Sloped transitions and upper stories often demand careful staging and protective access, which also factors into the final tally.
MetroWest labor demand, seasonal spring and fall scheduling pressure, and the prevalence of re-roofing on older homes all tend to push Natick pricing above a simple material-only estimate. If you're aiming to minimize disruption, you'll want to book critical work windows early and consider how weather windows affect delivery of heavier materials such as clay, concrete, or slate. For slate or tile projects, scheduling around milder weeks reduces the risk of long weather-induced delays, while asphalt gets faster turnaround but can still be longer than a straightforward replacement on a tight, wind-prone site.
Don't let upfront costs delay a critical repair - these contractors offer payment plans to fit your budget.
Shore Lock Homes
(800) 916-9438 www.justfixmyhome.com
2 Pumpkin Pine Rd, Natick, Massachusetts
4.1 from 111 reviews


In Natick, a full roof replacement typically requires a building permit rather than treating it as informal maintenance. Before any shingle is lifted, you should plan to submit project details with the town, including the scope of work, materials, and any alterations to flashing or ventilation. The permit fee is paid as part of the intake, and the approval process hinges on clear documentation of the planned installation. If the project involves sensitive historic materials or a mix of traditional and modern systems, be ready for extra scrutiny to preserve the character of existing rooftops while meeting code. A careful start with the town can prevent delays that ripple into cold snaps and ice-dam risk later.
Once the permit is issued, the work must follow the approved plan, with attention to proper flashing at penetrations, eave and rake details, and appropriate venting to manage attic moisture. In this climate, ice-damming pressure makes correct flashing and ice barriers crucial, especially around chimneys, skylights, and valley intersections. If you replace metal vent boots or add new exhaust routing, ensure this aligns with the permit stipulations. Keep organized notes and receipts on material types, underlayment, and any changes that arise from on-site conditions. If subcontractors are used, confirm they understand Natick's expectations for cleanup and waste removal so no stray nails or debris linger behind.
The final inspection focuses on how the roof was installed: flashing integration, venting adequacy, and general adherence to the approved design. The town inspector will look for a coherent system rather than a patchwork of fixes. Documentation of what was installed matters at closeout, including manufacturer specifications for underlayment, flashing components, and any structural reinforcements. Have your contractor prepare a concise set of installation records and warranties to present during the closeout. If a discrepancy is found, be prepared to address it promptly; a delay in the final inspection can leave you without the protection and comfort a properly vetted roof provides during spring thaws and winter ice.
In Natick and the broader Massachusetts market, insurers scrutinize roof claims for pre-existing wear versus sudden storm damage, making dated photos and maintenance history especially important. A homeowner who has kept clear records of twig damage, ice dam history, and previous repairs will be favored when a claim is evaluated. If a missing shingle or a small leak shows up years after a storm, the question becomes whether it was caused by recent impact or long-term deterioration. Keep a concise file of weather events, attic moisture notes, and any professional assessments to demonstrate a clean baseline before a loss.
Regional wind and hail events can create concentrated claim activity, so Natick homeowners should expect adjusters to request material specifications and a contractor scope of work. Have available the exact roof deck type, underlayment, and fastener details for any sections in question. If a claim moves forward, be prepared to share contractor specifications and a repair plan that aligns with the home's construction era and any historic materials. Clear, itemized communications help prevent disputes over whether a repair matches the original roof's performance or merely masks damage.
After major loss periods in Massachusetts, some carriers tighten underwriting, which can affect renewal terms for older Natick roofs even when a claim is not paid in full. A policy holder may see stricter terms or a higher deductible in the renewal cycle, especially if the roof shows signs of age or prior weather-related wear. To minimize surprises, maintain ongoing documentation of roof condition and any maintenance, and engage a trusted local contractor early when concerns first arise. This record trail supports steadier coverage decisions and smoother conversations with the insurer when the next storm season arrives.
Connect with contractors who help homeowners navigate the claims process from damage assessment to final approval.

New Stage Roofing & Home Improvement
(844) 616-0054 www.newstageroofing.com
232 Pond St, Natick, Massachusetts
4.9 from 124 reviews
Roofers Edge & Siding
(774) 273-7595 www.roofersedgeinc.com
2 Summer St Ste 306, Natick, Massachusetts
4.6 from 91 reviews

In older Natick homes, chimney flashing is a frequent failure point after harsh winters. You will often see more activity around chimney-related roof work than other areas because the mortar joints, crown, and flashing are aging in place. When a leak shows up near a chimney, start by inspecting the intersection where chimney masonry meets the roof plane. Look for loose or missing flashing, micro-cracks in the step flashing, and any gaps where the chimney meets the shingles. Pay attention to the vent stack boot and the transition where the chimney cap sits; even small gaps can channel meltwater into the attic. If you notice rust on metal flashing or staining on interior ceilings near the fireplace, treat it as a flashing fault first, not a blanket shingles issue.
Skylight service is highly active locally, making curb flashing, seal failure, and winter condensation around skylights a practical concern in replacements. When a skylight leaks, check the curb flashing where it sits on the roof deck, the seal between the skylight and the curb, and the sealant joints around the skylight flange. In Natick's freeze-thaw cycles, seal failure often shows up as hairline cracks or breached caulk that lets water creep under the shingles. Condensation issues in winter can indicate insufficient venting or a recessed skylight letting cold air pool against warm interior surfaces. Inspect the drip edges near skylights; even small misalignments here can direct water into roof seams.
On older Natick roofs, a leak investigation should distinguish masonry-related water entry, flashing failure, and roof-field deterioration rather than assuming shingles alone are at fault. Start by tracing interior stains to their closest exterior path: is water following mortar joints or flashing ridges, or is it seeping through aged shingles that have lost their protective granules? A methodical approach-checking the masonry joints, the flashing continuity, and the condition of the roof deck-helps prevent misdiagnosis and guides targeted repairs. In practice, plan for a phased assessment that covers chimney and skylight interfaces first, then moves to surrounding roof surfaces.
Find contractors experienced in skylight installation, flashing, and leak repairs to bring natural light into your home.
Watertite Company
(508) 655-5588 watertiteco.com
30 N Main St, Natick, Massachusetts
5.0 from 80 reviews
New Stage Roofing & Home Improvement
(844) 616-0054 www.newstageroofing.com
232 Pond St, Natick, Massachusetts
4.9 from 124 reviews

Natarelli & Son Roofing & Gutters
(508) 509-5128 www.natarelliandsonroofing.com
6 Austin Way, Natick, Massachusetts
5.0 from 51 reviews
When replacing a roof on an aging Natick house, you want a crew that can work around furnishings, decks, and tight corner lots without turning the neighborhood into a construction zone. Look for contractors who specifically list successful projects on occupied homes and can describe their tear-off plan for small driveways, alley access, and street parking. Favor teams that bring staged materials, portable wash stations, and clear on-site traffic patterns to minimize disruption.
Cleanup and protection are non-negotiables in this market, where winter ice-dam risk and storm activity heighten the stakes. Ask how the crew protects landscaping, foundations, and sidewalks, and whether they use magnet sweeps to recover fasteners after each day. You want a firm with a published response timeframe for leaks, especially during thaw cycles or heavy precipitation. A quick triage plan-covering sagging gutters, flashing, and vent openings-reduces water intrusion and speeds up repairs.
The Natick market features long-established, family-owned outfits alongside larger, volume-focused crews. Each has strengths: legacy firms often bring deep material knowledge and manufacturer certifications; volume operators may offer broader scheduling flexibility. Request evidence of manufacturer training or certification, plus a portfolio of local installations. A balanced bidder will present both hands-on craft and clear communication channels, with a point of contact who can coordinate with you during weather-driven delays.
Always request local references and site photos comparable to your house type-bays, dormers, slate or wood elements, or heavy canopy trees. Ask about projects on similar material sets and occupancy constraints. Verify whether the contractor can provide a concrete teardown plan, including debris management, material containment, and safe egress routes for family and pets. This combination of practicality and local know-how helps ensure a smoother, safer, and faster roof replacement.