Last updated: Apr 19, 2026
Spring storms bring hail and gusty wind that can crack shingles or create tiny openings that aren't obvious from ground level. If damage sits unseen, it can quietly worsen and jeopardize insurance eligibility, especially after a long Michigan winter. The risk isn't just cosmetic: a small opening can lead to interior leaks as water finds its way under layers of aging roofing underlayment. In a market where fast-response re-roofing and insurance-backed repairs drive decisions, delaying a full inspection after a storm can mean bigger headaches down the line. This is not the time to gamble on "it'll be fine." Every hail event has a potential claim trigger, and quick action protects you from further damage, higher risk of mold, and more invasive repairs later.
Damage to look for is not always obvious. In Burton, spring hail and storm systems are a primary trigger for roof inspections because damage may not be obvious from the ground but can still affect claim eligibility. After a storm, walk the perimeter with a flashlight to check for displaced granules, dented metal flashing, loose or curled shingles, and signs of granule loss at the gutters. Inside, check the attic for damp spots, roof sag, or unusual light filtering through the roof deck, which can indicate hidden intrusion. If there is an ice dam or repeated moisture intrusion along a seam or valley, that is a sign to escalate inspection and documentation. Remember: insurers often want a clear sequence of events and a record that ties the damage to a storm occurrence, not general wear and tear.
Michigan insurers commonly want pre-loss condition records, roof photos, and contractor estimates before approving Burton-area storm claims. Start compiling a simple, dated file the moment a storm hits: wide-angle photos of the entire roof, close-ups of damaged shingles or flashing, and a few interior shots of any attic or ceiling staining. Keep the date-stamped images organized by spot on the roof where issues were observed. A concise timeline helps a claims reviewer see the progression from storm impact to visible damage. Contractor estimates should be detailed and itemized, noting the specific roof section affected, the style of the shingles or metal components, and any underlying ventilation or underlayment concerns. The more precise the documentation, the smoother the claim review and the faster you can schedule repairs.
Because Burton winters bring freeze-thaw cycling, small storm-created openings can worsen quickly if repairs are delayed into cold weather. When temperatures dip, tiny gaps become micro-cracks, and water can seep into the deck or sheathing. If a storm damage assessment is delayed, a simple leak can escalate into widespread interior damage, requiring more extensive repair or full replacement. The best strategy is to align a prompt inspection, confirm damage with clear photos, and secure a contractor's assessment while temperatures permit safe, non-rushed work. Do not assume a temporary patch will buy time; in many cases, a quick, proper fix now prevents a larger, more costly project later.
Begin with a storm-specific inspection as soon as conditions allow. If damage is present, request a written estimate from a reputable local contractor with experience in insurance-backed claims. Share your photo log and the contractor's assessment with your insurer to substantiate the claim. Maintain steady communication with your insurance adjuster and the contractor, and keep a focused record of all correspondence and dates. If you need to coordinate repairs, prioritize materials and installation timelines that minimize exposure to continued weather events. The goal is a timely, well-documented claim that leads to appropriate, durable repairs, rather than a piecemeal approach that risks further damage.
Seasonal timing drives both price and crew availability in this area. Late spring through early fall is the preferred window for re-roofs, with long daylight hours and more predictable build days. In Burton, after a major storm or during peak summer demand, pricing and crew availability tighten quickly. If a homeowner is juggling insurance-backed repairs, that window can narrow further as adjusters pace work and roofing crews allocate resources to the highest-need homes. For most homeowners, planning a re-roof for asphalt shingles during the late spring-to-early fall stretch keeps the project faster and easier on the budget. Metal roofs, while more expensive upfront, are sometimes chosen for snow and ice performance and can be more viable outside the tightest window if weather holds.
Material choice shapes what you'll pay per square, and the season can tilt the practical decision. Asphalt shingles sit at the lower end of the local spectrum, typically ranging around 350 to 650 USD per square. They are the dominant, everyday option for Burton homeowners who want a straightforward re-roof with solid protection and a quicker turnaround. Metal roofing, favored by some for long-term snow and ice performance, carries a broader range of roughly 700 to 1,900 USD per square. The higher upfront cost can be offset over time by reduced ice dam risk and potential savings on maintenance, but it does demand vaster scheduling certainty. If a hail event has damaged the deck or if insurance timelines push, metal can be a good long-term bet when weather allows a careful, staged installation.
Other materials show similar patterns but with tighter windows and longer lead times in busy seasons. Clay tile typically lands from 1,000 to 2,500 USD per square, and concrete tile from 750 to 1,800 USD per square, each bringing distinctive weight, seismic considerations, and roof-slope requirements. Wood shingles or shakes sit in the 600 to 1,200 USD per square range, meaningful for a traditional look but sensitive to moisture and wind. Synthetic or composite shingles offer a middle path-generally 500 to 1,000 USD per square-and can blend reasonable cost with good durability in our climate. In practice, the season you target will interact with material choice: asphalt often delivers the most predictable scheduling and cost, while metal or synthetic options may compress or extend timelines depending on storm recovery demand.
Weather and decking condition are real constraints in Burton. Freeze-thaw cycles can complicate tear-offs, sealing, and timing, particularly when decking has shown signs of stress from winter. If ice, thaw cycles, or moisture are present, crews may need to stage work more carefully, which can push labor hours up and extend the project into shoulder months. When insurance-driven timing is a factor, expect tighter coordination with adjusters and a need for a clearly defined payment and inspection plan to avoid costly delays. In practical terms, choose a window where you can align the expected material lead times, crew availability, and potential weather delays to minimize weather-induced disruptions.
Good's Roofing
(810) 653-7663 goodsroofing.com
4477 S Center Rd, Burton, Michigan
4.7 from 421 reviews
Over the time we’ve been in business, we have earned a reputation as not just a company, but also a team of people, that you can trust. We pride ourselves on our technical expertise as well as our promise to treat each home as it if were our own. And this is precisely why our clients continue to use us time and time again. All of our technicians are fully trained and certified to carry out work needed, and we emphasize continual education for all of our staff to make sure our solutions remain cutting-edge. If you’re looking for help with your roofing needs, you’ve come to the right place!
Andy's Roofing
(810) 762-5958 www.andysroofinginc.com
3140 Kleinpell St, Burton, Michigan
4.5 from 119 reviews
Andy's Roofing has been installing roofs in South East Michigan for over 30 years. We are a Michigan based Company & Fully Licensed & Insured. Residential & Commercial roofs- For your homes roof we install shingle, metal or flat roofs. We are a Certainteed Gold Star contractor with over 300 options to choose from. Our commercial roof division installs & repairs commercial roofs. We use Versico Certified Commercial Flat-roof systems. White Rubber, TPO, PVC, EPDM and Spray Foam Systems. Serving Flint, Burton, Grand Blanc, Davison, Flushing, Mount Morris, Goodrich, Fenton, Hartland, Holly & Ortonville For a Free Estimate-Call a professional licensed Michigan roofing company. Call Andy's Roofing. Andys Roofing ...The Proof is in the Roof.
Pro Star Exteriors
(810) 223-7242 prostarexteriorsmi.com
Serving
4.6 from 34 reviews
Roofing Contractors serving Flint, Lansing, Ann Arbor, and Saginaw We proudly apply more than 15 years of experience with roof repair and window repair to all of our projects, allowing those in our community to fall in love with our results. For quality customer service and unparalleled results, turn to our roofing company. We are large enough to tackle any major project, yet small enough to work side-by-side with home and business owners to ensure they get exactly what they need. Get in touch with us today for a pricing estimate.
Rainwaters Roofing
(810) 447-5638 rainwatersroofing.com
Serving
4.9 from 22 reviews
Rainwaters Roofing, LLC is a reputable roofing company known for its high-quality services and customer satisfaction. With years of experience in the industry, they specialize in residential and commercial roofing solutions. Their services include roof installation, repair, replacement, and maintenance. Rainwaters Roofing prides itself on using top-notch materials and employing skilled professionals to ensure durable and reliable results. They prioritize customer communication and strive to exceed expectations on every project. Additionally, the company is known for its commitment to safety and adherence to industry standards. Overall, Rainwaters Roofing, LLC is a trusted choice for anyone in need of roofing services.
Hect Home Improvement
(810) 243-3303 hecthomeimprovementllc.com
Serving
5.0 from 111 reviews
Hect Home Improvement is the premier Roofing Contractor located in Flint, MI. With over 25 years of experience, we offer Roof Repair and Roof Replacement services. We specialize in Residential Roofing, using quality materials like Shingles, Metal and slate. We offer the best roof ventilation solutions. Here you have easy roof financing options. This makes your roof installation hassle-free. Located at 4487 Richfield Rd, our team of Certified Roofing installers ensures efficient, high-quality service. Trust us for all your roofing needs. We offer emergency roof repairs, siding, and gutter installations as well. All our work comes with a lifetime warranty for your peace of mind. Call or text us today for a free inspection and estimate.
Lockhart Roofing
(877) 766-3033 lockhartroofing.com
Serving
5.0 from 19 reviews
Lockhart Roofing is a family owned and operated residential and commercial roofing company that has been servicing Grand Blanc and the Mid Michigan areas since 1982. We also offer seamless aluminum gutters and commercial gutters.
Weather Shield Roofing Systems | Flint, MI
(616) 243-4040 weathershieldusa.com
Serving
4.9 from 14 reviews
With Weather Shield Roofing Systems, your roof is in good hands. Our team of experienced, certified roofers are specialized in industrial flat roofing. Over the past years, we’ve been named the Top 100 Roofing Contractors in the USA four times by Roofing, Siding, and Insulation Magazine and have been the #1 Contractor of the Year five times by two of the nations’ leading manufacturers of thermoplastic roofing.

By The Square
(248) 881-5408 bythesquare.net
Serving
5.0 from 46 reviews
""By The Square Roofing specializes in commercial and industrial roofing. We focus on solving roofing challenges with expert knowledge and installation experience. From flat roof repairs to full replacements, we offer reliable solutions tailored to your b
Elite Roofing Group
(888) 734-9766 eliteroofinggroup.com
Serving
4.2 from 48 reviews
Elite Roofing Group is the leading roofing company in Grand Blanc, MI, and the surrounding area. We proudly offer roof replacements, gutter guards, and siding services in Grand Blanc, MI! Contact us for all your roof repair needs. Elite Roofing Group promises to provide an individually designed, professionally installed roofing system. We take pride in each roofing project, from privately owned homes to industrial complexes, and guarantee our customers satisfaction. Our team has years of experience with roofing services and a reputation for quality. Elite Roofing Group has expanded nationwide and serves clients in Grand Blanc, MI. Get your roofing project started with Elite Roofing Group with a free roofing service estimate today!
Most Reliable Construction
(810) 922-4285 www.mostreliableconstruction.net
Serving
4.4 from 20 reviews
We are michigans nunber 1 roofing contractor we offer 20 year workmanship warranty as well as lifetime warranty roofing products. We do commercial, residential, and industrial roofing we are licensed and fully bonded and insured. We install Durolast, TPO and EPDM (rubber certified). We also install metal roofing and siding products as well as vinyl siding and free gutters with roof installation most reliable construction "Restoring the past building the future"
Ideal Roofing
(810) 258-0500 idealroofingco.com
Serving
4.9 from 55 reviews
Ideal Roofing is Flint's trusted roofing company serving all of Genesee County. We provide FREE roofing estimates, expert repairs, and complete roof replacements. With 30+ years of Michigan experience, we offer 24/7 emergency leak response, storm damage repair, and flexible financing. Locally owned, fully licensed & insured. Call for your free estimate today!
Maxim Commercial & Residential Roofing
(810) 768-7663 www.maximroofs.com
Serving
4.8 from 67 reviews
Call For Your Free Estimate For a Roofing Installation! At Maxim Commercial Roofs, we specialize in high-quality, long-lasting commercial roofing solutions across Oakland, Macomb, Wayne, Genesee, Livingston, Washtenaw, Monroe, Ingham, and Jackson Counties. As a Certified Platinum Contractor with Duro-Last, we take pride in delivering superior workmanship, energy-efficient systems, and industry-leading warranties to our clients-backed by a name trusted nationwide. Whether you manage a retail complex, industrial facility, warehouse, school, hospital, or government building, our experienced team is equipped to handle any size project with professionalism, precision, and integrity.
Before any full re-roof starts, identify the local building department that serves Burton and Genesee County. A residential full re-roof generally requires a permit through the appropriate agency, and starting without a permit can trigger delays or penalties when the work is discovered during a storm-damage claim or insurance review. Check the workflow early: pull the permit, note the required inspections, and confirm whether the roof replacement will be treated as an all-at-once project or staged work under a single permit. The department will outline the exact documentation needed, typically including project plans, material specifications, and contractor credentials. In practice, aligning with the permit schedule helps prevent interruptions from weather or insurance timelines.
As the project plan is submitted, a typical sequence includes an inspection during underlayment or nail-down phases. Expect a building official to verify that ventilation is compliant, flashing details align with local standards, and debris containment is prepared for tear-off work. In Burton, improper ventilation or flashing can lead to accelerated wear, ice dam risk, and failure to meet code during the final check. Have the roofing crew document attic ventilation checks and attic-to-roof transitions, especially around soffit vents and ridge vents. The initial inspection focuses on whether the underlayment is correctly installed, the nails or fasteners meet local spacing requirements, and temporary containment is in place to manage waste. If adjustments are needed, address them promptly to keep the project moving and avoid re-inspection fees.
During tear-off, proper debris disposal is a key Burton-area concern. The inspector will look for containment measures that prevent shingle and nail migration into gutters, driveways, and neighboring yards. Ensure the contractor plans for daily cleanup and an on-site disposal route that minimizes neighborhood disruption. A clean tear-off also reduces the risk of overlooked upcoming issues, such as venting clashes or flashing misalignments that could arise once the new roof is in place. If any waste streams appear unmanaged, scheduling a corrective pass with the contractor and the inspector can prevent unnecessary delays.
The final inspection confirms that the roof replacement is complete and meets all ventilation, flashing, and waste-disposal requirements. The inspector will review the completed work, confirm that all penetrations are sealed properly, and verify that the roof deck and underlayment were installed to spec. Having a prepared log of inspection records, manufacturer installation guidelines, and a photo trail of progress can help the final review flow smoothly. After successful approval, keep the permit closure letter and any warranty documents in a readily accessible location for future reference or insurance-related needs.
Coordinate with both the contractor and insurer to align permit timing with expected storm windows and potential hail-related claim timelines. Ask for a pre-inspection checklist to ensure ventilation, flashing, and debris-control measures are addressed before the official inspections. If a repair or partial replacement is proposed, confirm whether the permit scope matches the insurer's loss assessment to avoid mismatches at final review. In tight neighborhoods, communicate access routes and work hours clearly to minimize neighbor disputes and keep the permit process on track.
Burton's cold winters bring repeated freeze-thaw cycles that can stress shingles, flashing, and roof penetrations even when a roof isn't at the end of its nominal lifespan. The little cracks you see on high-traffic edges or around chimneys often start small, but they widen as ice expands in crevices and the sun's warmth briefly thaws the surface. Over several seasons, those micro-damages accumulate, and what looked like a sturdy cap on your roof can become a collection of weak spots that invite leaks after a heavy storm or a rapid thaw. Dark granule loss on asphalt shingles is a telltale sign, but don't overlook minor buckling, loose flashing, or nail heads showing through at valleys and joints. In this climate, durability isn't a one-time fix; it's ongoing vigilance against the invisible toll of cold, wet, and fluctuating conditions.
Snow accumulation followed by thawing and refreezing is a Burton-area leak pattern that often exposes weaknesses around valleys, eaves, and previous repair points. When snow sits, heat from the attic or roof can cause uneven melting that pools near seams and transitions. As the meltwater refreezes at night, it creates tiny ice dams that push against shingles and underlayment, often splitting sealants and lifting edge shingles just enough to invite slow seepage. Valleys, where two roof planes meet, are especially vulnerable because water can back up and find its way beneath the flashing if any laps or seals are compromised. Pay attention to any persistent damp spots inside the attic after a thaw and to discoloration along ceilings near corners-these are often the first signs that hidden damage has progressed beyond cosmetic wear.
Replacement timing in Burton is often planned outside winter because freeze-thaw conditions can complicate both installation quality and short-term watertightness during active work. If a roof shows multiple damaged shingles, lifted edges, or recurring leaks after seasonal cycles, it's prudent to align a replacement window to a milder stretch-ideally a period without prolonged freeze-thaw risk. Ensure crews stage a thorough upfront inspection, particularly around valleys and penetrations, and request a detailed plan for protecting interior space during the project. Understanding that some failures are incremental-caused by cumulative stress rather than a single catastrophic event-helps you set expectations: even a well-installed roof can exhibit temporary wet spots during the transition from old to new, but a properly executed replacement offers long-term resistance to Burton's signature weather. Stay proactive: a timely evaluation can save bigger headaches when the next winter arrives.
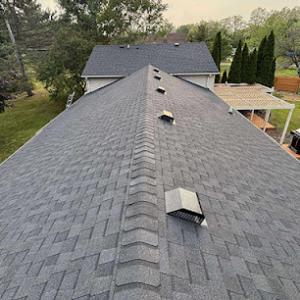
Asphalt shingles are the dominant material on Burton homes because they fit the area's mainstream residential stock and align with typical homeowner expectations. They handle Genesee County winters with their freeze-thaw cycles, and they're well suited to rapid response repairs after spring storms. For most neighborhoods, asphalt shingles strike a reliable balance between ease of installation, repair options, and long-term performance. When browsing color and profile options, look for laminated or architectural styles that increase wind resistance and shed snow off the slope more effectively. Local crews are widely familiar with these systems, which translates to faster scheduling after hail events or wind-driven damage.
Metal roofing has a meaningful market presence, reflecting homeowner interest in durability through snow seasons and longer replacement intervals. In Burton, metal roofs can shine when a home sits under heavy winter loading or faces repeated ice dam pressure. The ability to shed snow quickly reduces the risk of shingle blow-off and edge damage, and many metal systems come with integrated underlayment and simulated seams that resist water intrusion during blizzards and spring thaws. Availability of skilled metal-hammer and seam-seal crews is strong enough to support timely repairs and coordinated insurance-assisted projects, which matters when a storm claims process is underway. If choosing metal, consider a standing-seam profile for robust wind performance and a cleaner aesthetic on contemporary or mid-century homes.
Tile and wood products exist in Burton's material mix but are far less common than asphalt and metal, making contractor availability and repair matching more limited. Clay and concrete tiles offer excellent hail resistance and a long lifespan, but they demand careful roof framing, precise underlayment, and specialized installation. Wood shingles and shakes deliver a traditional texture that can weather fade gracefully, yet they require vigilant maintenance to prevent moisture intrusion and insect issues in intermittently shaded or mature neighborhoods. If a tile or wood option makes sense for a particular design or historic context, ensure the local contractor pool includes experienced installers and that roof framing supports the chosen system's weight and spacing.
Storm damage and insurance-driven timelines shape material decisions in this market. Asphalt remains the go-to for speed and compatibility with a broad range of roof decks, while metal offers a strategic option when long-term resilience is a priority. Tile and wood can be compelling for specific style goals, but planning around contractor availability and repair matching is essential. In all cases, the interplay between storm response expectations, hail exposure, and the insurer's preferred replacement approach should guide material selection so that the roof not only protects the home but also integrates smoothly with the broader renovation timeline.
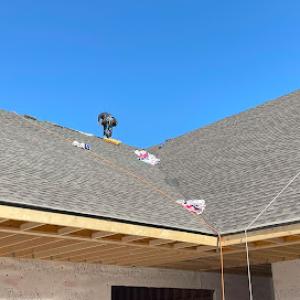
Find contractors who specialize in clay and concrete tile roofs, known for their durability and curb appeal.
In Burton-area claims, adjusters may request attic access in addition to roof access when evaluating leak paths and storm-related intrusion. Prepare by clearing access routes and noting any existing attic ventilation or insulation concerns that could influence how leaks travel. If attic access is granted, ensure the space is safe and well-lit so the adjuster can trace potential water paths from roof line to ceiling. Clear insulation around the attic hatch or access points to facilitate observation without creating new damage.
Michigan claim reviews commonly include manufacturer guidance and warranty context, which can affect how homeowners document prior repairs or aging materials. Gather product names, installation dates if known, and any wind or hail impact notes from prior work. Create a simple file that pairs photos with a date stamp and a short note about what was observed. When possible, reference warranty language or installation manuals that relate to the roof materials in place, so the adjuster can correlate findings with original specifications.
Photo documentation taken before and after storms is especially valuable because insurers often want evidence separating sudden storm loss from long-term wear. Focus on clearly showing hail impact marks, lifted shingles, granule loss, flashing displacement, and any signs of prior repairs. Use wide shots to establish the roof's overall condition, then close-ups of suspect areas. Keep a consistent photo log, noting weather conditions, time, and the approximate location on the roof.
Notes about prior repairs should be precise: dates, contractors, materials used, and why the repair addressed a specific failure. If aging materials are visible, mark them with a ruler or scale in photos to convey relative wear. When describing sequences of damage, tie each photo to a specific location and a timestamp, so the adjuster can follow the progression from the source to interior effects.
Understanding how storm damage and coverage interpretations influence timing helps you align your documentation with claim reviews. Keep the focus on clear, chronological evidence that differentiates a sudden loss from cumulative wear. If questions arise about next steps, reference the observed pathways and material guidance documented at the outset to support a timely, transparent evaluation.
The local contractor scene shows meaningful demand for low-slope work, especially for garages, additions, and mixed-roof sections on homes. That mix often creates hidden trouble where a standard pitch doesn't shed water as efficiently. If your retrofit involves any flat or near-flat surface, pay close attention to sealing, flashing transitions, and drain placement. A delay in addressing these details can turn a simple patch into a costly leak after a heavy rain or early thaw.
Freeze-thaw cycles accentuate weaknesses at flashing seams and skylight perimeters. Sealants dry out, caulk joints crack, and metal flashing can corrode where it meets a different material. With age, these joints accumulate micro-leaks that you might not notice until damp spots appear inside a attic or ceiling. For low-slope or skylit zones, even a small drip can travel along a deck or wall until it finds a corner to hide in. The consequence is often more extensive repair work than anticipated, especially if the leak has been active through multiple thaw cycles.
Autumn leaves in this area tend to linger, and on low-slope sections they can hold water longer than on steeper roofs. Debris buildup blocks drainage paths and creates standing moisture that accelerates wear on membranes, flashings, and edge details. The longer water sits, the more likely fasteners loosen, membranes sag, and granules shed prematurely. This is particularly true around skylights, dormers, and transitional areas where two roof slopes meet or where field membranes bend around a vent or chimney.
When inspecting a roof with low slopes or skylights, look for signs of aging sealants, pulled or cracked flashing, and any water staining near transitions. Prioritize prompt resealing and the careful re-sealing of skylight perimeters, with attention to drainage paths and debris-free gutters. If a concern shows up after a storm or freeze-thaw event, treat it as a priority rather than a future project. Early action reduces the risk of widespread damage to this specialized portion of the roof.
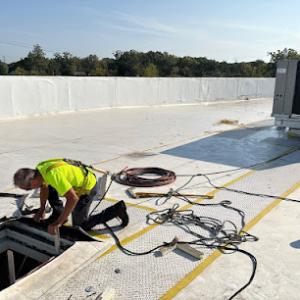
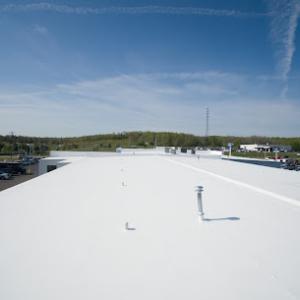
Find specialists in TPO, EPDM, and built-up flat roofing systems for residential and commercial properties.

Good's Roofing
(810) 653-7663 goodsroofing.com
4477 S Center Rd, Burton, Michigan
4.7 from 421 reviews
Andy's Roofing
(810) 762-5958 www.andysroofinginc.com
3140 Kleinpell St, Burton, Michigan
4.5 from 119 reviews
After a storm, timing matters more than anything else. Burton homeowners favor contractors who can be on site quickly, assess damage, and outline next steps within 24 to 48 hours. When you call, note the expected response window and whether the company prioritizes rapid-service positioning that the local market expects. A fast initial visit helps prevent further damage from wind-driven rain and hail, and it eases the insurance review process if you're filing a claim.
Cleanup quality influences final satisfaction as much as the roof itself. Local crews should provide a clear plan for tear-off debris, nail clean-up, and yard protection before work starts. Ask how they handle tear-off disposal, soil and lawn protection, and post-job yard checks. Reliable crews leave the property cleaner than they found it, with nails gathered and properly disposed of to prevent punctures in driveways, sidewalks, and gardens.
The Burton market leans toward long-established, family-owned companies that have stood through multiple seasons and storms. Local trust and service history matter as much as price. Look for firms with verifiable local references, a physical office or showroom, and a retirement-friendly owner or manager who remains reachable after the job begins. A company with years of local service is likelier to understand neighborhood wear patterns, typical storm damage, and common insurance expectations.
Understand how the roofer coordinates with your insurer after hail or wind damage. Ask about documentation practices, and whether the contractor provides a detailed, photodocumented scope of work that aligns with the claim. A contractor who can translate insurance jargon into clear, actionable steps helps prevent delays and reduces the chance of extra work surprises later.
Compare not just price but the entire service package: rapid on-site evaluation, transparent cleanup plans, and a demonstrable local footprint. Request written timelines, cleanup guarantees, and after-job follow-up to address any minor repairs or venting questions. In this market, a dependable, locally trusted team with a proven storm-repair track record often outperforms the lowest bid.