Last updated: Apr 19, 2026
Spring in this area brings frequent heavy rains and local severe storms that raise the risk of active leaks and wind-related shingle loss. After the fast-moving fronts pass, a roof that looked solid yesterday can start dripping tonight. The timing matters: thawing days followed by sudden cold snaps create vulnerable ice dams, while visible shingle lift or missing tabs from a hail event can escalate into interior damage before a homeowner notices. Stay vigilant as storms roll through and monitor the attic for warm-air leaks that fuel rapid ice melt near the eaves.
After major hail or wind events in this part of Michigan, homeowners may see insurer requests for photo documentation, contractor estimates, and a clear replacement scope before claim decisions are made. That sequence can drag if the roof has hidden damage behind gutters or vent flashing, so as soon as the storm passes, inspect carefully and document with detailed photos from multiple angles. Focus on cracked, curled, or displaced shingles, dented flashing, and granule loss in gutters and downspouts. Sinusoidal ice dam build-up along the eaves is a common spring adversary; if it's present, don't wait for a leak to show up inside the attic. Early reporting and precise photos speed up the claims path and reduce the risk of temporary patchwork turning into costly, lasting damage.
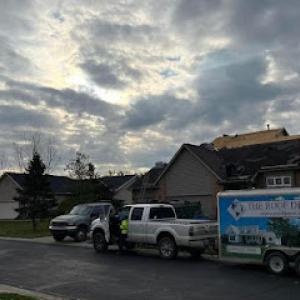
The local contractor signal mix shows storm damage and emergency repair as the most prevalent specialties in the market, indicating that post-storm response is a major homeowner need in Lapeer. That means quick access to a responsive crew is a real asset, but it also invites pressure-filled decisions. When a contractor arrives after a hail or wind event, expect a rapid assessment and a push to secure temporary protection. Request a written assessment that distinguishes between temporary tarping and permanent repair, and insist on a clear, line-by-line repair plan with a defined replacement scope that aligns with the insurer's expectations. If an estimate arrives verbally, ask for a written copy with itemized parts and labor so the claim process isn't stalled by ambiguity.
Winter's lingering grip fades, but the risk isn't gone. Planning now for spring means scheduling a proactive roof check with a trusted local pro who understands residential Michigan construction and the typical storm patterns here. Target a thorough inspection of the attic, ventilation, insulation, flashing, and vent boots after the wettest weeks pass. Develop a short-term coverage plan that minimizes further water intrusion while the claim process unfolds, and keep a documented log of storm dates, observed damage, and communications with insurers and contractors. Prompt, informed action today reduces the risk of costly leaks tomorrow.
Find local contractors experienced in assessing and restoring roofs after hail, wind, and severe weather events.
True built home pros | Roofing Contractor in Macomb & Oakland County | Best Roofer
(586) 634-1452 www.truebuilthomepros.com
109 Gray Rd, Lapeer, Michigan
5.0 from 22 reviews
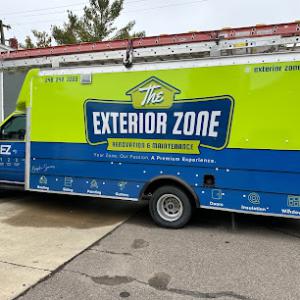
The Exterior Zone
3529 Genesee Rd Suite 3, Lapeer, Michigan
4.9 from 90 reviews
From day one, we envisioned ‘The Exterior Zone’ as a family of individuals with a passion for excellence, providing our clients with one turn key solution for all of their Exterior Renovation Projects. With the expertise to eliminate complexity, do it right the first time, provide consistent communication, and the comfort of knowing your zone is protected by one; We strive to give our clients a Premium Experience. Today, our clients know they can trust our hard-earned reputation for excellence on any Roofing, Siding, Gutters, Door, Painting or Insulation project. Servicing Oakland, Lapeer, & Macomb with over 15 years of experience! Your Zone. Our Passion. A PREMIUM EXPERIENCE!
Michigan Exterior Pros
(810) 834-8206 michiganexteriorpros.com
324 W Nepessing St, Lapeer, Michigan
4.9 from 68 reviews
Michigan Exterior Pros, based in Lapeer, Michigan, transforms both residential and commercial properties. Serving surrounding counties, we bring exceptional craftsmanship in roofing, siding, windows/doors, decks and more. We prioritize customer satisfaction with personalized solutions and transparent pricing. Using top-quality, locally sourced materials, we ensure durability and energy efficiency. Our expertise caters to Michigan's climate, and our comprehensive services range from minor repairs to major renovations. Trust us to enhance your property with professionalism and passion. Experience the difference with Michigan Exterior Pros, where your dream exterior becomes a reality.
True built home pros | Roofing Contractor in Macomb & Oakland County | Best Roofer
(586) 634-1452 www.truebuilthomepros.com
109 Gray Rd, Lapeer, Michigan
5.0 from 22 reviews
True Built Home Pros is a trusted 24-hour roofing contractor proudly serving Macomb Township and Clinton Township, MI. We specialize in roof repairs, shingle roofing, roof replacements, and storm damage restoration for residential properties. Our experienced team delivers reliable, affordable, and high-quality roofing solutions designed to protect your home year-round. Whether you need emergency roof repair, new shingle installation, or a full roof replacement, we are available 24/7 to get the job done right. If you’re looking for a dependable local roofer in Macomb County, contact True Built Home Pros today for fast service and expert results.

EavesTec
(810) 614-6617 www.eavestec.com
1897 N Lapeer Rd, Lapeer, Michigan
4.0 from 6 reviews
EavesTec is the areas premier exterior renovation company to revitalize your home or office! We specialize in protecting the integrity of your home or building structure while beautifying and customizing the exterior to your specifications. We offer a number of services to our customers to better help them achieve their vision. Our installers are trained specialists in their area of expertise which means we have different crews for each service we offer. We install roofing, siding and trim, garage doors and openers, seamless gutters and gutter guards, cultured stone, and custom copper and metal work. Let us help you turn your house into a home!
The Roof Depot
(586) 707-7663 www.lapeerroof.com
Serving
4.8 from 66 reviews
The Roof Depot is a locally trusted roofing company known for dependable service and quality workmanship. Our team helps homeowners and businesses with everything from new installations to repairs, always focusing on long-term durability and clear communication. We work with metal roofs, shingle systems, residential and commercial projects, and also offer siding services when customers want to update or protect their property. If you’re dealing with storm damage or sudden leaks, our crew provides insurance-supported repairs and fast emergency help any time of day. Reach out to The Roof Depot for reliable roofing and repair solutions you can count on.

Home Pro Roofing - Macomb
(248) 324-5733 homeproroofing.com
Serving
5.0 from 6 reviews
Home Pro Roofing provides expert asphalt shingle roofing services throughout Macomb County and surrounding communities. We specialize in complete roof installations, replacements for aging roofs, targeted repairs, thorough inspections, and full storm damage restoration. Our team installs premium asphalt shingles specifically engineered to withstand Michigan's harsh weather conditions from freezing winters to summer storms. We simplify the insurance claim process by handling all paperwork and communicating directly with your insurance company. Every asphalt shingle roof we install comes with a comprehensive 50-year warranty, and we offer flexible financing options to make your new roof affordable. Call Home Pro Roofing a free estimate.

MG Home Services
(810) 728-3037 mg-home-services.ueniweb.com
Serving
4.7 from 12 reviews
MG Home Services / For All Your Home Exterior Needs. Metal Roofing Specialists - Roofing - Siding - Decks - Doors - Windows - Additions - Pole Barns - And Much More - Call Today To Schedule a Free Estimate. 40+ Years Experience Licensed & Insured
Bay Area Roof Repair
(231) 649-7744 tamparoofrepair.com
Serving
5.0 from 16 reviews
Bay City Roof Repair, a locally-owned and operated company, proudly offers top-quality residential and commercial roofing services throughout Bay City and its surrounding areas. Our team of licensed professionals is here to ensure that all your roofing needs are expertly handled. Choose us, where customer satisfaction and experience truly matter. License #CCC1331776

George Thomas Construction Roofing, Siding, & Gutters
(248) 736-2153 georgethomasconstruction.com
Serving
4.9 from 46 reviews
At George Thomas Construction, we are your trusted local roofing experts in Lapeer, Michigan. Our dedicated team excels at delivering top-notch residential and commercial roofing solutions, ensuring your property is protected from the elements. With a focus on quality and reliability, we offer a range of services including roofing, roof repair, roof inspections, commercial roofing, and siding installation. Our experienced professionals are committed to providing superior craftsmanship and exceptional customer service. Whether you need a new roof, repairs, or inspections, we've got you covered. Choose George Thomas Construction for all your roofing needs and experience excellence in every detail.

Roofing Army
(248) 326-2020 roofingarmy.com
Serving
5.0 from 140 reviews
Roofing Army provides expert asphalt and metal shingle roofing services in Oakland and Macomb counties, MI. From free inspections to durable installations with premium shingles, we deliver reliable, long-lasting results. Backed by labor warranties and a trusted team, we ensure your home is battle-ready.

Hect Home Improvement
(810) 243-3303 hecthomeimprovementllc.com
Serving
5.0 from 111 reviews
Hect Home Improvement is the premier Roofing Contractor located in Flint, MI. With over 25 years of experience, we offer Roof Repair and Roof Replacement services. We specialize in Residential Roofing, using quality materials like Shingles, Metal and slate. We offer the best roof ventilation solutions. Here you have easy roof financing options. This makes your roof installation hassle-free. Located at 4487 Richfield Rd, our team of Certified Roofing installers ensures efficient, high-quality service. Trust us for all your roofing needs. We offer emergency roof repairs, siding, and gutter installations as well. All our work comes with a lifetime warranty for your peace of mind. Call or text us today for a free inspection and estimate.
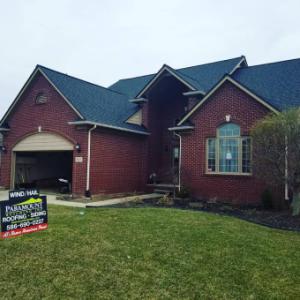
Paramount Roofing
(586) 690-0227 paramountbuildinginc.com
Serving
4.9 from 210 reviews
Paramount Roofing is dedicated to delivering outstanding quality at competitive prices. Our goal is to create long-term value by building trusting relationships with our customers. Our roofing specialists are certified to attend to any siding, insulation, gutter or roofing repair you need. With a focus on personal service and a commitment to integrity, our team is the best choice for any project you have.
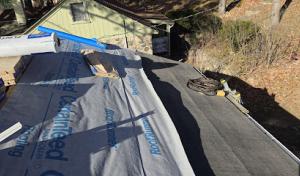
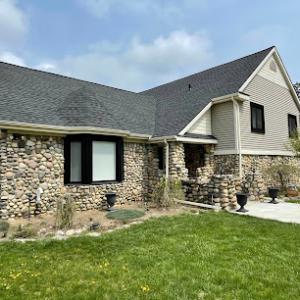
Asphalt shingles remain the dominant practical choice for homes in this area. They hold up well under normal Michigan winters, and their repairability makes them a common first step after wind or hail damage. In summer, heat and UV exposure can age the asphalt faster, so you'll want shingles with good UV resistance and a solid seal, especially on roofs with steep pitches where wind-driven rain can test edge seals. If choosing asphalt, prioritize a premium grade with enhanced warranties and consider extra attic ventilation to temper summer heat and reduce moisture buildup during thaw cycles.
Metal roofing has a meaningful local specialist presence and is often considered by homeowners looking for better snow shedding and durability through Michigan winters. In practice, metal helps shed fresh snow and reduces ice dam risk on sloped roofs, which is a steady concern here after heavy winter events. The panels or standing-seam options can also resist wind-driven debris better than standard shingles. If you lean toward metal, confirm a robust underlayment and proper flashing around roof penetrations, since cold cycles tighten seals and movement can reveal weak spots over time.
Clay tile, concrete tile, wood shakes, and synthetic products exist in the market, but their suitability depends heavily on structure, slope, and how they handle snow load, moisture cycling, and storm exposure. If the roof is already light-framed or has limited slope, heavier tiles may stress the structure in a freeze-thaw cycle. Wood shakes provide natural texture and good drainage but require regular maintenance to prevent moisture damage. Synthetics offer a lighter option with varied warranties, but performance under repeated freeze-thaw and ice dam scenarios should be evaluated with a local contractor who understands Michigan winters.
In practice, the best choice balances structural capacity with typical Lapeer winter events. If your roof carries heavy snow loads or has a history of ice damming, a metal or a high-grade asphalt system with rigorous underlayment and proper attic ventilation often proves most reliable. For older homes or steeper slopes, verify that any alternative materials can handle rapid temperature shifts without cracking or degrading seals. In all cases, ensure that the roof pattern, flashing details, and drainage plan are designed to minimize moisture cycling and storm-driven exposure. This guidance reflects Lapeer's winter pattern.
Explore specialists in steel, aluminum, and standing seam metal roofs built to last 50 years or more.


When you're planning a roof replacement in this area, price sits on a spectrum tied to material choice and the local weather calendar. Asphalt shingles sit at the lower end of the market, while tile systems push toward the high end. The per-square ranges you'll see are a good rule of thumb: asphalt shingles about 400-900 USD per square, metal 700-1200, clay 1200-2500, concrete 1000-1700, wood 600-1200, and synthetic or composite 500-1000. In a typical year, that spread helps you lock in a plan that respects both budget and performance needs given Mid-Michigan winters.
Winter ice dams and spring melt create distinct pressure points for scheduling. After a wind or hail event, demand for quick-response crews tightens the calendar, especially from late spring into early fall. If you've just dealt with a storm, expect pricing shifts and a flurry of contractor availability that can compress your options. A cautious approach is to secure a crew as soon as you're ready, but avoid rushing into material choices you haven't vetted for ice-d dam protection and underlayment improvements.
Material decisions matter more locally because snow, ice, and storm exposure drive the need for upgraded underlayments and ice-dam protection. In this climate, metal systems often provide better resistance to wind-driven debris and rapid freeze-thaw cycles, which can translate into fewer call-backs for repairs. If you're weighing options after a storm, you'll notice that high-end tiles and metal packages frequently justify the premium with longer life and enhanced protection against ice dam signaling. Synthetic options offer a middle ground that can still deliver strong performance without the top-end price, which is a practical compromise in a year with variable storm activity.
Get a clear picture of your project costs upfront - no commitment required.


For a full roof replacement, a building permit is typically required through the City of Lapeer Building Department. This requirement helps ensure the work meets local codes, weatherproofing standards, and structural safety considerations that matter in our freeze-thaw climate. The permit process is not a cosmetic step; it ties directly to how winter storms and rapid post-storm work are managed on a neighborhood-by-neighborhood basis.
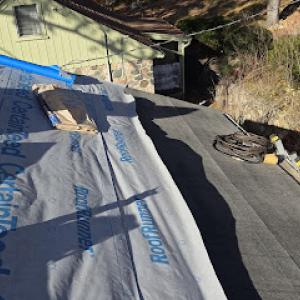
The local process includes a formal department review of project details, followed by permit issuance with applicable fees. Submittals commonly cover a roof plan, materials being installed, and a general construction timeline. In areas where wind-driven hail events are frequent, the department may request roof venting details, ice and water shield specifications, and attic ventilation notes to confirm the system will perform during heavy snowpack and thaw cycles. The review aims to minimize delays by aligning expectations on tear-off methods, decking conditions, and any necessary repairs before new layers go on.
Inspections are scheduled at key project milestones as work progresses. In this market, inspections are typically staged around tear-off, rough-in before shingling, and final closeout. Because Lapeer schedules inspections through these milestones, it is important to plan ahead so the work aligns with inspector availability and weather windows. A practical approach is to coordinate with the contractor to ensure that critical steps-such as removal of old decking, installation of underlayment and ice barriers, and any required repairs-are completed in a visible, accessible way for the inspector.
Before work begins, confirm with the contractor that tear-off timing, decking repairs, and final closeout will be visible to the inspector. The city's inspections rely on visible progress at each milestone, so ensure access to attic spaces during rough-in, and keep the job site organized enough to demonstrate compliance with local wind and moisture standards. If any deviations from the approved plan arise, notify the Building Department promptly to avoid delays in re-inspection. Because weather and sudden storm activity can influence scheduling, maintain open communication with both the contractor and the inspector so that any needed adjustments are documented and permitted in a timely manner.
Michigan's homeowners insurance market is generally stable, but in Lapeer major hail or wind events can still trigger premium adjustments or added documentation requests from some carriers. If a winter storm or a fast-moving hail event leaves visible damage, the insurer may ask for confirmation of both pre-existing conditions and the scope of the storm-related work. Understanding that reality helps you avoid delays or misunderstandings when a claim is filed.
Adjusters commonly ask local homeowners for photos of existing roof conditions, the proposed replacement scope, and contractor estimates when evaluating storm-related claims. Gather clear, dated images from multiple angles, including interior attic shots that show signs of moisture intrusion. If a re-roof is proposed, ensure the contractor's written scope matches what you present to the insurer, including materials and coverage areas. Having this material organized can speed the review and reduce back-and-forth questions.
Because storm-response work is so prevalent in Lapeer's contractor market, homeowners should keep dated photos and inspection notes before temporary repairs or tarping change the visible damage pattern. Tarps and quick fixes may hide or shift the visual evidence inspectors rely on, potentially influencing claim outcomes. A simple log, dated photos, and a brief note about the timing of the temporary measures helps maintain an accurate record for both the insurer and any future reviews.
When a storm hits, timing matters. Initiate documentation promptly, even if the roof appears superficially intact. Delays can complicate coverage decisions, especially if the claim hinges on the distinction between pre-existing wear and storm-induced damage. Coordinate with your chosen contractor to align the replacement plan with the documentation you've collected, and keep the insurer' s contact details accessible for any needed clarifications.
Connect with contractors who help homeowners navigate the claims process from damage assessment to final approval.

The Exterior Zone
3529 Genesee Rd Suite 3, Lapeer, Michigan
4.9 from 90 reviews
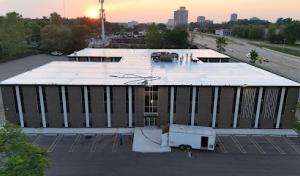
In this market, you notice a recurring pattern: flat-roof and skylight work shows up frequently in contractor requests. That means leak-prone transitions and penetrations are a real service category in this area. If you have a low-slope section, a skylight curb, or a chimney flashing detail, plan for extra attention during maintenance checks after long winters. The neighborhood contractor network already treats these spots as high-priority targets, not afterthoughts.
Freeze-thaw cycling in this climate can stress flashing at skylights, chimneys, and low-slope transitions where water lingers longer after snowmelt or heavy spring rain. When temperatures swing above and below freezing, sealants and metal flashing can separate or crack, and ice dams can push against edges, loosening fasteners. Inspect these areas first each year, especially after the first thaw and after winter storms.
Homeowners in this market often need targeted repair expertise rather than full replacement when leaks are isolated to penetrations or low-slope sections. Start by confirming the exact source: is water tracking from a skylight curb, a vent stack boot, or the transition from roof to wall? A careful water test or dye test can pinpoint the culprit. Prioritize repair of the weakest link rather than re-roofing an entire area if the rest of the roof is sound.
Begin with a visual walk around the house after a rainfall, noting any wet spots on ceilings below flats, skylights, or chimneys. Check surrounding flashing for corrosion, lifted edges, or missing sealant. On low-slope zones, look for ponding water that never fully dries before the next storm. If you see staining along chimney or skylight joints, test those seams specifically. Document every suspect area with photos and a simple sketch of the roof plane and penetrations.
Because this market leans toward fast storm response, keep a short list of trusted local techs who specialize in penetrations and low-slope work. When leaks appear, a rapid assessment and targeted sealant or flashing repair can delay more invasive measures and reduce disruption in the depths of winter or during Spring melt.
Find specialists in TPO, EPDM, and built-up flat roofing systems for residential and commercial properties.

In this market, re-roofing is a strong indicator that aging systems are nearing the end of their life cycle. Homeowners often choose replacement rather than a patchwork fix, especially after tough winters and mid-Michigan freeze-thaw cycles that push shingles, underlayment, and flashing toward failure. The timing of a re-roof matters: a loss of granules, curling shingles, or intermittent leaks during rapid temperature swings can accelerate the decision to replace rather than repair. Local crews commonly respond to storm events with urgency, but a deliberate plan-based on the roof's age, the attic's ventilation, and the condition of the deck-helps avoid rushed choices that could stall performance for years. When planning, consider how the roof's current condition will handle heavy snows, ice dam pressure, and spring melt, rather than waiting for a visible failure to drive the project.
Warranties matter in a climate where winter movement and storm sequences test installations. A smaller but meaningful share of local contractors advertise warranties, so you gain value from a written promise that covers both materials and workmanship for a defined period. When evaluating options, look beyond the label to what triggers coverage: what exactly is covered, for how long, and under what conditions. Pay attention to exclusions related to ice dam risk, improper attic ventilation, or insufficient underlayment-these are common sources of warranty disputes after a severe winter or a wind-driven event. A straightforward warranty should outline what is required of you as the homeowner (like routine inspections or seasonal maintenance) and what the contractor commits to repair or replace if an issue arises. Clear documentation up front helps prevent misunderstandings after a storm-heavy season.
Cleanup is a common homeowner expectation in this market, so clarify post-job debris handling and property protection alongside warranty terms. A professional re-roof should include removal of old materials, protection of landscaping and vehicles, and thorough cleanup of nails and debris from driveways and yard spaces. Confirm how yard debris, discarded shingles, and packaging will be contained and disposed of, and verify whether the crew conducts a final walk-through to address any leftover concerns. For homes with tight driveways or mature landscaping, insist on ground sheets or netting during material removal to minimize damage and maintain neighborhood cleanliness throughout the project.