Last updated: Apr 19, 2026
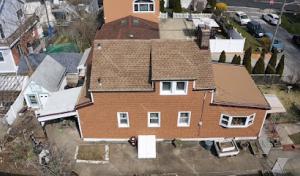
Copiague sits on Long Island's South Shore in the Town of Babylon, where nor'easters and tropical systems bring wind-driven rain that commonly exploits flashing edges and older shingle roofs. The coastal exposure, salty air, and heavy storm tracks mean that damage can pile up quickly after a fierce wind event, and leaks often show up where guards, vents, and chimney flashing meet the deck. Staying ahead of the next storm means treating every wind-driven rain as a potential sign of trouble and acting fast to reduce water intrusion.
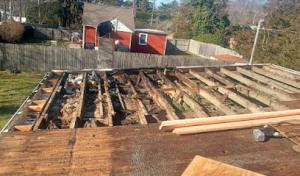
In this neighborhood, the most common failure points are the intersections where flashing meets shingles-around chimneys, vents, skylights, and wall transitions. Salt-laden air accelerates metal flashing degradation, while older shingles may curl or lift after a Nor'easter, creating tiny conduits for rainfall to sneak in. Flat or low-slope sections near eaves also collect wind-driven spray, which can lift edges and reveal underlayment damage. The weight of wet attic insulation after a heavy rain can further creep into interior spaces, sometimes long after the storm has passed.
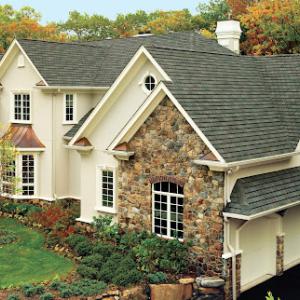
Roofing material choices seen locally range from aging asphalt shingles to metal and tile, each with its own vulnerabilities in this climate. Shingle roofs may hold up for years but show deterioration at valleys and step-flashed corners. Metal roofs offer good wind resistance but require precise panel seaming and flashing details against salt corrosion. Tile roofs-clay or concrete-face risk from hail impact and stressed fasteners in high-wind zones, with broken or displaced tiles creating instant leak paths.
If a leak is suspected or confirmed, safety comes first. Avoid standing on a wet roof; use sturdy ladders and fall protection while assessing exterior damage from ground level. Note any daylight showing through the attic or ceilings, and identify visible gaps around flashing, chimneys, skylights, or roof-to-wall junctions. Photograph damage from multiple angles before and after any tarp or temporary patch so a contractor can gauge scope quickly.
For quick mitigation, cover exposed areas with a watertight tarp secured to stable structures, not deck boards that could tear away in a storm surge. Focus on vulnerable edges first: chimney flashing, vent boot seals, and any roof penetrations that reveal the underlayment. If the attic is damp, prioritize drying and dehumidification to slow mold growth and protect insulation. In many Copiague homes, the effect of salt air means corrosion-driven leaks can reappear after neighboring repairs; a durable temporary fix buys time but does not replace a professional assessment.
Fall storm season is especially important locally because nor'easters and tropical activity can overlap with the preferred replacement window before winter freeze stress sets in. That combination means downtime between storms can be brief, and urgent repair demand remains high. When choosing a contractor, prioritize those with emergency-response capability, clear communication, and a track record of solid flashing work and wind-resistant installations. Expect to coordinate rapid on-site evaluations, tarp deployments, and interim sealant measures that hold up to coastal gusts.
Trust is earned through responsiveness and accountability. Reputable crews arrive with weather-ready equipment, bring a clear plan for stopping leaks immediately, and provide transparent next steps for permanent repair or replacement. In Copiague, the best outcomes hinge on rapid assessment, decisive temporary protection, and a well-timed, properly engineered fix that withstands the next nor'easter and tropical system. A proactive approach right after a storm reduces interior damage, preserves insulation, and minimizes the cascade of repair needs that can follow a severe coastal weather event.
A full roof replacement in Copiague typically requires a building permit through the Town of Babylon because the village is governed through the town structure in Suffolk County. The permit is more than a formality: it creates a documented record of the work and helps ensure that the repair or replacement accounts for the local coastal climate, salt air exposure, and storm-driven repair demands. The review focuses on structural and installation details that affect long-term performance, not solely the visible finished surface.
When you apply, expect a review that looks at the underlayment, how the roof is nailed, flashing at penetrations and penetrations around chimneys, and proper venting. Plans submitted should show reinforcing details for underlayment, any venting upgrades, and how the chosen roof system integrates with existing attic airflow. In many cases, plan notes or specifications related to ventilation will be requested, especially if the project changes roofing materials or aims to correct attic airflow issues. If there are existing ventilation problems, the plan should include a clearly described approach to address them, with measurements and placement that meet current code expectations.
The Town of Babylon review pays close attention to how the new roof will manage moisture, resist wind-driven infiltration, and allow for adequate ventilation. Materials selection may influence plan notes or conditions on the permit, particularly when moving from one roofing type to another (for example, from asphalt shingles to a low-slope or metal system). The reviewer will check details such as nailing patterns, fastener types, and corrosion-resistant flashing to ensure performance under coastal exposure and frequent nor'easters. If the project introduces a material with different installation quirks, expect additional notes or a small addendum in the permit packet.
Attic ventilation is a common focus during review, because improper airflow can compromise roof performance, especially along the South Shore where humidity fluctuates and salt-laden air can affect attic insulation and sheathing. Plan notes should address intake and exhaust vent sizing, baffle placement, and any required adjustments to soffit or ridge ventilation to maintain steady attic conditions. In Copiague, where older homes may have retrofit challenges, the permit process often prompts a careful assessment of existing vents and potential upgrades to meet current standards without sacrificing living space or energy efficiency. Expect a reviewer to request calculations or diagrams that demonstrate effective ventilation after the retrofit.
Inspections occur at key milestones, commonly after underlayment is installed, after roof deck and penetrations are secured, and again once the finished surface is in place. Inspectors will specifically verify that underlayment coverage is continuous, nails or fasteners meet code spacing and embedment depth, flashing around chimneys, skylights, and walls is properly integrated, and venting provisions are correctly implemented. In practice, this means a supervisor will be looking at details that influence leak prevention and storm resilience rather than focusing solely on the cosmetic grade of shingles. On the day of inspection, have the roof arrangement and attic ventilation clearly accessible for the inspector to assess without delay.
Because the local environment can stress older rooftops differently than new builds, the permit process often requires coordination with any nearby structures, venting routes, and drainage considerations to prevent moisture intrusion into the fascia, soffits, or interior walls. If a project involves changing roof geometry, such as adding or removing vents or altering attic space usage, ensure the plan notes reflect how these changes maintain balance between roof integrity and indoor comfort. The Town of Babylon's review encourages practical adjustments that preserve long-term durability amid coastal weather patterns. A smooth review trail helps avoid rework and delays, keeping the project on track with the town's expectations for safe, weather-ready roofing.
In this South Shore corridor, the dominant materials you'll encounter are asphalt shingles, metal, clay tile, concrete tile, slate, and aluminum roofing. Budgeting for a project starts with the per-square cost ranges you'll most commonly see here: asphalt shingles typically run from 350 to 650 USD per square, metal from 700 to 1300 USD per square, clay tile from 1000 to 1800 USD per square, concrete tile from 900 to 1500 USD per square, slate from 1800 to 3200 USD per square, and aluminum roofing from 700 to 1200 USD per square. Those figures cover typical full-roof replacements; keep in mind that a small repair or a layover estimate will sit well below or above those marks depending on scope.
Copiague costs can rise after regional storm events when South Shore demand spikes for tear-offs, tarping, and replacement scheduling across Babylon and nearby Suffolk communities. In the wake of nor'easters or high-wind systems, crews and material suppliers tighten access, and lead times lengthen. Plan for possible price bumps and bidding windows that compress quickly after a storm, and expect crews to prioritize safety and rapid mobilization over a quick, low-cost repair. If a storm damage path affects a wide swath of the South Shore, the price you see on a written quote may include conditional items like temporary containment and expedited removal to reduce interior exposure.
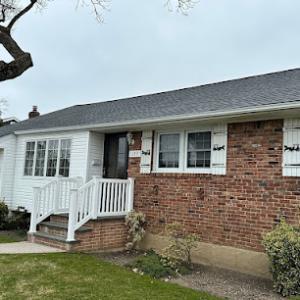
Asphalt shingles remain the most common, especially on mid-century Cape- and ranch-style homes. Their cost effectiveness and ease of installation fit our typical roof pitches and overhangs. Metal roofs are popular on newer or coastal-facing properties because of wind resistance and long service life, but they come with a higher upfront investment. Tile options-clay or concrete-are favored on certain hacienda- or Mediterranean-inspired homes and on the few larger dwellings where weight and underlayment are already accounted for. Slate and aluminum are less common but worth considering for longevity and coastal style, respectively. Each choice shifts not just the per-square price but installation complexity, attic ventilation needs, and flashing demands, which in turn influence labor hours in the field.
1) Verify square footage and roof complexity, including chimneys, dormers, and skylights, since more penetrations mean more flashing and sealing work. 2) Choose a material from the six dominant options based on budget, wind exposure, and long-term goals, then compare the corresponding per-square ranges. 3) Anticipate additional costs for tear-off, debris disposal, and waste management if the project involves full replacement after a storm. 4) Include a contingency for rapid scheduling when demand spikes, especially in late fall or after major coastal storms. 5) Request a detailed scope that itemizes underlayment, flashing upgrades, ventilation checks, and any the extra steps that reflect local coastal conditions, so you avoid overgeneral estimates and missed protection in high-wind periods.
Marvin Construction Services
(631) 639-6419 marvinconstructionservices.com
265 26th St, Copiague, New York
4.9 from 250 reviews
If you’re looking for a new roof installation or siding repair for your home, we are the construction company for you! For 15 years Marvin Construction Services has been dedicated to providing superior workmanship that is second to none. We have always been focused on high-quality results, excellent customer service, and reliable work ethic. Customers in Lindenhurst, New York and surrounding areas rely on us for professional roofing, siding, and gutter services. Our team has the experience, skills, and proper equipment to guarantee your home has the best outcome. We ensure all of our customers that we are a trustworthy company and that we always deliver the best results.
Selective Homes Roofing & Siding
(631) 736-5301 www.selectiveremodeling.com
Serving
5.0 from 20 reviews
Selective Homes Roofing & Siding is Long Island’s trusted exterior remodeling contractor, delivering expert roofing, siding, windows, and complete exterior upgrades that protect your home and elevate curb appeal. As a family-driven company rooted in craftsmanship and transparency, we specialize in roof replacement, roof installation, siding replacement, siding installation, and energy-efficient window installations. Our exterior specialists focus on durable materials, clean workmanship, and a homeowner-first experience—from initial inspection to final walkthrough. Whether you need a full roof replacement, new siding, upgraded windows, or a complete exterior renovation, we provide reliable, long-lasting solutions tailored to Long Island h...
Long Island Flat Roof IslandWide Commercial Roofing
(631) 838-9285 www.longislandflatroof.com
Serving
4.9 from 108 reviews
IslandWide Commercial Roofing is full service commercial roofing company located in Amityville NY and have been proudly serving customers throughout the Greater Long Island Area since over 10 years . From urgent flat roof repairs to complete flat roof replacements, we have become one of the most trusted industrial and commercial flat roofing contractors across the li. We believe that offering quality commercial and industrial roofing systems is simply not enough. We also set out ensure that all of our industrial roofing contractors are highly trained to a standard of excellence, and can offer an unprecedented level of customer service."
NY's Finest Roofing & Siding
(833) 476-6369 nysfinestroofingsiding.com
Serving
4.9 from 114 reviews
Roof Repair & Replacement Experts in Long Island & Queens! Worried about leaky roofs or outdated exteriors? NY's Finest Roofing & Siding, Inc. delivers peace of mind, lasting value, and superior craftsmanship for your home. We specialize in: Roof Repair Roof Replacement Flat Roof Repair & Replacement Siding Installation Why choose us? Nearly 30 years of experience serving Long Island, Queens, Brooklyn, Manhattan & Westchester. Skilled and certified roofing contractors who use the best materials. Fast and thorough appointment setting to job completion. Highly recommended by satisfied clients. Let us help you fix your roof leak with our roof repair or roof replacement solutions. Long Island's best roofing & siding Contractor!
Four Seasons Roofing & Exteriors
(631) 249-3377 fourseasonsroofingny.com
Serving
4.9 from 683 reviews
A Division of Four Seasons Enterprises, Inc.

Advanced Roofing
(516) 987-7478 advancedroofer.com
Serving
5.0 from 59 reviews
For all your Roofing ,Siding & Gutter needs. From simple repairs to complete installations. Family owned & operated since 1993.
Long Island Precision Roofing
(516) 850-5500 liprecisionroofing.com
Serving
5.0 from 199 reviews
Welcome to Long Island Precision Roofing where our staff is committed to providing our customers with the highest level of service, quality, and reliability in the roofing industry. We believe that every home and business deserves a roof they can trust, and we operate with a steadfast dedication to integrity, transparency, and excellence in all we do. Our mission is simple: to always do right by our customers, delivering honest, straightforward solutions, and maintaining open communication every step of the way. With us, you can count on a job well done, with no surprises—just dependable, top-quality craftsmanship you can trust!
J. Great Roofing
(631) 669-6269 www.jgreatroofing.com
Serving
4.9 from 120 reviews
J. Great Roofing & Siding stands behind GAF roofing products, you can count on consistency and the highest quality the industry has to offer. We are a "full service" roofing company and we will handle everything from a new roof installation, restoration and maintenance to re-roofs and repairs. All with the assurance that can solely come with years of experience.
Clearview Roofing & Construction Babylon
(631) 827-7088 longislandroofs.com
Serving
5.0 from 50 reviews
Clearview Roofing in Babylon, NY, offers top-quality roofing services, including installations, roof repairs, and roof inspections for residential and commercial properties. As a trusted "roofer near me," we use premium materials from leading manufacturers like GAF and Owens Corning to ensure durability and reliability. Our services include siding, gutter installations, skylights and emergency roof repairs. With over 60 years of experience, we provide exceptional customer service and fair pricing. Choose Clearview Roofing in Babylon, NY, for professional and reliable roofing solutions. From asphalt shingles to Flat Roofing. TPO and EPDM roofing repair, Clearview Roofing in Babylon, NY, has you covered!
JEL Home Improvements
(631) 433-3198 jelhomeimprovements.com
Serving
5.0 from 24 reviews
JEL Home Improvement is a family owned and operated business and plans to stay that way as we look to our future in the Home Improvement industry. We take great pride in the quality of our finished products and are confident that our customers will feel the same way about their projects.
Marcor Construction
(631) 321-0593 www.marcorny.com
Serving
4.9 from 381 reviews
Marcor Construction Roofing & More has been providing high-quality home improvement services to Long Island for over 30 years. We provide expert roof repair, roof replacement, siding installation, and more, and we can give you the perfect solution for your home's exterior improvement needs. We have installed thousands of roofs over the years, and we service a variety of roofing materials for both residential and commercial properties. We always put customer service first, and we will work with you to ensure that you are completely satisfied.
ML Best Construction
(631) 643-1404 mlbestconstruction.com
Serving
5.0 from 309 reviews
With over two decades of experience, ML Best Construction is a trusted name in residential, commercial, and industrial exterior renovations. Since opening in 2000, this family-owned company has provided top-tier craftsmanship for all roofing, siding, and gutter needs. Their skilled professionals also specialize in skylight, window, and door installations, using premium materials to ensure quality and durability. Their commitment to excellence has earned them a reputation for reliable service and superior results.
Copiague's coastal Long Island humidity and salt-air exposure make corrosion resistance and flashing durability more important than in inland New York markets. The combination of marine moisture, strong Atlantic winds, and occasional nor'easters means fasteners, trim, and exposed accessories must resist salt spray, galvanic corrosion, and wind-driven uplift. When selecting materials, focus on systems that emphasize secure flashing, corrosion-resistant hardware, and tight seam and transition details that can withstand repeated salt exposure without seeping or leaking.
Aluminum and other metal roofing categories are notable here, with good longevity under a marine-influenced environment. Metal roofs excel at shed-speed rain and wind resistance when panels are properly aligned and fastened with corrosion-resistant screws or rivets. The key is detail-oriented installation: continuous eaves and ridge flashings, properly sealed panel laps, and matching trim that won't loosen or deteriorate from salt exposure. In many homes, metal roofs pair well with standing-seam or corrugated profiles that minimize exposed fasteners and reduce opportunities for moisture intrusion. For fasteners and trims, choose stainless steel or hot-dipped galvanized options rated for salt air, and ensure sealants are compatible with metal substrates and the local humidity cycle.
Heavy materials like slate, clay tile, and concrete tile are part of the local material mix, so homeowners need to think about structural load and installation detail quality, not just curb appeal. A solid assessment of roof deck strength and chosen underlayment is essential, given increases in dead load and potential seasonal moisture. Tile systems demand precise roof framing and advanced flashing at valleys, chimneys, and dormers to minimize water intrusion through salt-laden winds. When these materials are installed, expect close attention to trillings, battens, and edge detailing to prevent wind-driven uplift in coastal gusts. The installation should emphasize high-quality sealants and compatible flashing across transitions to maintain long-term performance.
Regardless of material, the Copiague environment benefits from routine, coastal-adapted maintenance. Inspect flashing edges, eaves, and vent penetrations after major storms, and address corrosion spots or loose fasteners promptly. For lighter rain events, verify that gutters and downspouts are clear to prevent water backing up onto the roof edge. A well-sealed roof that accounts for salt air and marine wind exposure will save trouble during the busy repair cycles that accompany coastal storms.
The most popular roofing material in the US. Find pros who install, repair, and replace asphalt shingles.
Clearview Roofing & Construction Babylon
(631) 827-7088 longislandroofs.com
Serving
5.0 from 50 reviews
In Copiague, Long Island winters bring freeze conditions and snow load that can stress shingles, flashing, and roof penetrations before spring leak season begins. The combination of freezing cycles and shifting snow can push at caulks, joints, and ridge lines, making existing vulnerabilities more likely to bloom into leaks once the thaw arrives. Damaged or undersized flashing is a common weak point after a hard freeze, and even well-installed shingles can develop hairline fractures if a cold snap catches them at peak tension. Planning around these cycles means expecting some movement in roof assemblies and inspecting for gaps or gaps that look like they won't hold up through the next round of freezing, wind-driven spray, or stray ice dam formation.
Hot humid summers in Copiague can accelerate attic heat buildup and make installation conditions harder, which is why spring and fall are the preferred replacement seasons locally. High interior temperatures push underlayment and adhesive materials to work harder, sometimes reducing their long-term effectiveness if not handled with careful sequencing. Heat also ages valleys, seams, and vent penetrations more quickly when crews rush a job to beat the hottest part of the day. A cautious roofing plan accounts for the quirks of southern exposure on many homes, prioritizing ventilation and staged work to keep attic temps down and ensure proper sealing around penetrations.
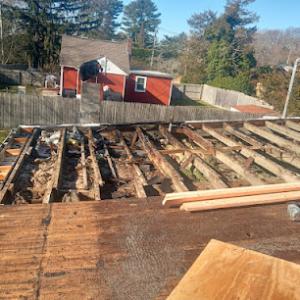
Spring rains on the South Shore can interrupt tear-off schedules and leave underlayment timing more vulnerable if crews are not sequencing work carefully. Water intrusions during a tear-off can compromise new underlayment or cause decking to show signs of moisture if rain delays are prolonged. A locally aware contractor will coordinate material delivery, weather windows, and sequencing so that underlayment and flashing are completed in a logical flow, with emergency protection on exposed areas during gaps. For homeowners, this means a plan that anticipates sudden showers, keeps tarps ready, and ensures that each stage-decking, underlayment, and final cover-occurs in a order that minimizes exposure to the South Shore's spring weather pattern.
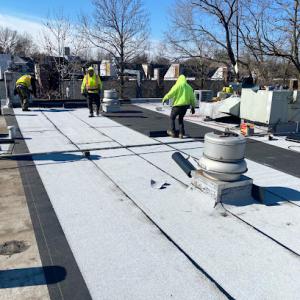
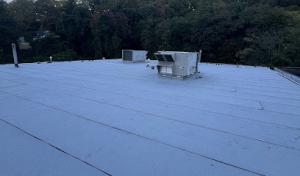
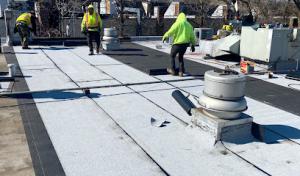
Flat-roof work is a noticeable current in this market, especially on low-slope additions, porches, and mixed-roof homes common across older Long Island neighborhoods. When you're evaluating a flat section, prioritize the condition of deck boards, edge drains, and accumulated debris that can trap moisture and spur early deterioration.
Skylight repair shows up regularly in this area, so expect ongoing maintenance to center on curb flashing and leak tracing around penetrations. Start with a careful water test around the skylight during a light rain, and inspect seals, low-profile curbs, and surrounding flashing first. If you spot staining on the interior ceiling, address the flashing as a first step before pursuing membrane fixes.
Chimney-related work is another common call, reinforcing that masonry-to-roof flashing transitions remain a practical weak point in this housing stock. Inspect the joint between chimney flashing and the shingle or membrane surface for gaps, loose nails, or rusted metal. Pay attention to mortar deterioration at the base, and note if flashing has pulled away where it meets the roof plane.
Begin with a walk-around after a nor'easter or heavy rain to identify active drips and any damp spots along the chimney, skylight, or flat sections. Trace leaks from the interior down to the most recent permeation point, then confirm with a targeted exterior inspection of flashing joints, fasteners, and sealants. Small fixes here often prevent larger, costly damage later.
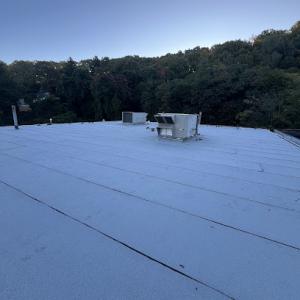
Find specialists in TPO, EPDM, and built-up flat roofing systems for residential and commercial properties.
Long Island Flat Roof IslandWide Commercial Roofing
(631) 838-9285 www.longislandflatroof.com
Serving
4.9 from 108 reviews
Copiague sits in a coastal Long Island insurance environment where wind and storm-related roof claims are common and documentation quality can affect outcomes. When a storm brews from the south or a nor'easter pushes salt air across the horizon, a quick patch can turn into a lengthy claim process if the record isn't solid. This is the climate where adjusters scrutinize storm causation, replacement scope, and any code-related items closely, so your documentation matters from day one.
Pre-loss photos taken on a bright, dry day are worth double when a claim lands on your desk after a storm. After the wind blows, you'll want crisp images of the roof, gutters, and fascia before any temporary fixes. Keep a dated file of inspection notes from a reputable roofer, showing observed damage, suspected causes, and recommended next steps. Material records-shingle types, underlayment, and fastener details-create a traceable chain of evidence that helps prove what was installed and when. In wind-exposed areas, the adjuster may pay close attention to underlayment quality and the roof's overall alignment with local conditions, so having exact product names and installation specs can shorten your review process.
After a storm, take new photos of any changes and capture areas that may not look damaged but could be vulnerable to future leaks. Keep a running log of communications with your insurance company, including dates, names, and what was discussed or promised. If a contractor recommends a scope that includes higher-performing materials or enhanced underlayment, document the reasoning and the wind exposure factors that justify the upgrade. A careful, well-organized file accelerates the assessment and helps ensure the scope aligns with the damage actually incurred, rather than with assumptions about what "should have" been done.
Solar roofing appears as an active specialty in the local market, so homeowners should coordinate roof age and replacement timing before adding panels. The coastally exposed climate, salt air, and frequent Nor'easters put extra emphasis on a solid, roof-wide plan. Installing solar on a roof with questionable structure or near the end of its life can complicate the system and lead to more maintenance down the line. In Copiague, aligning panel installation with the roof's health helps ensure long-term performance and minimizes the need for retrofits later.
When a full replacement is under discussion, the project becomes easier to manage if the solar array is scheduled to go in while equipment is still accessible and the roof deck is fresh. This approach reduces penetrations added after the fact and gives the installer a clean substrate to work with. For homes on the South Shore, where wind-driven rain can travel along the eaves, ensuring roof penetrations are sealed and flashed correctly at the outset matters more than ever. A cohesive plan helps protect the array and the roof from leaks during the first few years of service.
On Long Island, pairing solar work with a spring or fall reroof can reduce weather-related installation complications compared with peak summer heat or winter conditions. Moderate temperatures support adhesive cures and sealant performance, while calmer shoulder seasons limit rapid weather shifts that can disrupt panel mounting or wiring runs. Scheduling with the roof crew during these windows also provides a clearer window for any required inspections and final alignment checks before the system goes live.
Town-reviewed flashing and venting details matter more when roof penetrations and accessory systems are being integrated into a replacement project. Confirm that the existing chimney, vent stacks, and plumbing vents are integrated into the new flashing plan, and coordinate with the solar installer about any additional booting or resealing needed. Proper coordination prevents leak pathways around penetrations and ensures the solar hardware doesn't compromise the roof envelope.
Find contractors who integrate solar panels or solar shingles into your roof for long-term energy savings.