Last updated: Apr 19, 2026
Cold winters with snow followed by freeze-thaw cycles create a predictable pattern: water backs up at eaves and around roof penetrations as meltwater refreezes. In this climate, the top of your roof isn't just fighting meltwater; it's contending with repeated freeze-thaw stress that pushes ice into gutters, under shingles, and into flashing details. When a roof is aging or poorly vented, those cycles become a direct pathway for leaks. The result is not only a drip from the ceiling but a creeping water trail that echos along the roof line and into attic penetrations, soffits, and along chimney and vent stacks. The pattern is familiar to locals and is reinforced by the way houses here are built and clustered: many roofs share vents, valleys, and eave lines that are particularly vulnerable during spring thaws and heavy snows.
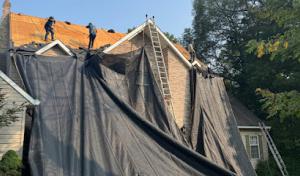
Regular rainfall outside of winter keeps pressure on flashing, valleys, and underlayment year-round. Wetting cycles don't pause for fall color or spring warmth, so even a roof that looked solid after a winter can reveal hidden weaknesses once spring rains arrive. Flashing may deteriorate, sealant joints fail, and valleys can become saturated channels for water that sneaks past roofing material. An aging re-roofed home, especially with lower-slope or complex roof lines common in our village housing mix, becomes a staging ground for slow leaks that suddenly turn urgent after a warm rain or a sudden downpour.
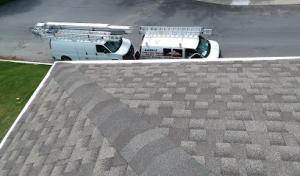
The local contractor signal mix strongly favors emergency repair and storm damage work, indicating that active leaks and weather-driven failures are a top homeowner concern. That means when a leak starts, response time matters. Delayed fixes amplify interior damage, increase the chance of mold growth, and push minor issues into major, costly repairs. In short: if a snowpack followed by a thaw leaves moisture near the eaves or around penetrations, you're already playing catch-up with a roof that wasn't built to tolerate repeated wetting with aging materials.
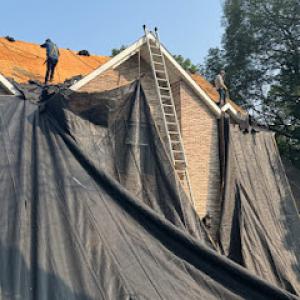
Ice dams often begin at the eaves, where heat loss from the attic melts a wafer-thin layer of snow that refreezes at the edge, forming a dam. Water trapped behind that dam seeks any available exit, which frequently means seeping beneath shingles at the eave line or finding cracked flashing around skylights, vent pipes, and stacks. Valleys can become saturated channels, especially where multiple roof planes meet. In Spring Valley, those vulnerabilities are magnified by the mix of dense, closely spaced houses and a winter-wet climate that keeps rain pressing on the roof well into spring.
Attic and ceiling spots are telling: dark stains, a musty odor, or visible staining near penetrations point to moisture that's bypassed the protective layers. If insulation is damp or sagging, the problem is not just roof strategy but indoor air quality and energy efficiency as well. Do not ignore a slowly widening stain-ice damming and recurrent wetting degrade underlayment and vulnerable flashings, accelerating failure.
Start with a fast attic check during a dry spell: look for signs of heat loss, missing or damaged insulation, and any obvious gaps around vent stacks or chimneys. From the outside, inspect for loose or damaged flashing around flashings, skylights, and roof penetrations. Pay close attention to valleys and eave edges, where ice damming and water backup are most likely to begin. If leaks are active, address them as a high-priority emergency to minimize interior damage.
For ongoing protection through the season, ensure proper attic ventilation and insulation to reduce heat buildup that fuels ice dam formation. Clear roof debris that can trap heat and moisture, but do not rake ice dam formations aggressively if you're unsure-call a professional to remove ice safely and prevent further damage. In this climate, proactive maintenance and rapid, professional response to new leaks are the best defenses against rapid, weather-driven roof failures.
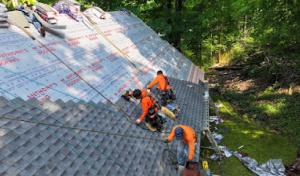
Winter in Spring Valley can delay tear-offs and installations because snow cover and ice damming make decking conditions harder to assess and protect. If appointments line up on days with clear access and minimal wind-driven snow, a tear-off can proceed, but the window is tight and safety is the priority. When snow is present, plan for temporary protection to shield interior spaces and to keep underlayment and insulation from long exposure to cold air. A mid-winter inspection can help identify compromised decking or hidden damage, but only when the surface is safely cleared and stabilized. If the available daylight is short, avoid urgent attempts to finish in December or January; instead, lean on protective tarping and staged tasks that reduce exposure time for exposed sheathing. Your crew should bring heated or fast-setting underlayment options for cold mornings and have a clear plan to re-check venting and drainage once temperatures rise enough to work consistently.
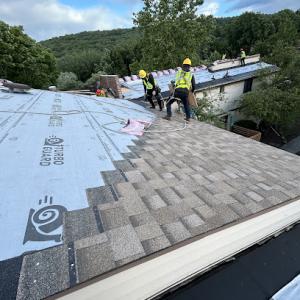
Spring thaw and heavy rain can interrupt dry-in schedules and make underlayment protection more important on local projects. Dry-in work should target a window where temperatures stay above freezing at night and consistently warm enough by day to set roofing materials without shrink-sag. In practice, that means coordinating the sequence: complete decking inspection and temporary weather protection first, then install underlayment with integrated ice and water shield at critical edges and penetrations. When rain becomes a factor, protect the exposed edges with wind- and rain-resistant membranes, and secure all fasteners to prevent water intrusion during the transition from dry-in to final layering. Keep gutters and downspouts clear before any peak-season storm, so water has a predictable path away from vulnerable joints. On days with forecasted heavy rain, implement a contingency plan to pause work and reseal seams promptly when conditions permit.
Summer heat and humidity and fall wind events both affect scheduling in Spring Valley, so homeowners often need to book earlier than expected for full re-roof work. High temperatures can accelerate material expansion and drying times, but heat also stresses workers and increases the risk of blistering on certain underlayments. Schedule the most intensive tasks-tile or metal layouts, roof deck rejuvenation, and venting adjustments-early in the day to minimize sun exposure on workers and reduce the likelihood of early deterioration on underlayment. Humidity can slow adhesive-setting times for certain shingles or underlayment products, so build a buffer into the timeline for quality checks and re-seating during mid-day lull. Fall winds can complicate shingle alignment and debris control; plan for additional fastening at exposed edges and ensure proper bracing for long runs of roofing material. Communicate with the contractor about sequence priorities, so the dry-in remains intact through the shoulder seasons and into the heart of winter, when the next cycle inevitably begins.
Get a clear picture of your project costs upfront - no commitment required.
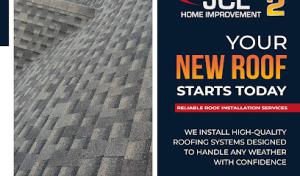
JCL Home Improvement 2
(845) 608-3620 www.jclhomeimprovement2inc.com
75 N Main St STE 6, Spring Valley, New York
5.0 from 24 reviews
Muicela's Roofing
(845) 290-7219 muicelasroofing.com
312 Old Nyack Turnpike, Spring Valley, New York
5.0 from 18 reviews
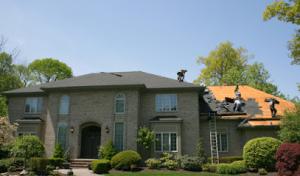
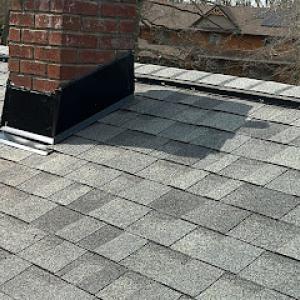
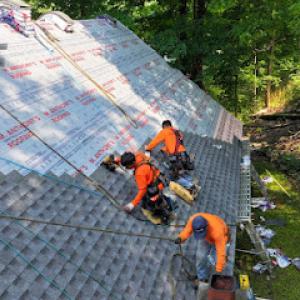
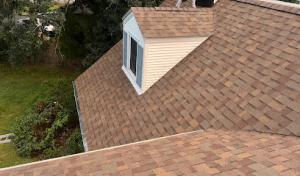
Asphalt shingles are the dominant roofing material in Spring Valley, aligning with the village's large stock of practical residential re-roof projects. This material strikes a balance between cost, ease of installation, and performance for four-season weather. When choosing asphalt, pay particular attention to granule durability and underlayment quality, since winter freeze-thaw cycles and year-round rain can stress aging roofs. A well-sealed edge, with proper flashing at valleys, skylights, and chimneys, helps prevent common leak paths that appear after the first heavy spring rain or a sudden mid-winter thaw. In this climate, a medium to high asphalt profile with self-sealing tabs is a sensible choice because it resists wind uplift and provides a forgiving surface for foot traffic during inspections or maintenance.
Metal roofing is present in the market and can appeal to homeowners looking for better snow shedding and longer service life in a climate with freeze-thaw stress. In Spring Valley, metal panels or standing-seam systems shed snow more readily than traditional shingles, reducing ice dam risk on steeply pitched roofs. The interlock and sealed joints minimize water intrusion during heavy rains, but attention must be paid to the connection details near eaves and penetrations. If choosing metal, ensure a vented roof deck and adequate insulation to prevent condensation-driven issues inside attic spaces. A solid color or light-reflective finish also helps mitigate heat gain during shoulder seasons, which can impact attic moisture dynamics on older homes.
Tile, wood shake, and synthetic/composite options exist locally but require careful matching to structure, slope, and maintenance expectations in a wet four-season environment. Clay or concrete tiles offer excellent durability and a distinctive profile, yet their weight demands a careful structural assessment and proper rafter support. Slope thresholds matter: many tile systems perform best on roofs with consistent, steep pitches to encourage reliable drainage. Wood shakes bring a traditional look but demand rigorous maintenance in wet conditions to prevent rot and insect issues; periodic treatment and timely replacement of damaged shakes help avert leaks. Synthetic or composite shingles can mimic other materials while offering improved impact resistance and moisture tolerance, but selecting a product with proven performance in freeze-thaw cycles and local rain patterns is essential. In all cases, ensure proper attic ventilation, consistent overhangs, and thoughtfully planned drip edges to guide water away from eaves and walls.
You'll notice that flat or low-slope roofs on ranches, duplexes, and mixed-use buildings in this area tend to behave differently once winter wears on. Spring Valley's winter ice damming and year-round rain put standing water, seam wear, and drainage challenges right at the top of the list. When a flat roof isn't detailed with precise slope and scuppers, water will sit long enough to wick into seams, edge details, and fasteners. The result is slow, cumulative leakage that you might not catch until discoloration or softness appears in the ceiling below. In dry spells between storms, the same roof surface can develop micro-cracks in membrane laps that look minor but become major leaks after the next thaw cycle. The practical takeaway is straightforward: ensure that low-slope sections have a clear, well-graded drainage path, and that seam transitions are reinforced with compatible sealants and robust edge detailing.
In the local housing mix, many roofs rely on overlapping seams rather than fully bonded, continuous membranes. Over time, traffic from maintenance, HVAC equipment, or skylight flashing can abrade those seams. After a harsh winter, you'll want to check for lifted edges, loose fasteners, or pooling near outlets and drains. A common pitfall is assuming seasonal rain will evaporate quickly; instead, standing water becomes a persistent source of moisture that works through minor gaps and accelerates deterioration. The best practice is to review drainage paths for blockages after heavy rain or thaw events and to verify that nail flashings and edge seals are still watertight. If you notice any wrinkles or soft spots in the membrane, treat them as early warning signs and address them before the next winter.
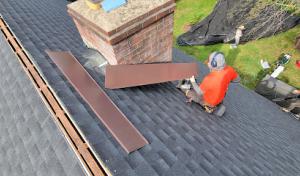
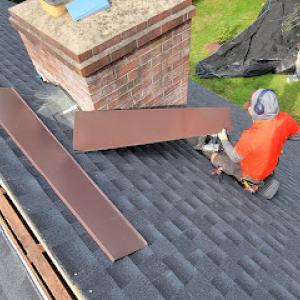
Skylights are a frequent leak point when transitions aren't carefully executed. In Spring Valley, repeated winter expansion followed by spring rain can reveal installation weaknesses around curb flashings and glazing penetrations. Look for any staining along the skylight perimeter, peeled flashing tape, or gaps where the curb meets the roof plane. The risk is not just seepage at the edge; water can travel along the sash and into framing members, inviting rot and costly repairs. A practical approach is to inspect skylight flashing annually, especially after a harsh winter, and to re-seal with a compatible butyl or synthetic sealant designed for flashing joints. If the flashing shows signs of movement or cracking, plan for a targeted repair instead of a full re-install.
Because leaks tend to accumulate slowly, a proactive schedule beats reactive fixes. In this climate, it's wise to pair seasonal inspections with a mid-year check that focuses on drainage efficiency, seam health, and skylight transitions. Addressing small flaws now helps prevent the cascade of damage that ice damming and spring rains can unleash on aging re-roofed homes and small commercial properties alike. Building homeowners awareness around these trouble spots reduces costly surprises and keeps roofs performing through multiple freeze-thaw cycles.
Find specialists in TPO, EPDM, and built-up flat roofing systems for residential and commercial properties.


Power Exteriors
(914) 506-2545 powerexteriorscorp.com
2 Dutch Ln Apartment 4J, Spring Valley, New York
5.0 from 25 reviews
Power Exteriors . When it comes to protecting your home from Rockland county, Orange county, and Westchester County, you can trust we have the expertise. Our strategically sized operation enables us to give you the personal relationship you deserve and the quality workmanship that you require. Power Exteriors, specializes in commercial & residential, roofing, Siding, Windows, Seamless gutters, Skylights, and more. From our initial visit we will always give you an honest opinion

JCL Home Improvement 2
(845) 608-3620 www.jclhomeimprovement2inc.com
75 N Main St STE 6, Spring Valley, New York
5.0 from 24 reviews
JCL Home Improvement 2 Inc was built with the commitment to ensure cost-effectiveness and high-quality in every home improvement project we are hired to work on for the community of Spring Valley, NY, and the surrounding areas. Our company was founded under the great values of: Professionalism Commitment Diligence Cost-Effectiveness Contact our team today and get a free estimate for any of the services that we offer. We are more than ready to start working on your projects, our goal is to exceed your expectations and always provide you with the best quality. Contact our professional and reliable company today to save time and money on your upcoming home improvement project!
Impact General Construction
(845) 494-2399 impactgeneralconstruction.com
46 Bethune Blvd, Spring Valley, New York
5.0 from 20 reviews
Our company's goal is to do the project correctly and provide a seamless procedure between our customers and contractors. We take great pride in each job we work on and hope to make a lasting impression on your house.
Gomez Construction & Roofing
(914) 906-0845 www.gomezconstructioninc.com
26 White St, Spring Valley, New York
4.8 from 31 reviews
When you’re looking for top quality roofing & remodeling services, Gomez construction inc ,is here to help. Our team of professionals is available to provide a wide range of customizable options, all guaranteed to meet and exceed expectations. Contact our office today to learn more about this and our other available services. From start to finish, our team will work with you to ensure your satisfaction every step of the way. offers an array of services for your home renovation needs. From kitchen and bathroom renovations to whole-house makeovers – we have you covered! Our experts do all work with years of experience in all types of projects, including quality brands.
Muicela's Roofing
(845) 290-7219 muicelasroofing.com
312 Old Nyack Turnpike, Spring Valley, New York
5.0 from 18 reviews
Muicela's Roofing is your trusted partner for all your roofing needs, serving homeowners with high-quality roofing solutions. We specialize in roof installations, repairs, and maintenance, ensuring your home is protected with durable and reliable materials. In addition to our expert roofing services, we offer professional gutter installations and chimney repairs, keeping your home safe from top to bottom. Our skilled team is committed to doing every job the right way, delivering exceptional workmanship and customer satisfaction. At Muicela's Roofing, we treat every home as if it were our own. Contact us today for a free quote and experience roofing done right.
A & J Reliable
Serving
4.9 from 255 reviews
At A & J Reliable we have some of the best and most experienced roofing specialists in New York, New Jersey and Connecticut. From the design phase to the installation phase, all of our team members work together in a spirit of collaboration to tackle all the challenges of your construction project. We are highly trained in all aspects of our business – commercial roofing and residential roofing; from gutter cleaning to installing rubber roofing. We are knowledgeable about our products, and installed products such as Gutter Topper and Deck Bottom USA, and are professional in our approach.
Cuenca Home Improvement
(845) 945-0473 www.roofingsidingcontractorny.com
Serving
5.0 from 35 reviews
Cuenca Roofing & Siding Reliable and Affordable Roofing Solutions! We specialize in residential and commercial roofing services, including repairs, installations, inspections, and maintenance. Our team uses top-quality materials and expert craftsmanship to protect your property from the elements. Whether you need a new roof, emergency repairs, or regular upkeep, we’ve got you covered. Contact us today for a free estimate! Serving New York and surrounding areas.

Emerald Roofing & Siding
(845) 377-5255 emeraldroofingusa.com
Serving
5.0 from 263 reviews
Emerald Roofing and Siding has been serving Rockland County and the entire state of new jersey for years with one goal in mind; to provide superior customer service and the highest level of quality workmanship. Emerald Roofing has been providing custom options and solutions to fit any style and budget. From residential and commercial roofing systems to siding, gutters and more. From new construction to repairs, re-roofs and exterior maintenance. Emerald Roofing and Siding is here to work with you!
M. Anthony's Roofing
(845) 714-0587 www.m-anthonys-roofing.com
Serving
4.8 from 84 reviews
Established in 2000, M. Anthony’s Roofing is a premier, family-owned roofing contractor dedicated to serving the Bardonia community. We are passionate about providing personalized service and meticulous craftsmanship for every project. Our experienced team offers a full spectrum of roofing solutions, ensuring your home is protected with quality materials and expert installation. We pride ourselves on being a trusted local business committed to excellence.
Elite Restoration
(845) 323-2295 eliterestorationgc.com
Serving
5.0 from 9 reviews
At Elite Restoration, our mission is to provide top-notch construction and restoration services that exceed client expectations. We are committed to quality craftsmanship and exceptional customer service in every project we undertake.
JKR Construction
(845) 659-1931 jkrconstructioncorp.com
Serving
5.0 from 79 reviews
At JKR Construction, we specialize in a comprehensive range of roofing services to meet all your needs. From shingles roofing leak repair in Pomona, NY, to chimney leak repair in Congress, NY, our experienced team provides reliable & efficient solutions. We also offer skylight replacement, chimney flashing replacement & asphalt shingles roofing repair to keep your home protected. Whether you need total roofing replacement, flat roofing replacement, or roofing repairs in Rockland County. Our services also include expert gutters repair & replacement. As trusted roofing contractors in Orange County, we deliver high-quality workmanship & customer satisfaction. For roofing replacement & repair in Rockland County.
Approved Contractors
(845) 671-6692 www.approvedcontractorsny.com
Serving
5.0 from 114 reviews
Approved Contractors, Inc. has been successfully improving residential and commercial properties in Rockland County, Orange County, Westchester County, and the Hudson Valley for many years. We have been supplying the highest quality residential and commercial roof replacements, roof repair, siding, and gutter systems. Our team is committed to achieving the highest standards in the industry. Contact Approved Contractors, Inc. for all your roofing needs. We offer free, no-obligation consultations for roof repairs, new roof installations, siding, and gutter systems. Contact us for an honest assessment of your property’s needs.
Costs in Spring Valley can rise when weather compresses the working season, especially after winter damage or storm-driven demand spikes that increase scheduling pressure. In practice, you'll see asphalt shingles sit in the roughly $450 to $800 per square range, with metal roofing typically $600 to $1300 per square. Clay tile work often lands between $1200 and $2600 per square, concrete tile between $1000 and $1800, wood shingles or shakes from $700 to $1500, and synthetic or composite shingles around $400 to $900 per square. Prices here reflect the village's mix of aging homes needing re-roofs, plus the extra attention given to venting, chimney flashing, and any decking work discovered during tear-off. Because Spring Valley experiences harsh winter cycles and frequent rain, crews factor in extra cleanup and potential trim-work around overhangs and dormers.
Winter freezes and thaws push some leaks earlier in the season, which can tighten scheduling windows and push up both material and labor costs. If a re-roof is timed after a storm or a heavy snow event, you may see higher demand that translates to quicker turnarounds but tighter bids. On projects where attic ventilation or decking corrections are needed to address ice damming or moisture migration, a portion of the cost comes from upgrading or rerouting vents and ensuring proper clearance for ridge and soffit vents. Consider that a typical asphalt job may require more tear-off and disposal in aging homes with brittle decks, increasing the per-square price slightly. In premium materials like clay or concrete tile, labor complexity around chimneys and parapet walls can add to the estimate, particularly if flashing details must be custom-fitted to match existing brick or stone accents.
When you choose material, expect the price bands to shift a bit based on weight, ramp-up time for crews, and the need for temporary protection during preparation. Asphalt remains the most budget-friendly option, but if you're replacing with metal or tile, plan for longer lead times and the potential for heightened post-installation checks to prevent leaks during thaw cycles. For aging homes with historically mixed roofing, common re-roofing tasks include sealing nail penetrations, upgrading underlayment, and addressing any ventilation mismatches flagged by the team. If your home has several roof penetrations, or a tall chimney with complex flashing, you'll want to budget for extra flashing kits and careful caulking to minimize future ice dam risk.
Don't let upfront costs delay a critical repair - these contractors offer payment plans to fit your budget.

When a full re-roof is planned, a permit is required. The Village Building Department closely watches re-roof work, venting, and post-installation steps, so don't skip this process. In practice, you'll want to start the permit conversation early, gather the required documents, and keep a clear line of communication with your contractor to avoid delays at the village counter.
Permit applications are handled by the Village of Spring Valley Building Department, not the county. This means your project will follow village-specific forms, checks, and timelines, which can differ from neighboring towns. Verify exactly which submittals the village requires before drafting plans or ordering materials.
Prepare a clear plan set that shows roof venting strategy, attic insulation details, and drainage considerations. The village will review this against local code expectations, so it's critical that the submitted plan aligns with the actual installation. Confirm with your contractor that the plan reflects the chosen roofing system, underlayment, and any ventilation upgrades you intend to install.
Inspections are scheduled after the work to verify proper installation and venting. Expect at least one post-install inspection focused on attic ventilation, flashing, and leak-preventive detailing. Ensure your contractor coordinates timing with the village and that the site is accessible for inspection during the agreed window.
Before work begins, verify that the contractor holds current licensure and that the permit application lists the licensed trades appropriately. Keep copies of the permit, submitted plans, and inspection notices in your project binder so nothing slips past the timetable. If plans diverge from on-site conditions, arrange a quick addendum with the Building Department to avoid rework.
When a wind or hail event hits, Spring Valley homeowners typically need clear photos, contractor bids, and documentation of the damaged areas and proposed scope. Take wide shots of the roof from ground level and close-ups of torn shingles, granule loss, or flashing gaps. Preserve curb-appeal references and neighboring structures for context. Clear, timestamped notes help avoid later confusion about what was damaged and what the contractor plans to replace.
Adjusters may ask for confirmation of replacement cost and project scope, which makes detailed local estimates especially important before work begins. A well-documented, itemized bid that matches the observed damage can reduce back-and-forth and speed toward a fair resolution. In a dense village housing environment, a thorough site assessment that covers venting, roof deck condition, and potential ice dam risk is particularly persuasive to an adjuster who understands year-round moisture challenges.
New York policy language can affect depreciation and payout amounts, so Spring Valley homeowners should review whether they have actual cash value or replacement-cost treatment before authorizing a full replacement. If depreciation applies, know how it will be handled, especially for components like underlayment and vents that influence long-term performance. Understanding the specifics helps prevent surprises as the claim progresses and supports a more accurate claim settlement after a winter that tested the roof.
Document every interaction with the insurer, keep all contractor communications, and ensure the scope aligns with observed damage and proper roof performance improvements to reduce future ice-dam risk. Your records become the backbone of a credible claim, particularly when the weather demands a reliable, long-lasting repair.
Connect with contractors who help homeowners navigate the claims process from damage assessment to final approval.
JCL Home Improvement 2
(845) 608-3620 www.jclhomeimprovement2inc.com
75 N Main St STE 6, Spring Valley, New York
5.0 from 24 reviews
Gomez Construction & Roofing
(914) 906-0845 www.gomezconstructioninc.com
26 White St, Spring Valley, New York
4.8 from 31 reviews
In Spring Valley, there's a large pool of affordable, quick-response contractors, but not all are solid re-roofing specialists. When you interview crews, press for years of focused experience on asphalt, metal, or tile re-roof projects rather than frequent rapid leak calls. Look for a track record of complete roof systems-including underlayment, flashing, vents, and tie-ins-not just shingle replacement. Ask for recent home addresses within blocks of yours and contact those homeowners to confirm performance after winter events.
Cleanup is a major local hiring priority, especially on dense village lots where debris can block gutters and blow into neighbors' yards. Ask the contractor to outline their cleanup plan: daily tarps, magnet sweeps for nails, and a final debris haul that leaves your property and adjacent properties clear. Confirm they will contain mats or air-sweep tools to minimize nail or shingle fragments in common driveways or near sidewalks. A written commitment to thorough cleanup before crew departure helps prevent neighbor complaints and post-job disputes.
Given the prevalence of chimney-related work in this market, homeowners should ask specifically about chimney flashing and tie-ins rather than treating the roof as a standalone system. Inquire about flashing material choices, sealant compatibility with existing chimneys, and how the crew handles step flashing at transitions. Request to see photos of recent chimney projects and references who can speak to long-term sealing and leak prevention around masonry features.
Local reliability hinges on communication. Verify any proposed schedule accommodates you, your family schedule, and potential winter storms. Ask who will be the on-site supervisor, how changes are communicated, and what steps trigger a site walk for post-installation inspection. A clearly defined process reduces miscommunication and speeds up the final inspection by the village building department.