Last updated: Apr 19, 2026
New City's cold winters with repeated freeze-thaw cycling put extra stress on shingle tabs, flashing joints, pipe boots, and exposed fasteners. When water seeps into micro-cracks or around fasteners, it freezes at night and expands by morning, prying apart edges and loosening fasteners. Over a season, that incremental movement creates micro-leaks that only become obvious after a heavy rain or a mid-winter thaw. Steep-slope asphalt shingles may shed granules and lift edges, while clay, concrete, or slate add their own failure modes when frost heaves push misaligned components out of position. The result is a creeping probability of leaks that starts slowly but can escalate quickly after a stiff nor'easter or a sudden freeze.
Moderate to heavy precipitation combined with winter snowpack raises the risk of water intrusion when melting refreezes around vulnerable roof details. Ice dams form where meltwater cannot flow freely to attic vents or gutters, backing up under shingles and flashing. In a climate with brisk daily freeze-thaw cycles, water trapped at the eave or in valleys finds a weak seam and begins a slow intruder's path toward the attic and interior. The problem is compounded for homes with older flashing or undersized roof penetrations around vent pipes, electrical chases, and exhausts. When the melt runs beneath coatings or membrane layers, it can push up shingles from the underside, creating hidden pockets that only reveal themselves after a series of warm days followed by a new cold snap. In Clarkstown's established suburban stock, those vulnerabilities are common where roof-to-wall transitions remain exposed to wind-driven spray and where valley flashings were never upgraded to modern flare configurations.
Nor'easter-driven wind and debris between seasons can loosen ridge, rake, and flashing components before leaks show up inside. High gusts fling branches, pine needles, and grit onto the roof, baking in the sun and then icing up in the cold, abrading shingle edges and moving flashing joints out of alignment. Ridge caps and rake edges become loose because repeated gusts press against them during storms and settle again when calm returns, leaving a fragile hold on the membrane or underlayment beneath. Flashing around chimneys and vent pipes often bears the brunt of these cycles, developing hairline gaps that are invisible from ground level but become obvious after a heavy rain or rapid temperature swing. The combination of wind-driven debris and freezing nights accelerates deterioration of sealants and caulks, making what starts as a small gap quickly become a channel for water intrusion.
In this climate, proactive inspections are essential. Check shingle tabs for lift or curling, especially after a season of freeze-thaw cycles. Inspect flashing joints around chimneys, skylights, vent pipes, and transitions to walls for loose or cracked sealant. Examine pipe boots for cracks or separation where ice expansion has pried them open. Look closely at ridge and rake components after storms; loosened edges may indicate wind exposure that will worsen with the next Nor'easter. If you notice damp spots on ceilings or stained attic insulation after a thaw, treat it as a priority signal of hidden roof leakage. In practice, a targeted, mid-winter inspection combined with a post-storm, after-wind assessment can catch rising issues before interior damage compounds and costs spike. Prioritize immediate attention to areas around penetrations and along eave lines where standing water or ice buildup tends to linger long after the storm passes.
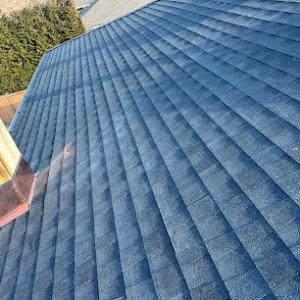
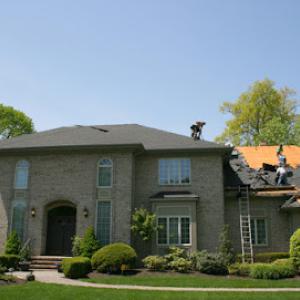
The dominant local material mix includes asphalt shingles, metal roofing, clay tile, concrete tile, slate, and fiber cement shingles rather than a single-material market. On steep suburban roofs, asphalt remains the everyday workhorse, while slate and tile show up on higher-end or older established homes where weight, flashing quality, and repair matching matter more. In Clarkstown, that mix translates to a practical decision tree: your roof type should pair with a matching underlayment, ventilation, and flashing strategy that stands up to freeze-thaw cycles and the stress of Nor'easters. If your house wears multiple layers or a history of patchy repairs, focus on how the details beneath the visible material hold up to moisture movement and winter wind-driven rain.
Freeze-thaw conditions push water into any seam or gap, then force it to expand. With steep slopes, the risk is not just surface damage but water migrating under shingles, tiles, or metal panels. Underlayment choice matters as much as the visible product. In homes with asphalt shingles, a high-quality, moisture-tired underlayment paired with a correctly installed ice-and-water shield in eaves and valleys can dramatically reduce ice dam risk. For slate or tile, the emphasis shifts to secure batten or deck integrity, plus durable flashing at chimneys, skylights, and valley terminations. Concrete and clay tiles demand careful eave and rake edge detailing because their weight concentrates stress at fasteners and flashing. Fiber cement shingles, while lighter than slate or tile, still require an underlayment and flashing that can move with seasonal contraction and expansion.
In Clarkstown's climate, underlayment should be moisture-resistant and capable of handling repeated freeze-thaw cycles. A continuous, properly lapped layer under any visible material is essential, with additional protection at eaves, hips, and valleys. Ventilation balance matters: too tight a roof allows condensation to linger, while too much venting can chill the roof deck and hinder drying of any incidental moisture. For steep-slope applications, ensure roof vents and intake are harmonized with attic insulation to prevent frost buildup along interior sheathing that can lead to wood rot or insulation degradation. Flashing needs to be integrated with the chosen material: metal flashing at step faces for shingles, copper or stainless accents where tile or slate meets walls, and reinforced, watertight transitions at all around-penetrations. The goal is a continuous, smooth path for water from surface to drainage, even when the wind drives rain up the slope during a nor'easter.
When inspecting a roof in this area, examine sealant lines around chimneys, skylights, and vent pipes for cracks or shrinkage. Check for lifted shingles or loose tiles after heavy storms, especially where roof edges meet gutters and downspouts. On asphalt, monitor for granular loss that often signals aging and reduced protection against UV and freeze-thaw cycles. For slate or tile, look for cracked or broken pieces and assess the underlying deck and flashing integrity, since failure can propagate quickly in cold snaps. Fiber cement shingles should be checked for allowing moisture behind the boards, which can compromise the underlayment beneath. A system that keeps water out at all critical junctions will perform best through New City's winter last storms and the spring thaw.
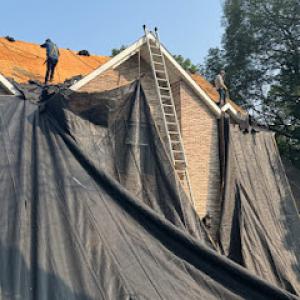
Spring storms and heavy rainfall in this area routinely expose weak points on steep-slope residential roofs and can delay tear-off and dry-in schedules. Snowmelt and rain combine to reveal buckling shingles, lifted tabs, and compromised flashing that might not have shown up during a calm season. When the first bands roll in, stay attentive to attic condensation, damp insulation, and sudden drips along chimneys or dormers. The rapid shifts in moisture and wind can push marginal roofs over the edge, turning a routine repair into an urgent salvage operation. If you notice any persistent leaks after a storm, don't wait for an official assessment-appointment slots fill quickly, and the clock can run out as the next front approaches.
Summer heat, with afternoon thunderstorms rolling through Clarkstown, directly affects installation pace and material staging. Crews will work around heat buildup, sun exposure, and the risk of wind-driven debris to protect open roof areas during active work. Scheduling becomes a balance: you may experience shorter work windows, tempered by the need to keep underlayment and roof deck dry and ventilated. Materials may be staged in shaded spots or on ground-level tarps to prevent warping or warping-driven delays, which means you'll see intentional pauses between critical steps. Communication about daily weather flags and contingency plans helps you understand why a project might pause versus proceed, and it can save frustration when a storm shifts the schedule mid- week.
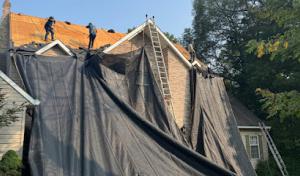
Because quick-response and emergency repair services are prevalent locally, homeowners often seek immediate tarping and leak control before deciding on full replacement. If a leak is actively dripping into living spaces, secure temporary tarps over exposed roof sections and seal obvious gaps to buy time. This buys essential minutes for safety, protects interior finishes, and reduces further water intrusion while you coordinate a full assessment. When a tarp is in place, keep the area clear for the crew and document any new damage with photos to share with your contractor. Act quickly, but choose trusted local responders who understand the unique weather patterns and the fast-moving nature of Clarkstown storms.
JKR Construction
(845) 659-1931 jkrconstructioncorp.com
191 S Little Tor Rd, New City, New York
5.0 from 79 reviews
At JKR Construction, we specialize in a comprehensive range of roofing services to meet all your needs. From shingles roofing leak repair in Pomona, NY, to chimney leak repair in Congress, NY, our experienced team provides reliable & efficient solutions. We also offer skylight replacement, chimney flashing replacement & asphalt shingles roofing repair to keep your home protected. Whether you need total roofing replacement, flat roofing replacement, or roofing repairs in Rockland County. Our services also include expert gutters repair & replacement. As trusted roofing contractors in Orange County, we deliver high-quality workmanship & customer satisfaction. For roofing replacement & repair in Rockland County.
Castillo's Roofing
(845) 598-5099 castillosroofingllc.com
39 S Main St unit 4, New City, New York
4.9 from 54 reviews
Castillo’s Roofing, led by Walter Castillo, is a family-owned, licensed and insured contractor with over 20 years of experience serving New York, New Jersey, Westchester County, Rockland County, Orange County, and the Hudson Valley. We provide residential and commercial roofing solutions, including roof repairs, replacements, new installations, shingle and flat roofing, leak repair, gutters, windows, doors, chimney flashing, storm damage repair, carpentry, and emergency roof repair. We use high-quality materials, offer free estimates, and stand behind our work with guaranteed, reliable service.
Cuenca Home Improvement
(845) 945-0473 www.roofingsidingcontractorny.com
3 Bristol Ct, New City, New York
5.0 from 35 reviews
Cuenca Roofing & Siding Reliable and Affordable Roofing Solutions! We specialize in residential and commercial roofing services, including repairs, installations, inspections, and maintenance. Our team uses top-quality materials and expert craftsmanship to protect your property from the elements. Whether you need a new roof, emergency repairs, or regular upkeep, we’ve got you covered. Contact us today for a free estimate! Serving New York and surrounding areas.
Artisan Exteriors
(845) 350-2055 www.artisanplan.com
368 New Hempstead Rd, New City, New York
4.7 from 51 reviews
About Artisan Exteriors is a NY based home improvement contractor specializing in home exteriors. We take pride in offering a unique approach to the home improvement industry. Combining advanced technology with age old commitment to customer service. Our methods have been proven to satisfy our many customers. We offer a complete service to our customer from initial conversation all through completion of the project. When it comes to planning, education and design our factory certified sales team will guide you towards achieving your goals. We have a fully stocked showroom with all the latest home exterior products on display. It is our passion to bring your ideas to life. We take pride in our amazing workmanship of skilled artisans.
Rdc Pro Exteriors
25 Butternut Dr, New City, New York
4.9 from 13 reviews
We have finance plans and we are insurance clam experts
Elite Restoration
(845) 323-2295 eliterestorationgc.com
164 W Clarkstown Rd, New City, New York
5.0 from 9 reviews
At Elite Restoration, our mission is to provide top-notch construction and restoration services that exceed client expectations. We are committed to quality craftsmanship and exceptional customer service in every project we undertake.
Bergen County Roofing
(201) 500-7504 bergencountyroof.com
New City, New York
5.0 from 2 reviews
Welcome to Bergen County Roofing – where we blend craftsmanship with the latest technology to deliver unparalleled roofing services. Our dedicated team, with years of expertise, is committed to providing long-lasting solutions for your home. From simple repairs to complete installations, we ensure each project is handled with utmost care and professionalism. Trust us to protect your home with roofing that’s built to last.

CUNIN Construction
(800) 803-0968 www.cuninny.com
Serving
5.0 from 100 reviews
CUNIN Construction is a trusted roofing contractor in Nanuet, NY, proudly serving Rockland County and surrounding areas. We specialize in roof replacement, roof repair, siding, gutters, chimney work, and exterior home improvements. Family-owned and operated, we offer free inspections, honest estimates, and quality workmanship. Call today for reliable roofing services near you.
M. Anthony's Roofing
(845) 714-0587 www.m-anthonys-roofing.com
Serving
4.8 from 84 reviews
Established in 2000, M. Anthony’s Roofing is a premier, family-owned roofing contractor dedicated to serving the Bardonia community. We are passionate about providing personalized service and meticulous craftsmanship for every project. Our experienced team offers a full spectrum of roofing solutions, ensuring your home is protected with quality materials and expert installation. We pride ourselves on being a trusted local business committed to excellence.
A & J Reliable
Serving
4.9 from 255 reviews
At A & J Reliable we have some of the best and most experienced roofing specialists in New York, New Jersey and Connecticut. From the design phase to the installation phase, all of our team members work together in a spirit of collaboration to tackle all the challenges of your construction project. We are highly trained in all aspects of our business – commercial roofing and residential roofing; from gutter cleaning to installing rubber roofing. We are knowledgeable about our products, and installed products such as Gutter Topper and Deck Bottom USA, and are professional in our approach.
Approved Contractors
(845) 671-6692 www.approvedcontractorsny.com
Serving
5.0 from 114 reviews
Approved Contractors, Inc. has been successfully improving residential and commercial properties in Rockland County, Orange County, Westchester County, and the Hudson Valley for many years. We have been supplying the highest quality residential and commercial roof replacements, roof repair, siding, and gutter systems. Our team is committed to achieving the highest standards in the industry. Contact Approved Contractors, Inc. for all your roofing needs. We offer free, no-obligation consultations for roof repairs, new roof installations, siding, and gutter systems. Contact us for an honest assessment of your property’s needs.
Impact General Construction
(845) 494-2399 impactgeneralconstruction.com
Serving
5.0 from 20 reviews
Our company's goal is to do the project correctly and provide a seamless procedure between our customers and contractors. We take great pride in each job we work on and hope to make a lasting impression on your house.
In Clarkstown, a full re-roof is treated as a formal project rather than casual maintenance. If a steep-slope asphalt, slate, or tile roof is being replaced, the local building department expects a permit that covers the scope of work, confirms the roofing materials to be used, and identifies the contractor doing the work. This isn't the kind of job you log after the fact; it should be initiated before any tear-off or installation begins. The permit process helps ensure the roof will perform through freeze-thaw cycles and Nor'easter exposure, which are common on established suburban blocks in this area.
Before work starts, the building department will typically review three core elements. First, the scope of work must be clearly stated, including whether you're re-roofing the entire structure, addressing vulnerable valleys, or upgrading ventilation and underlayment. Second, roofing materials and their compatibility with the existing roof deck and drainage plan should be documented. Third, plan submittals must include contractor information, verification of licensed trades, and any specialty components if slate or tile is involved. If any of these items don't align with local expectations, it can delay approvals and push back weather-sensitive milestones.
Inspections occur at several key milestones, and New City winters make timing critical. Common checkpoints verify that the underlayment is installed correctly and that the venting strategy aligns with the attic's needs for both summer heat and winter moisture. The fastener pattern matters, particularly on steep slopes where wind-driven rain and freeze-thaw cycles can stress transitions at eaves and ridges. A final completion inspection confirms that no residual work remains and that all penetrations are properly flashed. Scheduling around school and community calendars is practical, but the inspectors' availability and the completeness of documentation drive the pace of the project.
Coordinate closely with the contractor to prepare the permit package early: clearly labeled drawings, material specifications, and the contact details for the lead installer should all be included. Have a plan for accessibility during inspections, especially on steep roofs where safety scaffolds or staging must be in place. Keep a calendar handy that marks the expected inspection dates and any required re-inspection steps, so the project remains on a steady track rather than stalling in weather windows.
Provided local averages run from 350 to 650 USD per square for asphalt shingles, 900 to 1400 for metal, 1000 to 2000 for clay tile, 900 to 1800 for concrete tile, 1800 to 3000 for slate, and 500 to 900 for fiber cement shingles. On established suburban blocks with multiple penetrations and flashing details, those numbers don't stay flat for long. In practice, a straightforward asphalt replacement on a steep-slope roof tends to land near the lower end, while heavier assemblies or slate installs press toward the upper end of the range. If you're replacing with fiber cement or metal, you'll find a wider spread between basic installs and more complex, vent-laden flats and ridge work.
Costs in New City are pushed upward by weather-driven delays and the labor needed for steep-slope suburban roofs. Wet springs can stall shingle installations and extend crews' time on the roof, which translates to higher labor hours. Winter conditions add to those delays when work windows shrink and safety considerations tighten. The combination of a demanding climate and steep angles means a straightforward swap becomes a multi-day process, not a quick in-and-out project. If your roof has numerous penetrations (vents, skylights, chimneys), expect overtime or extended scheduling, which nudges the final bill higher regardless of material choice.
Asphalt remains the most common choice for Clarkstown-style homes, with costs typically in the 350-650 range per square. Metal roofs push toward 900-1400 per square and can be advantageous on long-term performance, especially when a precise, tight installation with flashing details is planned. Clay and concrete tiles run higher, generally 1000-2000 or 900-1800 per square respectively, and the extra weight demands structural checks and careful coordination around chimney and wall transitions. Slate sits at the top of the range, 1800-3000 per square, and is most sensible when the goal is a historically appropriate, durable finish and the home already leans into a higher-end aesthetic.
Slate and tile projects can become especially expensive locally when matching existing materials, handling heavier assemblies, or repairing adjacent chimneys and roof-wall transitions common on established homes. If the existing roof uses a specific profile or color, plan for a premium to recreate the identical look and seal around complex intersections. Likewise, if a chimney chase or parapet needs re-flashing, the labor load rises quickly. For most homeowners, balancing aesthetics with durability means pricing out two or three reputable options and testing a sample section before full installation.
Don't let upfront costs delay a critical repair - these contractors offer payment plans to fit your budget.
Rdc Pro Exteriors
25 Butternut Dr, New City, New York
4.9 from 13 reviews
New York's insurance environment sees regular weather-related roof claim activity, so New City homeowners should expect requests for detailed photos and clear pre-loss versus post-loss comparisons. When a claim comes in, keep a dated record of the roof's condition before any repair work begins, including the attic, interior ceilings, and visible exterior sections. Make sure photos show angles that reveal both common trouble spots and the overall condition of steep-slope surfaces. This preventative record helps prevent later disputes about what existed before the weather event.
Adjusters may ask for roofing estimates and some carriers may steer policyholders toward preferred contractors, making independent documentation important before repairs begin. If an estimator visits, provide a clipboard of recent storm-related damage notes, plus any rain or wind logs from local weather outlets. Have your own contractor-drawn sketches or simple measurements ready to contrast with the adjuster's numbers. If possible, obtain a neutral third-party assessment to serve as a reference point, especially for complex roofs with slate or tile.
Because New City roofs are often affected by wind, rain, and freeze-thaw rather than one dramatic event, documenting incremental storm-related damage quickly can matter in claim handling. Freeze-thaw cycles can create hairline ceiling leaks, shingle edges loosening, and micro-cracks in slate, even without a single spectacular storm. Start a damage log after each significant weather event: note shingle lifting, granule loss, and any observed water intrusion. Prompt, clear documentation reduces ambiguity for the insurer and supports a more accurate, timely claim resolution.
Keep a current set of high-resolution photos stored separately from the main file, labeled by date and weather conditions. If a claim is filed, resist making permanent repairs until the adjuster has inspected the site, unless a temporary safety measure is necessary. Engage a qualified roofer to provide objective, itemized observations that you can share with the insurer and any independent assessor. This approach helps ensure that the handling of weather-related roof damage reflects the roof's true condition and the impact of multiple events over time.
Connect with contractors who help homeowners navigate the claims process from damage assessment to final approval.
Artisan Exteriors
(845) 350-2055 www.artisanplan.com
368 New Hempstead Rd, New City, New York
4.7 from 51 reviews
Rdc Pro Exteriors
25 Butternut Dr, New City, New York
4.9 from 13 reviews
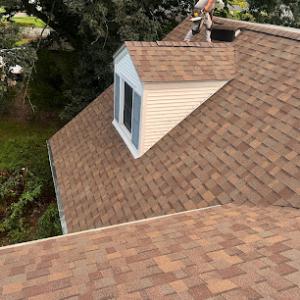
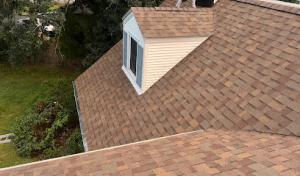
In Clarkstown's climate, skylights and their surrounding roof transitions show higher leak risk, especially where flat or low-slope portions meet steep asphalt planes. Local contractor signals indicate strong demand for skylight work, with many homes featuring added or retrofitted skylights that can trap moisture or fail at flashing transitions. When planning a replacement or repair, inspect the skylight curb, shingle-to-flashing interface, and the sealant line around the factory unit. Pay close attention to the edge where a flat or low-slope section abuts the steep roof; that junction is a common failure point after freeze-thaw cycles. Consider upgrading to a properly integrated curb flashing and a continuous, weather-vented poly sealant that accommodates expansion and contraction from winter temperature swings. Have the contractor verify that flashing corner laps are sealed and that shingles extend slightly over the skylight to shed water away from the curb.
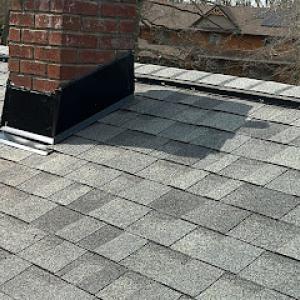
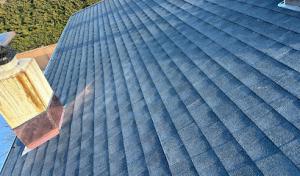
Chimneys are a frequent focus of work in the market, and this matters in freeze-thaw conditions where step flashing, counterflashing, and masonry-adjacent details often fail before the field roofing does. Inspect the chimney chase, brick or stonework, and the flashing that ties into the roof deck. In New City's winters, mortar joints can crack and allow water to travel behind the flashing, causing rot or ice dam development. A careful assessment should include the condition of the counterflashing behind the brickwork, the integrity of the chimney cap, and the connection to neighboring shingles. Replacement or repair should address any compromised masonry with compatible flashing materials and a continuous seal that prevents water ingress from grooming ice dams along the joint.
Low-slope sections over additions, porches, or rear extensions age differently from the main steep roof and need separate inspection during replacement planning. These zones can deteriorate faster due to shade, debris buildup, or limited sun exposure, which means the membrane, edge detailing, and drip edges deserve explicit scrutiny. Ensure that transitions from the low-slope surface to steeper planes maintain proper drainage without creating standing water in freeze-prone seams. When scheduling a roof project, coordinate replacement or repair of these areas to prevent a mismatch in material performance where slope differences exist, and verify that any penetrations (vents, drain lines) have compatible flashing and proper slope to direct meltwater away from the home's envelope.
Find contractors experienced in skylight installation, flashing, and leak repairs to bring natural light into your home.
JKR Construction
(845) 659-1931 jkrconstructioncorp.com
191 S Little Tor Rd, New City, New York
5.0 from 79 reviews
Castillo's Roofing
(845) 598-5099 castillosroofingllc.com
39 S Main St unit 4, New City, New York
4.9 from 54 reviews
Cuenca Home Improvement
(845) 945-0473 www.roofingsidingcontractorny.com
3 Bristol Ct, New City, New York
5.0 from 35 reviews
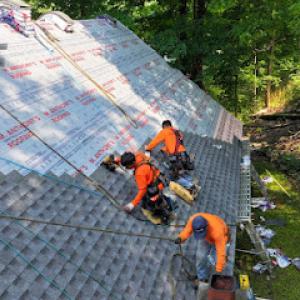
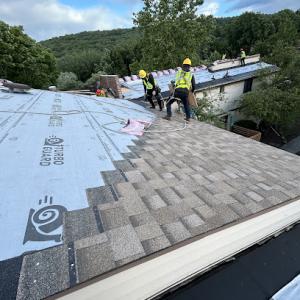
You should treat Clarkstown's heavy re-roofing focus as a reality test when evaluating bids. In this climate, tear-off quality, site protection, and cleanup matter as much as the shingles themselves. Some crews will skim over damaged underlayment or skip comprehensive debris containment, which can leave you with hidden leaks after a thaw and a nor'easter. Look for crews that outline a full, one-pass tear-off plan, sturdy edge protection, and daily cleanups with tarp enforcement to prevent shingle fragments in gardens and gutters.
Long-established, family-owned firms are common here, and that longevity often signals reliability alongside price. You will notice crews with long local ties who understand typical Clarkstown/weather patterns and who show up for inspections or follow-up calls. Don't assume the lowest bid is the best match; measure how the contractor communicates, how crews protect your landscaping, and whether they bring a supervisor on site daily who can answer questions about ventilation, attic access, and ridge vent placement.
Given the inspection process, confirm who handles permit paperwork, inspection coordination, ventilation details, and final closeout documentation. Ask for a written plan that details attic ventilation, drip edge installation, underlayment quality, and a staged inspection checklist. Make sure the contract specifies how weather delays are managed and how debris removal is verified at project close. In this market, clear accountability up front prevents delays and miscommunication when the north winds push through and the last shutdowns happen.
Before you sign, walk the roof edge and note sagging decking, soft spots, or prior patchwork. Ask for photos from the attic showing ventilation balance and insulation. Ensure the bid includes a cleanup log, a start date, and a plan for protecting landscape features during snow and thaw cycles. Ask for a written warranty, and confirm who handles post-install inspections if leaks appear after the first thaw, and emergency contact details.