Last updated: Apr 19, 2026
Cold winters here bring steady freeze-thaw cycles that don't just threaten the main roof field; they concentrate damage right at the eaves, gutters, and valleys. On the steeper rooflines common in this town, snow moves differently, and the meltwater has to navigate dormers, chimney intersections, and flashing details that were never meant to carry heavy loads year after year. In Ridgewood, those transitions are where the problem starts-where ice backs up, gutters clog, and water finds its way behind flashing. The result is not just an ice dam; it's a cascade of edge-detail failures that can undermine shingles, ridge vents, and the delicate balance of ventilation that keeps a roof healthy through winter storms.
The borough's mature tree canopy, plus autumn's leaf load, means gutters often clog well before temperatures drop. Backed-up meltwater refreezes along the roof edge, forming stubborn dams that push ice under shingles or tiles and onto metal edge details. Pay close attention to any signs of water staining in the attic near eaves, frost on the underside of roof sheathing, or damp rafters near dormers and chimney penetrations. Look for ice forming along the drip edge, at valley intersections, and where two roof planes meet. If ice dams persist past a couple of thaw-freeze cycles, the risk of fascia and soffit damage, gutter collapse, or interior leaks climbs quickly.
Most Ridgewood houses feature steep rooflines that shed snow dramatically, yet those same lines create stubborn snow traps around dormers and chimney flashings. When meltwater can't exit freely due to clogged gutters or compromised edge venting, it refreezes at the eaves. Valleys and transitions are the first weak points because flashing there bears the brunt of movement and thermal stress. If attic ventilation is uneven or insufficient, warm attic air elevates the deck temperature at the eave, accelerating ice dam formation. The combination of steep geometry, tree-induced debris, and older edge details means the failure sequence can begin at the edge long before the main roof reveals obvious damage.
Begin with immediate edge and gutter evaluation. Clear leaves and debris from gutters before winter sets in, but do not rely on gutter cleaning as a sole defense-ice dams can form where water has no obvious outlet. Inspect the drip edge and fascia for signs of bending, cracking, or corrosion, especially where metal flashing interfaces with brick or siding. Ensure the gutter system is securely fastened and pitched to drain toward downspouts; a sagging gutter can create a perched pool that accelerates dam formation. Address any visible gaps or step flashing deficiencies at dormers, chimney penetrations, and intersections of roof planes, because those are common stress points in Ridgewood's homes.
Coordinate with a professional to verify attic ventilation and insulation. Inadequate insulation lets warm air collect near the eaves, boosting melt rates at the edge and feeding ice dam development. Balance intake and exhaust vents, and seal penetrations between the attic and living spaces to reduce thermal bridging. If flashing around chimneys or dormers shows any sign of failure-loose sealant, gaps, or rust-prioritize repair before a storm. For roofs with historic materials like slate, copper, or clay tile, conduct edge-detail inspections with contractors who understand how those materials behave under freeze-thaw stress. Improper repairs on these materials can exacerbate edge failures and lead to long-term deterioration.
If ice dam formation is persistent after a few cold snaps, or if you notice water staining in the attic, warped sheathing, or moisture on interior ceilings near the edges, escalation is needed. Edge-detail failures often require targeted flashing repairs, vented soffit adjustments, and edge insulation improvements that a general contractor may not be fully equipped to perform. In Ridgewood, timely intervention saves not just roof integrity but interior living spaces and the historic character of older homes. If your roof hosts dormers, chimney intersections, or copper or slate elements, insist on specialists experienced with edge details and compatible with preservation-minded restoration. The stakes are high, and proactive steps now can prevent costly water damage after the first heavy snow.
After the spring storms roll through, Ridgewood homeowners routinely face a brutal combination: heavy rain, hail, and sharp, windy gusts. Those patterns stress steep-roofed homes and pull at the edges of older materials. The risk isn't just a missing shingle or a dented gutter-it's the potential for edge-detail failures that quietly sneak up until a leak or interior stain confirms the problem. The season's weather tends to target ridge caps, flashing seams, and the junctions where slate, tile, and copper meet the underlayment. If rain pours and wind howls, the damage often starts at the eave line and along the roof perimeter, well before a full roof failure becomes obvious from the ground.
Because Ridgewood is a built-out residential suburb with many neighboring structures and mature trees, wind events rarely damage a roof in isolation. It's common to see mixed roof damage-a combination of uplift from powerful gusts and branch impacts from surrounding trees. Ridge caps can lift, flashing can shift or buckle, gutters may bend or detach, and older shingle tabs can crack or detach under seasonal freeze-thaw cycles. The steep pitch that characterizes these homes can mask a developing problem until weather cycles have run their course, making careful post-storm inspection essential.
Local claim support is strongest when damage is photographed immediately after storms. You want a clear record of what happened before weather worsens conditions indoors or leads to collateral issues. Take wide-angle shots of the roof from the ground when safe, then closeups of ridge caps, flashing joints, and any exposed underlayment. Document dented gutters, displaced flashing, and any interior staining or damp spots that appear after a rain. Keep track of fallen branches or visible tree contact with the roof line, since such evidence supports a fast, accurate assessment by your insurer or local contractor. If you have a deck or balcony overlooking the roof, capture any streaks or granule loss that can indicate shingle damage.
Start with a careful rooftop and attic check for signs of water intrusion-stains, damp insulation, or sagging ceilings. If you see lifted flashing or missing ridge cap material, you're at risk of ongoing leaks. Do not delay scheduling a professional inspection, especially if wind or hail is recent; a qualified roofer can identify uplift zones and edge failures that aren't obvious from the ground. When storm debris is present, clear a safe path for technicians and never step on damaged sections that might fail under your weight. If damage is confirmed, prioritize temporary sealing of actively leaking areas and arranging a permanent repair plan before the next spring fronts arrive. Acting quickly protects copper, slate, and tile from accelerated wear and extends the life of the existing roof system in a way that matches Ridgewood's aging housing stock.
Find local contractors experienced in assessing and restoring roofs after hail, wind, and severe weather events.

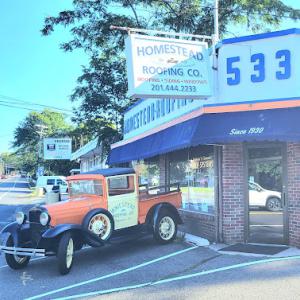
Homestead Roofing Company
(201) 322-5043 homesteadroofing.com
533 Goffle Rd, Ridgewood, New Jersey
4.6 from 168 reviews
Ultra Pro Roofing, Siding & Chimneys
(201) 554-4159 chimneycompanynearme.com
Serving
5.0 from 444 reviews
Homestead Roofing Company
(201) 322-5043 homesteadroofing.com
533 Goffle Rd, Ridgewood, New Jersey
4.6 from 168 reviews
For over 90 years, Homestead Roofing Company has provided high-quality, affordable residential and commercial roofing in Bergen County NJ, Morris County NJ, and Passaic County NJ areas. We remained focused on customer satisfaction and delivering the highest quality finished product available which is why we are continually designated by GAF as a GAF Master Elite roofing company. Whether it is a roof repair for a leak or a new roof installation or replacement, our highly experience in-house roof technicians will ensure that your roof is safe and secure for years to come. Contact your reliable Ridgewood and North Jersey roofing contractor for a free estimate!
Mayfair Remodeling
(201) 444-1440 mayfairhome.com
Serving
5.0 from 188 reviews
Combining years of experience with a dedication to client satisfaction, Mayfair Remodeling has established itself as the local leader in Roofing Contracting Services."
Mattsson Roofing
(201) 925-9709 www.mattssonroofing.com
Serving
5.0 from 327 reviews
Mattsson Roofing is a residential roofing company based in Glen Rock, NJ serving homeowners across Bergen County, Passaic County, and surrounding areas. We specialize in roof replacements, roof repairs, attic ventilation, gutter systems, skylights, and fascia and soffit work. Our approach focuses on understanding the entire roofing system—drainage, airflow, and flashing—so problems are solved at the source. Mattsson Roofing is known for educational inspections, clear communication, and long-term roofing solutions designed to protect homes throughout Northern New Jersey.

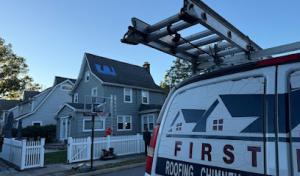
First Rate Roof Repair & Installation
(800) 941-8147 firstrateroof.com
Serving
4.9 from 89 reviews
With more than 25 years of experience, we at First Rate One Construction (also known as First Rate Roofing & Chimney) are the leading roofing, siding, masonry, and chimney service provider in Northern New Jersey. Founded in 1995, we are a locally-owned and fully-licensed, registered, & insured family enterprise based in Paramus, NJ. What started as a roofing installation company operating from a small workshop slowly expanded through the years. We cater to commercial & residential clients for roofing & home exterior needs.
Ultra Pro Roofing, Siding & Chimneys
(201) 554-4159 chimneycompanynearme.com
Serving
5.0 from 444 reviews
We are a Family Owned Company in New Jersey with more than 24 years experience working with Roofing, Siding and Chimney. Ultra Pro was built on quality work and customer service. We use the highest quality chimney products to ensure that our certified chimney services in New Jersey are built to last. We listen to our customers, provide them with the most reliable and long-lasting roofing services. We provide our customers with a detailed estimate for the roofing work required. We guarantee on all our roofing installations and even provide a manufacturer warranty so that our customers receive the maximum value for the money they invest into their chimney. |Fully insured and licensed Construction Company. LIC#: 13VH11344600
ProTech Roof Repair & Replacement
(201) 881-2431 protechroofingnj.com
Serving
4.9 from 54 reviews
ProTech Roofing and Exterior is a licensed residential and commercial roofing contractor serving North Jersey, including Bergen County, Passaic County, Essex County, Morris County, Hudson County, and Union County. We specialize in roof inspections, roof repairs, emergency leak repairs, storm damage restoration, and full roof replacements. Our team installs asphalt shingle roofing, TPO, PVC, EPDM rubber roofing, slate roofs, and modified bitumen systems. We also provide chimney repairs, skylights, siding, gutters, fascia, and exterior waterproofing. If you’re searching for a reliable roofing contractor near you, ProTech delivers durable, code-compliant results with honest pricing.
Planet Roofing & Exteriors S-Corp.
(201) 694-8141 planetroofingcompany.com
Serving
5.0 from 115 reviews
Planet Roofing is a trusted roofing contractor serving homeowners and businesses throughout North Jersey. We specialize in roof replacements, roof repairs, asphalt shingle roofs, flat roofing, leak repairs, and storm damage restoration. Our experienced team delivers high-quality workmanship using durable materials designed to withstand New Jersey weather. From small roof repairs to full roof replacements, we handle every project with professionalism, clear communication, and attention to detail. We proudly serve Bergen, Essex, Morris, Passaic, Union, and surrounding counties. Planet Roofing is committed to reliable service, competitive pricing, and on-time project completion. Free inspections and estimates available for residential and comm
One Call Construction
Serving
5.0 from 103 reviews
One Call Construction provides residential and commercial roofing and construction services across New Jersey, Pennsylvania, New York, and Florida.
Nick Roofing Contractor | nickroofing.com
(973) 207-0689 www.nickroofing.com
Serving
5.0 from 162 reviews
At Nick Roofing, we take pride in delivering high-quality roofing and exterior solutions to homeowners and businesses across New Jersey. Specializing in Roof Repair Hawthorne NJ, Emergency Roof Repair NJ, and Flat Roof Repair Experts NJ, our team ensures your home is always protected. We also offer expert Skylight Installation NJ, reliable Gutter Installation Services NJ, and long-lasting Waterproofing Services Hawthorne NJ. Whether you need a quick fix or a full roof replacement, our Residential Roofing Contractors NJ and Commercial Roof Repair NJ teams are here to help. Additionally, we handle Siding Installation NJ projects with precision, all backed by a trusted and experienced Local Roofing Company NJ.
Ultra Professional Roofing & Chimneys
(973) 390-4084 www.bergencountryroofing.com
Serving
5.0 from 34 reviews
We are a Family Owned Company in New Jersey with more than 24 years experience working with roofing and chimney. Ultra Pro was built on quality work and customer service. We use the highest quality roofing products to ensure that our certified roofing services in New Jersey are built to last. We listen to our customers, provide them with the most reliable and long-lasting roofing services. We provide our customers with a detailed estimate for the roofing work required. We guarantee on all our roofing installations and even provide a manufacturer warranty so that our customers receive the maximum value for the money they invest into their roof.
GenSun Roofing
(973) 310-6445 gensunroofingnj.com
Serving
4.9 from 66 reviews
GenSun Roofing, located at 129 4th Ave, is your go-to roofing contractor offering top-notch roof repair and new roof services. Recognized as the best roofing company in the country with 35 offices, we provide affordable roof replacement and expert solutions for both commercial and residential roofing needs. Our local roofing contractors are licensed and specialize in flat roofing solutions, delivering high-quality work at competitive rates. We offer free roofing estimates and quotes, ensuring transparency and customer satisfaction. With over 30 years of experience, our dedication to customer service and sustainable options, like our solar program, make us the preferred choice for all roofing needs.
JLL Painting & Home Improvements
(201) 398-3482 www.jllpaintings.com
Serving
5.0 from 21 reviews
For all your roofing needs, JLL Painting & Home Improvements, Inc in Englewood, NJ, delivers unmatched artistry and craftsmanship. Our experienced roofers will meticulously install, restore, or replace your roof, leaving it looking like a masterpiece. With JLL's dedication to precision and top-quality materials, you can trust that your home will remain securely sheltered for years to come.
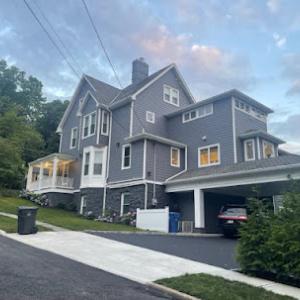
Ridgewood's housing stock supports a wider material mix than many suburbs, with asphalt common but slate, clay tile, concrete tile, metal accents, and copper details also fitting older architectural styles. The best choice often starts with the roof's long-term performance and how well it handles the winter ice dams and spring wind events that can stress edge details. If the home already reads as a classic, naturally aged look, let the material supplement the architecture rather than fight it. Asphalt can cover a broad range of styles, while slate or clay alternatives preserve curb appeal for a period-true feel.
Heavier materials such as slate and tile are especially relevant for older homes that were originally designed around premium, long-life roof assemblies rather than builder-grade replacements. When you consider these options, evaluate the underlying structure and the attic ventilation-both must be robust enough to manage the added loads and to minimize condensation that can contribute to ice-related edge failures. If the existing rafters or sheathing show signs of earlier water intrusion, a structural assessment becomes a practical prerequisite before selecting a heavy material. In many Ridgewood homes, a high-quality slate or concrete tile skin can resist seasonal freeze-thaw cycles and maintain edge security where ice dams are a concern.
Clay tile and concrete tile bring a distinctive character to older architectural styles, and they can be chosen to echo the historical details found on dormers, bays, and clipped gable ends. The edge detail-where tiles overhang and meet the fascia-needs careful integration with proper flashing and underlayment to prevent ice dam buildup. For clay and concrete, pairing with a compatible underlayment and metal edging along eaves reduces the risk of perched ice at the rake and valley intersections. In homes with ornate trim or descent into a steep pitch, these tiles often deliver both performance and a look that remains faithful to the era's design language.
Metal accents shine as practical choices for edge protection and long-lasting transitions, especially around valleys, bay roofs, dormers, and flashing on higher-end homes. A metal ridge vent or copper flashing can weather ice and wind more reliably than painted wood edges, while copper details evolve with a patina that complements aged masonry and slate. Copper is not just a full-roof decision; it is a strategic detail material that can shield vulnerable joints where snow slides or wind-driven debris collide with the roof edge. When copper runs along flashing or inlayed trims, ensure seam integrity and accessibility for future maintenance.
Edge-detail failures are a recurring issue on older steep roofs. Prioritize a continuous, well-sealed eave and rake line, with drip edge metal installed over underlayment and properly back-sealed at penetrations. For steep pitches common in the neighborhood, consider a secondary rain screen or vented soffit system to reduce ice dam risk by promoting warm attic air circulation. Regular inspections after heavy snows and spring storms catch potential edge failures before they become leaks, preserving the roof's performance and the home's historic look.
In this neighborhood, dormers, masonry chimneys, and intersecting roof planes often meet at awkward angles. The consequence is that leak diagnosis hinges more on flashing details than on field shingles alone. A small misfit at a dormer sidewall, or where a chimney chase meets a starter course, can channel water into attic spaces even when shingles look sound. Ridgewood's older homes frequently combine multiple dormers with masonry chimneys, which multiplies the potential failure points where roof planes converge.
Chimney-related roofing work is especially relevant in this market because chimney service is a common contractor offering alongside reroofing. The crown and flashing around a brick or stone chimney endure seasonal cycles of thawing and freezing. If the step flashing along the chimney base or the counterflashing behind the siding is compromised, water can creep behind the brick and into the wall, even if the visible shingles appear intact. Problems often hide in the details: the transition between chimney, roof deck, and fascia; the intersection where mortar joints butt against metal flashing; and the sealant joints at the chimney's top. Regular inspection should target these interfaces, not just the shingles adjacent to the chimney.
Skylights are a meaningful local specialty, reflecting how many homes have later additions or finished upper levels where curb flashing and surrounding shingles age differently than the main roof. The curb, flashing pan, and boot around a skylight can fail before the rest of the roof shows wear. In snow-heavy winters, ice can back up around the skylight flashing and push water under the curb. On upper levels or add-ons, skylight flashing may have settled or shifted since installation, creating slow leaks that manifest as small drips far from the skylight's base. When assessing a roof with skylights, inspect not just the skylight units but the flashing transitions to the surrounding shingles and any differential aging between the curb and adjacent planes.
Edge detailing matters more here than on flatter roofs. Ice dams frequently exploit gaps at dormer knees, chimney corners, and skylight flanges. Regular checks should focus on the metal step and counterflashing at all intersections, the integrity of sealants, and the condition of flashing at the rake edges where dormers meet the main roof. If a leak is suspected near a dormer, chimney, or skylight, address the flashing first rather than replacing shingles in the surrounding area. Keeping a close eye on these critical interfaces helps avoid the cascading damage that can arise from seemingly minor failures.
Find contractors experienced in skylight installation, flashing, and leak repairs to bring natural light into your home.
Homestead Roofing Company
(201) 322-5043 homesteadroofing.com
533 Goffle Rd, Ridgewood, New Jersey
4.6 from 168 reviews
In Ridgewood, the best window to replace a roof runs from mid-spring through early fall. Winter snow and ice complicate tear-off, and summer humidity can affect underlayment and sealant performance. If you're weighing a replacement, aim to lock in schedules around that calmer stretch, especially after the final thaw and before the first heavy leaf drop.
Autumn in this borough is a tradeoff. Weather tends to cooperate enough for installation, but mature trees shed leaves that can quickly obscure drainage details and roof edge failures. If you're targeting late fall, plan for a longer cleanup window and keep gutters clear so crews can assess the eaves and rake edges without obstruction. Don't let a crowded calendar force you into rushed decisions; a half-season buffer often prevents delays that leave you living with a dusty, noisy job into winter.
Older steep roofs in this area are particularly prone to edge-detail failures and ice dam issues when the eaves aren't properly insulated or ventilated. Before a tear-off, ask your contractor to inspect the entire edge line, including drip edge, fascia, and rake boards, for corrosion, rot, or loose fasteners. If you've had repeated spring ice dam events, you'll want a plan that includes upgraded insulation at the eave line and improved venting in the attic to reduce heat transfer to the roof deck. Pay attention to slate, tile, or copper edge details that carry historic or preservation-related value; these materials often require careful handling and specialist crews.
Severe spring weather can surge local demand quickly, so scheduling tends to tighten for inspections and reroofing slots. If your house has visible moisture intrusion, curled shingles, or loose flashing after a big storm, act sooner rather than waiting for a lull in the calendar. Early booking helps you secure a window with stable temperatures and daylight, which aids the practicalities of careful tear-off and clean-up.
If you notice persistent ice dam problems, recurring leaks along the eaves, or mounting edge damage, that's a clear cue to evaluate replacement options rather than extended repairs. For steep roofs with historic materials, engage a crew experienced in handling slate, clay, or copper with minimal disruption to surrounding trees and landscaping. In this climate, a well-timed replacement that respects both the house's age and the yard's rhythm saves headaches when winter returns.
Get a clear picture of your project costs upfront - no commitment required.
Homestead Roofing Company
(201) 322-5043 homesteadroofing.com
533 Goffle Rd, Ridgewood, New Jersey
4.6 from 168 reviews
Ultra Pro Roofing, Siding & Chimneys
(201) 554-4159 chimneycompanynearme.com
Serving
5.0 from 444 reviews
When homes in this stock feature steep pitches, multiple dormers, chimneys, and architectural details, tear-off and flashing work slows down appreciably and drives up labor time. That translates to higher install and removal labor cost on top of the material price. Asphalt shingles remain the baseline, but the premium you pay for edge detailing and careful flashing can push total square costs higher than in flatter markets. In Ridgewood, the gatekeeping factor is often how much roof perimeter is exposed to wind-driven snow and how many crickets, valleys, and rakes require delicate treatment.
Slate, tile, and copper show up in a way that isn't rare here, so premium materials aren't just outliers-they're part of the housing fabric. Slate and copper, in particular, demand specialized crews, slower tear-off, and meticulous edge work to prevent ice damming and ensure long-term performance. Concrete and clay tile also require careful staging and protection around chimneys and dormers. While these materials carry higher upfront costs, the long-term durability and period-appropriate aesthetics can be a worthwhile trade-off for owners of historic or architecturally detailed homes.
Edge-detail failures are a common failure mode when snow mass sits on a steep roof and eaves ice dams form. In Ridgewood, expect extra attention to drip edges, heat trace considerations, and proper underlayment. Costs rise when additional flashing around dormers, valleys, and chimney detailing is needed to avert leaks. Copper eaves or copper snow guards, while premium, are often pitched as preventive investments in neighborhoods with year-round freeze-thaw cycles.
Asphalt Shingles: 350-700 USD per square
Metal Roofing: 600-1100 USD per square
Clay Tile: 900-1500 USD per square
Concrete Tile: 800-1400 USD per square
Slate: 1000-1800 USD per square
Copper Roofing: 1800-3500 USD per square
Bids in this market should itemize edge-work, flashing, and stair-step detachment from steep slopes. Expect higher square-foot charges for square footage affected by dormers and chimneys, and anticipate a staged teardown if clean daylighting around gutters is limited by trees. Cleanup and protection time are non-trivial in tight, tree-covered lots, and crews may allocate extra hours for debris handling and final site restoration.
In Ridgewood, a full reroof typically requires permit review through the local building department before work proceeds. That process helps ensure materials chosen, roof geometry, and fastener methods align with town standards and adjacent homes, especially on the steep, tree-lined ridges common to the area. Start early by selecting a licensed roofer who can initiate the permit application and provide the required documentation, including project scope, ventilation plans, and decking assessment. Having permit review lined up reduces delays when the project is ready to move from framing to installation.
Inspection focus in this jurisdiction commonly includes decking condition, flashing, ventilation, and nailing patterns during and after installation rather than only a final visual sign-off. Decking checks catch rot or damage that could undermine a long-term reroof, while precise flashing around chimneys, dormers, and vent stacks matters as much as the type of roofing material chosen. Ventilation is critical on Ridgewood's older, steeper roofs, where attic heat and moisture can drive ice dams and edge deterioration. Expect the inspector to verify that the correct nailing pattern is followed for the chosen material, particularly on higher-slope sections where wind uplift and thermal movement are more pronounced.
Homeowners should expect permit posting and licensed-roofer involvement to matter in the approval process, especially on full replacement projects. The permit board often requires visible permit numbers on the site and a current contractor license for the duration of the work. A qualified roofer will coordinate periodic inspections and respond promptly to any notes from the building department, rather than waiting for a late-stage sign-off. Keeping communication clear between homeowner, contractor, and the inspector helps protect the project against weather-related setbacks and ensures that edge details-such as step-flashing and copper or slate transitions-are installed to code.
Prepare for a sequence where permit review may identify a needed decking or ventilation upgrade, which can influence product selection, especially on slate, copper, or tile installations. On Ridgewood's stiff weather swing, inspection readiness means maintaining proper access, protecting landscaping from debris, and ensuring the attic space remains vented during work. A proactive plan with a licensed roofer who understands Ridgewood's distinctive rooflines reduces the risk of rework and supports a smoother permit-to-installation flow.
After a coastal-style storm sweeps through winter or spring, a Ridgewood roof faces wind-driven damage, hail scuffs, and edge-details that fail on older steep surfaces. In this market, the process is rarely about catastrophe-only losses. Homeowners typically file standard wind and hail claims, which require solid documentation and a clear professional estimate to stand up to scrutiny.
Documentation matters. Post-storm photo records should cover shingles, flashing, gutters, skylights, and any interior leaks. Date stamps help establish when damage occurred, which matters if adjusters compare pre- and post-storm conditions. Detailed notes about ice dam patterns, missing mortar for slate or copper edges, and visible fastening issues can strengthen a claim and reduce back-and-forth with the carrier.
Adjuster reviews are common. Carriers in this region may request a post-storm adjuster review to validate claim scope. A homeowner benefits from presenting a consistent narrative: matched materials, visible wear on certain roof faces, and a transparent estimate from a reputable contractor with scope and line-item details.
Decisions about repair versus replacement hinge on policy language and deductibles. After a Bergen County storm event, a partial repair can be the prudent path if it restores function and preserves preservation-sensitive materials. However, if the documentation reveals widespread edge failures, multiple roof planes, or compromised attic structure, replacement might be more cost-effective in the long run. Your insurance provider will weigh these scenarios against your plan's language and deductible structure. If you disagree with the adjuster's assessment, request an independent appraisal and maintain all records; a careful, documented approach reduces surprises when the claim is reviewed during settlement negotiations, and helps protect your roof investment. Stay organized through the process to protect your roof investment.
Flat and low-slope roofing matters in this Bergen County suburb mainly on additions, porches, and smaller rear sections rather than as the dominant roof type across the borough. The local climate pushes winter ponding toward the eave line and at transitions where flat sections meet steeper main roofs. Ice at edges and along wall flashings can propagate damage across a small roof area, so attention to detail here pays off on the long run.
These low-slope sections are particularly vulnerable because they sit adjacent to steep, snow-ridden main roofs. Ice dams can back up onto the edge detail where the flat roof meets the wall or the main roof. Ponding heat loss, frigid air intrusion, and marginal flashing performance at the transition heighten the risk of leaks. Where a low-slope membrane ties into a slate, tile, or shingle roof, mismatches or poor drainage at the transition become a frequent failure point.
Start with the edge detail where the flat roof meets the wall and where it abuts the main roof. Look for pooling water after storms and check for exposed fasteners or damaged flashing along the parapet. Ensure the interior ceiling below any flat area shows no signs of staining or musty smells, which signal hidden leaks. Regularly clear debris from scuppers and ensure proper slope toward the drainage outlets. For mixed systems, verify that the membrane at the low-slope section is fully integrated with the adjoining roof materials and that transitions are sealed and reinforced.
Prioritize a durable membrane with compatible transition details to the main roof material. Where structural constraints exist, consider a built-up or modified bitumen system paired with a properly flashed edge that resists ice dam formation. In areas with heavy snowfall, specify a slightly steeper cross-slope at critical low-slope zones to promote drainage and reduce ponding time.
Find specialists in TPO, EPDM, and built-up flat roofing systems for residential and commercial properties.
Homestead Roofing Company
(201) 322-5043 homesteadroofing.com
533 Goffle Rd, Ridgewood, New Jersey
4.6 from 168 reviews
Planet Roofing & Exteriors S-Corp.
(201) 694-8141 planetroofingcompany.com
Serving
5.0 from 115 reviews