Last updated: Apr 19, 2026
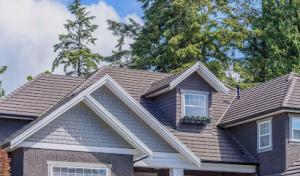
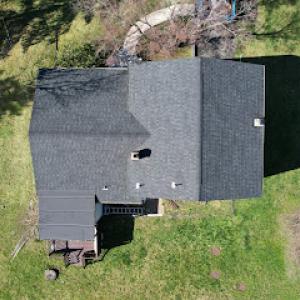
Cold winters in this area bring repeated snow, melt, and refreeze cycles that make ice dam formation a primary roof risk. When a shingle or flashing fails to deliver uninterrupted water shed, meltwater backs up at the eaves and freezes, pushing moisture into the attic and along exterior joints. Older homes commonly paired with aging roof assemblies can amplify this danger, especially where insulation and ventilation fall short. In Westwood, the pattern is clear: frost on the gutters, icicles hanging from eaves, and unseen moisture creeping into decks and ceilings long before a visible leak shows on a ceiling. The risk is not only cosmetic-it's structural, encouraging rot, mold, and accelerated wear on decking and underlayment.
The typical older roof in the borough often presents a mismatch: deteriorating or undersized ventilation paired with insulation gaps leaves the attic warm near the roof deck while the exterior is bone cold. Melted snow travels toward the colder eaves, where it refreezes and creates a dam. Water then pools behind that dam, finds small gaps around valleys, roof-to-chimney transitions, and any flashing that's aged or damaged, and begins to seep into the decking above. In other words, the obvious leak spots aren't always where the problem starts; the hidden routes often begin at these key junctions and work inward.
In these homes, moisture can accumulate quietly behind the rafters rather than visible in an overflowed gutter. In winter, the attic can act like a heat exchanger, moving warm indoor air into a cold attic space. When insulation is sparse or fractured, that warm air climbs and escapes through gaps, carrying moisture that condenses on cold sheathing. Over time, that condensation invites wood rot, compromising structural integrity and inviting mold along pathways that feed into living spaces. The danger is compounded when eave icing blocks attic vents, effectively turning the roof into a moisture trap with nowhere for damp air to escape.
Start with a thorough attic check focused on insulation gaps and vent integrity. Look for signs of staining on the underside of decking, frost patterns along rafters, or condensation on attic surfaces after a cold day. Seal obvious gaps with resilient sealants or foam specifically rated for thermal barriers, and address any blown-in or batt insulation gaps that permit warm air to reach the roof deck. Ensure soffit vents and ridge vents (or other prescribed ventilation paths) are clear of dust, nests, or insulation encroachment. If there's any doubt about the adequacy of ventilation, a diagnostic test-such as a blower door or infrared scan-can reveal hidden air leaks that are driving heat into the attic.
If ice dams form repeatedly or if you notice recurring moisture staining around eaves, valleys, or the roof-to-chimney area, professional evaluation is essential. A roofer familiar with Bergen County winters will inspect for damaged flashing, compromised underlayment, and failed or undersized ventilation routes, focusing on the eave-to-fascia junctions and any transitions to chimneys or skylines. Do not ignore repeated icicle buildup or soft spots along the decking, because those are red flags that a moisture problem is already underway and needs immediate attention to prevent long-term damage to the roof deck and interior ceilings. In Westwood, timely action protects both the roof's lifespan and the home's indoor air quality.
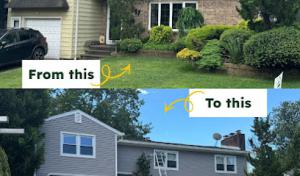
Winter ice dams are not the only threat after a warm-season storm or an autumn wind event in this borough. A typical Westwood block sees lifted shingles, branches punching through lighter roofing materials, and debris stacking up along eaves and valleys. These conditions turn a standard leak into a rapid, substantial water intrusion once the thaw starts or a storm reworks the debris bed. The combination of older housing stock and close-held layouts means water can migrate along the roof edges into attics, walls, and ceilings before a homeowner realizes there's a problem. This isn't a remote risk-it's a recurring pattern that demands fast eyes on deck and fast action.
Because claim activity in New Jersey often centers on wind and hail, photo documentation immediately after storms is essential, and you should snapshot the roof from multiple angles before any temporary repairs begin. Use a wide shot that captures the entire roof line, closer shots of damaged shingles, and any visible flashing or vent damage. If you see any active leaks or staining inside the attic or ceiling, document those areas with dated photos. Do not start large-scale quick fixes without documenting the pre-repair condition; insurers will want to see the original damage and the sequence of events. If ladders are used, ensure safe setup and fall-prevention practices and avoid work during wind advisories or icy surfaces. The moment weather eases, arrange a same-day inspection by a local contractor who understands how these roofs react to autumn wind across the borough and how underlayment and ventilation influence ice-dam risk.
In this market, insurers will expect prompt communication that ties the damage to recent storms and the observed roof condition. Share the photos, the storm date, and a clear note of any interior moisture signs. A contractor who can verify conditions quickly and provide a documented assessment will stand out in the claim process. Look for a firm capable of rapid on-site evaluation, temporary containment to slow dripping, and a plan that addresses underlayment, ventilation, and any sagging or damaged decking. The best responders are those who can coordinate with adjusters on the spot, supply a thorough scope, and move toward permanent mitigation without leaving the roof exposed to further weather. Time is of the essence when active leaks are involved, so prioritize responders who can be on site within 24 hours after the storm.
In this climate, the best crews are the ones that balance urgency with workmanship. Seek a local contractor who can demonstrate an immediate action plan: secure the site, install temporary tarping, and begin a measured assessment of underlayment and attic ventilation needs. Ask for recent storm-repair examples on similar Westwood houses and references that confirm their ability to document progress for insurers. If a contractor suggests delaying certain steps until after a formal inspection, push for a temporary but effective mitigation that reduces interior damage while the paperwork unfolds. The right team will treat this as more than a quick patch-it's a bridge to a properly vented, weather-tight roof system designed to cope with this borough's winter and wind pattern.
Find local contractors experienced in assessing and restoring roofs after hail, wind, and severe weather events.
GDC Contracting
(201) 225-1957 www.gdccontractinginc.com
123 Woodland Ave, Westwood, New Jersey
4.9 from 85 reviews
GDC Contracting is a trusted general contractor based in Westwood, NJ, serving Bergen County and surrounding areas. With over 50 years of experience, they specialize in roofing, siding, windows, and a wide range of remodeling services, including kitchen and bathroom renovations, additions, and finished basements. GDC Contracting is known for their quality craftsmanship and commitment to customer satisfaction, providing tailored solutions for both residential and commercial projects. Whether you're in need of a new roof, home exterior upgrades, or interior remodeling, GDC delivers professional, reliable results.

A1 Progressive Construction
Serving
4.7 from 79 reviews
Many around-the-house projects require more than just a few hand tools. A1 Progressive Construction can take care of the things that are out of your reach. Our specialists offer a variety of services for homes and businesses in the Northern New Jersey area. Choose us if you need gutter, roofing or chimney services. We also offer interior home remodeling services. Contact our experienced technicians today to schedule service.
Valdez & Sons Roofing
(201) 720-5170 valdezsonsroofing.com
Serving
4.9 from 78 reviews
Valdez & Sons Roofing is your trusted partner for all your roofing needs. With a commitment to excellence and customer satisfaction, we specialize in roofing installations, repairs, and maintenance. Our skilled team delivers personalized solutions tailored to your specific requirements and budget, ensuring the integrity and longevity of your roof.
Kelly Exteriors
(201) 977-1076 www.kellyexteriorsnj.com
Serving
5.0 from 58 reviews
At Kelly Exteriors, we take pride in providing top-quality roofing, siding, window, and gutter services to homeowners in the community. Our team of experts is dedicated to ensuring that your home is protected and looks its best. We use only the highest-quality materials and the latest techniques to ensure that your project is completed on time and within budget. Contact us today to learn more!
The Durbec Workers
Serving
5.0 from 11 reviews
Roofing, Siding, Skylights, and Gutter
Dalmatia Roofing
(845) 826-3576 dalmatiaconstruction.com
Serving
5.0 from 48 reviews
At Dalmatia Construction & Roofing, located in Rockland County in Tappan New York, we provide a full exterior envelope portfolio of your project needs. From roof repairs to maintenance and replacement services, construction, siding repairs and installation and window replacement, we can assist in a variety of ways! Our address is 204 Western Hwy S, Tappan, NY 10983. Please give us a call for a free estimate or roof inspection! We'd be happy to assist you!
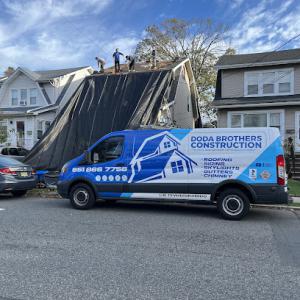
Doda Brothers Roofing & Chimney
Serving
4.8 from 25 reviews
Doda Brothers Construction is excited to serve Oradell, NJ, and surrounding areas! 🌟 We specialize in residential and commercial roofing services, including shingle repairs, roof replacements, skylight installations, and more. 🏠 As a family-owned, GAF-certified, and Better Business Bureau-certified contractor, we’re committed to top-quality craftsmanship and customer satisfaction. Whether you're in Oradell, Paramus, River Edge, or anywhere in Bergen County, we’re here to handle your roofing needs. Contact us today for a free estimate! ✅
Leaf Free Home Improvements
(201) 265-4500 www.leaffree.com
Serving
4.4 from 45 reviews
Leaf Free Home Improvements has offered services gutters or roofing in Bergen County NJ and Rockland County NY since 2002. We’re not your average roofing company; we also provide other exterior work such as aluminum siding, veneer stone, window work, & gutters. We serve residential and commercial clients with a wide range of quality services. We use only the highest quality materials and provide unsurpassed customer service and workmanship.
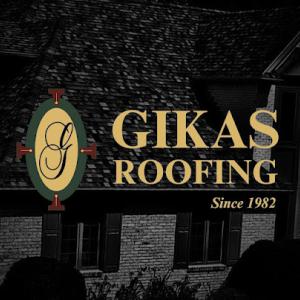
Gikas Roofing
(845) 441-7663 gikasroofing.com
Serving
5.0 from 167 reviews
Founded in 1982, Gikas Roofing has built a reputation for excellence through decades of dedicated service. As an Owens Corning Preferred Contractor, we bring industry-leading materials, expert craftsmanship, and a commitment to customer satisfaction to every project we take on. We specialize in roofing and gutter services, offering both residential and light commercial solutions throughout Rockland County, Westchester County, and Northern New Jersey. Based in Pearl River, NY, our team is known for reliability, clear communication, and delivering quality that stands the test of time.
Complete Roof Systems
(201) 734-5465 www.crsroofing.net
Serving
5.0 from 361 reviews
CRS is a family owned and operated commercial and residential roofing & siding company. Since 1977, we’ve been considered one of the best home remodeling companies in NJ as a result of our unmatched customer service. We specialize in residential roofing & siding installations, offering free quotes. We proudly offer GAF Energy Solar Shingles, as well as handling all insulation and siding services, as well as regular roof inspections and maintenance. For our commercial clients, we offer roof repair and replacement, as well as regular inspections and maintenance. Whether you are in need of a new roof or a repair, want to enhance your curb appeal with new siding, or are looking to upgrade to solar shingles, CRS has you covered!
ProTech Roof Repair & Replacement
(201) 881-2431 protechroofingnj.com
Serving
4.9 from 54 reviews
ProTech Roofing and Exterior is a licensed residential and commercial roofing contractor serving North Jersey, including Bergen County, Passaic County, Essex County, Morris County, Hudson County, and Union County. We specialize in roof inspections, roof repairs, emergency leak repairs, storm damage restoration, and full roof replacements. Our team installs asphalt shingle roofing, TPO, PVC, EPDM rubber roofing, slate roofs, and modified bitumen systems. We also provide chimney repairs, skylights, siding, gutters, fascia, and exterior waterproofing. If you’re searching for a reliable roofing contractor near you, ProTech delivers durable, code-compliant results with honest pricing.

First Rate Roof Repair & Installation
(800) 941-8147 firstrateroof.com
Serving
4.9 from 89 reviews
With more than 25 years of experience, we at First Rate One Construction (also known as First Rate Roofing & Chimney) are the leading roofing, siding, masonry, and chimney service provider in Northern New Jersey. Founded in 1995, we are a locally-owned and fully-licensed, registered, & insured family enterprise based in Paramus, NJ. What started as a roofing installation company operating from a small workshop slowly expanded through the years. We cater to commercial & residential clients for roofing & home exterior needs.
Asphalt shingles dominate practical replacements because they fit the area's common sloped residential rooflines and are easier to phase into storm-driven repairs. They pair well with existing underlayment and ventilation setups found on many older Bergen County homes. Premium materials-slate, clay tile, concrete tile, metal, and synthetic/composite shingles-offer long-term durability, but require careful evaluation before replacement. Slate and heavy tile demand a structural check to ensure the roof deck and framing can carry the load, while metal and composites call for attention to flashing details and how the material behaves in freeze-thaw cycles. In this climate, you want a shingle or panel that can shed snow efficiently without trapping moisture at eaves or in valleys, and that resists the harsher effects of humid summers on aging seals.
Material choice should be judged against snow shedding, humid-summer aging, and how well the assembly handles repeated winter expansion and contraction. In older homes, the roof structure may have settled or been rebuilt in sections, so a full assessment of underlayment, ventilation, and attic insulation is essential before committing to premium materials. If you lean toward slate or tile, verify that the rafters and roof pitch accommodate the installation without overloading the framing. Clay or concrete tile can perform beautifully in dry winter air, but frost cycles in the Northeast can stress grouted joints and flashing if the installation isn't engineered for repeated freeze-thaw cycles. Metal roofs excel at shedding snow and resisting ice dam formation, yet flashing transitions around chimneys, vents, and dormers must be meticulous to avoid moisture migration.
Before replacing, confirm that the roof deck is dry and solid enough to support the chosen material. Premium options typically need closer attention to ventilation and drainage details, especially around valleys and eaves where ice dams tend to form. For asphalt, ensure the current underlayment is compatible with the new shingles and that attic ventilation keeps humidity in check to slow moisture-related deterioration. If selecting slate or tile, plan for professional fastening patterns and temporary reductions in snow load on the structure during heavy storms. In metal or synthetic options, verify that fasteners and sealants used at penetrations are rated for freeze-thaw exposure and will remain watertight through the season.
Ongoing maintenance should target areas prone to ice dam development: eaves, gutters, and valley flashing. Clear debris from valleys and ensure gutters are tied into proper downspouts to minimize standing water. Humid summers can accelerate aging of sealants and flashing; inspect these joints annually and reseal as needed. For older Westwood homes, periodic infrared or moisture surveys can detect hidden leaks before winter sets in, guiding timely repairs that protect the roof system's integrity through the repeated heating and cooling of northern winters.
When planning a full roof replacement in this area, frame the schedule and budget around the standard Westwood per-square ranges. Asphalt shingles typically run from 450 to 850 USD per square. Metal roofing sits higher, at roughly 700 to 1400 USD per square. For those choosing clay tile, expect 1100 to 2400 USD per square, while concrete tile generally falls in the 900 to 1900 USD per square range. Synthetic or composite shingles are usually 550 to 900 USD per square, and slate comes in strongest at 1500 to 3200 USD per square. These figures reflect the long-term performance you're chasing in a climate with winter freeze-thaw cycles and potential ice dam exposure.
Costs in Westwood can rise when older roof decks need repair after long-term moisture intrusion from ice dams or storm leaks discovered during tear-off. If deck rot or hidden damage is found once the shingles come off, that adds material and labor time, pushing the overall price upward. Preparation work-replacing damaged sheathing, addressing fascia, and ensuring a solid ventilation and underlayment setup-helps prevent future moisture issues but adds to the upfront investment. Plan for a modest contingency if the previous roof endured several harsh winters.
Scheduling pressure after regional storms and the borough's approval timeline can affect labor availability and project timing, especially in the preferred spring and fall replacement windows. In practice, that means tighter windows and potential price bumps when crews are in high demand. If your roof is showing new leaks or ice dam-related moisture after thaw, expect faster scheduling but confirm the crew can complete underlayment, ventilation, and full tear-off with attention to wind and temperature constraints. A well-timed spring or fall project minimizes weather-related delays and helps keep the project on its planned path.
Get a clear picture of your project costs upfront - no commitment required.

In Westwood, a full roof replacement typically requires a building permit through the Westwood Borough building department. The permit process is a routine part of protecting the borough's older housing stock from water intrusion and improper venting, especially given the winter freeze-thaw cycles and potential for ice dam damage. The permit helps ensure that new underlayment, ventilation, and flashing meet local standards and that the project aligns with the borough's code requirements for safety and long-term performance.
Permit applications are generally submitted either by the contractor performing the work or by the homeowner when coordinating directly with a roofing contractor. A complete submission should include project details that reflect the roof's size, the proposed underlayment, ventilation plan, and material type. Processing commonly takes about 1 to 2 weeks, depending on department workload and whether additional documentation or plan reviews are needed. It's wise to plan for this window to avoid weather-related delays, especially as freezing conditions can complicate work timelines.
Inspections are scheduled during and after the work to verify installation details, with particular attention paid to underlayment quality, roof ventilation, and correct flashing around penetrations. In this borough, documentation and sequencing matter: expect the inspector to want to review the sequence of steps, from roof deck preparation and underlayment installation to shingle or tile attachment and venting setup. Keep track of the inspection calendar and ensure that key milestones are completed in the approved order.
If any revisions are required, work with the contractor to adjust promptly and resubmit as needed. A clear set of before-and-after photos, along with material specifications and installation notes that address underlayment type, ventilation strategy (including soffit and ridge vents or alternative designs), and fastener patterns, can help streamline the inspection process. Given the climate realities in this part of the region, documentation that demonstrates proper attic sealing and ventilation performance will be particularly scrutinized during permit closeout and any subsequent audits.
In Westwood, storm-related roof claims are influenced by New Jersey's periodic wind and hail events, so homeowners should expect carriers to scrutinize cause of loss and timing. That means the sequence from impact to claim decision is not automatic approval; carriers cross-check weather logs, damage patterns, and the likely onset of moisture intrusion. If a storm was recent, expect questions about whether damage existed prior to the event and whether the roof system was properly maintained to withstand freeze-thaw cycles. Understanding this dynamic helps prevent surprises when the adjuster arrives.
Adjusters may request site visits plus contractor photos, written scopes, and date-stamped damage records before approving full replacement versus repair. In practice, having clear, dated photos from multiple angles and a written scope that matches what the contractor notes on-site can shorten the process. If a tarping solution is used, keep receipts and note the date of installation and any subsequent weather exposure. The more you document, the stronger the claim narrative becomes, especially when the decision hinges on whether a full replacement is necessary to restore long-term performance.
Because claim handling can vary by carrier and policy form in New Jersey, Westwood homeowners benefit from documenting temporary tarping, interior leak staining, and all communication from the first notice of loss onward. Interior moisture can travel beyond the attic planes, so keep a log of staining, damp spots, and any rapid changes after a storm. When the adjuster calls, having a concise record of dates, photos, and messages reduces back-and-forth and helps alignment on the scope of work. In this market, consistent documentation through the process is your best defense against delays and unexpected interpretation of damage onset.
Skylights are a meaningful service category in this market, making curb flashing and surrounding shingle integration a common repair focus in Westwood homes. When the sun moves away in late afternoon and the temperatures swing, ice can back up at the curb if flashing isn't flashed cleanly into the shingles. Inspect junctions for hairline gaps, and ensure sealant around skylight frames remains intact. Replacing a compromised flashing boot or adjusting the curb with compatible shingles helps prevent ice dam formation directly at the skylight.
Chimneys are a habitual trouble spot during freeze-thaw cycles. The roofing work around masonry intersections must address both the base flashing and side shingles tie-ins, because even small gaps invite meltwater to follow the masonry into the attic. Look for rust stains, lifted shingles, or missing interlayment at the chimney's base. Replacing torn step flashing and resealing around mortar joints with long-lasting sealant can dramatically reduce moisture entry and subsequent ice dam buildup.
Although the market is mainly pitched roofs, some homes include low-slope additions or sunrooms that demand a distinct approach. These areas require a higher-grade underlayment and careful drainage planning to avoid standing water. Check transitions between main roofs and low-slope sections, paying attention to ridge line continuity and proper drip edge installation. Consider a leak-detection approach specifically designed for low-slope zones.
Where old stock meets new installations, improper shingle integration can create tiny seams that ice dams exploit. Ensure proper overlap, nail line alignment, and consistent overhang around perimeters and penetrations. Any discrepancy here can channel meltwater toward fascia boards and underlayment, increasing moisture risk during thaw cycles.
In Westwood's climate, proactive moisture monitoring beats late-season surprises. Schedule seasonal inspections after heavy snows and during thaws to catch hidden weak points early. Focus on flashing transitions, vent connections, and attic ventilation quality to keep insulation dry and reduce ice dam potential.
Find contractors experienced in skylight installation, flashing, and leak repairs to bring natural light into your home.
In this market, the profile of a trustworthy contractor matters as much as the material you choose. The local climate-with winter freeze-thaw, ice dams, and older housing stock-puts a premium on firms that can respond quickly to active leaks and guarantee post-job cleanup. A reputable company should outline how fast they can arrive after a call and what they do to keep your property tidy during and after work, from tarps and containment to meticulous debris removal.
Proof, not promises, matters most. You will encounter many long-established and family-owned firms, but the key is who handles the permits, inspections, and any storm documentation. Look for clear documentation of licensing, insurance, and manufacturer certifications when relevant, and ask for names of former customers you can contact. Request concrete examples of recent projects, ideally on homes similar to yours in age and roof type, and insist on written proof of who will be responsible for inspections and code checks. If a storm event is involved, verify that the contractor can produce the necessary post-storm documentation and timelines.
Older Westwood roofs demand more than a cosmetic patch. The right contractor treats underlayment, ventilation, and attic sealing as a system, not an afterthought. Check that they propose a full roof system upgrade where appropriate: ice and water shield at eaves and rake zones, proper attic ventilation, and a vented soffit strategy. In cold seasons, poor ventilation means moisture buildup and higher risk of ice damming; a responsible team will point to visible signs of prior moisture, staining, or past repairs and explain how their plan prevents recurrence.
On the ground, practical steps matter. Expect a written scope that details the exact areas to be stripped, the materials chosen, an explicit cleanup plan, and a realistic timeline. Ask for a single point of contact, and require a clear warranty stance on both materials and workmanship. A careful, transparent contractor is your best defense against hidden issues and recurring leaks.