Last updated: Apr 19, 2026
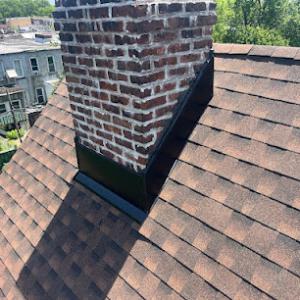
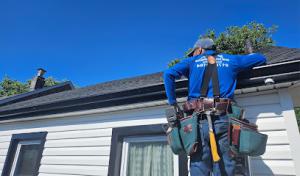
In this neighborhood, roofs are rarely a simple, stand-alone canopy. The majority of attached and semi-attached rowhouses stack low-slope rear sections, parapet walls, and shared side conditions into a compact, neighbor-packed silhouette. Leaks in these settings don't usually announce themselves with a dramatic pool in the middle of a deck; they start at the seams that are most stressed by freeze-thaw cycles, summer heat, and aging flashing. Parapet caps and party-wall intersections are the soft underbelly of many Woodside roofs, and a tiny crack in a parapet seal can unleash a slow, stubborn drip that travels along a party wall or into interior ceiling corners long before it's obvious from the street. You're not just protecting a patch of roofing-you're guarding a network of connections where rain finds the path of least resistance.
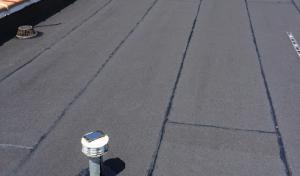
Because the blocks are dense and the buildings sit shoulder-to-shoulder, intrusion often doesn't originate in the field of the roof. Look closely at parapet caps-they absorb more heat and are exposed to more wind-driven spray. The intersections where the party wall meets the roof and transitions around dormers, if any, are frequent trouble spots. Chimney flashing and vent penetrations are high-traffic failure points, especially where flashing has aged, is blocked by debris, or has been disrupted by neighbor work nearby. Roof drain areas are another common front line, as clogged scuppers and downspout outlets can back up quickly in narrow soils and tight valleys. In Woodside, where neighboring structures cast shade and trap moisture, any overlooked seal around these edge conditions can become a chronic leak source.
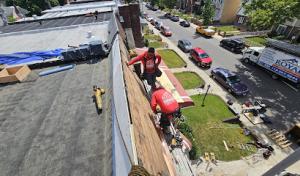
In dense Queens blocks, scaffold access, debris handling, and material staging aren't occasional inconveniences-they shape the entire project timeline and inspection cadence. A contractor may need to coordinate work around adjacent properties, shared ladders, and street congestion. That means leaks may persist longer than they would on a more open site, and a quick patch elsewhere won't erase the hidden escalation along a parapet or at a side-wall connection. When planning for a fix, expect delayed start times and tighter sequencing to accommodate neighboring buildings, scaffold containment, and the safe routing of materials through tight yards or walkways. If access is blocked or limited, water can chase a longer route, pooling in places you wouldn't expect until the next rainfall.
Start with a field check that prioritizes edge and connection points. Inspect parapet caps for loose or missing sealant, even if the field looks dry. At party-wall intersections, look for hairline cracks or gaps where sealants have peeled back after winter cycles. Examine chimney flashings and any penetrations, ensuring joint sealant is intact and flashing is continuous without uplift. Clear roof drains and check scuppers for debris that can back up a system that is already working within tight horizontal and vertical constraints. Implement proactive drainage checks after heavy rain and during seasonal transitions when freeze-thaw stress is greatest. Document any suspect areas with clear photos and notes you can show a contractor-edge conditions are the most critical to verify before a top-down repair.
If you notice staining near parapets, dampness around party walls, or moisture that seems to follow interior seams down a wall or into a ceiling joint, you should act quickly. In this market, a precise diagnosis often requires close inspection of edge details and flashings around shared walls, not just a superficial look at the field. A qualified local roofer will confirm whether the leak trace points to parapet caps, chimney flashings, or drain connections and then recommend targeted repairs that restore edge integrity and protect the envelope. You'll want a technician who can work with limited staging, coordinate around neighboring properties, and execute durable edge repairs that stand up to Woodside's freeze-thaw cycles and summer heat. This is where the difference between a temporary fix and a lasting solution is measured.
Eagle Express Contractor
(347) 362-0008 eagleexpresscontractor.com
Serving
5.0 from 82 reviews
At Eagle Express Contractor, we pride ourselves on delivering top-notch roofing services with a commitment to excellence and customer satisfaction. With extensive experience in the roofing industry, our skilled team is equipped to handle projects of all sizes, from minor repairs to large-scale installations. We believe no job is too big or too small for us, and we take every project seriously, ensuring high-quality results every time. Our motto, "One call does all," reflects our dedication to providing comprehensive solutions for all your roofing needs. Contact us today to experience the Eagle Express difference!
Neat Services
(718) 880-4080 www.neatservicescorp.com
Serving
5.0 from 143 reviews
Neat Services is a licensed roofing and siding contractor in Queens, NY, serving Maspeth, Jackson Heights, Astoria, Forest Hills, and Brooklyn. We specialize in roof replacement, roof repair, siding installation, and window replacement with premium materials (GAF, CertainTeed) and a 25-year workmanship warranty. Bilingual team (English/Español), Directorii-backed, BBB A+, and 143+ five-star Google reviews. Need a roofing contractor near me or siding contractor near me? Call Neat for fast estimates, clear communication, and clean, professional work done right.
Guaman Roofing Services
(917) 891-4164 guamanroofing.com
Serving
4.9 from 65 reviews
Guaman Roofing Services has provided quality services to residential and commercial owners in New York City. We know that you deserve the best quality service, that’s why our team executes precise and safe projects, always guaranteeing a professional service.
Astoria Roofing
(718) 285-6273 www.astoriaroofingny.com
Serving
5.0 from 78 reviews
For over three decades, Astoria Roofing has been a reliable roofing contractor servicing Queens, Brooklyn, and the greater NYC region. With an unwavering commitment to excellence, our skilled professionals specialize in residential and commercial projects, expertly handling various services such as roof replacements, leak repairs, flat roofs, waterproofing, and professional maintenance. Utilizing top-grade materials, our licensed and insured team provides durable and long-lasting solutions, ensuring superior protection for your property and peace of mind. For exceptional customer service, fast response times, and honest communication, Contact us today for a free estimate and see why New Yorkers trust Astoria Roofing.
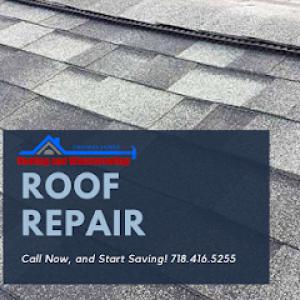
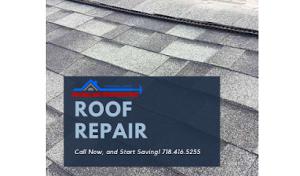
Thomas James Roofing & Waterproofing
(718) 416-5255 www.thomasjamesroofing.com
Serving
4.9 from 52 reviews
Since 1999, Thomas James Roofing and Waterproofing has been a trusted name in roofing, siding, and waterproofing. With a dedicated team of experienced professionals, they are committed to delivering high-quality, long-lasting results. Specializing in making each project as seamless and stress-free as possible, Thomas James Roofing and Waterproofing offers expert service with a focus on durability and customer satisfaction. Their skilled craftsmanship ensures that every home is treated with the care and attention it deserves, providing peace of mind and protection for years to come.
Brooklyns Best Roofing Williamsburg
brooklynsbestroofingwilliamsburg.com
Serving
5.0 from 121 reviews
Brooklyns Best Roofing Williamsburg delivers exceptional roofing solutions for homes and businesses. As a trusted leader, we are dedicated to providing top-quality residential and commercial roofing services in NYC. Our commitment to excellence shines through in every project, ensuring durability and complete customer satisfaction. From expert installation to meticulous repairs and ongoing maintenance, our skilled team uses only the best materials and provides reliable craftsmanship tailored to your specific needs. Choose us for roofing projects done right, every time.
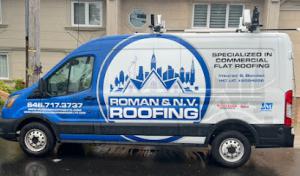
N.V. & Roman Commercial Roofing Brooklyn
(917) 440-1800 commercialroofingbrooklyn.com
Serving
5.0 from 97 reviews
Established in 1987, N.V. & Roman Commercial Roofing Brooklyn has been the premier choice for professional roofing services across New York City. As a fully licensed, insured, and bonded team of experts, they specialize in top-rated commercial roof installations and comprehensive property management solutions. Their commitment to quality and unmatched expertise ensures every project is completed to the highest standards, providing reliable and durable roofing for businesses throughout the five boroughs.
Daniel's Roofing:Best roofing contractor Queens/Brooklyn Ny
(917) 204-2906 danielsroofingnyc.com
Serving
5.0 from 78 reviews
Fourth-generation roofing contractor that does the job right! Serving New York and surrounding areas since 1987. I have developed a fantastic reputation in customer service and fast but neat quality work at a price that won’t break the bank. When you call for a free estimate or just to ask some questions, you get to talk right to me, the owner. I’ll repair your home like it’s MINE!
George's Roofing
(718) 747-4954 www.georgesroofing.com
Serving
4.8 from 38 reviews
For over three decades, George's Roofing has been a family-owned and operated business dedicated to providing top-tier roofing solutions. Based in Astoria, our expertise extends beyond simple repairs to include comprehensive new roof installations, meticulous masonry work, and professional pressure washing services. We take pride in our commitment to quality, ensuring every project, big or small, is completed with the highest level of craftsmanship. Trust our seasoned professionals to protect and enhance your home, guaranteeing exceptional results that stand the test of time.
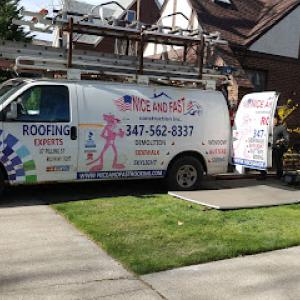
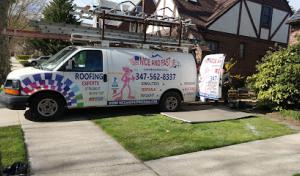
Nice & Fast Construction
Serving
4.9 from 63 reviews
Jaime J Duchi has been working as a local New York roofing contractor installing new roofs, vinyl siding, replacement windows and seamless gutters for over14 years. We have a great reputation for high quality workmanship, and also install roofing products with a lifetime warranty. Your roof protects your home, all of your personal belonings and most importantly your family so don't take any chances, call Nice and fast construction today!
Bushwick Roofing
(718) 285-7841 www.bushwickroofingny.com
Serving
5.0 from 44 reviews
Bushwick Roofing, established in 1988 and conveniently located on Knickerbocker Avenue in Brooklyn, is your dependable source for any and all roofing solutions. Our highly skilled and experienced team of roofing professionals offers extensive knowledge in both residential and commercial roofing, including repairs, replacements, and installations. From traditional shingle roofing to specialized flat roofing systems, we've got you covered. Bushwick Roofing is committed to providing top-notch quality work with free price quotes, a warranty for your peace of mind, and our status as a fully licensed and insured contractor, which ensures reliability and professionalism. Contact us today for a free estimate.
SRT roofing services
(917) 459-8918 www.srtroofingny.com
Serving
4.7 from 92 reviews
srt roofing is a full service roofing company specializing in the installation and repairs of flat roof and shingle roof systems
In this neighborhood, the insurance landscape is active after severe weather, and adjusters expect dated photos, clear evidence of roof age, and thorough contractor documentation. When a claim is filed, your roof's history matters almost as much as the present condition. Collect evidence before and after any event: timestamped photos of the entire roof line, close-ups of flashing, and notes from any previous repairs. If your roof has had past work, be prepared to explain what was done, by whom, and why. Delays and questions from adjusters are common, so organize records now rather than scramble after a storm.
Hail in this period can create subtle but stubborn damage that older Queens roofs miss, especially on asphalt, metal accessories, skylights, and soft flashing metals. A roof that has seen multiple repairs already faces composite vulnerabilities: impact marks can be small, yet they weaken water shedding and speed deterioration of flashings and seals. If you notice granule loss on asphalt shingles, pitting on metal vents, or clouded skylight lenses after a hail event, treat it as a warning sign rather than a routine blemish. In Woodside, the heat of summer compounds these issues by expanding and later contracting metal components, which can loosen fasteners and widen gaps around penetrations. Do not assume a quick rinse and repaint will fix the problem-permanent leakage pathways can develop behind the scenes.
On rowhouse-style buildings with shared walls, wind-driven debris can become a major complicating factor. Debris from a storm can strike the subject roof and then migrate through the party-wall connection, or vice versa, making it hard to tell where damage originated. This ambiguity matters for both diagnosis and responsibility if you share a wall with a neighbor. After a storm, carefully inspect the edge where your roof meets the neighboring structure for fascia damage, displaced shingles, and any signs of overspill where debris could travel. If you find moisture intrusion near shared components, document it promptly and coordinate with your neighbor end-to-end so repairs don't get stuck in dispute or delay.
Start with a careful, daylight inspection from the ground and, if safe, from a ladder with a spotter. Look for lifted shingles, cracked flashing, bent vents, or impressions that align with hail patterns. Note any disturbed sealants around skylights or chimneys. When hiring, prefer a contractor who can present a consistent history of work on similar rowhouse configurations and who can articulate how they will isolate and address potential migratory damage across a shared wall. For a claim, keep a detailed log that ties photos to dates, and have the contractor's written assessment ready to accompany the adjuster's visit. In this climate, timely, well-documented inspections are as important as the physical repairs themselves.
Find local contractors experienced in assessing and restoring roofs after hail, wind, and severe weather events.
Thomas James Roofing & Waterproofing
(718) 416-5255 www.thomasjamesroofing.com
Serving
4.9 from 52 reviews
N.V. & Roman Commercial Roofing Brooklyn
(917) 440-1800 commercialroofingbrooklyn.com
Serving
5.0 from 97 reviews
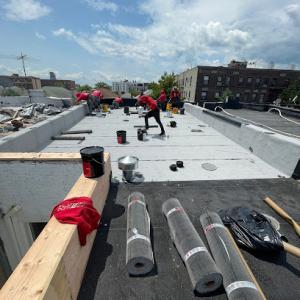
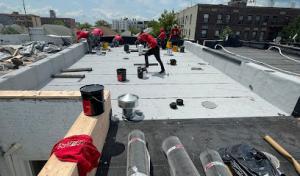
For a typical full roof replacement on a Woodside property, the process runs through New York City permitting rather than a small standalone village pathway. Homeowners should expect Department of Buildings-style paperwork and scheduling rather than informal local approvals. The timeline is real, and the paperwork covers the scope, materials, and structural considerations in a way that aligns with NYC codes and safety standards. Before any work begins, confirm the project scope with the contractor and submit plans that reflect proper drainage, flashing details, and ventilation. Expect communications that outline permit issuance milestones, inspection windows, and any required corrections tied to the approved drawings.
On tight Woodside streets and attached-house lots, scaffold setup becomes part of the practical permitting timeline even when the roofing scope itself seems straightforward. Access constraints matter, and crews often need to work with adjacent properties or street obstruction responses in mind. Sidewalk protection is more than a courtesy; it's a formal requirement that can affect where scaffolding stands and how debris is shielded. The plan should designate cordon points and protective netting to minimize disruption to neighboring sidewalks and pedestrian traffic. If a nearby facade or parapet is shared, verify ownership boundaries and ensure that tie-ins to building components meet NYC's safety expectations. Clear coordination with the permit office helps prevent delays tied to scaffold positioning or material staging.
Projects commonly involve inspection checkpoints after scaffold and material removal and again after installation, with extra scrutiny if structural repairs or flashing upgrades are part of the scope. In practice, you'll likely encounter a post-scaffold or post-demolition inspection to verify that the roof deck is clean, dry, and structurally ready for new layers. A second, final inspection typically occurs after flashing, underlayment, and the roofing material are installed. If any structural repairs are part of the plan, inspectors will want documentation of the repair method, fasteners, and weatherproofing details. Expect a responsive approach from the contractor to address any minor corrections that arise during these checkpoints; the aim is a watertight, code-compliant finish rather than a rushed cleanup.
Woodside's climate-freeze-thaw cycles plus hot summers-puts extra emphasis on flashing upgrades and drainage components. Permits will often require clear evidence that flashing transitions at valleys, chimneys, and wall interfaces are designed for long-term performance under freeze-thaw stress. Drainage paths must be preserved or improved, with scuppers or internal gutters designed to handle heavy summer downpours and sudden winter melt. Inspections specifically target these interfaces, so ensure flashing courses, sealants, and terminations are installed to current code expectations. Coordination between the roofer and the permit inspector helps keep the project on track while addressing Woodside's unique exposure to weather and neighboring structures.
Woodside pricing is notably influenced by NYC labor realities and limited access. Narrow lot widths, attached rowhouses, and buildings that require scaffold coordination rather than simple driveway staging push crews into more complex setups. Scaffolds, hoists, and safety nets add time and material costs, especially on multi-story structures. In practice, this means a straightforward roof replacement can become a staged, multi-day project even when the roof area isn't large. Contractors often price higher to cover staging, material handling, and the coordination needed to avoid sidewalk or street closures that violate tight urban sightlines.
Older Queens homes in this stock feature low-slope sections, parapets, chimneys, and heavy flashing around penetrations. These details account for a larger share of the total job than a simple per-square material price would suggest. Flashing at chimney bases, parapet walls, and transitions to gutters demands careful detailing, proper sealants, and periodic reflash opportunities. In Woodside, the cost to install or repair these features compounds when additional flashing runs or drip edges are required to manage thaw-freeze cycles and summer heat, leading to longer timelines and higher labor hours per square.
Demand spikes after regional wind and hail events tighten scheduling and push pricing higher in Woodside faster than in less dense markets. A single strong storm can align many homes with the same contractor pool, causing delays and rate increases across the block. If a project slides into a compact window, crews may charge premium for accelerated material staging, overtime, or weekend work to meet tight timelines, which is a practical reality in this neighborhood.
When budgeting, consider that low-slope and high-detail roofs often exceed simple per-square material pricing. Concrete or clay tiles and metal may carry higher saw-cut, flashing, and scaffold costs in addition to material rates. Expect significant variation depending on access constraints, the number of penetrations needing flashing upgrades, and the speed at which a chosen contractor can safely mobilize on a crowded midblock. In Woodside, these factors collectively push total project costs toward the upper end of general estimates for the chosen roofing material.
Get a clear picture of your project costs upfront - no commitment required.
Daniel's Roofing:Best roofing contractor Queens/Brooklyn Ny
(917) 204-2906 danielsroofingnyc.com
Serving
5.0 from 78 reviews
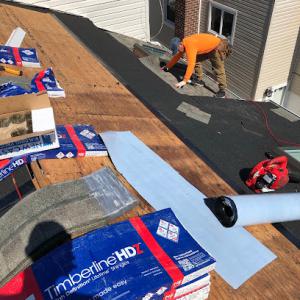
Asphalt shingles remain common, but in Woodside they are vulnerable to accelerated aging from summer UV and moisture retention, especially where ventilation is limited or low-slope transitions hold dampness. In practice, that means shaded roof valleys and balcony or rear-yard dormers can trap heat and moisture, softening edges and inviting algae or blisters. For homeowners, a well-sealed cap and coordinated flashing at transitions to keep moisture out of ceiling joists is essential. Choose shingles with a good UV resistance and consider venting upgrades or soffit improvements to move heat and humidity away from the attic. Regular but targeted inspections around valleys, step-flashing, and intersections with brick or masonry help catch leaks before they broaden.
Slate and tile fit parts of the broader Queens housing stock aesthetically, but their weight and repair complexity matter more on older structures where any deck or framing concerns may trigger added review. If a roof already carries heavy material loads, the local reality is to verify the underlying deck integrity and existing framing before committing to slate or concrete or clay tiles. Repairs are more intricate and often require skilled masons or carpenters familiar with historic detailing. For best results, plan for periodic assessment of cracking at hips and ridges, and ensure underlayment strategies accommodate variable moisture and freeze-thaw cycles that are common in this climate. Aged structures may benefit from partial replacements or reinforcement rather than a full material swap.
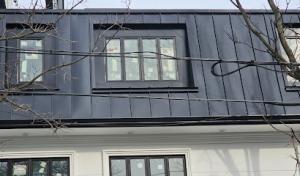
Metal roofing can perform well for shedding snow and resisting some weathering, but in Woodside it is often chosen selectively for certain roof forms or accent areas rather than as a universal replacement across attached-house blocks. Metal panels can handle rapid drainage and heat better, yet the look and acoustics may contrast with traditional rowhouse lines. Consider metal primarily on longer runoff planes, flat planes near parapets, or as an accent element over bay windows or dormers where structural updates already occurred. When chosen, ensure correct fastening over a solid deck, with attention to flashing continuity around chimneys, vent pipes, and transitions to lower-slope sections. Proper sealing at overlaps and penetrations minimizes leaks during winter thaws and summer downpours.
The most popular roofing material in the US. Find pros who install, repair, and replace asphalt shingles.
Chimneys in Woodside are a common source of recurring leaks because many older Queens homes still rely on masonry structures that were not designed for today's storm patterns. The way flashings and counterflashes seal against brick can fail over time, especially where mortar joints crack or the chase overhangs shift with temperature changes. When a chimney is involved, the leak isn't always right above the stain; water can travel along framing and settle at a distant wall, making detection tricky. If you notice damp spots after heavy rains, don't assume the chimney isn't the culprit-moisture may be wending its way through the flashing and into the attic or along a shared wall.
Skylights are a meaningful local service category, and on mixed-slope roofs in Woodside they often become leak points when surrounding flashing is patched repeatedly instead of rebuilt during replacement. A patched seal can temporarily stop a drip, only to fail with the next freeze-thaw cycle or heat spike. When a skylight is aged or poorly integrated with a nearby roof plane, the failure tends to show up as persistent staining at the edges or a damp ceiling that tracks along the rafters. If a skylight needs replacement, consider full, integrated flashing and properly sized kick-out flashing to direct water away from the joints.
On attached homes, leak stains near chimneys and skylights can travel along framing and party-wall lines, making source identification more difficult than the interior stain pattern suggests. Start by inspecting the exterior around the chimney chase and skylight curb for hairline cracks, rusted or lifted metal, and deteriorated sealant. In the attic, look for wet sheathing or darkening along rafters that line up with the suspected ornament or window. When gaps exist at the intersection of multiple roofing elements, it's often the coordinated failure of flashing assemblies that creates the cascade of leaks rather than a single point.
Find contractors experienced in skylight installation, flashing, and leak repairs to bring natural light into your home.
Thomas James Roofing & Waterproofing
(718) 416-5255 www.thomasjamesroofing.com
Serving
4.9 from 52 reviews
In Woodside, cold winters bring freeze-thaw stress that can open up vulnerable flashing laps and adhesive bonds, making late winter and early spring a common time for leak discovery rather than ideal replacement. Planning for replacement when the soil and roof deck are dry and the air is mild helps avoid tearing apart wet, ice-prone conditions and minimizes post-tear-off leaks.
Spring's heavier rain raises the risk of active leaks during tear-off, so homeowners here benefit from planning full replacement for drier, milder windows when possible. If you must schedule a tear-off in shoulder seasons, coordinate with the crew to block vulnerable areas, keep tarps ready, and stage materials away from tree debris and nearby outlets. Summer heat in Woodside can speed asphalt wear and edge lifting, which makes visible deterioration more obvious but can also complicate work sequencing on very hot roof surfaces. If replacing in summer, consider early-morning work sessions and frequent pauses to protect adhesive seams and edge details. For long gaps between inspection and replacement, use temporary waterproofing with high-quality sealants on critical seams to buy time without creating a false sense of security.
Frequent leaks after storms, persistent moisture in attic framing, and widespread edge lifting or curling on low-slope sections signal replacement as the practical path. Cracked flashing, separated seams, and patchwork repairs that fail after freeze-thaw cycles indicate aging membranes that struggle to hold under Woodside's seasonal swings.
Focus on full replacement when conditions are dry and moderate. Align a chosen install window with a stretch of consistent mild weather, and prepare for proper sequencing to protect interior spaces while the deck is opened. Prioritize reliable flashing detail transitions at vent stacks and joints to minimize future leak paths.
New York homeowners in Woodside typically carry standard wind and hail coverage, but settlement timing can depend heavily on adjuster review and the quality of pre-repair documentation. When a claim starts, the insurer will want a clear picture of the roof's condition before the damage, and you should be ready to explain what happened during the storm versus what was aging wear. This neighborhood sees rapid freeze-thaw cycles and hot summers that stress flashing, drains, and asphalt, so adjusters look closely at whether observed damage aligns with recent weather or long-term deterioration.
Start with a concise timeline of events and repairs. Note any prior patching, the roof age as best as you can determine, and how long-lasting leaks have been present. Gather contractor notes or previous inspection reports that document past conditions. A well-paced narrative helps the adjuster separate storm-related damage from chronic wear, which is a frequent issue for the layered repair histories common on rowhouses. Include details about attic condensation, interior stains, or mold that travel along interior paths, as these often map to exterior leak routes seen from the parapets and skylights.
Photo evidence should cover the roof field and extend to parapets, flashing, skylights, chimneys, and potential interior leak paths that are common on attached Queens homes. Take wide shots to show roof geometry and narrow shots to capture flashing seams, rusted boots, or lifted shingles. Include interior photos of ceiling stains or stained drywall in the top floors, especially along walls that align with exterior leaks. Photos taken after a rain event or windstorm are particularly persuasive, as they demonstrate current leakage behavior and help distinguish new damage from preexisting conditions.
Prepare a clean, organized packet: your narrative, a chronological list of repairs, and labeled photos. When the adjuster visits, accompany them to inspect flashing transitions at transitions from roof to parapet and around any dormers or skylights. Be ready to point out areas that were patched previously and explain why those patches may have created new leakage paths. A calm, factual presentation keeps the focus on verifiable conditions and observed damage rather than interpretation.
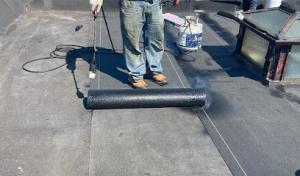
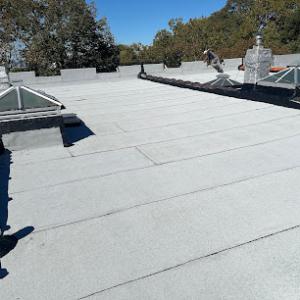
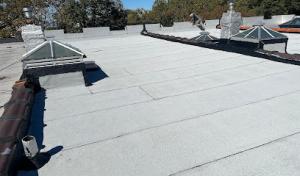
Coatings are a real local service category in Woodside because many homes and mixed-use buildings have low-slope sections where restoration may be considered before full replacement. If the substrate beneath is still solid, a properly chosen roof coating can extend life, seal minor leaks, and buy time between more invasive repairs. The key is to verify that the roof membrane is intact and that the coating system is compatible with the existing material and climate stresses the neighborhood faces.
In this climate, coatings are not a cure for failed flashing, saturated insulation, or structural deck issues. If any of those problems exist, a coating will not restore performance and could mask deeper failures. Before selecting a coating, ensure a reliable assessment shows the core issues are addressed or at least clearly delineated as separate repairs. In particular, check for persistent moisture around penetrations, vents, and where the roof plate meets parapets, as ongoing problems there undermine coating performance.
Dense urban exposure means homeowners should evaluate whether a coating plan addresses parapets, penetrations, and drain details rather than only the open field area. Parapet integrity, kick-out details, and downspout connections must be visually inspected and tested for leaks. Coatings perform best when drainage paths are clear, transitions are reinforced, and all penetrations are properly flashed or sealed prior to coating application. In Woodside, the height and proximity of neighboring structures can influence wind-driven moisture-factor this into the coating choice and application method.
Start with a targeted inspection of the low-slope roof zones, focusing on where water tends to collect and around all penetrations. If the substrate is sound and drainage improvements are feasible, prepare the surface according to the coating system's requirements: clean, dry, and mechanically sound. Plan for a coating strategy that layers protection across the open field with careful attention to edges, parapets, and drain outlets. Regular follow-ups after application help ensure performance through freeze-thaw cycles and hot summer days typical of the area.
Extend the life of your existing roof with reflective or waterproof coatings that protect against UV and moisture.