Last updated: Apr 19, 2026
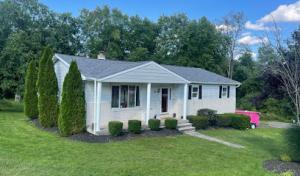
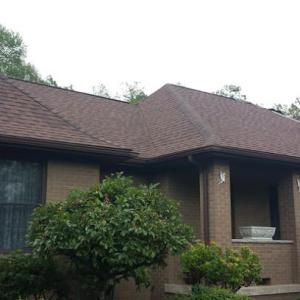
Snow piled against older rooflines and repeated freeze-thaw cycles push water up under shingles and flashing. In Kingston, the Susquehanna floodplain and Wyoming Valley climate mean attic temperatures can swing wildly, creating seepage paths that aren't obvious from ground level. When temperatures rise after a cold snap, meltwater refreezes at the eaves or along roof edges, forming ice dams that trap water behind them. That trapped water often finds its way under layers of shingles and into the soffit and ceiling joists, undermining wood and insulation. The result is hidden rot, mold, and interior staining that can worsen with every thaw. Snow load and winter access issues are a recurring local replacement problem, making leak response and temporary protection especially important. Asphalt shingles are common in Kingston and perform best here when attic ventilation is adequate enough to limit uneven roof temperatures.
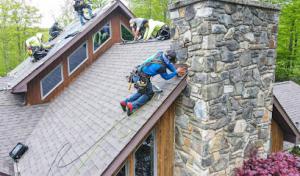
Look for a ring of hardened ice at the eaves, especially after a windy, sunny day that follows a bitter cold night. Inside, keep an eye out for damp patches along walls and ceilings where attic leaks can travel before they become obvious on a ceiling. If you see icicles forming from soffits or gutters that are pulling away, that's a sign the damming water is working its way under roof layers. In rough winter conditions, a small leak can become a big problem after a thaw when you're not paying close attention to every drip. The combination of steep asphalt and older flashing details common in Kingston makes proactive detection and rapid response critical to limiting interior damage and expensive repairs.
When a thaw begins and ice dams are forming, you should remove standing snow from the roof with a roof rake from the ground, never from a ladder on a slippery surface. Focus on the eaves and overhangs first to reduce heat buildup that feeds the dam. If water is actively leaking into the attic, place clean tarps or plastic sheeting over insulation and along affected rafters to limit further intrusion while the weather remains unfriendly. This temporary protection is essential given Kingston's winter access challenges and the typical need for quick, door-to-door responses to rising water issues. Before calling in help, document the damage with photos from the attic and exterior, so contractors can assess quickly and accurately.
Ensure attic ventilation is adequate to keep roof sheeting temperatures uniform, especially over older, steeper asphalt roofs. Poor ventilation creates hot spots that intensify thaw cycles and worsen ice dam formation. In Kingston's homes, attic vents, soffit vents, and ridge venting must work in harmony with existing insulation to maintain a cooler attic and minimize snow melt impact on the roof deck. When replacing or upgrading, insist on correct flashing details around chimneys, skylights, and vent pipes. High-quality step flashing and continuous eave flashing are essential on older stock where failure is most likely. A well-ventilated attic paired with properly installed flashing dramatically reduces the frequency of leaks during Kingston winters and minimizes expensive repeat repairs.
In this area, roof claims surge after a heavy freeze-thaw cycle or a sudden storm rather than a broad insurer market retreat. The warning signs aren't subtle: damp ceilings, musty attic air, and ice buildup along eaves. When a storm hits, the first 24 to 48 hours decide whether a leak becomes a chronic headache or a solvable fix. The pressure from winter ice dams is real, especially on older steep asphalt and slate roofs common in Kingston's housing stock. If any staining or dripping appears after a storm, treat it as an urgent roof issue and act fast to check for entry points.
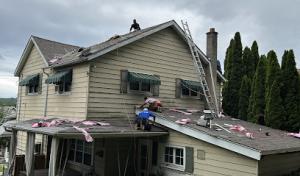
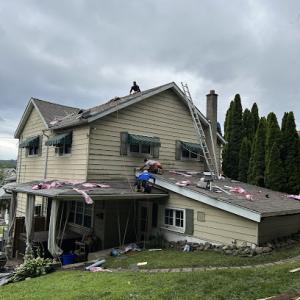
Autumn storms and leaf debris can hide damage and mislead homeowners during a pre-winter inspection. Leaves clog gutters and downspouts, creating heat pockets and backed-up water that freezes at the eaves. A routine fall check can miss hidden failures under shingles or flashing. So, before the first hard freeze, clear debris and visually inspect from a ladder with a buddy present. If you notice pooling water, curling shingles, or lifting slate, escalate to a professional immediately. Kingston local contractor signals show strong demand for emergency repair, storm damage work, and insurance-related roof service, which translates to longer wait times if you delay.
If a leak is detected, minimize interior damage by placing a tarp over the affected area from the outside, securing it with reinforcing boards and water-resistant hemlocks or ropes anchored to the roof or fascia. Do not attempt to seal leaks with caulk or tar from inside the attic; that only postpones the problem and invites mold. Photograph the damage from multiple angles, note the date of the storm, and keep records of any temporary repairs. When the phone call is made, describe whether ice damming, wind-driven leaks, or flashing failure is involved, and specify if attic ventilation seems compromised. Local crews respond quickly to documented emergencies, so preparation can shorten the total repair window.
Choose contractors who clearly outline a staged plan: emergency stop-gap, inspection, and a permanent fix that addresses attic ventilation, proper flashing, and material compatibility for older roofs. The Kingston market shows a high demand for timely storm-damage work, so ask for a written response window and a visible safety plan for both the crew and your property. Ask for references, proof of current insurance, and a detailed diagnostic that includes insulation checks and potential decking damage. A reputable crew will assess ventilation-critical for freezing cycles-and propose practical upgrades that reduce future ice dam risk on steep roofs.
When reporting to the insurer, present the storm's timing, the observed leaks, and any prior issues that could have contributed to the current failure. Keep all communication concise and factual, with copies of photos, dates, and repairs. In this climate, insurers recognize weather-driven claims, but precise documentation helps prioritize rapid response and a solid repair plan. A timely, professional assessment sets the foundation for a durable fix that stands up to another harsh winter.
Find local contractors experienced in assessing and restoring roofs after hail, wind, and severe weather events.
Black Label Builders
(570) 230-4072 blacklabelbuilders.com
355 Market St, Kingston, Pennsylvania
4.9 from 63 reviews
Crooked Ladder Roofing Scranton Wilkes-Barre
(570) 799-9200 crookedladderroofingswb.com
Serving
5.0 from 35 reviews
Black Label Builders
(570) 230-4072 blacklabelbuilders.com
355 Market St, Kingston, Pennsylvania
4.9 from 63 reviews
Contractor specializing in Exterior Renovations, New Construction and Post Frame Buildings. All types of Custom Homes, Barndominiums, Pole Barns, Garage Construction, Commercial and Residential. All types of Roofing Metal, Shingle, tile, epdm rubber roofing. Siding and Window upgrades. Storm damage repairs.
Crooked Ladder Roofing Scranton Wilkes-Barre
(570) 799-9200 crookedladderroofingswb.com
Serving
5.0 from 35 reviews
OUR ROOFING SERVICES Looking for a reliable roofing company to handle your new roof installation? Trust the experts at Crooked Ladder Roofing. With extensive experience and a dedication to excellence, we provide superior roofing solutions designed to protect your property for years to come. At Crooked Ladder Roofing, we know how crucial it is to have a roof that’s both strong and long-lasting. That’s why we use only premium-quality materials for every project. Whether you’re upgrading your home or need a durable roof for your business, our skilled team has the expertise and equipment to deliver outstanding results.
TC Roofing Pros
(570) 715-6460 tcroofingpros.com
Serving
4.9 from 114 reviews
TC Roofing Pros is a Pennsylvania Residential & Commercial Roofing Contractor. Providing work for all of Northeastern Pennsylvania since 2005. The business is Family Owned and Locally Operated. Serves Only Pennsylvania. While Residential, New Construction, and Commercial Roofing are core services, TC Roofing Pros also has been providing superior and affordable metal, siding, and home improvement services..
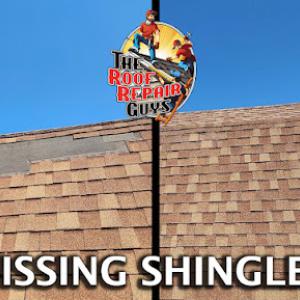
The Roof Repair Guys
(570) 639-7663 theroofrepairguys.com
Serving
5.0 from 244 reviews
The Roof Repair Guys specialize in repairing and replacing all types of residential and commercial roofing systems. Unlike contractors who push unnecessary replacements, we focus on helping homeowners extend the life of their roof until a full replacement is truly needed. When the time comes, our customers already trust us for a quality, stress-free roof replacement. Whether you need a repair or a new roof, we’re here to provide honest, expert service that puts your needs first.
Royal Roofing Systems
(570) 258-8866 www.royalroofnepa.com
Serving
4.8 from 55 reviews
Royal Roofing Systems offers a wide variety of roofing services for your home. We want you to be able to ask us for any roofing style and be able to perform to your satisfaction. That's why we offer a variety of roof installation types with a wide range of options in color, style, and shape to fit your needs and make your home or commercial property look better than it did when you first bought it. Installing a new roof on your home has never been easier with NEPA Roofing. We are here to serve our communities and all of Columbia, Lackawanna, Luzerne, Monroe, Wyoming, and Susquehanna county.
Anthracite Roofing Systems
(570) 430-7238 anthraciteroofing.com
Serving
4.2 from 25 reviews
Affordable expert residential and commercial roofing in Wilkes-Barre, Edwardsville, Kingston, Dallas, Shavertown, Plymouth, Larksville, Nanticoke, Mountain Top, Drums, Honesdale, Waymart, and all of Northeastern Pennsylvania. The best pricing and the areas most recommended and highly rated roofer. Owens Corning preferred contractor. WeatherBond certified EPDM membrane (rubber) installer.Mule-Hide certified EPDM membrane (rubber) roofing installer. High quality metal roofing, and green roofing products installed at reasonable prices. Lifetime guarantees on all of our roof shingle products. Financing though Acorn financing, please check out the financing page on our website. All credit cards accepted.
Drone Roofing
(570) 829-9179 droneroofing.com
Serving
4.7 from 15 reviews
Drone Roofing brings cutting-edge drone technology to roof inspections, giving homeowners and businesses a personal one on one, crystal-clear view of their roof’s condition. You don't even need to climb a ladder. Whether you need a detailed inspection, roof repairs, or a full replacement, we provide high-resolution imaging to assess damage, detect leaks, and ensure your roof is in top shape. Experience a smarter, safer way to handle your roofing needs with our professional drone-powered services.
W.A.C. Home Improvements
266 E Grove St, Kingston, Pennsylvania
3.7 from 3 reviews
General contractor with over 30 years experience in all types of home improvements.
Jeff Ashton Construction
(570) 855-4259 www.facebook.com
Serving
5.0 from 5 reviews
Jeff Ashton Construction, a locally owned and operated business based in Wilkes-Barre Township, Pennsylvania, specializes in all types of commercial and residential roofing, as well as decks, porches, siding, windows, doors, and more. With free estimates and experienced, licensed, and insured professionals (PA# 098039), Jeff Ashton Construction stands ready to serve all of Northeast Pennsylvania's roofing and general contracting needs!
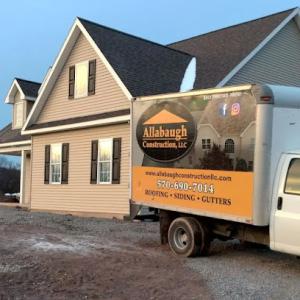
Allabaugh Construction
(814) 330-4897 allabaughconstructionllc.com
Serving
5.0 from 208 reviews
At Allabaugh Construction, we take pride in building, remodeling, and maintaining Luzerne County and Lackawanna County homes. Our business model is built upon providing full service to our clients. We know that a good contractor is hard to come by. We have spent the last 20 years building up our reputation and striving to provide the best to our Pa clientele. Our team has over two decades of industry experience with all facets of home construction, from roofing repairs and replacement to Siding and Gutters.
Northeast Roofing Specialists
(570) 709-1107 www.neroofingspecialists.com
Serving
4.7 from 64 reviews
Northeast Roofing Specialists provide residential and commercial roof replacement, roof repairs and storm damage repair to Luzerne County, PA and surrounding areas.
Bluefield Builders Roofing
(570) 600-4080 bluefieldbuilders.com
Serving
5.0 from 29 reviews
Roofing company specializing in asphalt shingles. Our goal is to provide you with a new roof while maintaining customer convenience and satisfaction.
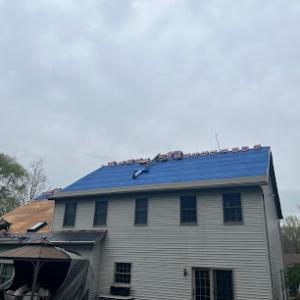
In this part of the Wyoming Valley, winter freeze-thaw cycles and spring thaws push project timelines and driving conditions. That reality tends to push a typical re-roof project into slower, more careful schedules, especially when storms threaten to delay tear-off or installation. Asphalt shingles, the most common choice for standard re-roofs, sit at the lower end of the price spectrum, while heavier legacy materials like slate push the cost much higher. Local pricing spans from asphalt shingles at 350 to 650 USD per square up to slate at 1500 to 3000 USD per square, reflecting Kingston's mix of standard re-roofs and heavier legacy materials. When the calendar rolls into winter or a rough spring, crews may charge more for expedited or weather-constrained work, and scheduling pressure can stretch overall costs.
Asphalt shingles remain the bread-and-butter option for many older homes with steep angles or mixed attic ventilation. For many Kingston houses, a complete asphalt roof typically lands between 350 and 650 USD per square. Steep slopes or additional flashing around skylights, chimneys, or vent stacks can push labor time and cost higher, especially if a careful ice-dam strategy is required. If your home has a southern exposure with better sun, you might shave a little on tear-off time, but snow load and ice dam risk still matter. When budgeting, plan for a modest increase if winter weather compresses the schedule and you end up with longer teardown or a second crew shift to finish before spring thaw.
Metal roofing is less prone to ice dam issues if installed correctly and ventilated, but Kingston's climate can still stress edge details and flashing on older stock. Expect to see prices in the 700 to 1200 USD per square range for metal. Labor is a significant portion of the total with metal, particularly on steeper pitches and older flashing layouts. If upgrading from shingles, you may reduce long-term maintenance costs and improve ice dam resistance, but the initial price premium should be weighed against the expected lifespan and local weather cycles.
Clay tile and concrete tile bring pronounced weight and wind considerations, and Kingston's mix of older housing stock means installers sometimes reframe roof framing to support the load. Clay tile runs roughly 1100 to 2000 USD per square, while concrete tile sits around 800 to 1500 USD per square. Both materials demand precise flashing and underlayment, plus attention to ventilation-issues that become more pronounced on steeper roofs and older homes. If you're moving from a lighter metal or shingle to tile, anticipate higher labor demands due to weight, climbing, and careful alignment to prevent leaks after freeze-thaw cycles.
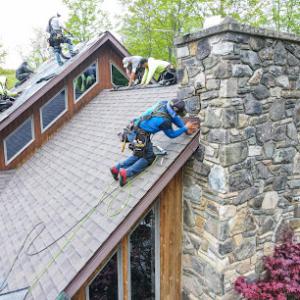
Slate remains the premium option, with prices commonly ranging from 1500 to 3000 USD per square. In Kingston, slate often comes with the need for specialized seam and valley flashing, careful ridge work, and a vented attic to minimize ice dam risk. The labor-intensive nature of slate, especially on older homes with complex roof lines, means crews plan for longer project times and more meticulous detailing around penetrations. If your home already features steep pitch and tight eaves, the project can be lengthy but yields excellent long-term performance in freeze-thaw conditions.
Winter weather, spring thaw, or storm-driven scheduling pressure can slow tear-off and installation, raising costs across the board. A practical approach is to secure a realistic window for work during shoulder seasons or to schedule multiple smaller phases rather than one long, weather-exposed block. For steeper roofs with additional flashing details, expect higher labor costs and a longer timeline, but the payoff is stronger leak control and better performance against ice dams once the project is complete. When comparing bids, weigh not just per-square price but how each contractor plans to manage ice-dam risk, ventilation, and long-term underlayment strategy for Kingston's climate.
Before any full roof replacement begins, you must align with the Kingston Building Department. The city expects a clear plan for material type, venting strategy, and underlayment details that address the area's winter conditions-tell the department how the roof will manage ice dams and freeze-thaw cycles common to the Susquehanna floodplain. Confirm whether your project requires drawings or specifications from a licensed contractor, and verify that the contractor is properly registered to perform roof work in Kingston. Having a detailed scope that covers ventilation, underlayment, and affected drainage paths helps the review move smoothly and avoids delays when the weather shifts.
Submit the permit package to the Building Department with the required forms, site plan, and product specifications. The city's review process focuses on safe installation practices suitable for older housing stock, including appropriate attic ventilation and underlayment choices that protect against Kingston's winter moisture. If the plan shows multiple roof sections or changes in slope, concrete steps or additional bracing may be reviewed more closely. Expect the application to be routed for technical review, where the department checks compliance with local codes and any neighborhood or historic district considerations. Once the review is complete, you'll receive guidance on any required adjustments or additional documentation.
Fee collection follows approval and is typically handled at the Building Department counter or by a dedicated permits desk. Have a clear schedule for the project, since inspections are tied to specific milestones and weather-related readiness. After payment, the permit is activated, and the clock starts on inspection windows. It helps to line up all material deliveries and the contractor's crew schedule with those windows, so exposure of rough-in or underlayment doesn't linger in winter conditions longer than necessary.
Kingston uses staged inspections to verify critical elements: roof underlayment integrity, proper attic ventilation and intake/exhaust balance, and the actual shingle installation. Expect a first inspection once underlayment is laid and flashings are in place, confirming it's weather-tight enough to withstand freeze-thaw cycles without leaking. A later inspection focuses on ventilation-ensuring soffit, ridge, and any powered ventilation meet code and local best practices for older homes with complex rooflines. A final inspection occurs after shingles are installed, with attention to nail patterns, sealant details around penetrations, and edge quality to prevent ice dam issues. Weather can push inspection timing; snow, thaw, or rain may delay checks or require temporary protection to keep exposed areas dry between stages. Coordinate closely with the inspector and contractor to reschedule promptly when winter conditions threaten progress.
Insurers in northeastern Pennsylvania typically want photos, proof of roof age, and a damage assessment before adjusting a roof claim. In Kingston's older housing stock, those requests come with added nuance: a clear record helps separate what happened in a recent freeze-thaw event from long-standing wear on steep asphalt and slate surfaces. Take wide exterior photos that show eaves, ridges, valleys, and any visible leaks inside attic spaces or ceilings. Include dated pictures of ice damming and any active staining or signs of moisture intrusion near soffits and chimneys. A simple, dated map of the roof's sections helps an adjuster understand where damage concentrates, especially when multiple roof planes meet at awkward angles over narrow gutter lines. Keep a dated log of events, noting storms, heavy snowfall, and temperature swings, since the timeline can matter when the carrier reviews cause and scope.
Claim outcomes in this region are often reduced when carriers classify part of the condition as normal wear instead of storm damage. In Kingston's mix of steep asphalt and slate, a claim might be narrowed if the evaluation emphasizes preexisting deterioration in slopes that already show cracking, curling, or mineral granule loss. That's why independent assessments from a reputable local contractor or a licensed roofer who understands freeze-thaw cycles are valuable. Ask for a written damage assessment that clearly distinguishes new impact from post-installation wear. If a portion of the roof is deemed maintenance or normal wear, you'll want to see how the adjuster documents the remaining area that is tied to the recent weather event. The goal is to secure coverage for the true storm-driven portion without letting routine aging dilute the claim.
Because policy language and riders vary by carrier in this market, Kingston homeowners need to compare actual coverage terms before approving replacement scope. Read the fine print on exclusions and endorsements that might affect steep-slope or slate sections differently from asphalt. Prepare to provide evidence that supports the extent of immediate need-like collapsed flashing, safety concerns from ice damming, or interior moisture that threatens structural components. If there's any ambiguity, request a written explanation from the insurer detailing what is considered storm-related versus wear, and request a revision or rider clarification before authorizing a full roof replacement. In practice, clear, localized documentation and honest conversations with the adjuster help prevent surprises when the claim moves from desk to payout.
Connect with contractors who help homeowners navigate the claims process from damage assessment to final approval.
Black Label Builders
(570) 230-4072 blacklabelbuilders.com
355 Market St, Kingston, Pennsylvania
4.9 from 63 reviews
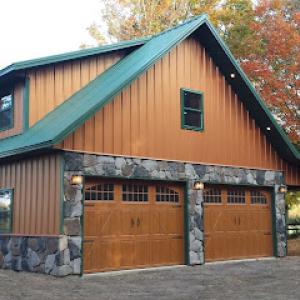
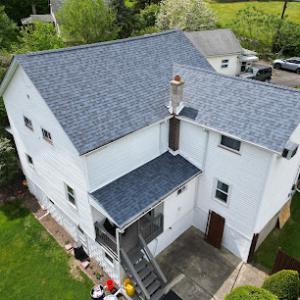
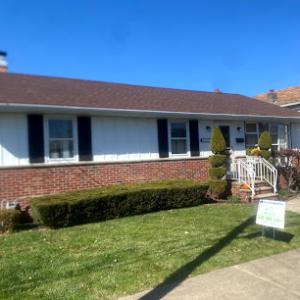
Kingston's dominant roofing materials include asphalt shingles, metal roofing, clay tile, concrete tile, slate, and fiber cement shingles. In winter, the freeze-thaw cycle and ice pressure over the Susquehanna floodplain make ventilation and proper deck condition crucial. Choose a material with proven performance in snowy, fluctuating temperatures and plan for a roof that breathes with the attic.
Asphalt shingles are a practical local fit because they handle Kingston's climate well when ventilation is designed correctly. Start with a well-sealed underlayment and a balanced soffit-to-ventilation setup to move cold air under the roof deck. In older homes, inspect the deck for moisture damage before re-roofing and consider upgraded attic vents or a ridge vent to prevent premature ice dam formation. Proper sealing around chimneys and skylights also reduces leaks during thaw cycles.
Slate and tile appear in the local material mix, which matters in Kingston because heavier systems and older structures require attention to deck condition and replacement complexity. Before installing, verify the load-bearing capacity of the existing framing and consider temporary or permanent reinforcement if the structure isn't designed for heavy weight. Inspect gutters and downspouts for efficient snowmelt drainage; clogged or undersized lines increase ice dam risk on heavier roofs.
Fiber cement shingles offer a middle ground in weight and durability, with good resistance to freeze-thaw when paired with solid ventilation. Metal roofing presents excellent snow-shedding properties but needs careful edge flashing and valley maintenance to avoid leaks. For any metal or fiber cement choice, ensure roof penetrations-vents, skylights, and chimneys-are integrated with precision to minimize seam failures during winter.
No matter the material, routine checks after heavy snows and thaws pay off. Focus on deck integrity, vent performance, and consistent fastening patterns. A well-ventilated, properly flashed roof reduces the chance of ice dams and extends the life of older structures common in the area.
Explore specialists in steel, aluminum, and standing seam metal roofs built to last 50 years or more.
Black Label Builders
(570) 230-4072 blacklabelbuilders.com
355 Market St, Kingston, Pennsylvania
4.9 from 63 reviews

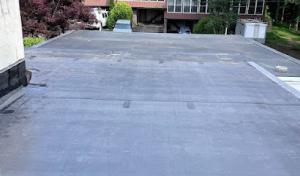
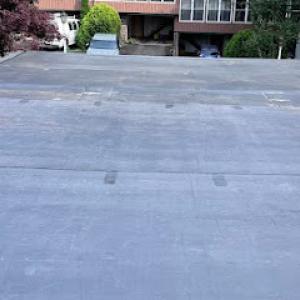
In Kingston, flat and low-slope roof sections behave like a pressure valve during thaw cycles. Local contractor signals show meaningful demand for flat-roof work, and that reality means leak risk is real even when the rest of the house looks solid. When snowmelt and spring rains arrive, improper drainage details or aging underlayment can fail first on these surfaces. If you notice water staining near parapets, pooled water after a rain, or damp patches that don't quite dry, treat it as a warning flag rather than a nuisance. The combination of freeze-thaw action and aging membranes can accelerate leakage in ways a steep roof rarely shows.
Spring rains in Kingston expose weaknesses in underlayment and drainage details on low-slope sections. The water can travel longer paths under the membrane before finding a seam or edge, so you may see interior dampness far from the obvious leak source. A careful inspection after a thaw, not just after a heavy storm, helps catch gaps, punctures, or edge failures before they start dripping through ceilings. Pay attention to flashing at transitions from flat to vertical surfaces; these junctions are common failure points when the roof has settled or expands with temperature swings.
Skylight repair appears often enough in local contractor offerings to suggest recurring flashing and penetration issues in the area's housing stock. A skylight that leaks may point to compromised flashings, deteriorated curb packs, or worn sealant around the frame. If you notice condensation between panes, weeping around the curb, or damp spots on the ceiling beneath a skylight, treat it as a warrantable spot repair rather than a full roof overhaul. Regular checks after heavy rains can prevent small leaks from becoming expensive rebuilds.
Look for standing water near flashings, parapets, and edge details after rain. Inspect scuppers and interior gutters for clogs, especially when a thaw follows a long dry spell. Confirm that roof penetrations-vent pipes, skylights, and exhausts-have clean, intact seals and flashing that isn't torn or sunken. If a low-slope section pops up in your annual check list, address it promptly rather than letting issues linger through another freeze. Kingston's winter rhythm rewards proactive care over waiting for visible trouble.
Find specialists in TPO, EPDM, and built-up flat roofing systems for residential and commercial properties.
Black Label Builders
(570) 230-4072 blacklabelbuilders.com
355 Market St, Kingston, Pennsylvania
4.9 from 63 reviews