Last updated: Apr 19, 2026
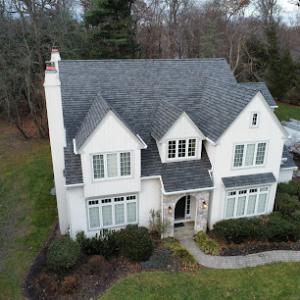
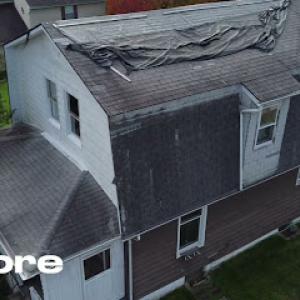
Macungie's humid continental climate brings cold winters with snow accumulation followed by thaw cycles that can back water up at eaves and around flashing transitions. When ice damming forms, meltwater has nowhere to go but under shingles, along soffits, and into attic spaces. That pressure is real, and it shows up as hidden leaks that can ruin ceilings, trim, and insulation during the first warm days after a long cold snap. If a home's roof detail is aging or undersized for the season, the risk jumps significantly. The moment you notice a persistent drip near a chimney, vent, or ridge line, you're in the warning zone.
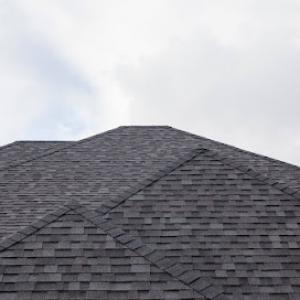
Seasonal snow load and ice are identified local roof stressors, making winter edge details and attic ventilation more important here than in milder Pennsylvania markets. Edge detailing is not cosmetic here; it's a line of defense that keeps meltwater moving to proper drainage paths. In practical terms, that means: check the outer roof edge for clean, well-seated ice shields, ensure flashing around chimneys and stack vents is continuous and sealed, and verify that roof-to-wall transitions have robust, properly integrated sealant and counterflashing. If eaves appear to sit in shadow longer into spring, or if ice often piles up along gutters, you are dealing with a setup that needs attention before the thaw cycle intensifies.
Attention to attic ventilation becomes a local priority. Inadequate ventilation creates warm attic zones that melt snow from the inside, feeding ice dams from above. You should look for a clear path for air to reach soffits and ridge vents, with baffles in place to maintain that channel even in tight attic spaces. Pair ventilation with proper insulation to minimize warm attic air that travels to the roof deck. In homes with older insulation or gaps around access hatches, consider upgrading to reduce seasonal heat leakage. The goal is a cold roof deck during the heart of winter, so meltwater travels down the roof rather than forming dams at the eaves.
Spring thaw in Macungie raises leak risk during active replacement projects, so timing tear-offs around late-winter and early-spring weather matters locally. If a roof is due for replacement, plan for the project to begin after the hardest freezes have passed but before days get consistently warm and wet. Temporary watertight measures-such as carefully managed tarps, protective underlayment, and staged flashing-can limit damage as crews move from one section to the next. Communicate window expectations with the roofing team so that critical edge work and flashing transitions receive priority during the first warm spells.
Inspect gutters and downspouts for ice buildup and ensure they route water away from the foundation. Clear snow from the roof edge using a plastic roof rake, taking care not to damage shingles. Verify flashing at valleys, chimneys, and transitions is continuous and sealed, with extra sealant or metal detailing where needed. If you notice staining on ceilings after a thaw, call a local roofer to evaluate possible attic leaks and to upgrade edge details and ventilation before the next cold snap hits. Time and attention now save bigger repairs later.
In this Pennsylvania market, wind, hail, and rain are the claim drivers homeowners are most likely to face rather than hurricane-related loss patterns. That means Macungie homes tend to attract damage from seasonal wind gusts, hail strikes on asphalt shingles or metal panels, and roof leaks tied to heavy spring rains and rapid freeze-thaw cycles in winter. The roof proof plan should assume a somewhat tight underwriting climate after a claim review, especially for older roofs, so preparation matters. The goal is to document and demonstrate the roof's condition, the work plan, and a clear history of prior damage to support a smooth claim process.
Before any repair work starts, assemble a concise photo timeline that shows the roof from multiple angles and includes close-ups of flashing, vents, and any existing damage. Take clear images of roof edges, valleys, intersection points, and areas where ice damming or water intrusion has been observed. Keep dated notes on the weather conditions that accompanied the damage and any structural concerns seen from the attic or upper floor. When contacting an insurer, present a short, organized portfolio that covers the pre-damage state, the plan for remediation, and post-work results. Insurers serving Macungie typically want photo documentation of existing conditions, the work plan, and prior damage history before and after roof work, so this approach reduces back-and-forth and helps secure timely decisions.
If a storm event is followed by a claim, ensure the file captures not only the visible damage but also contributing factors like attic insulation levels, ventilation, and roof-to-wall flashing where applicable. In Pennsylvania, winter ice damming can compound leaks even after a storm, so notes about freeze-thaw cycles, snow load, and any ice buildup near gutters or eaves should be included. The file should also record any remedial steps taken between events-such as temporary tarping or repairs to flashing-that illustrate proactive management. For older roofs, include evidence of prior repairs or service history, since underwriting scrutiny tends to tighten with age, potentially affecting replacement timing decisions.
A practical approach is to align the repair plan with the insurer's expectations for documentation and quality. Share the work plan and the anticipated sequence of repairs, including any ventilation improvements or flashing upgrades that address wind-resistance concerns. Ensure the contractor provides a written scope that explicitly covers replacement of damaged roofing sections, reinforcement of edge details, and any attic/ventilation improvements designed to preempt ice damming and freeze-thaw leakage. The insurer will look for clarity on how the remediation mitigates the risk of future damage, so tie the plan to specific climate challenges found in the Lehigh Valley: winter freeze-thaw cycles, heavy rainfall, and seasonally strong winds that stress roof edges.
Older roofs can face tighter underwriting scrutiny in Pennsylvania even though statewide insurer pullbacks are not the norm, which affects replacement timing decisions for Macungie owners. To navigate this, present a repair path that distinguishes between temporary fixes and durable, code-upgrade-level replacements. If a full replacement is warranted, document why patching will not provide a long-term solution given the roof's age, prior damage history, and the likelihood of recurring wind or ice dam-related leaks. By framing the case around durable mitigation-proper ventilation, robust flashing, and wind-resistive assemblies-the claim stands a better chance of aligning with underwriting expectations and achieving a smoother settlement.
Connect with contractors who help homeowners navigate the claims process from damage assessment to final approval.
Advance Exterior Solutions of Macungie
(484) 601-5137 advanceexteriorsolutions.com
Serving
5.0 from 26 reviews
Vera Roofing
(484) 239-0024 www.veraconstructionpa.com
7588 Crane Xing, Macungie, Pennsylvania
5.0 from 85 reviews
Locally owned and operated, Vera Construction is the go-to company for all your residential siding, gutter, & roofing needs. Our roofing installers also specialize in storm damage assessments and repairs for residential communities around the Lehigh Valley. Additionally, we’ve built a reputation in providing superior construction and solid results in every project we complete. So look to our certified and trained crew to bring you the best in exterior home improvements.

Lehigh Valley Roofers
(610) 597-8019 www.lehighvalleyroofers.com
6811 Spring Creek Rd, Macungie, Pennsylvania
4.9 from 164 reviews
Lehigh Valley Roofers Provides Residential and Commercial Roof Replacement and Repair Services to All of the Lehigh Valley and Surrounding Areas. Call Today for a Free Estimate! In business since 2016. Financing available.
East Coast Roofing Systems
(484) 445-9387 eastcoastroofingsystems.com
Serving
4.9 from 47 reviews
East Coast Roofing Systems is a premier residential roof repair and replacement company serving Southeastern Pennsylvania. Since our inception, We have strived to give the homeowner a breath of fresh air in the construction space. Providing seamless communication, service and an overall experience that trumps all others. Roofing as an Industry has become antiquated due to lack of technology, customer service and quality. Our mission at East Coast Roofing Systems is to provide a modern approach, with the ultimate goal of providing an exceptional roof inspection, repair, or replacement experience unmatched by anyone. Contact your reliable Southeastern Pennsylvania roofing, siding, window, and gutter contractor for a free estimate!

Joe Costa, Seamless Aluminum Gutters
Serving
4.8 from 11 reviews
Getting the best gutters PA has to offer is very important for the sake of your house as a whole. You will need to make an effort to find gutters that are going to last a long time and function properly so you can preserve the overall quality of your house. The quality of the gutters you get will determine how your foundation holds up over the years, which is why it's so important that you take the time to look for the right ones.
East Penn Roofing
(610) 871-5677 www.eastpennroofing.com
Serving
4.9 from 227 reviews
Located in the heart of Emmaus, PA, East Penn Roofing has been providing exceptional roofing services to residential and commercial clients for 27 years. Specializing in various roofing systems such as shingles, slate, metal, EPDM, TPO, and copper, our skilled roofers deliver precise installations and repairs. Additionally, we offer gutter systems and gutter guards to complement your roofing needs, ensuring the longevity of your property's exterior. Experience the excellence of East Penn Roofing and discover why we have earned a reputation for excellence in the Lehigh Valley area.
ROOFX Roofing
Serving
5.0 from 139 reviews
Roofx Roofing & Siding, nestled in the heart of Allentown, PA, is your premier destination for top-tier roofing and siding solutions. With a commitment to excellence, we specialize in a comprehensive range of services to safeguard your property. Our adept team excels in seamless roof replacements, expert roof repairs, and cutting-edge metal roofing installations. For businesses seeking robust solutions, we provide specialized commercial roofing services tailored to industry standards. At Roofx, we blend expertise with innovation, delivering unparalleled craftsmanship to meet all your roofing and siding needs. Trust us to elevate your property's protection and aesthetic allure with precision and care. Contact us today!
Advance Exterior Solutions of Macungie
(484) 601-5137 advanceexteriorsolutions.com
Serving
5.0 from 26 reviews
Advance Exterior Solutions of Macungie is a roofing and siding company based out of Macungie, Pennsylvania, USA. With our honesty, trustworthiness, and attention to detail, we have been helping Pennsylvania homeowners with their roofing and siding problems since 2012, powered by management who has been in the construction business for over 25 years. As specialists in residential roofing and siding services, we are dedicated to providing customer service that is second to none. Whether you have a new construction project or it is time for repairs, we offer the exterior services you need. We stay in constant communication with our customers until the job is done. If you have questions or special requests, just drop us a line.
DryMaster Roofing
(781) 281-8103 drymasterroofing.com
Serving
5.0 from 12 reviews
At DryMaster Roofing, we offer a comprehensive range of roofing services to ensure your home is well-protected and looking its best. Whether you need a new roof installation, prompt repairs, thorough inspections, or routine maintenance, our team of roofing experts is here to deliver excellence at every step. We take pride in using top-tier materials and a meticulous approach that guarantees the longevity and durability of your roof. Our commitment to superior craftsmanship and customer satisfaction sets us apart.
Matt Banes Roofing
(267) 377-0703 www.mattbanesroofing.com
Serving
4.9 from 24 reviews
MB Roofing is a family owned business established in 2000; we are known as MB Roofing & also Matt Banes Roofing! Matt has been roofing most of his life - along with bringing his daughter Jean into the business. No job is too big or small and our friendly, skilled staff will be happy to help you with a long lasting solution; whether its a roof replacement or roof repair!
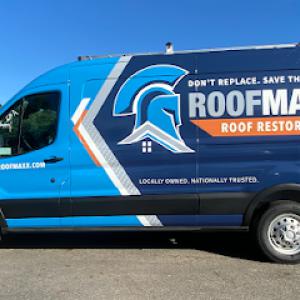
Roof Maxx of Bethlehem, PA
Serving
5.0 from 63 reviews
Roof Maxx offers a revolutionary roof restoration service, providing an eco-friendly, cost-effective solution for extending your roof's life. Specializing in roof rejuvenation, our innovative treatment revitalizes aging shingles, ensuring they remain flexible and waterproof. Ideal for roofs over 7 years old, Roof Maxx's unique formula penetrates deep into shingles, restoring their original functionality. This process not only enhances roof durability but also postpones the need for expensive replacements. Our professional roof maintenance services further protect your investment, keeping your roof in top condition. Trust Roof Maxx for sustainable, efficient roofing solutions.

Home Genius Exteriors
(267) 930-2956 homegeniusexteriors.com
Serving
4.8 from 43 reviews
Elevate your home with Home Genius Exteriors, setting the standard in Allentown by offering full-service solutions for roofing, siding, windows, doors, gutters and insulation. We support our veterans and communities by supporting local and national charitable organizations through our Home Genius Cares initiative. With an Owens Corning® Platinum Preferred designation, we also offer flexible payment options, industry leading warranties and a wide range of premium products tailored for your home. It’s time for a different experience, entrust your next home project to a genius and schedule your free inspection today!
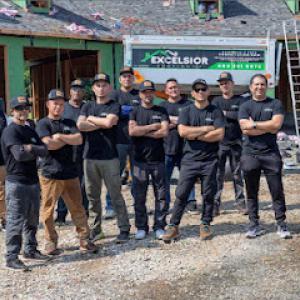
Excelsior Roofing
(484) 201-8073 www.roofingbyexcelsior.com
Serving
5.0 from 21 reviews
Excelsior Roofing is a family-owned, fully licensed and insured Pennsylvania roofing contractor serving homeowners and businesses since 2011. We specialize in residential and commercial roof installation, roof replacement, roof repair, roof framing, shingle replacement, and gutter services. Our GAF- and Owens Corning-certified roofers deliver quality craftsmanship, transparent pricing, and accurate on-site estimates. We proudly serve Bucks, Lehigh, and Northampton Counties, including Allentown, Bethlehem, Easton, Emmaus, Quakertown, Nazareth, Center Valley, Macungie, and surrounding areas. With 100+ five-star reviews, strong warranties, and dependable service, Excelsior Roofing has Pennsylvania covered.
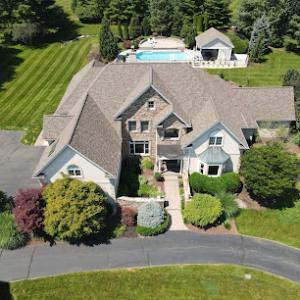
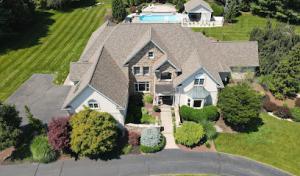
Macungie homeowners commonly choose among asphalt shingles, metal, clay tile, concrete tile, slate, and fiber cement shingles. The local cost landscape reflects this mix: asphalt shingles generally run roughly 350 to 650 USD per square, metal roofing 700 to 1300 USD per square, clay tile 900 to 1800 USD per square, concrete tile 900 to 1700 USD per square, slate 1200 to 3000 USD per square, and fiber cement shingles 520 to 900 USD per square. In practice, many houses here replace with standard systems while some upgrade to heavier premium packages, especially when the roof has a history of ice damming or unusually high winter loads.
The Lehigh Valley's older housing stock, which shows up in Macungie, often demands more robust installation for tile and slate. Structural loading, specialized flashing, and precise wind-resistance detailing become relevant as a homeowner considers long-term performance. That means costs in this area can tilt toward the upper ends of the local ranges when slate or ceramic tiles are involved, or when a heavier system is paired with reinforced underlayment. Even for asphalt or fiber cement, a careful assessment of attic ventilation and ridge and drip-edge flashing impacts overall price, because the winter season exposes weaknesses that a standard install might miss.
Winter damage and clustered storms can tighten contractor schedules in this market. When a repair or full replacement is needed after the cold snap, be prepared for quicker decision windows and potential scheduling delays. In Macungie, the price pressure from this tightening tends to push bids toward the higher end of the local ranges, particularly for premium systems or where expedited service is requested. If a project must be moved up due to ice damming or freeze-thaw cycles, expect more limited options and longer lead times for material delivery and crew availability.
Start by listing priorities: wind-resistance, heat management, and how aggressively ice dams have appeared in past winters. If the budget allows, compare standard versus heavy premium configurations side by side, with emphasis on flashing quality and attic ventilation. For tile or slate, insist on structural verification and a mock-up of flashing transitions around chimneys and skylights. For asphalt or fiber cement, confirm shingle weight, underlayment, and edge details. With winter looming, build in a contingency for potential scheduling shifts and material lead times to avoid a rushed project that could compromise winter dam prevention and long-term durability.
A full roof replacement in Macungie typically requires a permit issued through the borough building department rather than being handled informally. That process is not something to treat as optional or purely administrative; it is a practical step that can affect timing, approvals, and the way the project interacts with winter conditions. Before any ladder work or material orders, confirm the project scope with the permit office and secure the necessary approvals. Missing or delayed paperwork can stall project progress and complicate later inspections, especially when winter weather puts extra stress on a roof.
Macungie requires an on-site inspection after installation so homeowners should expect the finished roof to be reviewed before considering the job fully closed out. This inspection is not merely a formality-it is the final check that confirms everything is installed to code and to borough expectations. Plan for potential touch-up work if inspectors identify gaps between the installed system and the approved plan. The timing of this inspection can be influenced by weather, crew scheduling, and how quickly the site is prepared for review. Leaving debris or unfinished details can slow the closure process and extend the window of exposure to winter conditions.
Local permit review and inspection attention commonly centers on ventilation, flashing details, and compliance with wind-resistance requirements. In winter and during freeze-thaw cycles, proper ventilation is critical to prevent ice damming and interior leaks. Expect inspectors to scrutinize ridge and soffit venting, attic air sealing, and any penetrations around chimneys, skylights, and exhaust vents. Flashing around valleys, along eaves, and at transitions to walls must be integrated with both the roof surface and the roof-to-wall interface. Wind-resistance requirements matter as well, given exposure to Nor'easter winds and local snow loading patterns. Ensure that fasteners, underlayment, and flashing are installed to the borough's specifications, and that any retrofits or repairs align with the approved plan. A careful, transparent conversation with the contractor about how ventilation, flashing, and wind-resistance are addressed can reduce last-minute surprises during the inspection.
When you compare roofs across town, asphalt shingles stand as the baseline, but the mix of options is richer here than in many neighboring towns. Metal roofs bring durable wind resistance and faster shedding of snow, while slate, clay tile, concrete tile, and fiber cement shingles each contribute a distinct look and performance profile. The Lehigh Valley's winter freeze-thaw cycles and summer humidity create patterns of wear that show up differently depending on material. Sealant aging, flashing performance, and the ability to handle repeated freeze-thaw stress all influence how long a roof will keep water out and energy bills in check. In practice, the right choice balances appearance, maintenance needs, and how these climates affect joint details and roof deck health over time.
Asphalt shingles remain the baseline for most homes, offering straightforward repairability and a familiar install process. Metal roofing appeals where you want excellent wind resistance and rapid snow shedding, but it can require careful flashing details at intersections and gutters to prevent ice dams. Slate and clay or concrete tiles deliver a long life and a premium look; however, they come with substantial weight and the need for a properly reinforced structure, plus access to skilled labor for installation and repairs. Fiber cement shingles provide a middle ground in weight and durability, with simpler repair options than natural stone or tile. In this market, homeowners should weigh the labor availability for repairs on heavier systems and the long-term performance under Macungie's winter conditions, especially regarding water intrusion and seasonal expansion.
Ice damming remains a central concern for homes with any roof type in this region. The mix of sustained winter snow and occasional warm spells creates melt and refreeze cycles that stress sealants, underlayment, and flashing. Pay particular attention to roof deck ventilation, attic insulation, and proper drip edge placement, as these elements influence where ice tends to creep under shingles or tiles. Tile and slate setups demand careful attention to fastener integrity and flashing at hips, valleys, and roof-to-wall transitions to reduce potential leak paths during freeze-thaw events. For asphalt, metal, and fiber cement, the emphasis shifts toward ensuring sealants and flashing are in good condition and that any penetrations are watertight before heavy snow seasons.
The presence of slate and tile in the local market means you must consider weight load when evaluating structure and potential retrofits. Repairability becomes a factor for aging installations; slate and concrete or clay tile repairs typically require skilled specialists and careful matching of materials. In contrast, asphalt and many metal systems are more forgiving for patches and spares but still demand attention to flashing and ventilation to prevent wind-driven or ice-related leaks. Planning ahead with a trusted local roofer who understands winter performance, access to the right materials, and the realities of Macungie's housing stock will help keep a roof resilient through the region's seasonal shifts.
Flat and low-slope roofing is an active specialty in the Macungie contractor market, even though the town is primarily residential. Additions, porches, garages, and mixed-use buildings often rely on these transitions, so it pays to treat low-slope sections as an integral part of the roof system, not an afterthought. The region's snow retention and spring rain make drainage and seam integrity especially important on low-slope sections compared with the steeper main roofs common in the area.
When evaluating an addition, start with the interface between the main roof and the low-slope transition. Look for signs of subtle staining or dark streaks along the edge, which can indicate slow leaks that linger after a melt. Pay close attention to drip edges, parapet connections, and any existing flashing at the transition; these are common failure points in Macungie's winter cycles. Gutters and downspouts should be checked for proper slope and clear flow, since clogging is a frequent contributor to ice damming on exposed low-slope sections.
Choose materials that handle freeze-thaw cycles and wind exposure well, with robust seam systems and dependable fasteners. In addition, consider a roofing assembly that includes a vapor barrier, proper insulation, and a continuous drainage plane behind the low-slope surface. For additions, ensure flashing profiles are compatible with the adjacent main roof material and that transition membranes extend well over the seam to prevent water from lingering at the joint during rapid snowmelt.
During installation, verify that all seams are fully sealed with industry-grade seam tapes or cements rated for low-slope use, and that the flashing at the transition is mechanically secured and properly integrated with the main roof flashing. Rely on wind-rated fasteners and confirm that material laps face the expected drainage direction. In Macungie, installers often add secondary drainage paths or scuppers to keep meltwater from pooling near the transition.
Create a routine that focuses on the low-slope transition at least twice per year, plus after heavy storms. Inspect for standing water, oversaturated insulation, and any signs of moisture intrusion around the seam. When ice damming is evident, address the edge and flashing promptly, as lingering water can penetrate into the structure over time. Regularly clean debris from around the transition and ensure that any penetrations through the roof are sealed to resist winter-driven leaks.
Find specialists in TPO, EPDM, and built-up flat roofing systems for residential and commercial properties.
Winter in Macungie brings snow load and ice dam risk, shaping every homeowner's decision about replacement timing. If a roof is opened during the heart of a winter thaw or after a heavy snowfall, added stress from thawing ice can complicate repairs and trap moisture inside. Cold snaps followed by rapid warming push shingles and underlayment to their limits, increasing the chance of leaks once the work is finished. A replacement started in mid-winter should be paired with staged removal and careful insulation of the attic to minimize interior condensation and to reduce the chance of damming on late-season melts.
Spring thaw and rainstorms in this area raise the stakes for timing a roof replacement correctly. Opening the roof at the wrong moment can leave upper structures exposed to lingering moisture and new leaks during a season when rainfall is common. If the roof is opened too early before decks and sheathing can dry, or if ventilation and flashing are not fully addressed before rain events, the interior may experience rapid moisture movement. Planning a replacement for a window when outdoor humidity is moderate and soil conditions are dry helps ensure the roof deck can dry properly between stages.
Hot, humid summers accelerate material aging and affect sealants used around penetrations and flashing. Scheduling repairs during peak heat can compromise sealants that need cooler temperatures to cure correctly, while a full replacement in the heat may stress underlayment and adhesives. Consider aligning work with cooler mornings or overcast stretches, and ensure attic ventilation is brought up to spec so that interior spaces stay dry as outdoor temperatures rise.
Autumn wind and storm activity in the area can damage shingles with debris impacts, making fall a common repair season and a period of weather-related urgency. If replacement is delayed into late autumn, a single storm could disrupt progress or expose newly installed components to rain before winterizing. A well-timed autumn project prioritizes secure shingles, robust attic ventilation, and flashed transitions to withstand early winter conditions.
In this borough, active leak calls and winter storms are a regular reality, so you want a roofer who prioritizes rapid response and measurable remediation history. Start by asking how quickly they can assess after a rain or thaw-and-refreeze event and whether they have a track record of complete re-roofs when a full replacement is warranted. Local customers value crews that commit to on-site timelines and clear, actionable plans for both temporary mitigation and long-term protection against ice damming.
One of the strongest signals you'll notice in Macungie is the expectation that cleanup is included. A reputable contractor treats the jobsite like you would your own home: gutters swept, debris contained, and nails picked up to prevent punctures on driveways or lawns. When you tour past jobs, check how neatly the crew leaves the yard and how they manage drip edges, flashing, and wind-driven debris. If cleanup isn't baked into the quote, you're likely dealing with a shop that prioritizes price over property protection.
Families here often seek long-established, family-owned firms that emphasize value over the latest gadgetry. You'll hear about crews with longstanding local roots, a steady workforce, and a reputation for fair pricing. Ask for a homeowner reference who had a storm-related leak repaired and another who completed a full roof replacement. The answers tell you whether the contractor consistently delivers secure ventilation, sound flashing, and wind-resistance-key factors during freeze-thaw cycles and heavy snow.
Connect with specialists in the installation and restoration of natural cedar shake and shingle roofs.

In Macungie, winter's freeze-thaw cycles and the frequent wind-driven storms can test roofs in ways that insurers notice. Damage often shows up as interior leaks after a heavy thaw or a sudden hail strike, not as dramatic coastal storm scenes. Keeping a careful record helps policy decisions move faster and reduces the chance that a future claim is disputed for missing history.
For claims, gather date-stamped photos of every roof surface, but prioritize problem spots. Show creased or curled shingles, bent or dented metal components, displaced flashing around chimneys, vent pipes, and edges, and any water entry points on ceilings or attic walls. Interior evidence matters just as clearly: stained ceilings, warped sheathing, and any signs of attic condensation. Retain photos of prior repairs, including the date, what was fixed, and who did the work. This history helps carriers understand the roof's condition trajectory and supports the narrative of ongoing vulnerability during winter cycles.
Because wind, hail, and rain are the main local claim triggers, document damage patterns that align with those events rather than imagining coastal storm scenarios. Focus on how wind moved shingles, how hail impacts appear on metal surfaces, and whether flashing gaps or corner joints show wear from wind-driven rain. Clear, timestamped images paired with a succinct event note (date and weather) strengthen a file that may otherwise hinge on general statements about roof age.
If a roof is older, verify policy terms before pursuing replacement. Underwriting decisions in Pennsylvania can shift based on documented condition and age, so a transparent file that maps out when issues began and how they progressed is especially valuable. Keep a simple, chronological set of documents so that any reviewer can trace the roof's history without guesswork. This approach helps secure a fair assessment when weather and time begin to take their toll.