Last updated: Apr 19, 2026
In this neighborhood, cold winters, snow, and repeated freeze-thaw cycles turn small drainage or flashing issues into fast, loud leaks. Ice dams form at the eave line when meltwater refreezes, backing water up under shingles and flashing. In tight, older rooflines with closely spaced homes, a single compromised edge or valley can send water streaming into ceilings within minutes, then creep across attic spaces before exterior damage is even noticed. The pattern is predictable: a minor edge or flashing fault baits ice into a dam, snow loads press against it, and a small leak sprouts into a visible interior stain that looks modest from the attic but can ruin the ceiling and walls below if not addressed quickly.
Spring and early summer bring heavy, sustained rain that tests roofs already strained by winter. Snowmelt and ice dams leave fibers of shingle underlayment exposed or torn, while weakened flashing can separate further under new rainfall and wind. The result is not just a single drip but a cascade that overwhelms attic spaces and ceiling lines. In homes where gutters clog or downspouts are misdirected, the same rainfall pressure concentrates at roof edges or in valleys, accelerating water intrusion. If soaked roofs are subjected to repeated downpours, leaks multiply and spread through ceiling joints, creating a domino effect in connected rooms.
The township's older housing stock, with attached or tightly spaced homes, means a leak at one edge can quickly threaten neighboring units. Water that starts at a minor edge seam or valley can travel along fascia boards, into soffits, and down interior walls with little warning. Small exterior signs-streaks on brickwork, damp soffits, or bubbling paint-often hide a larger interior issue behind dry-wall or plaster. Because interior ceilings can be reached from multiple rooms with shared joists, a leak may appear in an upstairs room far from the original source. The net effect is a small roof fault becoming a costly, multi-room problem long before it's obvious from the street.
If pooling water is observed along eaves or near flashing during or after a thaw, prioritize removing blockage from gutters and ensuring downspouts discharge at least a few feet away from the foundation. Check attic ventilation and insulation; cold air should move freely to prevent uneven warming that fosters new ice dams. Look for softened or displaced flashing at valleys, skylights, chimneys, or roof-to-wall transitions, and note any loose or missing shingle tabs. In rooms below an attic vent or near a suspect seam, inspect ceilings for brownish stains, paint that's bubbling, or curling wallpaper-these are signs to halt further water exposure and call in a roofing professional promptly.
If winter damage is suspected, or if a leak persists after a rainstorm, reach out to a local roofer with experience in older, dense housing stock. Seek a contractor who can perform a comprehensive roof-edge and flashing inspection, verify attic ventilation, and provide a plan to address both the immediate leak and the underlying freeze-thaw vulnerabilities to prevent repeat failures. In tight-home neighborhoods, timely, targeted repairs prevent a small breach from becoming a larger interior flood.
In rowhome neighborhoods, many roofs evolve into tight, multi-section systems with rear low-slope sections, porch roofs, and sharp transitions. The result is a string of potential leak points where a problem on one part can quickly affect shared walls, parapet edges, and neighboring structures. Freeze-thaw cycles in winter magnify this, turning small flashing gaps or drainage quirks into fast leaks along common coping or edge details. This means your roof isn't a single surface but a network of interdependent pieces that must all be kept dry to protect the interior walls and attached spaces.
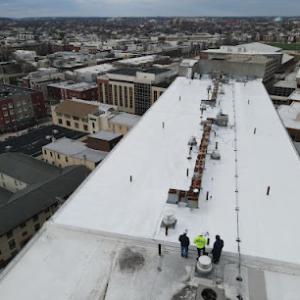
Flat and low-slope portions are common enough that neglecting them invites trouble in this market. Look for pooled water on rear decks or porch roofs, especially where downspouts discharge onto a main wall or drainage plane. Check transitions where a low-slope roof meets a steeper segment, or where a porch roof abuts a living space-these are favored crack points for ice damming and slow leaks. In tightly packed rows, failed drainage on one unit can influence neighboring units through shared parapets or party-wall assemblies, so a localized issue often has cascading effects beyond a single home.
Start with a careful walk of the roof from the back and along any shared walls. Look for exposed fasteners, lift at flashings, and any signs of ponding after a light rain or thaw. In many rowhomes, the rear low-slope area has less visible access, so use a safe, small inspection camera or a seasoned pro with proper roof access to verify under-flashing conditions and membrane edges. Pay attention to the condition of drip edges, terminations at parapets, and the sealant lines around vent flashings-these are common leak gateways when ice forms in the joint or expands during thaw.
Because many Upper Darby homes are attached or semi-detached, drainage problems on one roof section can affect shared walls, parapet areas, and adjoining structures more quickly than on stand-alone houses. If you notice water marks on a party wall, test for moisture through both sides of the joint and inspect the adjacent roof edges for missing or deteriorated membrane. A coordinated plan with neighbors can help preserve the integrity of the common drainage plane and prevent neighbor-to-neighbor issues, especially when dealing with low-slope transitions that run along party walls.
When sealing and flashing low-slope areas, use materials designed for cold-weather performance and freeze-thaw resilience. Keep debris out of rear scuppers and downspouts, as clogged lines create standing water that quickly freezes. For porch roofs and transitions, ensure proper slope grading toward guiding channels and ensure drip edges are continuous along the edge, with no gaps where ice can back up. In dense neighborhoods, consider targeted inspections after heavy storms or rapid temperature swings, and schedule periodic resealing of joints that are visible during a casual walk around the street.
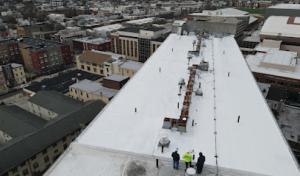
Flat and low-slope sections are common enough in this market that flat-roof specialization is a meaningful local hiring signal, not a fringe service. When evaluating contractors, prioritize those with documented experience in rowhome configurations, parapet detailing, and integration with adjacent units. A contractor who understands how a small patch in a rear parapet can reverberate through the row is better suited to prevent recurring leaks and to plan durable, cohesive maintenance across the entire roof system.
Find specialists in TPO, EPDM, and built-up flat roofing systems for residential and commercial properties.

Last Stop Roofing & Home Repair
(516) 710-6656 laststoproofing.wixsite.com
Upper Darby, Pennsylvania
4.9 from 73 reviews
Last Stop Roofing & Home Repair
(516) 710-6656 laststoproofing.wixsite.com
Upper Darby, Pennsylvania
4.9 from 73 reviews
Last Stop Roofing & Home Repair, LLC is one of the best roofing companies in Philadelphia providing roof repair, Shingle Roofing, Flat Roofing, Full Roof Replacement and serving Philadelphia & all surround areas. We are the top Contractors in Philly committed to highest customer service and workmanship. Protect your largest investment with our reliable roofing services
New Look Builders
Upper Darby, Pennsylvania
4.6 from 80 reviews
New Look Builders is a full-service roofing contractor serving customers since 1996. New Look Builders specializes in roof repair, roof replacement, siding, commercial roofing, windows, deck installation, and more. Call today or visit for a free estimate if you live in Ambler and nearby areas.
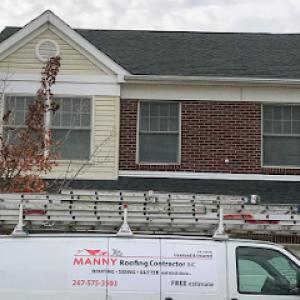
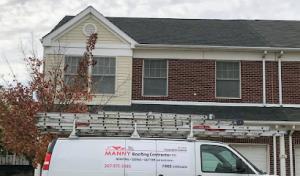
Manny Roofing Contractor
(267) 575-3503 www.mannyroofingcontractor.com
Serving
4.7 from 52 reviews
Manny Roofing Contractor Based in Upper Darby and serving the communities of Wayne, PA, USA Bryn Mawr, PA, USA Haverford, PA, USA Villanova, PA, USA Media, PA 19063, USA Upper Darby, PA, USA Radnor, PA 19087, USA Broomall and all the surrounding areas Manny Roofing Contractor has been a trusted name in roofing services for over 12 years. Our mission is to offer fair prices without compromising on the quality of materials. Whether you need a simple repair or a complete roof replacement, our experienced team is dedicated to delivering top-notch craftsmanship and customer satisfaction. Choose Manny Roofing Contractor for reliable, high-quality roofing solutions.
Industrial Roofing Contractors
(856) 602-5937 indroofingcontractors.com
Serving
4.6 from 34 reviews
Industrial Roofing Contractors is a roofing contractor in Philadelphia, PA that services Fishtown, University City, West Philadelphia and nearby areas. Our roofing company offers residential roofing, commercial roofing, roof repair, asphalt shingle roofing, metal roofing many more. Customers love us because of our 24/7 emergency repair services and 5 star reviews and customer references. If you want to feel how your most trusted Philadelphia roofing company embrace our motto “No Job is Too Small or Too Big”, call us now for free estimate!
O'Donnell Roofing
(610) 449-8188 odonnellroofingco.com
Serving
4.8 from 202 reviews
O’Donnell Roofing, a family-owned business has been serving the exterior needs of customers in the greater Philadelphia area since it was established in 1924. Over the company’s 100-year history it has remained focused on innovation, expanding beyond roofing repairs and replacements, to service the complete home exterior, including siding, windows, skylights and solar. Now in its fourth generation of family ownership, the company continues to provide the highest level of honest, professional service to all its customers.
McHUGH ROOFING • SIDING
(484) 494-0245 mchughroofing.com
Serving
4.8 from 210 reviews
Reliable roofing professionals committed to providing outstanding service and quality products at a fair price. With over 30 years experience - we specialize in: shingle roof replacements, siding, gutters & windows. Residential + Commercial 0% Interest Financing Available Free Estimates Certainteed Certified 8x Voted Best Roofer of Delaware County, PA Happy Homeowners in PA, NJ & DE
Jim Miller
(484) 412-8246 www.jimmillerinc.com
Serving
4.4 from 98 reviews
For over three decades, Jim Miller has proudly served the Tri County area with exceptional roofing, siding, and gutter services. With a wealth of experience garnered since its inception in 1994, this family-owned business has built an enviable reputation for quality craftsmanship and unwavering commitment to customer satisfaction. Residents of Ardmore, PA, and surrounding communities can trust Jim Miller to provide unparalleled service and personalized solutions for all their roofing, siding, and gutter needs.
Trama Roofing Company
(215) 474-5600 www.tramaroofing.com
Serving
3.5 from 48 reviews
We are a full service, family owned and operated roofing establishment serving the city of Philadelphia and surrounding areas since 1983. Our company is licensed, bonded and insured. Honesty, Integrity and Dependability has and always will be our everyday policy. Specializing in hard-to-find leaks on residential and commercial properties, there is no job too big or too small for us. Being in the business for 37 years, we are experienced in every type of roofing and all of our work is guaranteed. “From our family to yours, we look forward to assisting you with all your roofing needs!”

Hynes Construction - Decks, Roofing & Siding
(610) 707-8665 hynesconstruction.com
Serving
4.2 from 118 reviews
Since 1974, Hynes Construction is serving Ardmore, and neighbourhood areas with home improvement services. We specialize in roofing, siding, decks, gutters, and more. If you look for roofing contractors near me, emergency roof repair near me, roof replacement, we ensure your home stays safe. Being GAF Master Elite® roofing contractor, we have high-quality products backed by industry-leading warranties. Whether you’re looking for a commercial roofing near me solution or need a trusted roofing contractor for your residential project, Hynes Construction is your go-to choice for reliable service. Looking for deck contractors near me, gutter installation, and expert siding contractors? From quick repairs to remodels, we do it with commitment.
AMDG Exterior Contracting
Serving
4.9 from 142 reviews
AMDG Exterior Contracting, LLC has been proudly serving Delaware and Montgomery Counties since 2005. The company was established in Clifton Heights, Pennsylvania where it ran all operations for eight years. AMDG quickly established a neighborhood reputation as an honest and reliable roofing and siding company. During their time in Clifton Heights AMDG was voted by readers of the Daily Times as the “Best Home Improvement Contractor” in the annual Best of Delco publication. Through pure dedication to their craft, AMDG gained GAF MasterElite roofing status, an A+ rating from the Better Business Bureau, and certifications in Certainteed and Versico roofing systems.
J. Parker Contracting
(215) 837-9135 pennsylvania-roofing.com
Serving
4.7 from 87 reviews
For over two decades, J. Parker Contracting has been a trusted name in the home improvement industry, providing comprehensive roofing, painting, and siding services to residents of Delaware County. Renowned for their unwavering commitment to excellence and customer satisfaction, J. Parker Contracting has established itself as a pillar of dependability in the community. Family owned and operated.

KO Roofing
(610) 506-9819 koroofingphilly.com
Serving
4.5 from 130 reviews
Contractor specializing in all phases of home exteriors including shingles, flat roofs & siding servicing Philadelphia and surrounding counties. We strive to provide quality work at honest affordable prices.
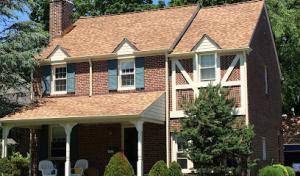
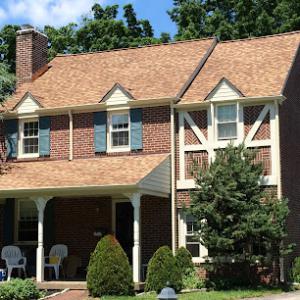
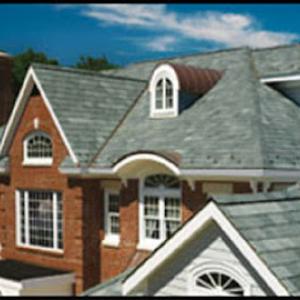
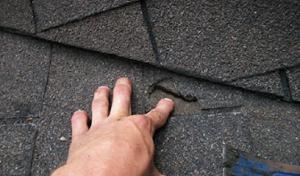
Asphalt shingles dominate the local market because they fit the common residential roof forms found in tighter housing clusters and are the most cost-effective option. For many aging, closely spaced homes with shallow to moderate slopes, asphalt shingles offer reliable performance without overwhelming structural loads. In winters with freeze-thaw cycles, proper installation and underlayment become critical: ensure the shingle tab layout and attic ventilation are designed to handle rapid temperature changes that can drive leaks through corner details, flashing, or vent penetrations. Choose high-quality, laminated or architectural shingles for improved wind resistance and longer run life, which are well-suited to the freeze-thaw stress seen on roofs in this climate. In addition, ensure edge footings and eaves have solid drip edges and well-sealed valley configurations to prevent ice dam-related leaks that creep under shingles during sudden thaws.
Metal roofing is present, but usually selected selectively where homeowners want superior shedding of rain and snow and a longer service life. In tight layouts, metal can offer a clean, low-profile appearance and excellent durability against repeated freeze-thaw cycles. If you lean toward metal, pay attention to the specifics: panel profiles that minimize water intrusion at seams, and a robust snow guard system where local snowfall and wind-driven drifts can push ice into valley and corner flashings. Not all metal systems are created equal for older homes with traditional detailing; some setups may require additional structural assessment to handle wind uplift and the weight of accumulated ice. A metal roof can pair well with a carefully planned flashing strategy around chimneys, skylights, and roof-to-wall intersections-areas that commonly leak after heavy storms or sudden temperature swings.
Tile, wood shake, and synthetic products exist in the market but are less common and need careful structural and detailing review on older roof frames. Clay and concrete tiles bring distinct durability and curb appeal, but their weight demands a rigorous structural check; many older Upper Darby homes do not have the framing or conservative spacing to support tile without reinforcement. Wood shakes offer a classic look but can be susceptible to rot, insect damage, and rapid deterioration if flashing and ventilation aren't executed precisely; in freeze-thaw climates, any gaps can become leak paths as water freezes and expands. Synthetic shingles and composites mimic the appearance of more premium options with usually better weight characteristics and more forgiving installation tolerances. When considering these options, verify that the existing roof deck and interior ceiling framing can safely support the chosen material, and plan for meticulous detailing around penetrations, valleys, and eave intersections to mitigate localized leaks after storms.
In this climate, the way a roof handles water is as important as the material itself. Look for properly sealed laps, clean and continuous underlayment, and flashing that integrates with common Upper Darby roof geometries (such as intersecting valleys and multiple dormers). Tight housing stock increases the risk that a minor drainage issue will become a fast leak after a storm, so prioritize robust detailing at corners, chimney bases, and roof-to-wall joints. If the roof is approaching the end of its life or shows widespread wear, a material choice that supports easier maintenance and more predictable performance through freeze-thaw cycles can save headaches down the line.
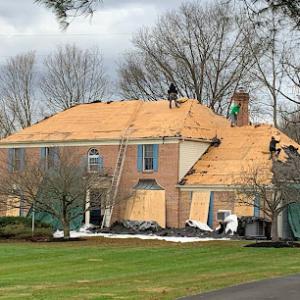
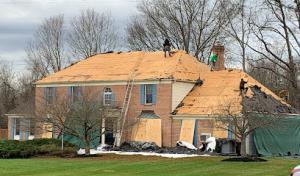
In Upper Darby, the mix of older homes and tightly spaced attached layouts means tear-offs are common and hidden decking or flashing damage often shows up after removal. That can push labor time and disposal costs higher than you'd expect in newer, detached suburbs. Expect crews to need careful staging to keep debris from drifting between homes and to manage access through narrow driveways or alley corners. These realities nudge overall project cost toward the middle to upper end of the local ranges, especially after a winter's freeze-thaw cycle has exposed compromised decking.
Common options and their local ranges are: asphalt shingles from roughly 350 to 700 USD per square, metal roofing from 700 to 1200 USD per square, clay tile from 1100 to 1800 USD per square, concrete tile from 900 to 1500 USD per square, wood shingles or shakes from 750 to 1300 USD per square, and synthetic or composite shingles from 800 to 1400 USD per square. Given Upper Darby's older housing stock and frequent storm-driven needs, you may see bids that fall toward the higher end of these ranges when a tear-off reveals rot or structural repair is necessary beneath the surface. Increases can come from specialized underlayment, enhanced flashing repairs, or added attic ventilation to address long-standing heat and moisture cycles.
Storm-driven demand spikes after hail, heavy rain, or winter damage can tighten scheduling and push pricing toward the upper end of the provided ranges. If a crew is already booked, you may face longer waits or rush fees to secure a start date and expedite cleanup. Plan for contingency days if weather swings back to thaw cycles, since soft decking or batten systems sometimes need extra drying time before a full replacement proceeds. Your contractor should walk you through staged work, from teardown to decking inspection to final cleanup, so you understand where costs accumulate and where you can avoid unnecessary add-ons.
Ask for itemized line items to see how much is being spent on tearing off old material, replacing decking, and upgrading flashing or underlayment. Given the tight housing layouts, request concrete plans for material staging and debris containment to minimize nuisance and labor. If you're balancing multiple bids, weigh not just price but estimated timelines and warranty terms, especially on higher-end materials that promise longer life in Upper Darby's freeze-thaw environment.
Get a clear picture of your project costs upfront - no commitment required.
When your home needs a full re-roof in this tightly packed neighborhood, expect that a building permit through the local building department is required for most jobs. The permit process is not just a formality; it's a safeguard against missteps that can create leaks, ice dams, or drainage problems that escalate in winter. Because many roofs here are older and bear the marks of previous patches, the permit review looks closely at how the overhaul will protect those vulnerable flashings and penetrations in the tight lot lines. If a contractor glosses over permitting, the risk is not just a shutdown-it's a risk to your home's long-term integrity.
Before any wrench hits a nail, the roofing scope and plans often need to be submitted for approval. This means you'll want a clear diagram of ridge lines, eave details, skylights, vents, and the method for tying into existing gutters and downspouts. In Upper Darby, inspectors will look for a plan that demonstrates proper sealing against freeze-thaw cycles and adequate provision for ice and water shield in the most vulnerable eave and rake areas. A thorough plan helps the crew follow current code requirements and reduces the chance of back-and-forth delays proving costly when winter weather turns a small leak into a bigger, harder-to-fix problem.
Inspections commonly occur at rough and final stages. During rough inspections, the focus is on whether the roof structure and underlayment are installed according to the approved plan and code, not on cosmetics. The final inspection checks that the finished roof matches the approved drawings, penetrations are properly flashed, and all components meet local code standards. If anything is out of spec, you'll face tampering, rework, or re-inspection, which can extend a project timeline well into the weather-dependent months. In a neighborhood where drainage and flashing flaws can quickly become leaks during a thaw, timely inspections are not just bureaucratic hurdles-they're a practical safeguard against costly damage.
Coordinate closely with the roofing contractor to ensure the scope and plans are ready for submission before work begins. Schedule inspection dates with the building department early to avoid your project stalling as winter approaches. Keep a copy of approved plans on site during construction, so if an inspector asks for a comparison, you can show exactly how the build aligns with the permit and code requirements. A well-documented process minimizes surprises when the weather turns and helps ensure your new roof stands up to Upper Darby's freeze-thaw realities.
In this dense housing area, freeze-thaw cycles and tight roof clearances can turn small issues into fast leak problems. Pennsylvania insurers commonly allow wind and hail claims when homeowners provide strong documentation, making photos and dated records especially important after local storms. After a storm, take clear photos from ground level and from roof edges if safe, capturing any missing shingles, flashing gaps, or algae and moss clumps that might hide deterioration. Keep a running log of dates, weather on those days, and any indoor water spots you notice, since that sequence helps connect the storm to the damage.
Adjusters may ask for before-and-after photos, contractor assessments, and written estimates, so Upper Darby homeowners benefit from documenting even minor damage early. Have a trusted contractor come by for a quick, written assessment within a week of the storm, noting exposed felt, ridge cap conditions, and any signs of water intrusion around dormers or chimneys. Get two or three written estimates, each with a clearly labeled scope of work, material type, and an estimated milestone timeline. If possible, include photos of attic rafters and sheathing showing any water staining or moisture meters readings; these details can smooth review when the claim progresses.
Because code-compliant replacement matters in claim handling, permit records and inspection sign-offs can support smoother reimbursement discussions. After a claim is approved, ensure any replacement uses material and flashing details that meet current standards, and keep copies of permit-related documents and final inspection notices. If a contractor performs temporary fixes, document what was done and when, but plan for a proper, code-aligned installation as the final step. Having a complete packet-photos, dated notes, contractor assessments, estimates, and sign-off documents-helps the adjuster verify that the remedy addresses both the original leak and the home's tighter, older roof assembly.
Connect with contractors who help homeowners navigate the claims process from damage assessment to final approval.
When a roof is replaced in this market, skylights tend to become the weak link if their seals and flashing aren't treated as part of the same system. Skylights that were installed long ago can fail at the curb or around the unit even when the shingles look fine. In older homes with tight eaves and close-proximity neighbors, a small leak around a skylight can travel quickly along a ceiling line and reveal itself far from the original source. Plan for a thorough inspection of the skylight flashing, curb integrity, and any deterioration in the surrounding deck or neoprene seals. If a leak shows up during a thaw, investigate both the skylight seal and the intersection where deck, curb, and roofing material meet. Specialized attention during roof replacement pays off by preventing repeated, targeted leaks.
Chimney-adjacent flashing matters locally because chimney work appears regularly in the contractor market alongside roofing services. The transition from brick or stone to roof deck often hosts multiple layers of flashing that can fail in cold snaps, especially where mortar joints and flashing nails misbehave with freeze-thaw cycles. Pay special attention to step and counter-flashing at the chimney chase, as well as the intersection with any metal cricket or saddle. Even small gaps can allow water to saturate the decking and travel inward along the wall void. If an aging chimney cap or cracked mortar is present, address it alongside the roofing work; otherwise a new roof may not stay dry for long.
Rooms and hallways in tightly packed homes frequently share roof transitions-valleys, rake lines, and transitions between different roof pitches. In Upper Darby's older stock, leak complaints center on penetrations and transitions rather than broad field shingle failure alone. Freeze-thaw cycles widen hairline gaps at flashing, boot seals, and curb penetrations, turning minor issues into fast leaks after a heavy storm. When a roof is serviced, ensure all transitions are flashed with correct material, properly lapped, and sealed to shed water toward the eaves rather than trapping it at joints.
Find contractors experienced in skylight installation, flashing, and leak repairs to bring natural light into your home.
In this tight-knit market, homeowners often look for long-established, family-owned contractors who have weathered many Upper Darby winters. Your neighbor's choice matters because a durable roof is built on steady relationships as much as on shingles. Expect crews that can be on site reliably, with seasoned crews who know local quirks-like how freeze-thaw cycles push flashing joints to the limit, especially on older, tightly spaced homes. Ask for a clear history of projects in similar neighborhoods and request references you can actually speak with.
Cleanup is a major hiring priority in this dense residential setting where debris can block driveways, curb lines, and storm drains quickly. A responsible contractor uses daily cleanup routines, not just a final sweep. They should lay down protective ground cover, manage waste containers on a schedule that won't disrupt neighbors, and remove disposal bags promptly. Verify what happens if a windy day scatters loose material and whether tarping or containment silt barriers will be used at critical transition points around eaves, skylights, and chimneys.
Warranty is a meaningful differentiator when many homeowners are replacing rather than building new. Look for manufacturer-backed installation credentials that specify required roof preparation, acclimation of materials, and fastener patterns tailored to your roof type and climate. Confirm the installer's training on flashing details at valleys and dormers, which are common leak sources in older homes with complex rooflines. A solid warranty should spell out who handles workmanship issues, the duration, and how claims are processed, with a clear contact path rather than vague promises.
Request a comprehensive post-installation packet that includes product specifications, maintenance tips tailored to your roof type, and a written timeline of service milestones. In this market, it helps to have a local point of contact who can respond quickly if a freeze-thaw event reveals a concern after a storm. Ensure the contract clearly lists exactly what is covered by warranty, what requires annual inspections, and how inspections are scheduled through the first few winters.