Roofing in Rhode Island
Last updated: Feb 28, 2026
Rhode Island roofs live with the rhythm of four distinct seasons, and that matters when you plan maintenance. Nor'easters push wind and rain straight at coastal towns; salt air can accelerate corrosion and moss can take hold in shady spots; and brutal winters with freeze-thaw cycles stress shingles and flashings. Here in our small but mighty state—from Providence's brick-and-masonry streets to Newport's seaside vistas—a sturdy roof isn't a luxury, it's a practical credential for comfort, energy bills, and long-term value. If you're facing a shingles crack, a slow drip, or the first green shimmer of moss on a north-facing slope, you're not alone. The good news: Rhode Island homeowners can stay ahead with clear, local guidance that translates weather realities into smarter choices. This page is designed to be that friendly, trustworthy neighbor you can rely on.
Here's a quick preview of what you'll find, with Rhode Island in mind (without getting lost in every detail):
- Local climate considerations and seasonal upkeep
- Materials that stand up to our humidity and salt air
- Popular RI roof styles and how they fit historic neighborhoods
- Typical costs in Rhode Island and how to budget
- Permits and local regulations you'll need to know
- Common Rhode Island roofing problems and practical fixes
- Maintenance and repair tips tailored to our conditions
- Guidance on when to repair vs. replace, and when to hire a pro
All guidance here is tailored to Rhode Island's conditions and supported by local resources and reputable pros. We'll connect you to practical checklists, cost ranges, and when to call in a licensed roofer, so you can approach every issue with confidence. From energy efficiency tweaks to moisture management and emergency leak response, you'll have a plain-language playbook you can share with your contractor and your insurer. Our aim is steady, safe, and cost-conscious results that hold up through our winters and our summers.
To start, let's look at how Rhode Island's climate shapes your roof.
Local Climate & Its Impact on Roofs
Winter Weather & Freeze-Thaw Cycles
Rhode Island winters bring regular freeze-thaw cycles, average snowfall, and occasional nor'easters. Those swings push roofing materials to expand and contract, which over time can loosen shingles, degrade underlayment, and widen gaps around flashing.
- What to expect: cracked shingles, granule loss, flashing leaks at chimneys and vents, and faster wear on lower slopes where runoff concentrates.
- Red flags: ice dam formation, damp spots along eaves, and curling or cupped shingles.
Keep these practical steps in mind:
1) Improve attic insulation and ventilation to maintain a uniform roof temperature. 2) Verify ductwork and bypasses aren't dumping warm air into the attic. 3) After heavy storms, inspect for damaged shingles or lifted edges.
Warning: do not venture onto a icy roof to inspect. Snow and ice can slip or break shingles and cause serious injury.
Snow Load & Ice Dams
Heavy snow and rapid melt/refreeze cycles are common in Rhode Island. Ice dams can back up water under shingles, leading to interior leaks and wood rot when left unchecked.
- How it shows up: ridges stay dry while lower areas stay damp or stained, gutters fill with ice, and ceiling stains appear in upper rooms.
- What to do: address ventilation and insulation first, then consider roof edge protection.
Steps to reduce risk:
1) Ensure the roof has a proper ice and water shield along eaves and around penetrations. 2) Improve attic insulation (aim for a high R-value appropriate for your home) and balanced soffit-to-ridge ventilation. 3) After storms, use a roof rake from the ground to remove new snow build-up—avoid climbing on a slippery roof. 4) If you notice recurring leaks, have a roofer assess flashing at chimneys, vents, and eaves.
Warning: aggressive roof-clearing can damage shingles; hire a professional for significant snow loads or ice dam removal.
Coastal Winds & Salt Air
Rhode Island's coastal towns face higher wind uplift and salt exposure, which can accelerate corrosion of metal components and increase shingle uplift.
- Impacts: faster wear on flashing, vent collars, and metal flashings; higher risk of loose shingles along exposed edges; corrosion on fasteners near salt spray.
- Mitigation: choose materials rated for higher wind uplift where exposures are severe; use corrosion-resistant fasteners; ensure all flashing is continuous and well-sealed.
Actions to take:
1) Inspect flashing around chimneys, vents, skylights, and gutters after major coastal storms. 2) If you're near the coast, consider upgraded edge metal and sealants designed for salt spray. 3) Schedule more frequent roof checks in off-season to catch corrosion early.
Warning: coastal storms can be sudden and severe; secure loose objects around the roof and check for wind-damage after storms.
Humidity, Moss, Algae & Material Aging
Rhode Island's humidity supports moss and algae growth, especially on shaded or north-facing roofs, which can trap moisture and degrade shingles over time.
- Effects: surface staining, reduced solar reflectivity, and gradual shingle deterioration.
- Control: keep gutters clear, trim nearby branches, and treat or clean affected roofs with products suitable for your shingle type.
Maintenance tips:
1) Trim overhanging branches to improve airflow and reduce shade. 2) Install zinc or copper strips near the roof ridge to slow algae growth (where appropriate). 3) Use moss-removal methods that won't damage shingles; rinse gently and dry thoroughly.
Seasonal Maintenance & Inspection Notes
Rhode Island homeowners should plan an annual roof inspection, plus post-storm checks after Nor'easters or hurricanes.
- Quick-check list: shingles condition, flashing integrity, gutter and downspout clearance, attic insulation and ventilation, and chimney flashing.
- When to call a pro: significant granule loss, persistent leaks, or damage from high winds or heavy ice.
Official resources for planning and risk context:
- NOAA National Weather Service: and
- FEMA:
Warnings about local risks:
- Ice damming can cause hidden leaks and interior damage; address ventilation and insulation first.
- Coastal exposure increases wind uplift risk and salt-related corrosion; consider higher-rated materials and robust flashing.
- Snow and ice removal can be dangerous; prioritize professional help for heavy accumulations.
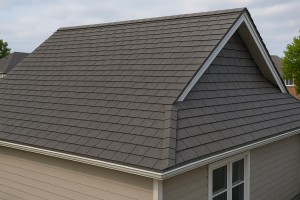
Recommended Roofing Materials for Rhode Island

- Why they work: Affordable, quick to install, widely available, and versatile for many Rhode Island neighborhoods.
- What to look for: Architectural (laminated) shingles with 110 mph (or higher) wind resistance rating and a solid manufacturer warranty. Choose a product with good algae and moisture resistance for coastal moisture.
- Pros: Wide color selection, easy repairs, decent life span for the price.
- Cons: Shorter overall lifespan than metal or slate; performance can drop in heavy ice dam areas if attic ventilation is poor.
- Coastal note: Ensure proper sealing at hips and valleys to prevent wind uplift in Nor'easters.

- Why they work: Extremely durable, excellent wind resistance, great for snow shedding, and long-lasting.
- Best options for Rhode Island: Standing-seam metal or aluminum/galvanized steel panels. Aluminum and zinc-coated steel resist salt air better in coastal zones; copper is long-lasting but pricey.
- Pros: Very long life, low maintenance, high resistance to hail and wind, energy efficient.
- Cons: Higher upfront cost; can be noisy in heavy rain unless you add attic decoupling or insulation; color fading is possible over time.
- Coastal note: Metal's corrosion resistance and fastener integrity are crucial near salt spray. Hire a pro to ensure proper sealing and underlayment.

- Why they work: Classic look for historic or cottage-style Rhode Island homes; good insulation when well maintained.
- What to consider: Use treated or fire-rated wood to meet local codes; expect more maintenance in damp coastal air.
- Pros: Attractive natural appearance; good insulation value.
- Cons: Higher maintenance, rot risk in damp climates, fire code considerations, shorter lifespan than slate or metal if not properly protected.
- Coastal note: Regular cleaning to prevent moss and fungi, plus resealing every few years.
- Why they work: Durable, resistant to rot, insects, and fire; can mimic wood or slate without the same upkeep.
- Pros: Moderate weight, good weather resistance, lower long-term maintenance than real wood.
- Cons: Heavier than asphalt; requires professional installation; color may fade if not protected.
- Coastal note:boards perform well in humidity and salt exposure when properly installed with appropriate fasteners and sealants.
Slate and Synthetic Slate
- Why they work: Long lifespan, excellent fire resistance, and timeless aesthetics.
- Best for Rhode Island: Real slate for historic homes; synthetic slate as a lighter, cost-friendly alternative that still mimics the look.
- Pros: Very durable; low maintenance; strong resale appeal.
- Cons: Real slate is very heavy and expensive; installation requires skilled tradespeople; synthetic options vary in longevity.
- Coastal note: Proper underlayment and secure fastening prevent wind uplift, especially in high-wind coastal zones.
Hybrid and Other Considerations
- Synthetic/Composite Shingles: A practical middle-ground between asphalt and natural slate, offering enhanced durability and a longer life than standard asphalt.
- Flat or low-slope options: If you're dealing with a flat or low-slope roof, consider rubber membrane (EPDM) or TPO for coastal moisture and wind resistance, alongside a compatible drip edge and flashing system.
How to pick the best material for your Rhode Island home
1. Assess climate exposure: coastal salt spray, Nor'easters, snow load, and sun exposure.
2. Match roof slope and weight: heavier materials require structural checks; ensure the attic is vented and insulated.
3. Check local codes and insurance: some areas have fire-resistance or wind-resistance requirements; verify with your insurer.
4. Plan for maintenance and ROI: weigh initial costs against lifespan, maintenance needs, and energy efficiency.
5. Hire for quality installation: wind resistance and drainage rely on proper underlayment, flashing, and fasteners.
Quick reference by scenario
- Coastal, high wind: metal or architectural asphalt with robust wind rating; proper fasteners and sealants.
- Historic homes: slate or fiber cement for durability and authentic look; ensure structural compatibility.
- Budget-conscious with long-term value: architectural asphalt shingles or fiber cement with a solid warranty.
- Snow-prone, damp climate: materials with strong moisture resistance and good sealing at valleys; consider metal or fiber cement as reliable options.
Popular Roof Styles & Architectural Trends in Rhode Island
Common Rhode Island Roof Styles
- Cape Cod and Cape-inspired gable roofs: Steep pitches shed snow and ice efficiently, with dormers that add usable attic space and light. They're a staple for traditional New England homes and pair well with clapboard siding.
- Saltbox roofs: Long, asymmetric slope on one side give historic charm and efficient snow shedding. Ideal for modest footprints and older neighborhoods, yet adaptable with modern finishes.
- Gable roofs: Classic triangular shape that's economical and versatile. Works with many styles—from Cape Cod to Colonial Revival—and is easy to insulate and vent.
- Hip roofs: All sides slope down, offering excellent stability in windy coastal zones. Common on Tudor Revival, Queen Anne, and modern coastal homes for a balanced look and strong wind performance.
- Gambrel roofs: Barn-like silhouette that creates extra attic space. Seen on some historic Rhode Island homes and farmhouses, offering a distinctive profile without sacrificing headroom.
- Mansard roofs: Elaborate, two-tiered roof common on late 19th-century to early 20th-century revival homes. Provides dramatic curb appeal and additional living space, but requires skilled maintenance.
- Flat or low-slope roofs: Found on contemporary coastal homes, garages, and terraces. They require careful drainage design and durable membranes to withstand Rhode Island rain and sea air.
Roofing Materials Popular in Rhode Island
- Asphalt shingles (architectural/dimensional): The workhorse of Rhode Island roofs—cost-effective, readily available, and available in wind-rated options to handle Nor'easters.
- Standing seam metal: Excellent wind uplift resistance and snow shedding; long-lasting and low-maintenance, ideal for coastal exposure and modern designs.
- Cedar shakes and shingles: Natural, warm aesthetics that suit historic districts; higher maintenance, rot and insect risk near salt air, and regular sealing or staining helps longevity.
- Slate: Classic for historic Rhode Island homes, especially in Providence and Newport; superb durability but heavy and expensive, needs skilled installation.
- Synthetic slate or composite: Lightweight, durable alternatives that mimic slate without the weight or cost; good for restorations or additions.
- Concrete or clay tile: Durable in dry climates; heavier and less common in RI, but possible on select homes with structural backing and appropriate ventilation.
- Flat roofing membranes (EPDM, TPO, PVC): Used where a true flat roof is needed (garages, additions, roof decks); choose weather-rated membranes and proper flashing.
Architectural Trends Shaping Rhode Island Rooflines
- Colonial Revival and traditional symmetry: New England's roots drive dormers, balanced facades, and historically appropriate roofing materials like slate or cedar.
- Shingle Style and Craftsman influences: Irregular rooflines, open eaves, and mixed textures create layered, cottage-to-mansion looks that blend with coastal landscapes.
- Newport and coastal grandeur: Copper details, widow's walks, dormered skylights, and expansive decks on upper levels contribute to a nautical, enduring aesthetic.
- Cape Cod and saltbox revivals: Clean lines, steep pitches, and elemental materials suit small footprints and storm-aware construction.
- Modern, energy-focused updates: Solar-ready layouts, cool-roof paints, reflective shingles, and enhanced attic ventilation to boost efficiency without sacrificing style.
- Historic preservation considerations: Many RI neighborhoods require period-appropriate roofing colors and materials to protect character while upgrading performance.
Practical Considerations for Rhode Island Homeowners
- Wind, snow, and storm resilience: Prioritize wind-rated shingles or standing seam metal, solid flashing, and proper underlayment for Nor'easters.
- Ice dam prevention: Ensure adequate attic insulation, proper ventilation, and ice/water shields at eaves to minimize dam-related damage.
- Maintenance cadence: Schedule inspections after severe winter storms; clean gutters and debris to maintain drainage and extend roof life.
- Local compliance: Check with your town's building department for permits and guidelines, especially for historic districts and renovations.
- Budgeting for material choice: Slate and high-end cedar offer beauty and longevity but require larger upfront investment; standing seam and architectural shingles balance cost with durability.
- Contractor fit: Hire RI-licensed roofers with experience in local climate, coastal environments, and historical restorations for best results.
Average Roofing Costs in Rhode Island
Cost Overview in Rhode Island
Rhode Island homeowners typically see installed roof costs that reflect local labor rates, material availability, and the state's weather patterns. Expect higher bids in coastal towns where salt air, wind exposure, and winter weather push durability and performance to the top of the list. Most RI projects fall within a per-square-foot range that varies by material, roof complexity, and whether an old roof must be removed.
Common Roofing Materials and Typical Installed Costs
- Asphalt shingles (3-tab): roughly $4.50–$6.50 per sq ft installed.
- Architectural/asphalt shingles: about $5.50–$9.00 per sq ft installed.
- Metal roofing (steel, aluminum): roughly $9.00–$14.00 per sq ft installed.
- Cedar shakes/shingles: around $7.00–$12.00 per sq ft installed.
- Slate: typically $15.00–$30.00 per sq ft installed, depending on quality and thickness.
- Clay or concrete tile: about $10.00–$20.00 per sq ft installed.
Note: Most Rhode Island homes fall into the asphalt or architectural asphalt range if you're balancing cost with durability. Premium options like metal, cedar, slate, or tile raise the project total significantly, especially on larger or more complex roofs.
Additional Cost Factors in Rhode Island
- Old roof removal and disposal: removal usually adds $1.50–$3.50 per sq ft, plus disposal fees of $0.50–$1.50 per sq ft.
- Roof pitch and complexity: steep pitches or intricate layouts (multiple dormers, valleys, or skylights) can add 10–30% to the base price.
- Underlayment, flashing, and ventilation: upgrading to higher-quality underlayment and improving attic ventilation typically adds $0.50–$1.50 per sq ft.
- Per-mit fees: town or city permit costs generally range from $50–$300, depending on the municipality and project scope.
- Debris containment and cleanup: some contractors include this, others itemize it; plan for $100–$400 depending on roof size.
- Weather considerations: winter schedules may extend timelines and sometimes raise temporary protection costs or require contingency budgeting.
Local Considerations: Style, Architecture, and Coastal Factors
- Colonial, Cape Cod, Victorian, and other historic-inspired homes common to Rhode Island often feature complex rooflines, ornate trim, and multiple dormers. The added labor to preserve aesthetics can raise costs on the higher end of the local ranges.
- Coastal exposure increases wind resistance requirements, potentially pushing material upgrades (e.g., factory-sealed fasteners, more robust underlayment) and impact-resistant shingles for shorefront properties.
- Salt air and humidity can accelerate wear on fasteners and some metals. In mixed climates, some homeowners choose longer-lasting options (metal, slate, or synthetic shakes) despite higher upfront costs.
- Roof geometry, such as irregular footprints or extended overhangs, commonly found on new coastal homes, can also drive up installation time and price.
Budgeting Tips and Step-by-Step Estimation
1. Measure or confirm the total roof area in squares (1 square = 100 sq ft).
2. Pick a material and understand its installed cost per square foot in RI.
3. Add 10–30% for roof pitch, dormers, valleys, and potential complex details.
4. Include removal and disposal costs if you're not leaving an existing roof intact.
5. Account for permits and any city/town-specific requirements, plus contingency for weather-related delays.
6. Get at least three local bids to compare material choices, warranty terms, and crew experience with RI conditions.
Rhode Island Seasonal Window and Scheduling
- Peak season typically runs spring through late fall; winter work is possible but can require additional protection strategies and scheduling flexibility.
- In coastal towns, storms, nor'easters, and snow can influence timing and cost, so plan buffers in both budget and calendar.
Permits & Local Regulations
Do I need a permit for roof work in Rhode Island?
In Rhode Island, most roofing projects require a permit from your local building department. Even small jobs can trigger a permit in some towns, so it's best to check early. If you skip a required permit, you may face fines, stop-work orders, or issues when selling the home.
What typically triggers a permit:
- Removing and replacing shingles, underlayment, or decking
- Any structural changes to the roof, rafters, or support system
- Installing skylights, vents, chimneys, or modifying ventilation
- Altering roof pitch, drainage, or flashing
- Work in a historic district or a wet/wind-prone area with code-specific requirements
Note: Some cosmetic repairs or routine maintenance may not require a permit in certain municipalities, but local rules vary. When in doubt, ask your local building department.
How to obtain a roof permit (Rhode Island)
Follow these practical steps to get your permit without delays:
1) Identify the right authority
- Contact your city or town's building department (often at the town hall or city clerk's office) to confirm permit requirements and the correct portal or form.
2) Gather required documents
- Permit application (completed)
- Property owner information and address
- Contractor license and proof of insurance (your contractor should be licensed per RI rules; verify before work starts)
- Scope of work description (including materials to be used and any structural changes)
- Roof plan or sketches (Some towns want a simple diagram of the roof layout and any penetrations)
- Evidence of plan review if required (rare, but some towns ask for stamped drawings)
3) Submit and pay
- Submit the package to the building department and pay the permit fee. Fees vary by town and project scope, typically modest for roofing work.
- Expect a processing window; some towns issue permits quickly, others may request quick plan clarifications.
4) Schedule inspections
- After permit issuance, plan for inspections at key milestones (see “Inspections” below). Your contractor or you will arrange these with the building department.
Inspections you'll encounter
Inspections verify code compliance at critical stages. Typical Rhode Island roofing inspections may include:
- Pre-installation or framing/deck inspection (if structural work is involved)
- Underlayment, ice/wwater shield, and ventilation inspection
- Final roof installation inspection (shingles, flashing, vents, flashing around penetrations)
- Optional moisture barriers or warranty- or manufacturer-specific checks
If your project includes skylights, chimneys, or roof penetrations, additional inspections may be required. Schedule inspections in advance and ensure access for the inspector.
Special cases: Historic districts, coastal towns, and HOA requirements
- Historic districts: In cities like Providence or Newport, exterior changes may require approval from a Historic District Commission. Obtain any necessary approvals before pulling a permit to avoid conflicts.
- Coastal/wind-prone areas: Some towns (especially on the coast) have wind-load or flood-related considerations. You may need higher-rated underlayment or specific fastener requirements.
- HOAs and covenants: Homeowners associations may have rules about roof color, material, or appearance. Obtain HOA consent if applicable to avoid conflicts with covenants.
Practical tips
- Always verify permit needs before purchasing materials or starting work.
- Prefer the permit to be in your name as the property owner; let your licensed contractor handle the application if allowed in your town.
- Keep a copy of the permit and all inspection receipts on-site during the project.
- Confirm your contractor is insured and licensed; many towns require this as part of the permit process.
- If plans change during the project, reopen the permit or amend it as required by the building department.
Common Roofing Problems in Rhode Island & Solutions
Ice dams and water intrusion
- Symptoms: icicles along eaves, staining on ceilings or walls near the ceiling, damp spots on interior walls.
- Why it happens: heat loss from an underinsulated attic melts snow near the roof, which refreezes at the eaves and creates a dam that pushes water back under shingles.
- Solutions:
- Short-term: safely remove surface ice with a roof rake from the ground; never chisel or climb on a wet, icy roof.
- Long-term: improve attic insulation (aim for a high R-value) and seal air leaks around attic penetrations; ensure soffit and ridge ventilation are working to keep the roof cold in winter.
- Install or upgrade an ice and water shield along the eaves and critical penetrations; consider heat cables only as a targeted, code-compliant last resort and have a pro install them.
- Have a licensed roofer assess leak pathways and reseal flashing where needed.
Snow load and wind damage
- Symptoms: missing or lifted shingles after storms, loose flashing, granular loss on shingles exposed to high winds.
- Why it happens: Rhode Island winters bring heavy snowfalls and gusty winds that can lift poorly fastened shingles and expose underlayment.
- Solutions:
- Schedule a post-storm roof inspection to catch loose shingles or damaged flashing early.
- Re-seal or replace damaged shingles with wind-rated products appropriate for RI winds.
- Ensure underlayment and flashing are properly installed to resist wind uplift; reinforce areas around chimneys, vents, and dormers.
- Consider upgrading to higher-wind-rated asphalt shingles or a more durable roof system if frequent damage occurs.
Poor attic ventilation and insufficient insulation
- Symptoms: attic feels hot in summer, rapid ice dam formation in winter, higher utility bills, musty attic air.
- Why it happens: blocked soffit vents, closed-off attic spaces, or gaps in insulation trap moisture and heat.
- Solutions:
- Step 1: seal obvious air leaks around penetrations (pipes, wires, attic hatch).
- Step 2: increase insulation to current code or better (R60 in many RI attics, with consideration of vented spaces).
- Step 3: establish a balanced ventilation system (soffit intake plus ridge or gable exhaust) and verify airflow year-round.
- Step 4: add or upgrade attic vents and consider a small attic fan for moisture control if recommended by a pro.
Moss, algae, and stain buildup
- Symptoms: dark streaks or green growth on shingles; spongy feel when walking on roof in damp weather.
- Why it happens: shaded roofs with high moisture and organic debris thrive in RI's humid climate.
- Solutions:
- Gently clean with a non-abrasive solution (often a 50/50 water and bleach mix; rinse thoroughly).
- Trim branches that overhang the roof to reduce shade and debris accumulation.
- Install zinc or copper strips near the ridge to inhibit regrowth and extend roof life.
- Consider professional cleaning to avoid damaging shingles or voiding warranties.
Flashing leaks around chimneys, vents, and dormers
- Symptoms: damp ceilings near flashing lines, staining around the chimney or vent pipes.
- Why it happens: aging or damaged flashing, gaps at joints, or improper counterflashing.
- Solutions:
- Have flashing inspected and replaced with corrosion-resistant metal (stainless or copper where appropriate).
- Re-seal joints with compatible roofing sealants and ensure counterflashing overlaps properly.
- Verify roof-to-flashings transitions are integrated with the shingles and underlayment for a watertight seal.
Gutter and drainage problems
- Symptoms: overflowing gutters, fascia rot, ice dams along eaves, water pooling near the foundation.
- Why it happens: clogged or sagging gutters, improper slope, downspouts that don't clear water away from the house.
- Solutions:
- Clean and inspect gutters at least twice a year; repair or replace damaged sections.
- Re-secure sagging hangers and adjust slope to promote proper drainage (roughly 1/16 inch per foot).
- Extend downspouts away from the foundation and add guards to reduce debris buildup.
- Consider gutter guards or integrated rainwater management if there's persistent debris.
Aging shingles and deck rot
- Symptoms: curling, missing granules, roof feels soft in spots, visible rot in attic decking after a leak.
- Why it happens: Rhode Island's climate accelerates wear on aging asphalt shingles and can rot plywood/OSB if leaks persist.
- Solutions:
- Repair small damaged areas or replace individual shingles; for widespread wear, a roof replacement may be more cost-effective.
- If deck wood shows rot, replace damaged sections and address underlying leaks to protect new decking.
- Use roofing materials with appropriate RI wind ratings and warranty terms to extend life.
Salt air corrosion on coastal homes
- Symptoms: rust staining or corrosion on metal flashings and vents near the coast; more frequent leaks around coastal homes.
- Why it happens: salty, humid air accelerates corrosion on metal components.
- Solutions:
- Upgrade to corrosion-resistant metal flashing (stainless or coated metals) where feasible.
- Regularly inspect and replace compromised flashings; keep coatings maintained to resist rust.
- Schedule more frequent roof maintenance and cleaning for coastal environments.
Maintenance & Repair Tips for Rhode Island
Seasonal Maintenance in Rhode Island
- Rhode Island's climate means harsh winters, coastal winds, and humid summers. Schedule a thorough roof inspection twice a year: after winter and after fall before winter weather returns.
- Post-storm checks: after nor'easters or heavy snowstorms, look for slipping shingles, damaged flashing around chimneys and vents, and granule loss on asphalt shingles.
- Gutter and drainage care: clear leaves and debris in spring and fall. Ensure downspouts direct water at least 3–4 feet away from the foundation to prevent basement moisture.
- Attic checks: inspect insulation and ventilation. Look for warm, moist air near the attic floor, which can indicate air leaks or insufficient venting.
- Moss and algae: Rhode Island's humidity encourages growth. If you see dark spots or moss, identify shaded areas and plan cleaning and moisture management.
Ice Dam Prevention and Repair
- Improve attic sealing: seal gaps around headers, around vents, and along the attic hatch. Block heat from escaping into the attic to reduce ice dam formation.
- Adequate insulation and ventilation: aim for enough insulation to keep the attic cold in winter and ensure a balance of soffit and ridge vents for continuous airflow.
- Snow management: safely remove snow from the roof with a roof rake from the ground after heavy storms, reducing the chance of ice dams forming at the eaves.
- Safe de-icing: use calcium chloride-based ice melts along the eaves if ice dams develop. Avoid rock salt or products that can damage shingles, vegetation, or metal flashing.
- Pro repair: if ice dams cause active leaks or noticeable interior water intrusion, contact a pro to remove ice blocks carefully and assess flashing and membrane integrity.
Gutter and Drainage Maintenance
- Biannual cleaning: remove leaves, pine needles, and debris. Flush gutters with water to check flow and identify clogs.
- Secure and repair: fix sagging sections and reseat loose screws or hangers. Consider upgrading to reinforced or larger gutters if your roof area is prone to heavy runoff.
- Downspout extensions: ensure discharge outlets point away from the house and foundation. Use splash blocks or extend lines to safe drainage zones.
- Gutter guards: if you have nearby trees or frequent debris, consider guards, but monitor for clog buildup behind guards.
Roof Inspection Checklist
- Visual walk-around: look for curling, cupping, or missing shingles; pay attention to high-wind areas and roof edges.
- Flashings and penetrations: inspect around chimneys, vents, skylights, and dormers. Reseal any gaps with compatible sealant or replace worn flashings.
- Sealant integrity: check for cracks in roof sealants and re-caulk where needed to prevent leaks.
- Interior indicators: watch ceilings and walls for new stains or dripping during rainstorms, which can signal a growing roof issue.
- Safety first: never climb on a wet or icy roof alone. If unsure, call a professional for an inspection.
Material-Specific Tips for Rhode Island
- Asphalt shingles: coastal exposure can accelerate granule loss and color fading. Monitor shingle wear along the edges and at valleys; replace damaged sections promptly.
- Metal roofs: while resistant to wind, salt spray can cause corrosion over time. Wash surfaces occasionally and inspect flashings for corrosion and fastener wear.
- Slate and clay tiles: durable but brittle when cold. Avoid walking on brittle areas; replace cracked tiles promptly to prevent leaks and structural damage.
- Moss and lichen management: for all materials, keep roofs clear of vegetation that holds moisture. Use gentler cleaners and soft brushes to avoid scratching surfaces.
When to Hire a Pro in Rhode Island
- Leaks with multiple penetrations, significant shingle damage, or compromised flashings require a licensed roofer.
- Ridge lines, chimneys, or dormers with complex flashing should be addressed by a pro to ensure proper sealing and ventilation.
- Seasonal timing: schedule major repairs in dry, mild weather windows to minimize disruption and weather-related complications.
- Vetting a contractor: verify Rhode Island licensing, ask for references, confirm insurance coverage and worker's compensation, review written warranties, and obtain multiple written estimates.
When to Repair vs. Replace
Signs repair is enough
- Localized leaks or stains appear after a storm, not across large sections of the roof.
- A small area shows damaged shingles, loose flashing, or vent flashings that can be resealed without touching the entire roof.
- The underlying roof deck is sound, dry, and structurally solid.
- Your roof is relatively young (under 15–20 years for asphalt shingles) and the damage is isolated.
- Your budget is tight and the long-term payoff of a repair outweighs the cost of replacement.
When replacement is the better option
- Widespread shingle damage: curling, cupping, granule loss, or missing shingles across many sections.
- Multiple leaks or widespread water intrusion that suggests damaged decking or structural rot.
- The roof is past its typical life expectancy for its material (see RI-specific guidance below).
- There is persistent ice damming with water backflow into ceilings, indicating insulation or ventilation problems plus aging components.
- Your roof has extensive structural deterioration, such as sagging rafters or widespread rot, requiring deck replacement.
- Energy costs are up and you'd gain better airflow, insulation, and ventilation with a full roof replacement and upgraded underlayment.
Rhode Island climate and material considerations
- Harsh winters and freeze–thaw cycles accelerate wear on shingles and flashing; ice dams are a common driver of interior leaks, especially on older roofs.
- Coastal areas face higher wind exposure and salt air, which can corrode flashing and fasteners more quickly.
- Asphalt shingles typically last 15–25 years in RI, with architectural shingles lasting 25–40 years if properly installed and vented.
- Roofs in storm-prone neighborhoods or with prior hail exposure may need replacement sooner than the national average.
- If you have frequent roof repairs and live in a high-salt or high-wind zone, replacement with upgraded underlayment, starter shingles, and improved ventilation may provide better long-term value.
Age benchmarks for common roof types in Rhode Island
- Asphalt shingles: 15–25 years for standard; 25–40 years for architectural (depending on warranty and maintenance).
- Metal roofs: 40–70 years with proper coating and maintenance.
- Wood shingles/shakes: 20–30 years, shorter in damp coastal environments.
- Clay/Concrete tiles: 40–75 years, with proper framing and substrate.
Practical decision steps
1. Assess damage extent: document with photos; note leaks, staining, and decking condition.
2. Check attic ventilation and insulation: poor ventilation can cause premature roof failure and ice damming.
3. Get two to three written quotes focusing on repair scope vs. full replacement, including underlayment, flashing, and venting upgrades.
4. Verify warranties: manufacturer shingle warranty, workmanship warranty, and any remnants of prior roof guarantees.
5. Consider long-term value: factor in energy efficiency gains from proper insulation and a weather-tight roof.
6. Schedule work for the shoulder seasons in RI (late spring or early fall) to avoid extreme winter conditions and minimize disruption.
Decisions by scenario (quick guide)
- Localized damage in a roof under 15–20 years old? Repair first, provided decking is solid.
- Damage across many sections near or beyond 15–20 years? Get replacement quotes and compare lifetime costs.
- Signs of deck rot or widespread leaks with multiple repairs already done? Replacement is usually more cost-effective in the long run.
Maintenance tips to extend life between repairs or replacements
- Keep gutters clean and free of debris to prevent water backing up onto the roof.
- Clear directional water flow around chimneys and vent stacks; ensure flashing is intact.
- Inspect after major storms for curled shingles or lifted edges.
- Improve attic insulation and ventilation to reduce ice dam risk and heat buildup.
- Have a qualified roof pro perform a yearly inspection, especially after winter and storm seasons.
When to Hire a Professional
If you're seeing water stains, dripping ceilings, or active leaks in the attic, time to call a pro. Other red flags include:
- Missing or curling shingles and protruding nails
- Damaged flashing around chimneys, vents, or skylights
- Ice dams or water backing up in gutters during Rhode Island winters
- Soft or sagging roof decking
Age and extent considerations
Even if you're not actively leaking, age and widespread wear matter in Rhode Island's climate. Consider a professional if:
- The roof is 20 years old or more (common lifespans vary by material)
- You notice widespread granule loss, cupping, or curling shingles across large sections
- You're experiencing multiple leaks or repeated patch jobs in different areas
- There are soft spots or visible sagging in the decking
Complex projects and safety
Some jobs are beyond DIY scope and require a licensed roofer:
- Steep pitches, multiple layers, or uneven framing
- Roofs with many penetrations (vents, skylights, chimneys) or challenging geometry
- Underlayment replacement, ventilation upgrades, or integration with attic insulation
- After severe storms with branches, hail damage, or structural concerns
Rhode Island licensing, permits, and local considerations
Rhode Island requires contractors to be properly licensed and registered. Before you hire:
- Verify licensing with the Rhode Island Department of Business Regulation and the Contractors' Registration/Board. Ask for the license number and confirm it's active.
- Most Rhode Island towns require a building permit for roof replacements. Check with your local building department and ensure the permit is pulled and inspections are scheduled.
- Insist on a written contract that includes scope, materials, timeline, and a clear payment schedule. Confirm that permits, debris disposal, and site cleanup are part of the plan.
- Request proof of insurance (general liability and workers' comp) and obtain lien waivers as work progresses.
How to evaluate a Rhode Island roofing contractor
- Local presence and references: choose a company with a physical address and RI-specific references.
- Licensing and insurance: confirm active license numbers and adequate coverage.
- Warranty and manufacturer certifications: look for workmanship warranties and any applicable material warranties; ask about what voids a warranty.
- Detailed, transparent estimates: compare material quality, insulation/ventilation improvements, and debris removal.
- Professionalism and communication: responsiveness, clear contracts, and a dedicated project supervisor matter.
- Local knowledge: contractors who understand Rhode Island weather patterns (winter snowfall, ice damming, summer heat) tend to plan better.
Steps to hire (practical, Rhode Island-friendly)
1. Get at least 3 written estimates from RI-licensed contractors.
2. Check licenses and insurance; verify license status on the state portal and request proof of workers' comp.
3. Review references and look at recent Rhode Island projects similar in size and scope.
4. Confirm permits will be pulled and inspections scheduled; ensure responsibility for compliance.
5. Read the contract carefully: scope of work, materials, timeline, cleanup, warranties, and payment terms; require a lien waiver.
6. Schedule a site visit to discuss specifics, obtain a staged milestone plan, and set a realistic start date.
Seasonal timing tips for Rhode Island
- The sweet spot for most replacements is late spring through early fall when temperatures are moderate and weather is more predictable.
- Avoid winter installations if possible due to cold temps, snow loads, and shortened daylight; these conditions can complicate installation and impact warranties.
Quick red flags to watch for
- Vague or verbal estimates with little detail
- Pushy sales tactics or pressure to sign immediately
- Contractors who avoid providing a written contract, license, or insurance proof
- Short project timelines without a clear plan for cleanup and disposal
Putting A Lid On It: Roof Maintenance, Repair, and Replacement in Rhode Island
Rhode Island's climate puts roofs through a unique mix: brisk, windy winters with thick snows, humid summers, and occasional coastal storms. That combination means shingles wear faster, flashing and gutters face more stress, and moss or algae can take hold in damp spots. Regular maintenance is essential to head off small issues before they become costly repairs. A practical, Rhode Island–specific approach helps your roof weather the seasons and keeps your home comfortable and dry.
A little planning goes a long way. Simple annual habits—like a post-winter roof check, a fall gutter sweep, and a quick attic insulation scan—can save you headaches later. When you stay on top of it, you'll reduce the risk of leaks, ice damming, and wind-driven damage, and you'll extend the life of your roof without unnecessary expense.
Seasonal checks and practical care
- Spring: look for loose or damaged shingles, verify flashing around chimneys and vents, and ensure gutters are clear after winter storms.
- Summer: keep branches from brushing the roof, check attic ventilation, and watch for signs of algae or moss on shaded areas.
- Fall: clean gutters and downspouts, reseal flashing where needed, and inspect for loose fasteners or worn sealants as you prepare for winter.
- Winter: safely remove loose snow when possible, monitor for ice damming, and confirm the attic is well insulated to minimize heat loss into the roof plane.
Common Rhode Island roof concerns
- Moss, algae, and debris in shaded, damp areas—address early to prevent shingle lift.
- Salt spray and coastal exposure on metal components and fasteners—look for corrosion and consider protective coatings.
- Ice dam risk in poorly insulated or ventilated attics—improve insulation and ventilation to reduce meltwater on eaves.
Repair vs. replace: knowing the difference
- Small leaks or curled shingles can often be repaired promptly with proper sealants, flashing fixes, or targeted shingle replacement.
- Widespread damage, multiple failed flashings, or aging roofing materials typically signals the time to consider replacement.
- For uncertain cases, a local pro can assess structural integrity, roof deck condition, and ventilation needs to guide the right choice.
Choosing a trusted local professional
- Seek licensed, insured roofers with Rhode Island references.
- Ask about warranties on workmanship and materials.
- Request a written assessment and a transparent, itemized estimate.
A hopeful, community-minded note
You're part of a community that takes pride in sturdy homes and friendly neighborhoods. With a simple rhythm of seasonal checks, thoughtful care, and timely professional help when needed, you can enjoy a beautiful, durable roof that stands the test of Rhode Island weather—and feel confident inviting friends and family home for many seasons to come.