Last updated: Apr 19, 2026
Ice damming and edge damage are not abstract threats in Cranston-they are seasonal realities that hit older roofs hardest. The combination of repeated freeze-thaw cycles and storm-driven winds can push water where it doesn't belong, into eaves, under shingles, and around roof penetrations. When an attic or upper floor living space already bears heat loss, the risk rises: warm interior air leaks up, melts snow on the roof, and that meltwater refreezes at the cold eave line, creating ice dams that back up under shingles and drip into ceilings and walls. This is a locally urgent pattern in established neighborhoods with aging roofing around porches, additions, and multifamily buildings.
Snow piling along the lower roof line, followed by thaw-refreeze conditions, opens narrow pathways for leaks around eaves, valleys, and roof penetrations. In Cranston, the problem is intensified by shingles and edge detailing that were installed decades ago or that have seen years of exposure without recent maintenance. As temperatures swing, the edges of shingles may curl, crack, or lift, creating micro-leaks that become major problems once the weather shifts again. The result is a creeping deterioration that often starts at the roof edge and gradually travels inward, underscoring how critical edge integrity is on aging stock.
In older Rhode Island housing stock, attic heat loss does not stay upstairs where it should. When insulation and ventilation are uneven or insufficient, hot attics push more heat into the roof structure, accelerating the melting of snow at the upper roof. That melted water runs down to the colder eave areas, where it refreezes and forms dams. The pattern of heat loss plus inconsistent roof temperature makes Cranston homes uniquely vulnerable to interseason leaks, especially in places where vertical penetrations, dormers, or low-slope sections around porches intersect with traditional shingles.
Addressing the issue often requires a coordinated approach: sealing attic leaks to reduce warm air reaching the roof deck, improving insulation to keep heat where it belongs, and ensuring proper ventilation so that any remaining heat can escape without creating moisture problems in the attic. When ventilation is inadequate, moisture can condense in attic spaces and mold can become a parallel concern, compounding the risk of roof deck decay and long-term shingle deterioration. In older homes, these fixes can overlap with the decision to replace or upgrade the roof, making a thorough ventilation and insulation assessment a prerequisite to any major roofing project.
Watch for early melt events followed by rapid re-freeze along the eaves, unusual icicle formation at rakes and valleys, and visible gaps at the edge of shingles or along fascia lines. If attic access shows signs of heat leaks-stale air colors, damp insulation, or puffed vapor barriers-tawnier moments for improvement are at hand. When multiple storms arrive back-to-back, a delayed response can translate into water stains, ceiling bulges, or stained drywall that signals unseen roof deck damage. In short, Cranston homeowners should treat ice dams, edge wear, and uneven roof temperatures as a connected risk cluster demanding timely inspection and coordinated air-sealing, insulation, and ventilation improvements alongside any roof work.
Late summer through fall brings hurricane-season wind and wind-driven rain risk to Cranston, ramping up the chance of dislodged shingles, lifted flashing, and rafter-end exposure on aging roofs. The inland Rhode Island thaw-freeze cycle already wears shingles and seals year after year, and those storms hammer at openings you may not notice from ground level. Pay special attention to low-slope sections around porches, additions, and multifamily builds, where wind-driven rain can find seams and drip edges even when the rest of the roof looks intact.
Rhode Island storm patterns mean water can track along roof lines and flashings and only reveal itself after a gusty event has passed. A wind-driven rain can force water into joints you didn't realize were compromised, and the full extent of damage often becomes visible days later as ceilings soften or brown stains appear. Don't rely on the absence of active leaks during the storm to gauge condition. A post-storm walk-around and attic inspection can uncover hidden leaks before they turn into costly interior damage.
After a storm, take clear photos from ground level and from the attic if safe access exists. Document shingles that are cracked, curled, or lifted, flashing around chimneys and vent pipes, and any signs of moisture intrusion on ceilings or walls. Create a dated record that you can share with crews or insurers. In Cranston, faster documentation translates to faster triage from local roofers, which matters when demand spikes following regional storms.
If shingles are visibly detached or flashing is compromised, arrange temporary tarping to limit interior exposure. Do not delay, even if the wind has died down; a single storm crest or a rapid freeze-thaw cycle can reopen vulnerabilities. Keep areas around vents and skylights clear so crews can access and seal properly. When scheduling, expect tightened availability after major regional events, and confirm tarp integrity with a quick follow-up check after strong gusts.
Storm-driven cycles create recurring peaks in Cranston's contractor market. Have a trusted roofer inspected before the season's peak and plan for targeted repairs that address the most vulnerable points: shingle edges, valley seams, and any low-slope transitions. If a full replacement is looming, coordinate timelines early to align with calmer windows, minimizing the risk of exposure during a storm-heavy period. Stay vigilant through early fall when lingering heat or cool nights can accelerate material fatigue and edge failure.
Find local contractors experienced in assessing and restoring roofs after hail, wind, and severe weather events.
Rhode Island Remodeling
130 Belvedere Dr, Cranston, Rhode Island
5.0 from 177 reviews

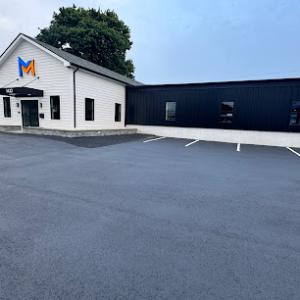
757 Exteriors Roofing & Siding
(401) 583-6671 757roofingandsiding.com
25 Bain St, Cranston, Rhode Island
5.0 from 72 reviews
Miceli Roofing
(401) 433-7663 miceliroofing.com
1422 Park Ave, Cranston, Rhode Island
4.9 from 151 reviews
Rhode Island Remodeling
130 Belvedere Dr, Cranston, Rhode Island
5.0 from 177 reviews
Rhode Island Remodeling has been a trusted name in home improvement services in Rhode Island since 1988. We are a family-owned and operated business that takes pride in delivering high-quality workmanship and exceptional customer service on every project. We are pleased to serve the entire state of Rhode Island.
757 Exteriors Roofing & Siding
(401) 583-6671 757roofingandsiding.com
25 Bain St, Cranston, Rhode Island
5.0 from 72 reviews
757 Exteriors Roofing and Siding specializes in reliable roofing services in Cranston, RI, and the surrounding areas. We offer roof repairs, installations, replacements, and siding solutions. Our experienced contractors ensure your roof is repaired efficiently, providing peace of mind for your home security against the elements. Contact us today to learn more about how we can protect your investment!
Miceli Roofing
(401) 433-7663 miceliroofing.com
1422 Park Ave, Cranston, Rhode Island
4.9 from 151 reviews
Miceli Roofing is a family-owned and operated business that has offered residential and commercial roofing services since 1960. Our longevity is a testament to us having consistently provided homeowners and property managers a superior experience. We truly partner with our clients to execute precise roof installations (and repairs) that fulfill the desired goals. We’re licensed and fully insured. We also offer up to a 10-year labor warranty, which reflects the utmost confidence we have in our craftsmanship. Homeowners choose us for several reasons: roof customization; a wide selection of products; accountability for our work; affordability; and craftsmanship. Request a custom (on roof) quote today.
Erie Home
1 Wholesale Way, Cranston, Rhode Island
4.7 from 110 reviews
Since 1976, Erie Home has manufactured, supplied, and installed the best-performing roofing on the market. By providing ironclad warranties and convenient financing, we ensure that every homeowner we work with receives top quality service and value for their homes and properties. Erie Home professionals are the roofing company of choice in the greater Providence, RI area. Whether you need roof inspections or roof damage repair services, Erie Home has been the go-to roofing contractor for nearly 50 years because of our attention to detail and dedication to making sure our customers are satisfied with their results. Contact us today for a quote and see why we're the trusted roofing company Providence counts on.
Tim's Fast Repair Leak Roofing
(872) 213-0649 tims-fast-repair-leak-roofing.ueniweb.com
229 Auburn St, Cranston, Rhode Island
5.0 from 14 reviews
Tim's Fast Repair Leak Roofing offers high-quality roofing design and services in Cranston. We are seasoned roofers who deliver top quality and budget-friendly roofing services. Get in touch with us on +18722130649. When you hire us, you know you’re getting skilled, passionate technicians you can trust to do the best job possible. And, as a bonus, we always feature competitive pricing on our services.

AJ Budget
(401) 461-3660 www.ajbudget.com
53 Carlton St, Cranston, Rhode Island
4.8 from 11 reviews
We are a full-service roofing company, specializing in residential roof replacement and repair operating for over 37 years.
Cornerstone Contractors
(401) 347-2326 www.ricornerstonecontractors.com
Cranston, Rhode Island
4.3 from 10 reviews
Cornerstone Contractors are a full service roofing contractor company centrally located in Rhode Island. We offer residential and commercial roofing, from repairs to installs. We service all cities and towns in RI. As licensed and insured professional certified roofing contractors. Cornerstone Contractors are locally owned and operated. We have 25 years of experience in the roofing business. Cornerstone Contractors are experts in helping home owners increasing their home values, lowering energy expenses, and the over all comfort of their home. Whether it is a whole new roof or a repair, we are the contractors for you and will help you find most cost-effective solution.
Couto Construction
(401) 420-7248 coutoconstruction.com
Serving
4.9 from 400 reviews
Couto Construction is the most-trusted home exterior renovation serving Warwick, Rhode Island and surrounding areas since 1987. A family-run business they are a one-stop shop for all your home's exterior needs, specializing in roof replacement and repair, siding, windows, doors, gutters, and attic insulation. Their team of certified contractors brings decades of expertise ensuring top-quality results that last. They use only the best materials and back their work with a peace-of-mind 50-year warranty. Get a free inspection and estimate and Couto Construction will work closely with you to understand your needs and budget, ensuring a smooth and stress-free home exterior remodeling experience.
RTP Roofing
Serving
5.0 from 196 reviews
Established in 2006, RTP Roofing is a well-established, trusted roofing contractor serving the Rhode Island community. RTP Roofing is committed to delivering top-quality services, specializing in residential and commercial roofing. Whether fixing a leak, installing a new roof, or replacing an existing one, RTP Roofing has the expertise to handle all your roofing needs. Our roofing company also offers comprehensive siding and gutter installation services, ensuring that your property has a sturdy roof and boasts impeccable exterior features. With a focus on precision and customer satisfaction, RTP Roofing is the go-to choice for all your roofing and exterior improvement projects.
Skyview Exteriors
(401) 375-4491 www.skyviewexteriors.com
Serving
5.0 from 254 reviews
Skyview Exteriors is a leading roofing company in Providence, Rhode Island, providing top-notch services such as roof repairs, replacements, skylight installations, and more. Our skilled team also specializes in solar installations, siding, and gutters, ensuring comprehensive exterior solutions for your home. Experience unmatched quality and expertise with Skyview Exteriors for all your roofing and exterior needs.

QSPS Housing Solutions
(401) 230-9004 www.qspshousingsolutions.com
Serving
4.8 from 283 reviews
Roofing & Water Restoration Solar Specialists. 15+ years.Siding,Windows Skylight Gutters & PVC Fencing
Paramount Roofing Solutions
Serving
5.0 from 20 reviews
Paramount Roofing Solutions is the trusted roofing contractor serving Warwick, RI, with a commitment to delivering high-quality roofing services for residential and commercial properties. Whether you're in need of a new roof installation, roof replacement, or expert roof repair, our team has you covered. We specialize in a variety of roofing options, including durable metal roofing, classic asphalt shingle roofing, and energy-efficient commercial TPO roofing. We also offer top-notch services for new construction roofing projects and flat roofing systems. With years of experience and a dedication to customer satisfaction, Paramount Roofing Solutions ensures your roof is built to last, protecting your property from the elements.
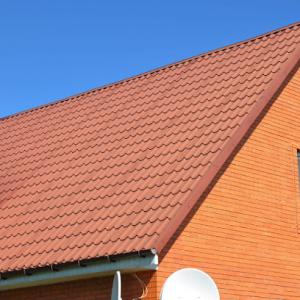
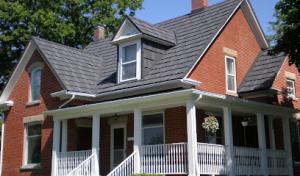
Asphalt shingles dominate because they fit the area's common residential roof forms and offer a lower entry cost than slate, tile, or metal. In Cranston, where many homes feature steeply pitched gables and modest porches, asphalt shingles provide solid performance against freeze-thaw cycles and spring storms. When selecting shingles, look for good granule adhesion and a limited number of exposed fasteners to reduce ice dam risk on eaves and lower-slope areas around additions. A reflective or algae-resistant option helps with summer heat buildup, which can stress attic ventilation alongside aging roof decks.
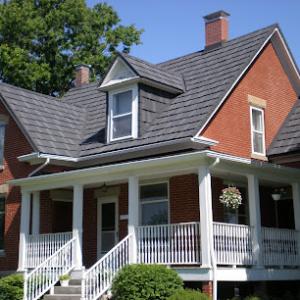
Slate remains relevant in older Rhode Island homes but replacement and repair are more specialized because of weight, flashing integration, and matching challenges. If a Cranston house has existing slate or a compatible roof frame, slate can deliver long life and a classic look, yet it demands accurate assessment of the roof structure and surrounding flashing to prevent leaks during heavy Nor'easters. Replacements should use matching thickness and nail spacing, and any repairs must coordinate with downspouts and valley flashing to avoid ice dam leakage. Slate is less forgiving for retrofit accents or porches unless the home was built with slate-compatible framing in mind.
Metal roofing is a practical upgrade for homeowners prioritizing snow shedding and durability, especially on roofs with long, uninterrupted runs or low-slope pockets around porches and additions. In Cranston, metal's quick shedding helps minimize ice buildup along eaves, reducing ice dam exposure to interior ceilings. Look for standing-seam installs with integrated flashing at transitions and a properly vented attic to prevent condensation issues. Metal can be a strong match for homes with modern additions or retrofits, though color matching and flashing detail should be planned to integrate with the existing roof line and gutters.
Tile options are less common and may require structural review on homes not originally built for that load. Clay and concrete tiles offer unique aesthetics and long lifespans but impose significant weight and require careful fastening and flashing coordination at chimneys, skylights, and valleys. If a Cranston home has older framing or limited attic space, consultation is necessary to confirm structural capacity and to plan for attic venting and drainage. Tile roofs pair best with homes that already lean toward a heavier, traditional look, where the roof plane and parapets can be harmonized without compromising drainage or emergency access.
Synthetic or composite shingles cover a middle ground, delivering improved durability without the heft of tile or slate. They fit well on older homes that need a modern upgrade without dramatic structural changes, and they resist weathering from wind-driven rain and freeze-thaw cycles typical of Cranston winters. Consider products with proven granule adhesion and UV stability for the long run, especially on roof surfaces facing prevailing winter winds.
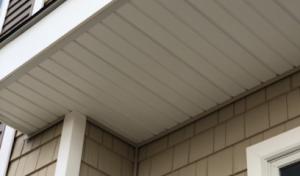
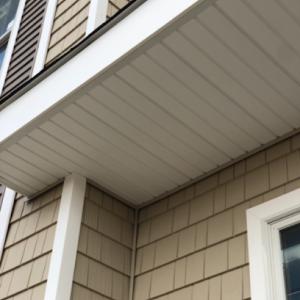
Even where the main roof is pitched, Cranston homes often have low-slope sections over porches, dormers, additions, or multifamily rear extensions that fail differently than the main shingle roof. Those zones guestimate water flow differently, and materials can age out on their own timetable. Expect that these areas will reveal wear patterns sooner than the steep main roof if the details aren't protected well.
Warm, humid summers can stress low-slope membranes and sealants, while winter ponding and freeze-thaw cycles increase seam and flashing vulnerability. In practical terms, that means water can sit on a flat or near-flat surface long enough to creep into edges and fasteners. The result is a slow but stubborn leak that doesn't always announce itself with a dramatic drip-until a heavy rain or a sudden freeze hits.
Transitions between steep-slope roofing and low-slope sections are a common leak point in older New England homes. Look closely at those junctions where a dormer meets the main roof, or where a porch roof ties into the home's shell. The detailing there-flashing, membrane seams, and fastener placement-often determines whether an otherwise sound roof keeps moisture out.
For routine checks, pay attention to any staining or damp spots near porch ceilings, interior walls, or attic corners where a low-slope area meets the attic space. In the attic, examine for soft spots along the transitions, loose or missing fasteners, and shingle lift near edge flashings. If you notice repeated winter meltwater pooling at the same seam, that's a sign to re-evaluate sealants and flashing details before a deeper issue forms.
Plan proactive maintenance that targets the particular vulnerabilities of low-slope sections: resealant joints, verify proper drainage at all low spots, and ensure flashing overlaps are intact. These steps help reduce storm-driven leak risk and extend the life of the roof components that don't share the same aging cycle as the main steep-slope roof. In Cranston, keeping an honest eye on these areas saves surprises when spring rain arrives.
Find specialists in TPO, EPDM, and built-up flat roofing systems for residential and commercial properties.
In Cranston, pricing is influenced by the mix of older homes, tear-off complexity, chimney flashing work, and the need to correct decking or ventilation issues uncovered during replacement. As storms and winter cycles tax aging roofs, crews often encounter rotten decking or ventilation gaps that add time and material costs. This city context means there is less predictability than a uniform new-build project, and bidding may vary by contractor availability after a major wind event or a harsh freeze.
Heavier materials such as slate, clay tile, and concrete tile can add structural and handling complexity compared with standard asphalt shingle projects. In practice, you may see higher per-square costs when choosing these options, driven by crane time, extra crew labor, and potential structural checks. For Cranston homes, asphalt shingles remain common and reliable, with cost ranges that reflect typical removal and deck prep, plus local disposal fees. If choosing metal, expect a broader window in pricing due to panel length, fastening details, and flashing work around chimneys and dormers.
Ice dams and freeze-thaw wear are central to Cranston roof projects. Addressing roof ventilation and proper decking repair during replacement can prevent future leaks, but these improvements add to the budget. Proper attic ventilation, curb flashing, and soffit-to-ridge airflow are particularly important where older homes show signs of moisture intrusion. Storm-driven demand surges can tighten scheduling and labor availability after major wind or winter events, potentially pushing material lead times and crew rates higher for a stretch.
Typical per-square costs in this market align with the following ranges: Asphalt Shingles, 350-650 USD per square; Metal Roofing, 900-1800 USD per square; Clay Tile, 1400-3200 USD per square; Concrete Tile, 1400-2900 USD per square; Synthetic/Composite Shingles, 450-900 USD per square; Slate, 1200-3200 USD per square. For Cranston projects, the final number reflects tear-off complexity, the extent of flashing and chimney work, and any decking or ventilation corrections uncovered during replacement.
Given the Providence-area market dynamics, after a significant wind or winter event, expect tighter scheduling and limited labor availability. If your project aligns with a post-storm window, plan for potential delays and confirm updated start timelines with the contractor. Clear communication about anticipated crew availability and material delivery margins helps avoid last-minute price shifts or resequencing of work.
Get a clear picture of your project costs upfront - no commitment required.
757 Exteriors Roofing & Siding
(401) 583-6671 757roofingandsiding.com
25 Bain St, Cranston, Rhode Island
5.0 from 72 reviews

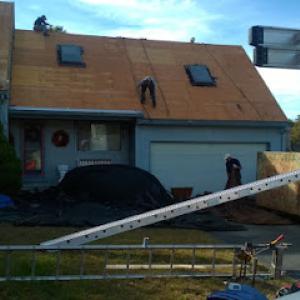
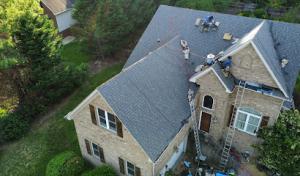
Cranston generally requires a building permit for a full re-roof, and work should not begin until the permit is issued by the City of Cranston Building Department. The permit process helps ensure the project is planned with attention to the local freeze-thaw cycles, wind exposure, and typical housing stock in the area. A full re-roof on an older shingle roof or a low-slope section near a porch or addition should be treated as a major, code-impacting job, not a cosmetic upgrade. Before any ladder work or tear-off begins, confirm that the permit notice is posted on site and that the job scope aligns with the approved plans.
In practice, the roofing contractor commonly submits the permit application and pays the fee as part of the project setup. This arrangement can save you time and help ensure that the documentation matches the actual materials and installation methods planned for Cranston's climate. When the permit is submitted, expect a review period that may include detailing roof ventilation, attic insulation, and drip-edge protection, all of which affect long-term performance in freeze-thaw conditions. If you prefer to review the submission yourself, request a copy of the plan set and the code references that the Building Department will rely on during review.
Inspections are scheduled during and after the job to verify code compliance and proper installation before closeout. Typical checkpoints cover shingle or panel attachment methods, flashing around chimneys and vent stacks, valley and edge treatments, and proper underlayment installation for moisture management. In addition to the mid-project check, a final inspection confirms that the roof system meets current code requirements and is suitable for Cranston's winter and storm patterns. Prepare for access needs and bring any manufacturer installation-attachment documentation to the inspector, since these can help demonstrate compliance and facilitate a smooth closeout. If any discrepancies arise, the contractor will address them before the permit can be released for final validation.
You'll typically rely on standard Rhode Island homeowners coverage for wind and storm-related roof damage rather than a uniquely restrictive local insurance market. After a nor'easter or seasonal hurricane activity, insurers will evaluate claims against your policy's storm and wind damage provisions. In Cranston, carriers commonly expect that damage is tied to weather events and that the roof has been properly maintained prior to the event.
Insurers may request roof-condition documentation, maintenance history, and photos before approving a claim, especially after regional storm activity. Gather recent roof assessments, attic inspections, and any available maintenance notes. Take clear exterior photos from multiple angles, focusing on shingles lifting, flashing separation, and any signs of ice damming along the eaves. Inside the attic, photograph any staining, rot, or moisture, and note the travel path of any leaks. Make a dated record of the storm itself, including wind speeds reported locally and the time of impact.
Because claim handling can vary by insurer, homeowners should document exterior damage, interior staining, and temporary mitigation steps immediately after a storm. If safe, place tarps over exposed areas, cover leaks with plastic sheeting, and keep a log of all temporary measures and weather conditions. Contact your insurer promptly to report the claim and request guidance on preferred documentation. Keep receipts for any temporary repairs or materials used to prevent further damage, as those may be eligible for reimbursement or considered in the assessment.
When an adjuster visits, provide the dossier you prepared: dated photos, maintenance history, and a written narrative of how the storm impacted the roof and interior. Be ready to explain any preexisting issues that could complicate the claim, and offer to walk the inspector through attic areas to corroborate moisture or ice-damming evidence.
Connect with contractors who help homeowners navigate the claims process from damage assessment to final approval.
Rhode Island Remodeling
130 Belvedere Dr, Cranston, Rhode Island
5.0 from 177 reviews
757 Exteriors Roofing & Siding
(401) 583-6671 757roofingandsiding.com
25 Bain St, Cranston, Rhode Island
5.0 from 72 reviews
Miceli Roofing
(401) 433-7663 miceliroofing.com
1422 Park Ave, Cranston, Rhode Island
4.9 from 151 reviews
In Cranston, active leaks and fast debris control drive most homeowner decisions. When a storm or ice dam threatens a roof, you want a crew that answers the call, arrives on schedule, and sets up a clear plan to stop leaks quickly. Look for a response window that fits the typical Cranston winter pattern-short notice, flexible hours, and on-site assessment within 24 hours when possible. After the fix, expect a thorough cleanup that leaves no shingle granules or nails behind, because tight residential lots mean cleanup must be visible and complete before the next street plowing and school pickups start up again. A crew that uses magnetized cleanup and a final walk-through with the homeowner earns trust in this market.
Re-roofing is a common need around here, and Cranston homeowners typically compare established crews on responsiveness, affordability, and experience with occupied homes. Prioritize a proven track record of completing projects without extended disruption to daily routines. Your chosen roofer should demonstrate a clear project timeline, communicate equipment staging to minimize yard and driveway blocking, and show written references from nearby street addresses with similar roof styles. On older houses, where aging shingles meet low-slope sections, expect careful sequencing to protect interior spaces during a full roof replacement. A company with a steady crew, predictable material delivery, and a habit of keeping neighbors informed earns specific credibility in this market.
Chimney-related roofing work matters locally because many older homes require coordinated flashing where roof meets masonry. Ask for examples of chimney flashing kits used on homes with similar brick or stonework and discuss how overhangs, kickouts, and mortar joints will be treated to prevent ice dam leaks. The right contractor will partner with a masonry specialist when needed and implement a unified flashing plan that integrates shingles, underlayment, and masonry sealant. Expect precise attention to sealant compatibility, backer rod placement, and a clean, leak-tested finish that stands up to Cranston's freeze-thaw cycles.