Last updated: Apr 19, 2026
In this city, cold winters with snow and regular year-round precipitation make freeze-thaw cycling a primary roof-aging force locally. Water that doesn't fully dry or drains slowly seeps into small gaps, freezes, and expands, gradually widening cracks in shingles, flashing, and underlayment. Over multiple seasons, that cycle wears away protective layers, promotes moisture intrusion, and accelerates the need for repairs or a full replacement on aging homes that already carry generations of patching.
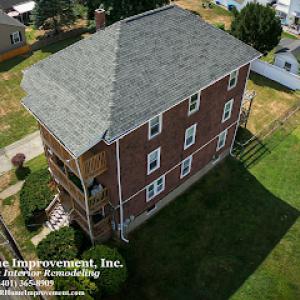
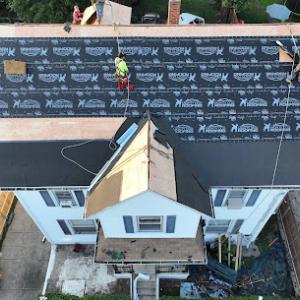
Pawtucket's stock of older houses means many roofs have seen a dozen or more winters of patching and weathering. Flashing around chimneys, skylights, and dormers often bears the brunt first, showing signs of lifting, rust, or gaps. The roof deck itself can develop soft spots or cupping from repeated moisture exposure, especially where gutters and downspouts fail to channel runoff effectively. In the most common cases, the combination of porous or worn roofing material and undersized or clogged drainage shortens service life. When you pair that with a long history of intermittent repairs, the roof becomes less able to shed water efficiently, and each new thaw-cycle compounds the damage.
Look for hairline cracks in shingles, granule loss in asphalt products, and dark staining where moisture pockets linger. Metal flashing that rusts or pulls away from joints can indicate chronic water entry. Roofing penetrations-vents, vents boots, and pipe collars-are frequent failure points; the sealants around them often degrade after years of freeze-thaw spray and sun exposure. Sheathing rot or warped decking beneath shingles is a louder alarm that the interior layers have endured more moisture than they can safely bear. If you notice intermittent damp spots on ceilings after heavy rains or after rapid temperature swings, the roof's waterproofing layers may be compromised and in need of attention.
Replacement scheduling is typically best from late spring through early fall because winter conditions and autumn temperature swings complicate tear-off and installation timing. Cold, frosty mornings slow tear-off and adhesive setting, while late fall can expose crews to early snowfall before all outdoor work is finished. For homes with a long history of patching, the contractor will likely suggest replacing the roof once the weather window is reliable and the deck is dry enough to support a solid installation. Advancing maintenance during the milder months helps minimize the risk of leaks during the critical colder season.
Keep drainage channels clear so water doesn't back up and freeze near eaves and valleys. Clear gutters and downspouts at least twice a year, ideally after leaves drop and again after storms, to prevent ice dam formation. Inspect flashing around chimneys, skylights, and dormers for loose nail heads, lifted metal, or gaps; reseal or replace compromised pieces before the next freeze cycle. Replace aging shingles with curling edges or missing tabs to restore a uniform surface that sheds meltwater efficiently. Finally, counsel with a local roofing professional about reinforcing vulnerable sections of the roof deck and updating underlayment to better tolerate Pawtucket's winter moisture and recurring precipitation.
Spring storms roll through the Blackstone and Seekonk corridors with a bite that older roofs feel fast. Wind-driven rain exposes weak shingles, vulnerable ridge caps, and flashing corners long before a planned replacement project can begin. In Pawtucket, that means a handful of quick, pressure-driven leaks can flare up after a late evening gust, and those spots often reveal themselves just as days stay damp and temperatures swing.
After a spring storm, walk the attic and edges with a flashlight to spot any moisture trails, soft spots, or loose fasteners around the ridge and vent stack. On the roof, look for lifted shingles, torn edge seals, or flashing that has pulled away from chimneys or walls. If you find trouble, address it fast with temporary tarping or a spot patch to minimize interior damage until a pro can seal the worst leaks. This is where time matters: the longer water sits, the more likely the damage will spread into insulation and ceiling finishes.
Rhode Island insurers commonly see wind and hail claim activity, so having solid photo evidence after a storm is essential. Take wide-angle shots of the entire roof and close-ups of any lifted areas, broken granules, or damaged flashing. Collect a few panels of the roof with a ruler or coin in each photo to convey scale. After a storm event, share those images with your contractor and insurer promptly, along with a clear timeline of when the damage was noticed and what temporary measures were taken to control leaks. Having this documentation ready speeds up the claim review and reduces back-and-forth.
Quick-response roofers are especially prevalent in this market, reflecting homeowner demand for fast leak control after wind-driven rain and storm damage. If a contractor can mobilize within 24 to 48 hours, that speed often determines whether interior damage is contained and outward weather exposure is minimized. When you call for a fast response, ask for a brief written assessment that prioritizes safe, stanchioned temporary fixes and a concrete plan for secure, weatherproofed temporary protection while a longer-term repair or replacement is scheduled.
Keep a short list of trusted local roofers and emergency contact numbers handy, especially around the late-winter to early-spring transition. Set expectations with your contractor about the scope of spring storm risks in this area: exposed ridge lines, edges, and flashing need extra attention, and temporary protections bought and installed promptly can save significant interior damage. After each storm, re-check the roof and attic spaces for new indicators of exposure, and maintain a rapid-response plan so you're not scrambling when the next squall arrives.
Find local contractors experienced in assessing and restoring roofs after hail, wind, and severe weather events.
B&R Home Improvement
(401) 365-8909 www.bandrhomeimprovement.com
24 Morris Ave, Pawtucket, Rhode Island
4.9 from 213 reviews
Lizmar construction
(401) 955-4517 lizmarconstructionllc.com
45 Lee St, Pawtucket, Rhode Island
5.0 from 25 reviews
United Better Homes - Roofing, Solar & Windows
(401) 274-0111 www.unitedbetterhomes.com
Serving
4.8 from 232 reviews
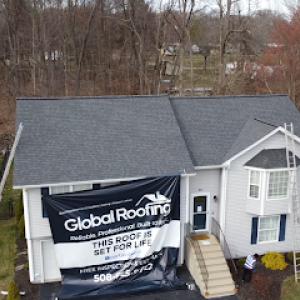
Global Roofing
(508) 625-9734 www.getglobalroofing.com
163 Exchange St Suite 202, Pawtucket, Rhode Island
5.0 from 143 reviews
Global Roofing delivers reliable residential roof replacements across Massachusetts, Rhode Island, New Jersey, and Connecticut. We do it once, and we do it right - with materials built to handle New England's toughest weather. Our GlobalCare approach means going above and beyond on every project: premium 50-year warranty materials, optimized ventilation, advanced water prevention, and a meticulous cleanup. As a CertainTeed Premier ShingleMaster contractor, we're Google Guaranteed and trusted by over 3,000 homeowners. Most roofs completed in just one day. Free inspections and flexible financing with no payments for 12 months. Call today for your forever roof.
B&R Home Improvement
(401) 365-8909 www.bandrhomeimprovement.com
24 Morris Ave, Pawtucket, Rhode Island
4.9 from 213 reviews
B & R Home Improvement offers services for all your residential home repair needs. We offer interior and exterior remodeling, such as roofing, gutters, decks, kitchen and bath makeovers, as well as additions.
Lizmar construction
(401) 955-4517 lizmarconstructionllc.com
45 Lee St, Pawtucket, Rhode Island
5.0 from 25 reviews
LizMar Construction is a licensed and insured roofing contractor serving Pawtucket and all of Rhode Island. We specialize in roof replacement, roof repair, siding installation, gutter services, painting, and storm damage restoration. Our team provides free inspections, honest estimates, and high-quality workmanship for residential and commercial. Whether you need emergency roof repairs or a full roof replacement, LizMar Construction is committed to reliable service and customer satisfaction across Rhode Island.
United Better Homes - Roofing, Solar & Windows
(401) 274-0111 www.unitedbetterhomes.com
Serving
4.8 from 232 reviews
United Better Homes - Roofing, Solar & Windows, located at 535 Pine Street in Central Falls, RI, is your trusted, family-owned contractor for top-quality roofing services. Specializing in both residential and commercial projects, our GAF Master Elite team excels in roof repair, replacement, and installation using premium materials from brands like CertainTeed. Proudly serving areas across Rhode Island, Massachusetts, and Connecticut, we also offer solar panel and window installations, boosting energy efficiency and curb appeal. With a focus on customer satisfaction, we provide free roof inspections, detailed estimates, and various financing options. For stellar service in "roof repair" and "roof replacement," contact us today.
N.E. Building & Restoration
Serving
4.9 from 124 reviews
N.E. Building & Restoration is a Seekonk, MA–based roofing replacement company serving local homeowners and businesses with professional exterior construction services. Founded in 2018, we focus on roof replacements designed to withstand New England’s harsh winters, heavy snowfall, coastal winds, and seasonal temperature swings common across Bristol County. Our team also provides siding, gutters, custom decks, and solar installation for both residential and commercial properties. Every project is handled with close attention to craftsmanship, clear communication, and practical solutions tailored to local conditions. We bring experienced roofers, proper licensing, and a disciplined, professional approach to every job.
Milanovich Brothers Roofing | Commercial | Industrial | Residential Roofing
Serving
4.2 from 32 reviews
Milanovich Brothers Roofing we are a family owned and operated company at your service Specializing In all types of roofs commercial/Residential flat/shingle replacements, Overlays, Roof Repairs, Roof Coatings, here at M.B.R we guarantee 100% customer satisfaction
Mr. Roof.
(508) 342-5373 www.misterroof.net
Serving
4.8 from 197 reviews
MR. ROOF. INC, located at 829 Newport Ave, is your trusted roofing contractor with over 22 years of experience serving South Massachusetts and Rhode Island. We specialize in Roof Repair, Roof Replacement, Shingle Roofing, Metal Roofing, and Emergency Roof Repair, delivering top-notch solutions that blend quality and efficiency. Our expert team is committed to enhancing your property's durability and aesthetics, offering advanced roofing systems using energy-efficient materials for both residential and commercial clients. With a reputation for exceptional customer satisfaction and robust warranties, choose MR. ROOF. INC for all your roofing needs. Call (508) 342-5373 today for a free quote!
MDJ Roofing & Siding
(401) 541-8148 mdjconstruction.net
Serving
5.0 from 14 reviews
Don’t settle for the rest when you can call the best! Call MDJ Roofing & Siding today! MDJ Reps are roofing and siding experts with expertise in working with Insurance. Call for your free inspection today!
Exact Exteriors
(401) 420-5645 exactexteriorsllc.com
Serving
5.0 from 136 reviews
Exact Exteriors is a trusted local roofing company serving Providence, RI, and surrounding areas since 2019. We specialize in both residential and commercial roofing, siding, windows, and exterior painting—using quality materials and expert craftsmanship to deliver lasting results. Contact us today for a free, hassle-free estimate!
Mighty Dog Roofing of Rhode Island
(401) 425-4108 www.mightydogroofing.com
Serving
5.0 from 67 reviews
When it comes to your home’s exterior, Mighty Dog Roofing delivers top-of-the-line services matched with the neighborly customer care our clients have come to love. Our team of skilled experts will conduct a free, detailed inspection of your home, treating it as our own. Whether your home needs a simple repair or a full roof replacement, expect to receive the transparent guidance you deserve. Whatever the case, our team will work to meet your safety and budget needs. We take pride in operating with quality materials, hiring skilled roofers, and providing our customers with a high-quality experience. See for yourself; our reviews say it all. Schedule your free, exterior home inspection today!

Concep Roofs
Serving
5.0 from 11 reviews
Concep Roofs, your premier roofing experts serving the beautiful state of Rhode Island. With years of experience and a commitment to excellence, we are dedicated to providing top-quality roofing solutions to homeowners and businesses alike. Our skilled team of roofing professionals is trained in the latest techniques and uses only the finest materials to ensure durable and long-lasting roofs. Whether you need a roof repair, replacement, or installation, we've got you covered. We offer a wide range of services, including shingle replacement, leak detection and repair, gutter installation, and much more. Our goal is to deliver superior craftsmanship and exceptional customer service on every project we undertake.
Skyview Exteriors
(401) 375-4491 www.skyviewexteriors.com
Serving
5.0 from 254 reviews
Skyview Exteriors is a leading roofing company in Providence, Rhode Island, providing top-notch services such as roof repairs, replacements, skylight installations, and more. Our skilled team also specializes in solar installations, siding, and gutters, ensuring comprehensive exterior solutions for your home. Experience unmatched quality and expertise with Skyview Exteriors for all your roofing and exterior needs.
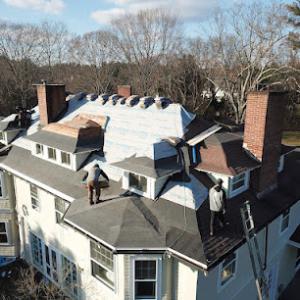
The dense, older housing stock along the Blackstone and Seekonk corridors in this city endures a winter that tests roofs with repeated freeze-thaw cycles and regular precipitation. That pattern-moisture seeping into joints, freezing, expanding, then contracting-accelerates wear on shingles, fasteners, and flashing. Heavier snowfall adds load that some older structures were not originally framed to bear. In this context, heat resistance matters less than moisture tolerance and the ability to hold up under freeze-thaw stress while fitting onto aging roof decks. Asphalt remains a practical baseline because it pairs well with existing roof pitches and can be installed efficiently over failing but still sound underlays. But the most durable long-term options in this neighborhood often hinge on materials that manage moisture well, distribute weight thoughtfully, and resist cracking or delamination after repeated cold cycles.
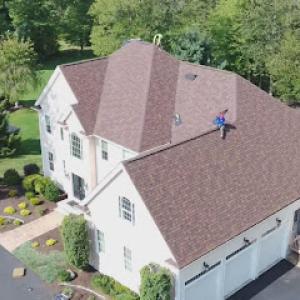
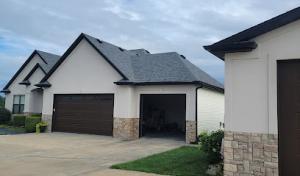
Asphalt shingles are the workhorse for many re-roofs. They tolerate irregular roof lines, are forgiving with mismatched or uneven decking, and align well with the way most older homes were framed. The technology now offers better granule durability and rain resistance, which helps in a climate with frequent damp days. Metal roofing provides a different payoff: aluminum or steel panels shed moisture quickly, resist dimensional changes, and can extend a roof life on homes where deck rot is a concern. In snow-prone sections, metal's smooth surface also helps with ice dam formation, provided the attic is well-insulated and ventilated. Clay and concrete tiles contribute a heavyweight, traditional look suited to certain Northeastern aesthetics; they demand a strong structure to carry the extra weight and careful detailing around penetrations. Synthetic or composite shingles emulate the appearance of more traditional options while offering improved impact resistance and dimensional stability in the cold, which can be appealing on older, plaster-inset homes. Slate remains a reference point for durability and heritage; it's resilient in cold climates and long-lasting, but it requires substantial structural support and careful framing-making it a better fit for homes with the underlying strength to handle its weight. In Pawtucket's context, slate and tile are often found on the most historic, heavier-roofed houses where the visual and historical value justifies the upgrade in framing and support.
Older homes commonly have roof decks that show signs of wear, with potential sag or uneven support. The choice of roof should acknowledge that these structures may not comfortably carry the weight of heavy tile or slate without reinforcement. If the existing rafters and sheathing show age, a lighter option such as asphalt or synthetic shingles may be prudent, or a tile system could be planned with a structural assessment and possible reinforcement. Look for roofs with adequate attic ventilation and a robust underlayment strategy to manage moisture ingress: good ventilation reduces ice dam risk and helps the roof materials perform as intended through freeze-thaw cycles.
Choose a material that respects both the visual character of the home and the practical demands of a Northeast winter. If the goal is to preserve a historic silhouette while improving moisture resilience, a high-quality asphalt or synthetic shingle paired with a solid underlayment and proper flashing around chimneys, vents, and valleys can deliver reliable performance. For homes with the structural capacity to bear heavier systems, slate or traditional clay tile offer enduring aesthetics and proven cold-weather durability. In all cases, ensure the chosen system complements existing insulation, attic ventilation, and drainage details to minimize moisture retention and maximize long-term life. Paisley or brick exterior detailing, common in older neighborhoods, often benefits from thoughtful edge treatments that prevent wind-driven water intrusion and preserve the roof's edge integrity over decades. The best approach balances local housing realities, climate stressors, and the structural truth of the house you're protecting, rather than chasing heat-focused performance alone.
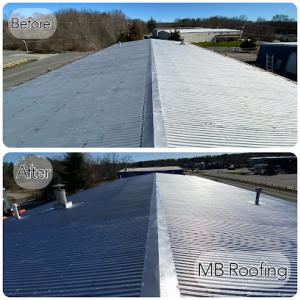
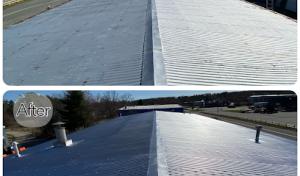
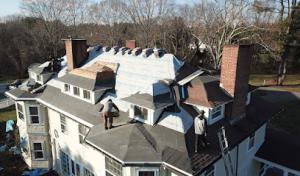
Flat-roof specialization is meaningfully present in the Pawtucket market, reflecting a real local need beyond standard pitched-house re-roofing. In dense urban blocks, flat sections are common on additions, porches, and mixed-use properties, and the work you see here is not simply a matter of choosing a new membrane. It's about understanding that these roofs live at the intersection of space constraints, moisture management, and a climate that tests joints and edge details year after year. The local crews you'll encounter expect to deal with aging parapets, penetrations, and accumulations of debris that never quite settle the way they do on a stand-alone home.
Dense urban building patterns mean some homes rely on low-slope sections that handle standing moisture differently from steep roofs. Regular precipitation and winter freezing make drainage performance especially important on low-slope roofs. When water lingers at the edge or around penetrations, ice damming and seepage become more than cosmetic issues; they can undermine flashing, insulation, and interior finishes. In blocks where porches and extensions share a roof with the main structure, a small miscalculation in slope or overflow capacity quickly multiplies into bigger headaches. A well-designed drain plan-proper slope, adequate scuppers, and reliably fastened membranes-won't magically fix every issue, but it buys you time before leaks become visible.
You'll notice a range of flat-roof systems in this market, from traditional built-up membranes to modern single-ply sheets and modified bitumen. The right choice for a Pawtucket roof is not solely about initial appearance or the membrane brand; it's about how the system handles freeze-thaw cycles and seasonal precipitation with the specifics of the block's geometry. Edge detailing, flashing around vents or skylights, and consistent maintenance of parapets determine how long a flat roof lasts in this climate. Be prepared for periodic maintenance on seams, fasteners, and any penetrations, because neglect here tends to show up as moisture intrusion sooner than you expect.
Start with an assessment focused on drainage clarity: confirm that gutters and downspouts are clear and that any scuppers discharge away from the building. Inspect around parapets for signs of bulging flashing or mineral buildup at joints, especially where multiple roof planes meet. If you notice pooled water after rain or after snowmelt, address that immediately with a professional who can adjust slope or add overflow paths. When selecting a contractor, prioritize experience with low-slope systems in urban settings, where tight access and shared loads demand careful execution. In these blocks, the difference between a roof that merely sheds water and a roof that resists leaks is a careful blend of design, routine maintenance, and timely repairs.
Find specialists in TPO, EPDM, and built-up flat roofing systems for residential and commercial properties.
Milanovich Brothers Roofing | Commercial | Industrial | Residential Roofing
Serving
4.2 from 32 reviews
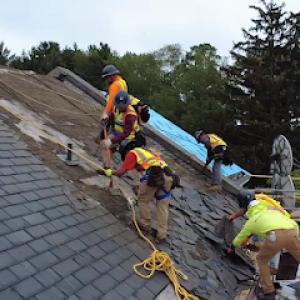
Typical local material pricing runs about $400-$700 per square for asphalt shingles, $600-$1200 for metal, $900-$1800 for clay tile, $850-$1600 for concrete tile, $450-$800 for synthetic/composite, and $1100-$2300 for slate. In Pawtucket, older homes along the Blackstone and Seekonk corridor often reveal more once the tear-off starts: decking repairs, chimney flashing issues, or layers from previous renovations that accumulate over decades. Those hidden conditions push the project beyond a simple shingle swap and toward a broader repair + replacement bill. When a contractor peels back the old roof, expect a closer look at deck integrity, surrounding venting, and drainage details that can add to the price.
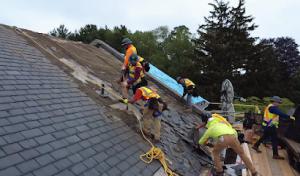
Seasonal wear matters in this neighborhood. Winter freeze-thaw cycles stress shingles, nails, and flashing, while regular precipitation tests joints and seals. If a tear-off uncovers damaged decking or rusty nails, the crew will typically replace sections of sheathing and re-fasten a proper underlayment. Chimney flashing is a frequent source of leaks after a long Pawtucket winter, and addressing it often means extra metal or sealant work. Layered prior work is common in older homes, and peeling back those layers can reveal the need for additional flashing, counterflashing, or flashing around roof penetrations. All of this translates to longer crews, more materials, and higher costs than a straightforward one-layer install.
Seasonal demand spikes after winter damage and spring storms can affect scheduling and pricing, while late spring through early fall is the preferred replacement window. If you wait for mid-winter dryness or respond to a sudden leak during a thaw, you may encounter tighter labor markets and higher rates. Planning ahead for a late spring or early summer replacement can help you secure a slot with experienced local roofers and may reduce the risk of concurrent projects driving up prices.
Choosing material in this climate hinges on balance between upfront cost, durability, and the reality of maintenance on aging homes. Asphalt shingles present the most budget-friendly option but may need more frequent attention in a freeze-thaw cycle. Metal offers longevity but comes with a higher initial price. Clay and concrete tiles bring exceptional durability yet can be heavier and require a reinforced deck. Synthetic/composite provides a middle ground in weight and performance, while slate delivers top durability at a premium. For Pawtucket's older housing stock, weigh the likelihood of hidden deck repairs and flashing remediation against the material's long-term performance to avoid surprises during installation.
Get a clear picture of your project costs upfront - no commitment required.
Lizmar construction
(401) 955-4517 lizmarconstructionllc.com
45 Lee St, Pawtucket, Rhode Island
5.0 from 25 reviews

In this city, a building permit is typically required for a full re-roof, and timely coordination with the right local office helps prevent delays that can push a project into cold snaps or late winter work windows. The City of Pawtucket Department of Inspectional Services handles permit issuance and roofing inspections, so starting the process there sets expectations early in the season when frost and precipitation are common.
Begin by confirming that the permit cover is specifically for a full re-roof, not just patch work or repairs. The department will want details on the existing roof, the proposed materials, and the height and access of the project. When you submit, you'll likely be asked for structural notes if the roof replacement involves changing sheathing or decking, or if structural members are modified to accommodate new underlayment or heavier materials. Having a clear project scope helps smooth the review during the busy fall and spring windows.
A rough inspection during construction is expected in most cases. This is your checkpoint to verify that framing, underlayment, ventilation, and flashing details align with code requirements and the specifics of the chosen roofing system. Noting the climate reality here-freeze-thaw cycles and substantial precipitation-the inspector will check for proper ice and water shield placement in valleys and boundaries, as well as adequate attic ventilation to manage moisture.
Upon completion, a final inspection confirms everything is properly installed and sealed against the next winter. For larger or more complex homes, be prepared for added documentation or an optional review step. It's not unusual for multiple decks, dormers, or intricate eaves to trigger a supplemental review to ensure that flashing transitions, drip edge, and gutter connections perform reliably in heavy snow and seasonal melt.
Keep organized project notes and clear site access for inspectors, especially in tight curbsides or dense neighborhoods where bulk materials and debris can impact access. Schedule inspections with buffer time around storms and temperature swings, which are common in this corridor. If the project changes-for example, a shift to a heavier material or a larger overhang-update the permit records promptly to avoid compliance issues during the final review.
In this city, wind and hail events drive a steady flow of roof claims, especially on older homes along the Blackstone and Seekonk corridors. Insurance coverage is generally available, but the frequency and timing of storms mean that homeowners often face multiple claims over the life of a roof. Knowing that adjusters frequently weigh repair versus full replacement, it helps to approach a claim with clear records from the start.
Begin with solid, dated photos showing the roof before any work starts. Photograph visible damage from ground level and from attic spaces if leaks are present, capturing the extent from multiple angles. Take pictures of temporary patches or tarps you install, and keep copies of any contractor estimates or written notes about needed repairs. Document the storm date and hours of rainfall, plus any active leaks you observed, such as ceiling stains or dripping inside walls. Keeping a simple log of when you noticed problems makes a real difference when an adjuster reviews your file.
When the claim is filed, expect an on-site visit to verify damage and discuss options. In Pawtucket, adjusters often decide between patching and repairing versus replacing large sections, so having a contractor estimate early helps frame the conversation. Bring your photos, the storm timing log, and notes about any prior roof issues or previous repairs. If temporary repairs were made, include receipts and photos; these show urgency and the current condition of the roof.
Before any permanent work begins, outline your goals with the contractor and the insurer, emphasizing long-term protection against recurring winter moisture. If the claim focuses on weather-induced damage, insist on documenting whether leaks were active at the time of the storm and whether the roof's underlying structure shows signs of freeze-thaw stress. Clear, organized documentation reduces back-and-forth and speeds the transition from approval to repair.
Chimney joints and flashing are a frequent contractor signal on older homes here, where masonry intersections are common leak points after freeze-thaw cycles. When mortar joints crack or the chase area settles, water can follow the path down into ceilings and attic spaces long before a visible drip shows on the living room wall. If your chimney shows spalling brick, loose flashing, or missing step caps, treat it as a stealth warning for the whole roof system beneath.
Skylights are a regular focus for repairs in this market because the glazing and flashing meet aging roof structures. In many cases, you'll notice condensation, fogging, or small leaks around the flashing boot that migrates with winter wind-driven rain. Pay attention to any discoloration or softening around the base of a skylight; those are signposts that the sealant and curb details have weathered beyond simple resealing.
On older homes, investigations often zero in on transitions-where roof planes meet walls, eaves, or dormers-and penetrations like vents, pipes, and their boots. The freeze-thaw cycle drives movement here, widening gaps and loosening fasteners. Even when the field shingles look sound, a narrow seam at a valley, near a vent stack, or along a dormer can become the weak link that lets moisture travel downward.
Start with a careful, seasonal inspection that prioritizes chimneys, skylights, and all transitions. If you notice peeling sealant, rusty flashing, or unusual moisture along flashings, consider a targeted check of those interfaces first. When a leak appears-whether a small stain or a damp attic corner-think along the lines of joints and penetrations before chasing a suspected field shingle issue. This mindset helps you catch problems early and address the real sources rather than treating symptoms.
Find contractors experienced in skylight installation, flashing, and leak repairs to bring natural light into your home.
B&R Home Improvement
(401) 365-8909 www.bandrhomeimprovement.com
24 Morris Ave, Pawtucket, Rhode Island
4.9 from 213 reviews
Lizmar construction
(401) 955-4517 lizmarconstructionllc.com
45 Lee St, Pawtucket, Rhode Island
5.0 from 25 reviews
United Better Homes - Roofing, Solar & Windows
(401) 274-0111 www.unitedbetterhomes.com
Serving
4.8 from 232 reviews
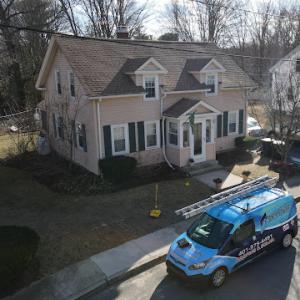
In Pawtucket, winter freeze-thaw cycles and regular precipitation put extra stress on aging roofs. The local market signals that homeowners prioritize quick, complete projects and cleanups, not just a listed price. A contractor who arrives on time, protects landscaping, and cleans up debris daily earns trust quickly.
Affordable pricing matters, but long-established or family-owned crews often offer steady scheduling and transparent communication. Look for a company that can provide references from nearby blocks and a history of re-roofing older homes along the Blackstone and Seekonk corridors. A reputable crew will explain how they protect against lingering moisture and ice dam risk.
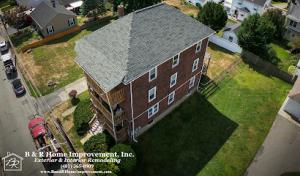
Residential work dominates here, yet commercial presence means some roofers handle larger materials and flatter commercial sections. Ask about crews skilled in steep-pitched single-family roofs as well as multi-unit lines, since Pawtucket homes vary from a standard cape to a three-story brick or wood-frame structure. Photo documentation of past projects helps.
Start with a grounded estimate that includes tear-off, disposal, and waste cleanup; then verify insurance coverage and a written warranty. Check local references, especially for winter-weather performance. Request a quick on-site walk to discuss snow-load concerns, insulation, and ventilation as they relate to the roof deck.
A responsible crew will protect driveways, tarps decks, and plantings during a snow-prone season, haul away debris the same day, and leave gutters clear. In this market, the ability to respond promptly to weather shifts and post-storm inspections is valued as highly as the initial install.