Last updated: Apr 19, 2026
Roofing in this high-elevation mountain environment must be engineered and inspected with the realities of prolonged winter snow accumulation in mind. Snow here doesn't behave like milder climates; it piles into deep drifts, sits on perches, and exerts continuous pressure on the roof deck and supporting structure. When snow loads are underestimated, every spring reset becomes a risk: sagging rafters, misaligned decorative features, and potential structural damage that compounds over multiple winters. The attic and roof assembly should be treated as a critical, ongoing load path, not a routine maintenance afterthought. If a roof is nearing the limit of what the framing was designed to carry, failures can occur suddenly under new snow events or after a string of heavy storms. Immediate action is to verify that the chosen roof system and its gather of support elements-sheathing, rafters, and connections-are designed to handle Park City's typical snowfall patterns. In practice, that means coordinating with a roofer who understands elevation-specific load data, snow drift behavior on steep pitches, and how long snow sits on the roof before it's shed or melts. When in doubt, perform a cautious assessment after the first heavy snows of the season and again after mid-winter thaws.
Ice damming is a real and escalating hazard when daytime sun drives interior warmth upward into the attic and heats the roof surface beneath the snow. As daytime temperatures rise, snow melts on the upper roof, channels water toward the colder eaves, and refreezes where heat leaks persist. The result is ice dams that back up water under shingles, fascia, and underlayment, eventually creating leaks that travel inward along cold joints and soffits. In this climate, a longer winter with clear sun exposure can intensify this cycle, turning a small nuisance into a sizable interior problem in a surprisingly short window. Action steps are concrete: ensure continuous, properly sized soffit-to-ridge ventilation to balance roof temperature and reduce melt-water formation at the eaves; install or verify a heated or properly vented eave edge detail to discourage dam formation; and seal attic penetrations around chimneys, skylights, and vent stacks to minimize warm leaks that feed the damming cycle. If ice dams are already forming, address them promptly with snow removal from the roof edge and gutter lines in a controlled way, avoiding damage to shingles and underlayment. A robust drip-edge and ice barrier system under the roofing material can be a practical line of defense in this climate.
Winter performance hinges on how well the roof assembly breathes and resists the wear of repeated freeze-thaw cycles. Freeze-thaw damage compounds over seasons when small water intrusion freezes and expands, loosening fasteners and degrading fastener longevity. A well-ventilated attic keeps roof temperatures closer to outside air, reducing the amplitude of interior snow melt on the deck. Pair good ventilation with a high-quality underlayment rated for cold climates and long-lived exposure to moisture. In real terms, that means checking for unobstructed soffit vents, clear ridge or turbine vents, and appropriately sealed penetrations. The goal is to keep the attic dry, stabilize roof deck temperatures, and prevent tiny leaks from becoming big problems after a heavy snowfall. For homes with complex roof geometries, consider additional eave protection and a secondary water-resistive barrier in valleys and at transition points where meltwater tends to pool.
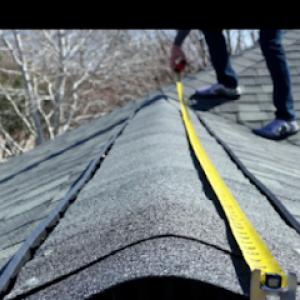
When a roof is due for evaluation, inspectors in this climate zero in on whether the assembly meets snow-load expectations and how well ventilation performs under peak winter stresses. Look for signs a roof may have outgrown its original load assumptions: sagging, nail pops near the eaves, or gaps in flashing around dormers and chimneys. Pay attention to the age and condition of the underlayment, the integrity of valley channels, and the presence of snow guards or barriers in areas with heavy drift potential. If a roof shows signs of compromised snow-shedding performance, action is needed now: rework the eave details, upgrade the underlayment, or replace sections with a higher-rated, frost-resistant system. In Park City, winter safety and long-term resilience hinge on proactive attention to snow load and a thoughtful, climate-aware approach to ventilation and ice dam mitigation.
The typical reroof window in Park City runs from dry late spring into early fall because winter snowpack and spring thaw make tear-off and dry-in more difficult. Plan your project to start after reliable thaw and when about a solid two-week stretch of dry days can be forecast. Concrete and slate roofs demand the most careful scheduling for long, wind-free dry-in periods, while asphalt is a bit more forgiving. In practice, aim for a calendar block that avoids the peak of spring melt, when freeze-thaw cycles can crack underlayment and push nails and shingles out of place. Start-ups late in May or early June give crews time to acclimate materials and still protect your interior from lingering moisture.
Spring in this altitude zone brings uneven thaw and late-season snowfall chances that can trap work behind snowbanks and high moisture content. Freeze-thaw cycles can reveal decking and underlayment weaknesses once the snow recedes, so you want a plan that accounts for potential remedial work. If a portion of the deck shows signs of moisture damage or soft spots after the first warm storms, address repairs before the full tear-off proceeds. De-icers and thawing patterns influence roof access, so ensure temporary path clearing and heated areas for crews where practical. Expect short delays from sudden warm rain that saturates a day's progress; a two- to three-day buffer can save a re-ridging step down the line.
Summer afternoons bring the most consistent dry periods, but they also bring sudden convection storms and hail. In practice, scheduling buffers matters more here than in lower-elevation Wasatch Front cities. Aim for morning work windows when temperatures are cooler and air is more stable, then plan for a possible afternoon halt if thunderheads build. Hail seasons require pre-storm protection of exposed materials and shaded staging areas to minimize heat-related handling issues. Because afternoon storms can derail progress, keep a realistic buffer in the plan for back-to-back storm days and potential re-drying time for underlayment in shaded attic zones.
As summer wanes, the risk of extended fall rains increases. Schedule finish-out where crews can complete the dry-in and inspection steps before nights drop into freezing territory. A late-season push should prioritize securing underlayment and ice-barrier placement in the eaves and valleys so snow shedding points are protected well before the first heavy snow. If a mild spell appears mid-September, it can be worth accelerating the final ridge and venting work to avoid a storm-induced delay. The goal is a sealed, dry-in finish that leaves the interior insulated and ready for a winter without moisture intrusion.
Coordinate a phased approach: tear-off first, then decking inspection and repairs, followed by underlayment and ice-damming measures, and finally shingle, metal, or tile installation. Build in buffer days for weather, a mid-project moisture check, and a contingency for material delivery delays caused by mountain weather. Communicate clearly with the crew about preferred work hours, snow and ice forecasts, and the need to pause work if temperatures threaten underlayment performance or adhesive cure times. This sequencing minimizes moisture risk while accommodating Park City's high-elevation climate.
Alta Vista Roofing
7182 Silver Creek Rd Suite A, Park City, Utah
5.0 from 37 reviews
Alta Vista Roofing, your trusted local roofing expert in Park City. Located in the heart of the Wasatch Mountains, we understand the unique challenges of the local climate. We're dedicated to providing durable and aesthetically pleasing roofing solutions. From new construction to repairs, our expert team handles every project with precision and care, ensuring a high-quality finished product you'll love. Get your free, no-obligation estimate today. Voted Park City's Best Roofer in 2020 / 2022 / 2023 / 2024
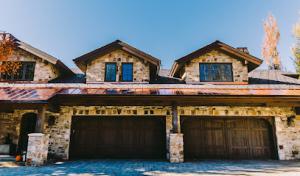
Copper Hammer Roofing
(435) 244-6268 copperhammerroofing.com
661 Parkway Dr STE 3, Park City, Utah
5.0 from 23 reviews
Copper Hammer Roofing is Park City's Premium Metal and Shingle Roofing Contractor. With extensive Park City roofing experience, our team brings a level of craftsmanship and insight you simply can’t get from most other roofing contractors. Get the highest level of protection and a roofing system built to perform all winter long.

Stratus Roofing
(435) 252-9608 stratusroofingcompany.com
155 Aspen Dr, Park City, Utah
4.6 from 169 reviews
Stratus Roofing is the premier provider of high-end residential roofing in the Mountain West. We partner with luxury homeowners and builders to deliver tailored, architecturally refined roofing systems that combine durability with design excellence.
On Top Roofing
(435) 503-3271 ontoproofing.com
1910 Prospector Ave, Park City, Utah
4.7 from 65 reviews
We provide durable metal and shingle roofing solutions designed for Park City’s unique climate. From handling insurance claims to preventing ice dams, our family-friendly team ensures your roof is ready for heavy snow and mountain weather. Our mission is simple: a strong roof for life with minimal hassle. We offer expert installation, repairs, and maintenance subscriptions to protect your investment. Choose On Top Roofing for long-lasting quality and local expertise in Summit County. We look forward to serving you!
Aspen Roofing
(435) 252-1399 www.parkcityroofer.com
1389 Center Dr #200, Park City, Utah
4.6 from 13 reviews
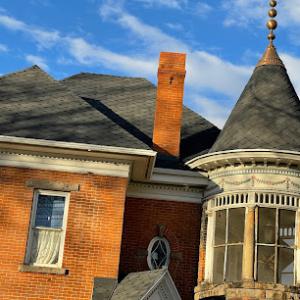
Aspen Roofing has been servicing the Park City market since 2001. We hire and retain long term employees giving you the best installations, product selection, customer service, and warranties. Our employees are factory trained, certified, and award-winning technicians that deliver quality workmanship on every job. We can install any type of roof or wall system, but we specialize in metal product offerings including zinc, copper, stainless, rustic steel, and corrugated metal. We have extensive experience installing metal panel roof systems, exterior wall systems (including ACM wall panels), custom gutter systems, and even custom metal accents including chimney hoods, chimney caps, bay windows, cupolas, and finials.
Legacy Roofing
(385) 832-7317 legacyroofingutah.com
2064 Prospector Ave #101C, Park City, Utah
5.0 from 1 review
We are a full service roofing and general contractor in Park City and Summit Country. Our roof replacement and specialty roofing services are the best in Utah. We are a GAF Master Elite Contractor, as well as a Tesla Solar Certified Installer and focus on each detail to ensure a quality and weatherproof install on each roof we install. We use the highest quality material with the longest backed warranty in the industry. We bring our industry experience to create the ultimate finished roof for your home. What truly sets us apart in the roofing industry is our top quality workmanship and excellent customer service. Legacy Roofing is a locally owned and family operated company. Call us today to schedule free roof inspection.
Red Mile Roofing
(385) 866-3290 redmileroofing.net
Serving
4.8 from 45 reviews
Red Mile Roofing is your trusted local roofing company in Perry UT that provides roof inspections, roof repair, roof replacement, storm damage roofing, and more. We specialize in residential and commercial roofing services, as well as maintenance. Our team of experienced professionals is dedicated to providing top-tier craftsmanship and unparalleled customer service. Whether you need a quick fix or a complete roof replacement, count on Red Mile Roofing for reliable, affordable, and durable solutions. your satisfaction and the protection of your property will always our top priorities and we take them very seriously. If you're looking for an experienced, skilled, up front roofing company to handle your roofing needs, we're glad you're here!
Timp Roofing
(385) 223-5581 www.timproofing.com
Serving
5.0 from 21 reviews
When your property in Pleasant Grove, Lindon, Provo, or a surrounding area needs roofing expertise, you want contractors who understand Utah's unique weather challenges and building requirements. Timp Roofing brings together modern technology, premium materials, and transparent communication to deliver roofing solutions that protect your investment. We're a locally owned company that's built our reputation on honest pricing and dependable results.
Exceptional Roofing
(801) 680-6499 www.exceptional-roofing.com
Serving
4.8 from 16 reviews
Exceptional Roofing has served Salt Lake City for over 25 years, providing trusted roof servicing and replacement. Backed by decades of experience, we deliver reliable solutions, personalized service, and a commitment to quality workmanship that protects your home or business year after year.”
JD Roofing
(855) 554-7663 www.jdroofing.com
Serving
4.6 from 23 reviews
Get a Free Estimate Today Your Stress-Free Roofing Company Say goodbye to the stress and hassle of traditional roofing projects. With JD Roofing’s ultra-fast roofing experience, we’ll transform your home quickly and efficiently, leaving you with a beautiful, durable roof and peace of mind. Your Roof, Done Right, Done Fast We understand your time is valuable. That’s why we strive to complete most roofing projects in just 1-2 days, minimizing disruption to your life. Our efficient, streamlined process delivers a new roof without the hassle.
Slc Roofers
(801) 647-3633 www.slc-roofers.com
Serving
5.0 from 6 reviews
SLC Roofers, your trusted roofing partner serving Utah with over a decade of dedicated service. With deep roots in our communities, our team of roofing experts understands the local environmental needs and the specific needs of homeowners across the state.
Utah Roofing Pros
(801) 901-2200 www.utahroofingpros.com
Serving
5.0 from 89 reviews
Utah Roofing Pros in Cottonwood Heights, established in 2017, is a family-owned and operated roofing contractor dedicated to delivering exceptional roofing solutions along the Wasatch front and back, from Provo to Ogden and Tooele to Heber. With a commitment to excellence, they combine skillful expertise with personalized service, earning a reputation for trust, reliability, and integrity in every project they undertake. Specializing in residential repairs and commercial installations, Utah Roofing Pros serves as a trusted partner for homeowners and businesses alike, ensuring the protection and longevity of properties with durable and reliable roofing systems.
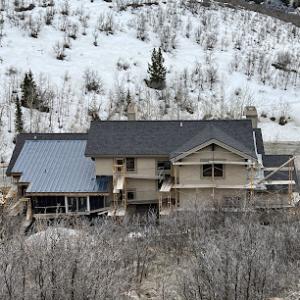
Metal roofing shines in this elevated mountain setting where heavy, repeated snow loads and long cold spells test every seam. The smooth finishing characteristics of metal help snow release more predictably, reducing the duration of snow loads perched on upper slopes and avoiding ice dams that form when meltwater refreezes at eaves. In steeper homes with alpine profiles, metal panels or standing seam systems provide excellent wind resistance and a durable, low-porosity surface that stands up to freeze-thaw cycles without the rapid wear seen on lighter materials. When evaluating metal, focus on panel width, fastener design, and a well-sealed seam system because those details directly influence performance in the high-elevation freeze-thaw environment.
Asphalt shingles remain a dominant option, but Park City's freeze-thaw cycling and snow retention make underlayment quality and attic ventilation more consequential than in milder Utah markets. A high-quality, properly installed underlayment helps shed ice and moisture while providing a secondary barrier if shingles become saturated. Ventilation reserves are crucial to keep the attic space near ambient outdoor temperatures, limiting condensation that can lead to attic deterioration or warm areas that accelerate snow melt in localized spots. If choosing asphalt, pair it with a robust ventilation plan, a continuous seam or integrated drip-edge membrane, and attention to attic baffles and ridge vents that maintain air flow even under heavy snow loads. For other options, ensure the chosen system includes appropriate underlayment and securement that accounts for snow insolation patterns and seasonal expansion.
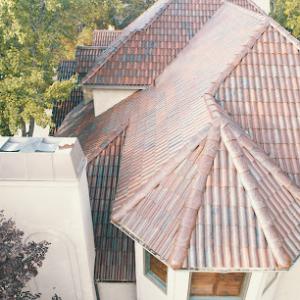
Tile, slate, and wood shake appear in higher-end mountain architecture, but their weight and snow behavior demand careful evaluation against local winter loading. Tile and slate provide distinctive aesthetics and solid longevity when properly supported, but they add structural demands and can be vulnerable to freeze-thaw damage if micro-cracks develop or if fasteners loosen under thermal cycling. Wood shake offers rustic charm and good insulation but can be susceptible to moisture-related issues, warping, and more involved maintenance. If cost and weight are not prohibitive, these materials can be viable with a structural assessment and a design that anticipates snow retention, outlet for meltwater, and efficient ventilation. In any case, a detailed snow load analysis and an inspection plan for seasonal debris and ice management are essential to ensure long-term performance in the alpine climate.
Provided local ranges run about $350-$600 per square for asphalt shingles, $700-$1100 for metal, $900-$1500 for clay tile, $900-$1700 for concrete tile, $800-$1350 for wood shingles or shakes, and $1500-$2800 for slate. In practice, the final price in a Park City project reflects more than the material itself. Steep rooflines, complex ridge lines, and mountain-house detailing add to handling time, material waste, and equipment setup. Asphalt remains the most economical route for a starter replacement, but the region's winter-oriented thinking means you'll often see the cost spread across higher-fee installations when a roof carries multi-story eaves or intricate cantilevers.
Costs in this mountain setting are often pushed upward by steep rooflines, snow-oriented detailing, and mountain-home complexity rather than simple low-slope suburban layouts. Snow shedding, ice-damming resistance, and longer-term endurance under freeze-thaw cycles demand more careful underlayment choices, enhanced ventilation planning, and sometimes premium fasteners or ice barriers. These factors show up as higher labor intensity and more protective layers, especially on roofs with multiple planes or exposed gables. If a roof uses heavier tiles or metal with standing seams, the price ladder widens again because longer spans and precise seam sealing require skilled installation.
Seasonal demand can tighten during the short preferred reroof window between late spring and early fall, which can affect labor availability and project timing. In practice, that means earlier planning yields steadier scheduling and reduced risk of weather-driven delays. If a slate or concrete tile project is contemplated, expect longer lead times for specialty crews and material deliveries, particularly after a dry winter when crews shift from snow removal to re-roofing. Keep in mind that weather gaps in late spring can compress the window you have to get underlayment, ice barriers, and ridge venting installed before the first deep snow.
For a home facing long snow seasons and repeated freeze-thaw cycles, many local homeowners weigh performance with price. Asphalt remains reasonable, but if a steep, snow-prone roof requires maximum durability and minimal maintenance, metal or concrete tile can offer long-term value despite higher upfront costs. Clay tile and slate provide exceptional freeze-thaw resilience and aesthetic appeal on alpine designs, though both demand careful substrate prep and qualified crews to maintain warranty integrity. Wood shingles or shakes deliver a traditional look but may demand more attention to moisture control in freeze-thaw cycles. In the end, a thoughtful balance of slope, detailing, and climate resilience drives the most cost-effective replacement for your home.
Park City typically requires a building permit for a full roof replacement rather than treating reroofing as a no-permit cosmetic job. That means your project will need formal review before any shingles come off or new decking goes on. Start the process early, because the permit review can influence material choice and ventilation strategy, especially after a long snow season has stressed the roof deck. Delays in obtaining approval can push installation windows into tighter winter months, which increases the risk of weather-driven scheduling conflicts.
The local process generally involves submitting a scope of work and then scheduling inspections after installation. A clear scope helps both you and the inspector understand when you're meeting snow-load and ventilation expectations. When preparing the scope, include details about underlayment type, attic ventilation plan, eave and ridge vent coverage, and any structural or decking work. If you're replacing only the surface, still document substrate conditions and fastener patterns. Inspections typically follow installation, so synchronize delivery of materials with the anticipated inspection dates to avoid rework or delays.
Inspectors in Park City verify compliance with local snow-load and ventilation requirements, which is a more winter-performance-focused review than in many lower-risk climates. The review looks for how well the system sheds snow, how roof lines handle ice dam risk, and whether ventilation is sufficient to prevent attic condensation during freeze-thaw cycles. Expect scrutiny on how the chosen roofing assembly interacts with eaves, overhangs, and snow guards. If the roof interfaces with vaulted ceilings or complex rafters, be prepared to provide additional drawings or calculations that demonstrate load transfer and venting efficacy.
Coordinate with a licensed roofer who knows local expectations and can articulate the necessary permit details. Have the contractor provide a pre-inspection checklist that aligns with Park City standards so you aren't surprised by what the inspector will request. Maintain access for inspectors: ensure all attic hatches, mechanical rooms, and eave lines are clear, and keep a folder with product specs, installation manuals, and venting layouts. Finally, plan for a potential winter moisture check after the first big freeze to confirm that ventilation and underlayment are performing under real Park City conditions.
Winter damage and hail events can trigger noticeable claim spikes in this high-elevation climate, but the market does not run on constant catastrophe headlines. Insurance activity in the area tends to rise after significant snow loads or a local hail episode, then settle back toward normal levels as crews complete repairs and adjuster workloads balance out. This means responses can be variable, but not unpredictable if you plan ahead.
Adjusters commonly request photo documentation and condition records, which is especially important when snow, thaw, and hail damage overlap on the same roof. Take clear, date-stamped photos from ground level and from the attic if feasible. Capture the snow load on the roof, ice damming near eaves, and any visible shingle or flashing damage. Maintain a simple condition log that notes when thaw cycles occurred and any subsequent frost or ice exposure. Providing a cohesive trail of evidence helps prevent misinterpretation when multiple types of damage occur simultaneously.
Broad insurer pullback is not typical in this market, but local climate and Utah claim conditions still influence coverage decisions and claim timelines. Start the claim as soon as damage is noticed, then coordinate with a licensed local roofer who can document conditions with professional photos and measurements. When meeting an adjuster, present the roof and attic observations in a concise package: photos, notes, and the roof's key vulnerabilities (including ventilation and underlayment concerns caused by freeze-thaw cycles). Clear communication reduces back-and-forth and helps keep the claim moving.
Connect with contractors who help homeowners navigate the claims process from damage assessment to final approval.
On Top Roofing
(435) 503-3271 ontoproofing.com
1910 Prospector Ave, Park City, Utah
4.7 from 65 reviews
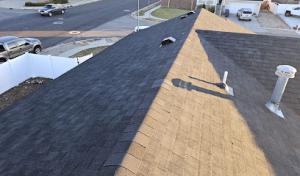
In this elevated climate, meltwater collects along the eaves and lower roof edges, then refreezes during ice-dam conditions. That cycle creates a stubborn barrier that pushes against gutters, shingles, and the underside of the overhangs. The result can be chipped edge protection, backup at the soffit venting, and water sneaking into the fascia boards. To reduce risk, ensure drip edges are solid, gutters are clean, and the eave flashing is continuous and well-sealed. If the downward slope is modest or if snow tends to linger near the eaves, consider upgrading to a more robust ice and water shield along the first several feet of the roof plane.
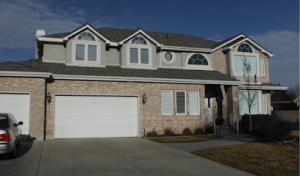
Spring thaw after a long snow season puts unusual stress on decking and underlayment, especially when moisture has been trapped during winter. When ice dams form, water can pool against the underlayment and then push up at seams as the sun strengthens or temperatures rise. Over time, hidden fatigue appears as small leaks, localized staining, or softened decking. Prioritize a continuous, high-grade underlayment that resists puncture and moisture wicking, and verify that attic ventilation remains adequate to balance interior humidity during thaw cycles. A garage or porch roof that shares an exterior wall should be checked for signs of moisture intrusion that originate at or near the shared barrier.
Skylight and roof-penetration detailing deserves extra scrutiny in this snow climate because drifting snow and refreeze cycles can keep these areas wet for extended periods. Look for improper flashing, misaligned seals, or crown mold where the flashing meets the skylight curb. Snow drift can force moisture laterally into joints that otherwise stay dry, causing accelerated wear around flashing boot layers and fasteners. Regular inspection after heavy snowfall, and cleaning of debris around penetrations, helps prevent long-lasting staining, rot, or ice buildup that can compromise the roof's integrity.
Find contractors experienced in skylight installation, flashing, and leak repairs to bring natural light into your home.
On Top Roofing
(435) 503-3271 ontoproofing.com
1910 Prospector Ave, Park City, Utah
4.7 from 65 reviews

Low-slope roof sections exist in a mountain climate that already tests every inch of a roof. In Park City, a few homes and additions tuck a lower pitch into an otherwise steep profile, and those areas behave very differently when snow builds up and meltwater runs. The combination of intense winter loading and sudden thaw cycles means the low-slope plane will shed and dry differently, so attention to edge details and waterproofing is essential.
Steep mountain roofs shed snow quickly, but low-slope areas are more vulnerable to standing meltwater during thaw cycles than the main planes. Ice and water can pool near parapets, transitions, and overhangs, while heat from attic zones can create uneven melting. A deliberate gutter and edge strategy, along with a reliable underlayment, helps minimize seepage at the transition from high to low.
Mixed rooflines on mountain homes can create uneven snow shedding patterns that concentrate water and ice at transitions. Where a low-slope section meets a steeper portion, ice dams often form at the joint, pushing meltwater toward underlayment seams. Detailing that seals the transition, plus properly positioned snow guards and targeted insulation, reduces risk without creating new leakage paths.
Practical detailing and maintenance to consider locally include enhanced underlayment in the low-slope zones, continuous insulation to limit freeze-thaw stress, and careful flashing at roof-to-wall joints. In areas with heavy snow, avoid abrupt interruptions in roof plane where meltwater can funnel. Regular inspection after storms helps catch compromised seams before ice damming starts.
Keep an eye on ventilation around the attic access and vent stacks near low-slope sections, because trapped heat accelerates thaw cycles. When a low-slope patch is added or altered, ensure the roof deck is sound, the fasteners are compatible with the existing system, and the transitions to steeper planes are reinforced for long-season durability. In snowier years, coordinate maintenance with storms to minimize exposure and keep transitions watertight. Ask a roofer about micro-slope options.
Find specialists in TPO, EPDM, and built-up flat roofing systems for residential and commercial properties.
Alta Vista Roofing
7182 Silver Creek Rd Suite A, Park City, Utah
5.0 from 37 reviews
Stratus Roofing
(435) 252-9608 stratusroofingcompany.com
155 Aspen Dr, Park City, Utah
4.6 from 169 reviews