Last updated: Apr 19, 2026
In this community, the Milwaukee metro weather pattern constantly tests roofs with cold winters and warm summers, creating repeated freeze-thaw cycles that accelerate material fatigue and shorten overall service life. Shingles crack, edges lift, and flashing joints become vulnerable as moisture alternates between freezing and thawing. That cycle compounds after every severe temperature swing, especially on older roofs or those with marginal installations. The result is a roof that looks fine at a glance but harbors hidden wear that can fail suddenly after a spring storm or during a mid-winter thaw.
Spring in this market brings more than longer days; it brings hail and gusty wind events that hammer exposed roof profiles. Hail can bruise shingles, dent metal edges, and loosen fasteners, setting up faster wear once moisture seeps under imperfect seals. Wind can peel back shingles along eaves and ridge lines, lift fluttering edge tabs, and stress weakened flashing around chimneys and vents. Insurance activity tends to spike when these events hit, and the resulting claims often reveal roofs that sustained duress from prior freeze-thaw cycles coupled with recent impact or wind damage. In practical terms, a single strong storm can expose weeks or months of slow deterioration that quietly accumulates until spring repairs begin.
Snow and ice winters pile up, and frozen conditions complicate any inspection or repair plan. Ice dams form along eaves, pushing moisture under shingles and flashing, which can corrode the roof deck and create interior leaks before crews can access a dry window in spring. The stress from ice and heavy snow loads transfers to edges, gutters, and fascia, where connections may fail if materials have already weakened from freeze-thaw cycles. Delays due to inclement weather also push repairs into a tighter spring window, increasing the risk of further damage during milder conditions when roofs suddenly warm and contract.
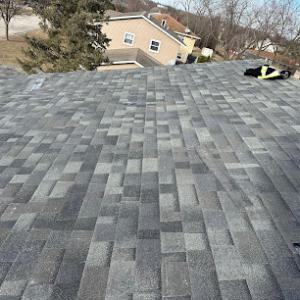
Look for granular loss on shingles, curling corners, or buckling along roof planes. Check for exposed fasteners, loose flashing at chimneys and vents, and any unusual daylight intrusion through the attic hatch or ceiling spots. Inside the attic, you may notice irregular staining or damp patches that correlate with heavy melt events outside. In windy springs, feel for soft spots along rakes and hips where shingles may have lifted and settled. If any of these signs appear, the window for timely intervention narrows as the spring repair season approaches, so prompt assessment matters.
Begin with a focused roof inspection after any major thaw, hail event, or wind storm. Document damage with photos and notes, and prioritize areas around vent pipes, chimneys, and eaves where moisture intrusion tends to start. Schedule a professional inspection that includes a careful look at attic ventilation, decking integrity, and flashing. Address minor repairs quickly to prevent escalation into leaks and decking rot, and be prepared for a comprehensive re-roof if sustained freeze-thaw wear has compromised structural elements. In this climate, proactive monitoring and rapid response are the critical defenses against escalating storm and freeze-thaw damage.
The most favorable replacement window in this area runs from late spring through early fall, when conditions tend to be drier and temperatures are moderate enough to keep shingle adhesives and sealants operating as designed. That window tends to align with concrete work, attic venting checks, and the ability to complete tear-off and re-decking without exposing the roof to harsh late-season moisture. When planning, target the middle of the season for the most predictable schedules and steady material delivery, and build a contingency buffer for any sudden weather changes.
As fall approaches, temperatures swing more dramatically, and that shift can influence how asphalt shingle sealants set and cure. Temperatures hovering near or below the mid-40s on installation days can slow sealant adhesion, which means crews may need to retrim or reseal sections after initial application. Roofing decisions should account for anticipated daytime highs in the 50s to 70s; if a project runs into cooler nights, flex trim time and additional curing windows may be required. Planning for a fall installation means coordinating attic ventilation checks, ensuring roof deck drying times after any prior moisture exposure, and scheduling crew access to complete all seams and hips before true freeze-thaw cycles begin.
Summer thunderstorms and heat in this part of the country can interrupt scheduling, affect material expansion, and reduce crew productivity. Humid, high-heat days cause asphalt shingles to expand, which can temporarily alter alignments and nailing patterns if crews push ahead without allowing for expansion. Lightning storms can trigger safety stoppages and material handling pauses, leading to staggered progress. When planning a summer project, consider early arrival times to beat heat, plan for mid-afternoon breaks, and establish clear communication with the crew about ongoing weather monitoring. Have a contingency plan for rescheduling and ensure safe storage for exposed decks during sudden downpours.
Winter can generate ice dam risk if a warm spell follows a heavy snowfall, so the optimal window inherently mitigates this risk by avoiding the peak of winter. The shoulder periods-late spring and early fall-provide the most stable mixing of dry days and manageable temperatures. If spring rain is persistent, gates to the roof may need extra tarping and temporary protection to minimize moisture intrusion during tear-off and deck preparation. Proactively coordinating with neighbors for access during peak drying and curing times can also help keep crews on track, especially in dense neighborhoods where street parking and driveway space influence material staging.
On any replacement in this climate, a practical sequence begins with thorough roof system evaluation, including deck condition and existing underlayment. Tear-off, where required, should proceed with careful containment to limit wind-driven debris and possible damage to adjacent features. After deck inspection and any necessary repairs, install underlayment and metal flashing in a logical progression to ensure drainage and wind resistance. Finally, flush the project with a careful inspection after completion, prioritizing sealant performance around vents, chimneys, and transitions, and confirming that gutters and downspouts are clear of debris so water flows freely away from the new roofing.
Get a clear picture of your project costs upfront - no commitment required.

Better View Home Improvements
(414) 234-3700 www.betterview.homes
W141N5974 Kaul Ave, Menomonee Falls, Wisconsin
5.0 from 41 reviews
Expert Exteriors
(414) 519-1260 www.expertexteriorswi.com
N50W13740 Overview Dr, Menomonee Falls, Wisconsin
4.9 from 51 reviews
Integrity Roofing
(262) 251-0740 integrityroofingwi.com
N95W16975 Falls Pkwy #9, Menomonee Falls, Wisconsin
4.9 from 61 reviews
Better View Home Improvements
(414) 234-3700 www.betterview.homes
W141N5974 Kaul Ave, Menomonee Falls, Wisconsin
5.0 from 41 reviews
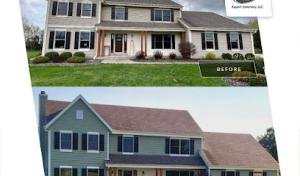
Looking for a roofer you can trust? Better View Home Improvements provides expert roofing, siding, and gutter services across the Greater Milwaukee area. Backed by 30+ years of local experience and GAF Certification, our family-owned team handles everything from storm damage restoration and insurance claims to full home exterior transformations. We ensure top-tier craftsmanship on every project. Call us today for a free estimate and experience the "Better View" difference!
Expert Exteriors
(414) 519-1260 www.expertexteriorswi.com
N50W13740 Overview Dr, Menomonee Falls, Wisconsin
4.9 from 51 reviews
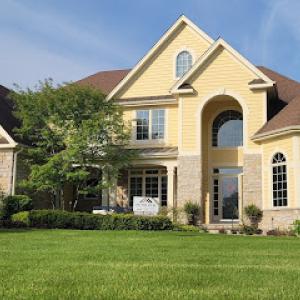
Expert Exteriors has proudly served Washington County since 2005, becoming the trusted name in residential roofing and exterior solutions. From comprehensive asphalt and architectural shingle installations to robust metal roofing systems, they ensure lasting quality. Specializing in storm damage repairs with seamless insurance claim support, Expert Exteriors also offers annual inspections, preventive maintenance, and expert gutter and siding integration. Their commitment ensures every project not only meets local codes but also enhances curb appeal and endures the elements for decades.
Integrity Roofing
(262) 251-0740 integrityroofingwi.com
N95W16975 Falls Pkwy #9, Menomonee Falls, Wisconsin
4.9 from 61 reviews
Wisconsin Licensed Roofing Contractors serving Germantown, Menomonee Falls, Grafton, Cedarburg, Mequon, West Bend, Slinger and beyond since 1996. We provide roofing and siding Ozaukee County, Washington County, Waukesha County, and areas nearby. We are roofers and we also install siding and gutters, do chimney repair and tuck-pointing, and soffit & facia work. We give free estimates, and you won't pay anything, not a single penny, until the work is completed. We’re members of NARI, certified by the shingle manufacturers, and check out our BBB rating! We don’t have sales people, so you won’t get a high-pressure sales pitch. We recycle your old shingles.
AD Roofing
(262) 251-4500 adroofingllc.com
Serving
4.6 from 45 reviews
Family owned and operated. Happy customers. Free estimates. A+ BBB rating. No dumpsters - No sales staff (only estimators who work on roof projects on a regular basis). We recycle. Award winning. We can help, let's talk!
Odyssey Home Remodeling
(855) 913-3770 odysseyremodeling.com
Serving
5.0 from 26 reviews
Protect your largest investment with our affordable roof replacement, siding replacement, and window replacement services in Wisconsin. At Odyssey we take pride in installing quality products that are manufactured with the latest technologies, installed by certified professionals, and customized to meet both your needs and your budget. We have taken the time to narrow down the type of materials – and manufacturers of those materials – that provide the best value to our customers. Whether you are looking for architectural or designer shingles, DaVinci composite and metal roofing, or modern energy efficient windows and beautiful, long lasting siding – Odyssey Home Remodeling has partnered with the best to provide you with the best.
JF Lopez Roofing
(262) 345-5450 www.jflopezroofing.com
W140 N5959, Lilly Rd, Menomonee Falls, WI
5.0 from 1 review
JF Lopez Roofing is a locally owned and operated roofing contractor dedicated to serving our customers with superior solutions. Whether it's roof replacements, repairs, storm cleanup, or new construction our passionate team of experts is ready to work with you.
DuraShield Roofing & Contracting
(262) 244-0749 durashieldroofingmilwaukee.com
Serving
5.0 from 37 reviews
DuraShield Roofing & Contracting, located at 11414 W. Park Place Suite 202, is your go-to roofing contractor in Milwaukee, WI. Since 2003, we've been specializing in both residential and commercial roofing projects, offering comprehensive roofing services like repairs, replacements, installations, and inspections. With expertise in a variety of roofing systems, including designer asphalt shingles, metal, cedar shake, slate, and advanced composites, we provide tailored solutions for homes and businesses. Our commitment to quality is backed by top industry certifications, ensuring durable and aesthetically pleasing roofs. Choose DuraShield for expert roofing solutions that exceed expectations.
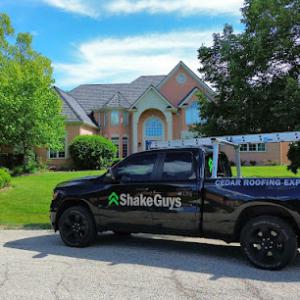
Shake Guys
Serving
5.0 from 22 reviews
Shake Guys is a well-established, 5-star roofing company that specializes in cedar shake and composite/synthetic shake & slate roofing services. We are dedicated to delivering 100% customer satisfaction!
Swift Exteriors
(414) 763-5045 swiftroofingwi.com
Serving
4.8 from 103 reviews
We grew up in the trade & duplicated ourselves in the field. We are a family owned business. We take pride in doing good business & thinking long term creating customers for life. We like to say we are your roofers favorite roofers! We always get the emergency phone calls to save the day from home owners, realtors, property management companies or other General contractors , and other roofing companies to come troubleshoot or clean up the mess of other cheap or inexperienced roofers. Let's save us both time & money and call us the first time around. We are making clients happy 1 Roof at a time!! We would love the opportunity to earn your business.
Exterior Pros
(262) 300-5384 www.extpros.com
Serving
4.6 from 493 reviews
Exterior Pros is a locally woman-owned and operated Home Improvement Company based in Sussex, WI. Specializing in roofing, siding, windows, doors, baths, gutters and leaf protection, we are sure to help you complete your project with quality workmanship and products. With just over 13 years in the industry, we are the only company in Southeastern WI to achieve President’s Club status, given to only the top 0.5% of roofing contractors in the US. We carry an A+ rating with the BBB, are 10x Angi’s List Super Service award winners, and strive for 100% customer satisfaction. If you are in need of a home improvement project, look no further! Give us a call today.
Immortal Exteriors
(414) 881-1605 www.immortalexteriorllc.com
Serving
4.9 from 49 reviews
Immortal Exteriors is a full exterior remodeling Company with the knowledge and experience to help you replace your roof, gutters, siding and windows. We use the highest level of quality products available. Our experienced installers focus on the details on every project. Our goal is 100% satisfaction. We want to be your go to contractor in Southeastern Wisconsin. Each consultation is 100% free and no pressure.
Isabel Construction
(262) 373-1931 isabelconstructionwi.com
Serving
5.0 from 15 reviews
Isabel Construction is your trusted local expert for roofing, gutters, and siding in Brookfield and the Greater Milwaukee area. As a family-owned and operated business, we take pride in delivering honest, reliable service with a commitment to 100% satisfaction. From roof repairs to full replacements, we offer free estimates, a best price guarantee, and a 2-year labor warranty. Whether it's residential or commercial, you can count on our skilled team for quality craftsmanship and peace of mind on every project.
In this area, the materials you'll most commonly see are asphalt shingles, metal roofing, clay tile, concrete tile, synthetic/composite shingles, and slate. Cost ranges reflect the Milwaukee-metro freeze-thaw cycles and spring hail exposure that residents contend with year after year. Asphalt shingles sit at the lower end of the scale, typically around 350 to 700 USD per square, while metal roofs run higher, in the 650 to 1100 USD per square band. Clay and concrete tiles push further into the mid to upper range, roughly 900 to 1800 USD per square for clay and 850 to 1500 USD per square for concrete. Synthetic or composite shingles land between asphalt and premium options, about 450 to 900 USD per square, and slate sits at the premium end, from 1200 to 2600 USD per square. These figures are material-focused and intended to reflect what a homeowner in this market should expect when lining up bids after a hail or wind event.
Storm-driven demand spikes commonly follow hail and strong winds in spring and early summer, which tightens contractor availability throughout the village area. When multiple projects collide-roof replacements scheduled after a single event, plus concurrent repairs in nearby neighborhoods-expect a noticeable bump in project quotes. In practical terms, timing a replacement right after a major hailstorm can mean longer wait times for work crews and potentially higher mobilization costs. If a contractor's calendar fills quickly, prices can edge upward as crews balance tight schedules and the need to source specialized materials. Having a plan to book in a window with moderate demand can help lock in materials and labor more predictably.
The freeze-thaw cycle and wind exposure here place a premium on edge sealing, underlayment quality, and fastener design. Asphalt remains cost-effective and durable under freezing conditions when installed properly, but shingles with a thicker gap or impact resistance may pay off in hail-prone periods. Metal roofs resist damage from wind and ice dams but command higher upfront costs and require precise installation to prevent noise and thermal expansion issues. Clay and concrete tiles bring long service life but are heavier and require a sturdier deck; they're less forgiving if the roof structure needs reinforcement after a big storm. Synthetic/composite offers a middle path with improved impact resistance over asphalt, while slate provides enduring beauty and longevity at the highest price point and weight considerations. Weigh performance under freeze-thaw cycles, wind uplift resistance, and local roof deck suitability when weighing bids.
When gathering estimates, ask for a per-square price broken down by material and for tear-off if applicable. Storms can skew scheduling, so confirm whether pricing includes removal and disposal, plus any required upgrades to attic ventilation or underlayment. If hail or wind damage is suspected, request a written assessment outlining immediate repairs versus full replacement and how each option affects material choice and warranty. In this market, flexibility with timing and a clear understanding of trade-offs between initial cost and long-term performance help keep the project on track without surprise shifts in price.
A full re-roof typically requires a permit, and the Village is the agency that issues that permit. The process is designed to ensure that new decking, ventilation, flashing, and overall roof assembly meet local safety and performance standards that stand up to the region's freeze-thaw cycles and spring hail. Work cannot proceed beyond certain milestones without the permit in hand, so starting the process early helps avoid delays that can cascade into weather-related setbacks.
Inspections are commonly scheduled after tear-off and again after completion. The tear-off inspection focuses on decking condition-checking for rot, stiffness, and any needed repairs that could affect the new roofing system. The final inspection verifies venting, flashing around hips, valleys, chimneys, and dormers, and confirms that the overall installation aligns with Village codes and manufacturer requirements. If decking needs repair, the inspector will expect documented mitigation before the project proceeds. Scheduling around those inspection points helps keep the project moving, especially during spring wind events or late-winter warm spells that can lead to rapid work pacing.
Homeowners should plan for roughly 1-2 weeks of permit processing time, recognizing that the schedule can shift with peak construction seasons and weather windows. It's wise to coordinate the permit timing with the planned tear-off date, since once the permit is issued, the clock is running for the inspection sequence. If the project scope changes-such as adding roof vents, skylights, or an underlayment upgrade-inform the Building Department promptly to avoid delays or the need for amendments.
Keep a clean job-site record and have decking photos handy to show any areas that will be inspected for condition and repair. Confirm with the contractor that the tear-off plan includes proper disposal methods and a waste containment strategy that complies with local environmental rules. During the final inspection, ensure that attic ventilation meets the recommended balance to minimize freeze-thaw damage and that flashing details around chimneys and sidewall intersections are sealed and weather-tight. If the permit package includes special Village requirements or a re-roof weather window, align the schedule to these constraints to minimize the risk of weather-caused setbacks.
Storm activity here hits roofs with real regularity, and this area has a meaningful claim landscape for hail and wind damage rather than a quiet, low-claim environment. After a severe storm, shingles can crack, granules can wash away, and flashing can bend or lift. A smart homeowner treats every impact as a potential claim trigger, not as a normal maintenance issue.
Insurers serving this area often require solid documentation of prior damage and a clearly defined scope of work before approving replacement. If a roof has known wear, a carrier may deny or delay a claim unless the history is crisp and the plan is specific. A well-documented history helps prevent back-and-forth debates about what was damaged by the storm versus what was aging on its own.
Adjusters frequently ask for detailed photos and measurements, sometimes down to individual shingles or patches. You should gather images from multiple angles, include close-ups of damaged areas, and provide a dated timeline of storm events. Measurements of roof surface, vent penetrations, and any delamination or water intrusion seen in attic spaces support a transparent, defensible claim file.
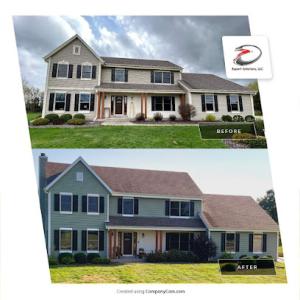
The moment a storm passes, document damage before temporary repairs are removed. Nature can hide damage behind fresh patches or tarps, and later photos may fail to reveal the true extent. A before-and-after progression helps an adjuster see the full scope. If a contractor's temporary fix is necessary, take clear photos of those efforts and note the date they were applied.
Communication with the adjuster should be precise and solution-focused. Outline the proposed scope of work, the expected materials, and the extent of tear-off or overlay. Be prepared to explain how ongoing freeze-thaw cycles could worsen minor damage over time, and how replacement now may prevent further interior water intrusion and secondary issues.
In this market, choosing the right contractor matters. Look for local experience with storm-related repairs, a transparent process for documenting pre-existing damage, and a plan that aligns with the adjuster's expectations. A careful, well-documented approach reduces surprises when the claim moves from assessment to replacement.
Connect with contractors who help homeowners navigate the claims process from damage assessment to final approval.
Better View Home Improvements
(414) 234-3700 www.betterview.homes
W141N5974 Kaul Ave, Menomonee Falls, Wisconsin
5.0 from 41 reviews
Expert Exteriors
(414) 519-1260 www.expertexteriorswi.com
N50W13740 Overview Dr, Menomonee Falls, Wisconsin
4.9 from 51 reviews
Integrity Roofing
(262) 251-0740 integrityroofingwi.com
N95W16975 Falls Pkwy #9, Menomonee Falls, Wisconsin
4.9 from 61 reviews
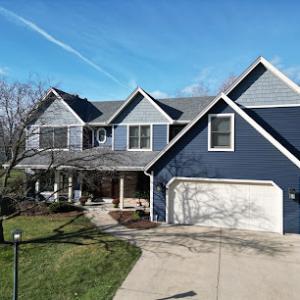
In Menomonee Falls, asphalt shingles remain the dominant practical choice because they fit the local replacement market and are widely supported by area contractors. They handle the freeze-thaw cycle, light hail, and seasonal wind exposure well when installed over a solid deck with proper underlayment. Look for dimensional or architectural shingles with good wind resistance and a durable granule coating to resist surface wear from Wisconsin summers. Regular inspections after storms help catch lifted tabs or minor impacts before water intrusion develops.
Metal roofing is a meaningful but smaller specialty in this market and is often considered by homeowners looking for durability through Wisconsin winter and summer temperature swings. Steel or aluminum panels with a standing-seam profile can provide excellent wind resistance and a longer service life. A quality snow guard system helps manage excessive snow load and potential ice dams in heavier winter snows. Metal often requires precise detailing at roof-to-wall intersections and chimneys, so choose a local installer with experience in cold-weather climates and proper sealants to prevent thermal movement issues.
Clay tile, concrete tile, synthetic/composite shingles, and slate are present in the local material mix but require more specialized installation and repair knowledge than standard asphalt systems. Clay and concrete tiles are heavier and can be fragile under impact; they also demand a robust structure and careful attic ventilation to manage heat gain in summer. Synthetic or composite shingles offer a broader range of looks with improved impact resistance, but installation details still demand care to avoid wind uplift and moisture problems. Slate delivers longevity and a distinct aesthetic, yet it needs experienced hands for crack-prone repair and precise flashing to manage freeze-thaw movement. In all these options, work with installers who understand local weather patterns and can tailor underlayment and ventilation to minimize ice dam formation and moisture intrusion.
The most popular roofing material in the US. Find pros who install, repair, and replace asphalt shingles.
Better View Home Improvements
(414) 234-3700 www.betterview.homes
W141N5974 Kaul Ave, Menomonee Falls, Wisconsin
5.0 from 41 reviews
Expert Exteriors
(414) 519-1260 www.expertexteriorswi.com
N50W13740 Overview Dr, Menomonee Falls, Wisconsin
4.9 from 51 reviews
Integrity Roofing
(262) 251-0740 integrityroofingwi.com
N95W16975 Falls Pkwy #9, Menomonee Falls, Wisconsin
4.9 from 61 reviews
In this village, inspections on reroofs routinely flag improper venting and flashing as leak drivers. When planning a tear-off, verify that each vent boot, roof jack, and top-of-vent alignment sits flush with the roof surface and that flashing around hips, valleys, and eaves is continuous without gaps. Have a compatible sealant plan for seasonal freeze-thaw cycles and ensure step and base flashing are integrated with the new underlayment. Document clear transitions where vents intersect the roof deck so the inspector can see intentional, durable detailing rather than improvised fixes.
Chimney-roof intersections are a common contractor signal in this market, and they can be a primary source of water entry. Prioritize a crack-free chase seal, suitable counterflashing, and a properly dressed base at the chimney differential. If the chimney is brick, ensure mortar joints are repointed and widen flashing to meet the sides of the chimney without creating a water trap. For metal or prefab chimneys, confirm that sealants and counterflashing materials match the roof system and remain compatible through freeze-thaw cycles. A small leak at the chimney line often points to a larger flashing failure elsewhere on the deck.
Skylight repairs are notably prevalent, and penetrations frequently become leak hotspots. Inspect the curb or flange for a true watertight seal, then verify the flashing surrounding the skylight blends with the roof plane. If the skylight is old, plan for replacing the sealant or the unit itself during reroofing to avoid future mis-seals. Check for any signs of condensation or discoloration around the glazing, which can indicate a slow bleed through the flashing or improper shingle-to-flash transitions.
On-site, perform a thorough walkaround with the homeowner after the tear-off. Confirm venting routes remain clear, verify chimney and skylight flashing are uninterrupted by obstructions, and test any roof penetrations for fit before finishing the final layers. Document all flashing details with photos and notes so the final inspection has a clear, traceable history of weatherproofing decisions.
Find contractors experienced in skylight installation, flashing, and leak repairs to bring natural light into your home.
Expert Exteriors
(414) 519-1260 www.expertexteriorswi.com
N50W13740 Overview Dr, Menomonee Falls, Wisconsin
4.9 from 51 reviews
Integrity Roofing
(262) 251-0740 integrityroofingwi.com
N95W16975 Falls Pkwy #9, Menomonee Falls, Wisconsin
4.9 from 61 reviews
DuraShield Roofing & Contracting
(262) 244-0749 durashieldroofingmilwaukee.com
Serving
5.0 from 37 reviews
In Menomonee Falls, flat and low-slope roofing is a meaningful specialty in the contractor market even though the city is primarily a residential re-roofing community. The emphasis here is on long-term drainage performance because water that sits on a low-slope surface tends to find seams, penetrations, and edge details to exploit after every freeze-thaw cycle. When a low-slope section is added to an eave, porch, or accessory structure, the wrong slope or imperfect transitions can become a recurring headache. Your best defense is a precise assessment of slope, deck condition, and edge termination before any material choice is locked in.
Freeze-thaw cycling in the Milwaukee metro area makes drainage performance especially important on low-slope sections and attached structures. Inspect gutters, scuppers, and downspouts for blockages that can back up water under membranes. Check the transitions where a parapet, curb, or wall meets the roof deck, since those joints are common failure points after winter. If a low-slope roof shows evidence of ponding, plan for a drainage fix as a priority before re-covering. The goal is to keep water moving off the surface rather than waiting for a membrane to fail beneath a patch or coating.
Summer heat and thunderstorms can stress low-slope roof membranes and complicate repair timing in this region. Heat softens some waterproofing products, which can affect sealant work and fastener choices during the repair window. If a storm rolls in during a membrane repair, temporary coverings and secure fastening become essential to prevent wind-driven insult. Scheduling repairs for cooler, dry spells when possible reduces material creep and helps seam tapes or flashings cure properly. In practice, plan around forecasts and coordinate temporary protection with a trusted local contractor who understands how heat and sudden downpours impact a low-slope system.
Find specialists in TPO, EPDM, and built-up flat roofing systems for residential and commercial properties.
Better View Home Improvements
(414) 234-3700 www.betterview.homes
W141N5974 Kaul Ave, Menomonee Falls, Wisconsin
5.0 from 41 reviews

Because Menomonee Falls has a large re-roofing contractor pool, homeowners should expect many companies to compete on response time, cleanup, and price rather than on niche luxury materials alone. The quick turnarounds that storm season demands can tempt rushed decisions, so it pays to slow down enough to verify the essentials: timely arrival, thorough debris removal, and clear post-installation checks. If a contractor promises a flawless system without addressing ice dam risks, wind-driven debris, or proper attic ventilation, you may end up paying later in repairs or insurance disputes.
Long-established, family-owned, and locally owned firms are a visible part of the market, which matters when comparing accountability after storm seasons. A locally rooted company tends to stand by workmanship and is more accessible for follow-up service or warranty work when the weather again tests the roof. Look for a proven track record in your neighborhood and for crews that are familiar with common attic condensation and gutter challenges seen after freeze-thaw cycles. Those connections can translate into faster cleanup and fewer surprises during the middle of a harsh winter.
Manufacturer-certified and warranty-offering contractors are present but not universal, so warranty terms and installation credentials should be checked carefully on higher-cost systems. The reality is that some storm-damaged roofs end up with installation gaps or mismatched materials that void guarantees later. When evaluating bids, ask specifically who will install, who they are certified with, and how warranties are transferred if you move or sell within the warranty period. A trusted contractor will provide written confirmation of product certifications, crew training, and a clear process for addressing post-installation concerns without delays.
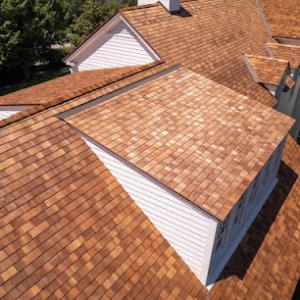
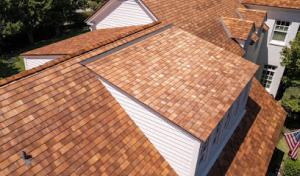
Cedar shingles and shakes show up less often than asphalt, but they remain a visible feature on older homes and certain craftsman-style houses in the area. Because cedar requires careful ventilation, appropriate underlayment, and precise fastener choices, not every roofer will take on cedar work. Homeowners should expect to encounter more limited contractor availability and a narrower pool of cedar specialists. If the existing roof uses cedar, verify that the contractor has prior experience with shake repair, proper matching of shakes, and a plan for seasonal maintenance that protects the wood from winter freeze-thaw cycles and spring moisture.
Slate and concrete or clay tile deliberately stand out in the local material mix, yet contractor specialization is noticeably thinner than for standard asphalt re-roofing. Slate, in particular, requires exacting workmanship, specialized fasteners, and careful assessment of underlying sheathing. Tile roofs can be forgiving in some seasons but are brittle in cold snaps and after hail. When considering repair or partial replacement, seek a roofer with demonstrable slate or tile portfolios, references from homes with similar roof ages, and a plan for matching profiles and textures so the roof maintains its curb appeal and performance.
Specialty roofs in this market often require more deliberate scheduling because the local market is dominated by mainstream residential re-roofing demand. If a storm or wind event damages a cedar shake section or a tile roof, expect longer lead times for specialized materials and crews. Planning ahead helps-coordinate with the roofer on material sourcing, confirm the exact shake grade or tile profile, and align on a repair window that minimizes exposure to winter conditions. In some cases, interim protection may be advised to guard underlayment and sheathing during the wait.
Before work begins, document the existing roof with clear photos of shakes or tiles, and identify any knotty cedar or cracked tiles that signal deeper moisture issues. Ask for a detailed scope that includes material matching, underlayment replacement where necessary, and a plan for integrating repairs with surrounding sections to avoid mismatches. For storm-damaged cedar or specialty roofs, confirm the contractor's process for debris containment and edge protection to prevent damage to nearby siding or landscaping. A thoughtful approach to scheduling and material choice can help ensure a durable repair that respects the roof's original character.
Connect with specialists in the installation and restoration of natural cedar shake and shingle roofs.
DuraShield Roofing & Contracting
(262) 244-0749 durashieldroofingmilwaukee.com
Serving
5.0 from 37 reviews

American Roofing & Home Improvements
(262) 662-5311 www.american-roofing.net
Serving
4.9 from 34 reviews