Last updated: Apr 19, 2026
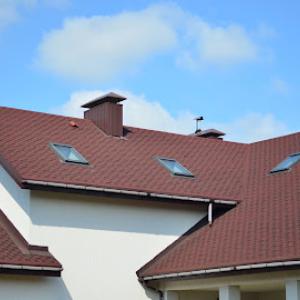
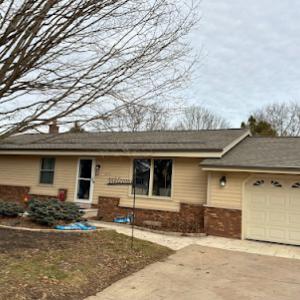
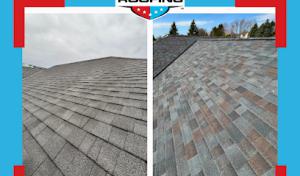
Pewaukee homeowners deal with both winter snow-load and freeze-thaw stress that hammer roofs year after year, on houses built to last but not always built for the lake-influenced wind and moisture patterns around Pewaukee Lake. When a storm moves through, hail and high winds often show up with a quick, dramatic impact that weakens shingles, loosens flashing, and drives water into vulnerable spots. The combination of heavy snow in deep freezes and rapid thaw cycles accelerates shingle blow-off, granule loss, and edge damage. If you've already tracked several winters of ice damming, you know the drill: water finds the path of least resistance and sneaks into soffits, attic joints, and chimney penetrations. The risk is not just a roof problem - it's interior damage, mold risk, and escalating secondary repairs that compound quickly.
The city's roofing demand is strongly tied to storm response and emergency leak control, which aligns with the unusually high local prevalence of emergency repair and storm-damage contractors. That means after a damaging event, you're not just picking shingles off a roof - you're choosing a response window. Emergency crews often arrive first, but the window to secure a leak and dry in the structure quickly is narrow. In practical terms, if a storm leaves a breach in the roof deck or flashing, delaying a professional assessment can turn a manageable repair into a full roofing replacement. The strongest signal is a ceiling stain that appears after a storm, a windy morning reveals curling shingles, or you notice granules in gutters where hail hammered the surface. Act quickly to document damage, photograph the scene, and mobilize a crew that can stop the leak on day one.
Replacement timing is often pushed into late spring through early fall because Wisconsin winter conditions complicate tear-offs, dry-in, and final scheduling. While it's tempting to wait for a "better season," the lake effect and freeze-thaw cycles mean the roof will pay for delays with accelerated deterioration. If an inspection reveals widespread shingle loss, internal moisture, or compromised deck integrity, a careful plan to stage a repair rather than a full replacement may be necessary, but do not let a temporary fix lull you into longer exposure to the next storm. In Pewaukee, the weather calendar rarely cooperates with a perfect tear-off, dry-in, and reseal in the heart of winter; instead, your best window often sits in late spring through early fall, when temperatures are steadier and work crews can complete a full dry-in without the risk of a sudden freeze.
Start with a trusted local contractor who understands lake-influenced storms and Wisconsin's freeze-thaw rhythm. Prioritize securing all obvious leaks and damaged penetrations immediately, even if the job is not fully finished yet. Document every issue with dated photos, focusing on water intrusion points, compromised flashing, and damaged gutters. If you've experienced hail or strong winds, insist on a comprehensive roof assessment that includes flashing, decking, underlayment, and attic ventilation, since these elements influence how long water can travel unseen. And when a scope of work is prepared, request a clear, phased plan that aligns with Pewaukee's typical seasonal window, so you're not left exposed during a sudden cold snap or a late fall storm.
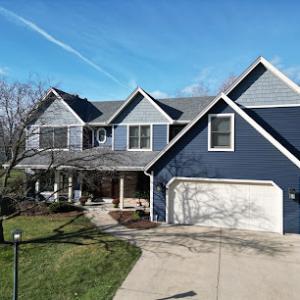
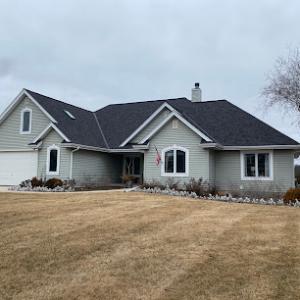
In this lake-influenced climate, the most practical steep-slope options tend to be asphalt shingles and metal. They balance performance, long-term durability, and local labor availability in established Pewaukee neighborhoods. Tile and cedar remain more specialized installs, often reserved for specific homes or architectural visions. If your goal is steady standby protection with predictable maintenance, asphalt and metal are the smart starting point for planning and budgeting.
Asphalt shingles are the workhorse for many Pewaukee roofs because they handle the freeze-thaw cycles and heavy winter snow typical of southeastern Wisconsin with a straightforward replacement path. Costs typically sit in the mid-to-lower part of the market for this area, and most re-roofs in mature neighborhoods involve tear-off, decking inspection or repair, and new flashing along with site cleanup. Expect pricing in the range of about 350 to 550 USD per square for common 3-tab or architectural shingle styles, depending on brand, warranty length, and any needed decking work. If a home has older or damaged decking, the project can push toward the higher end of that band after labor for removal and disposal is included.
Metal roofs offer a compelling option for storm-prone seasons and the freeze-thaw pattern that Wisconsin winters impose. In this market, metal commonly covers homes needing robust protection without the same frequency of maintenance as some other materials. Costs generally run higher than asphalt, reflecting material durability and installation complexity, and fall roughly in the 700 to 1100 USD per square range. A metal installation often includes careful detailing around vents, chimneys, and edges to prevent wind-driven leaks, which aligns well with Pewaukee's windy springs and hail events. For longer-lived performance, metal can reduce tear-off frequency, though initial cost is a consideration.
Clay tile and concrete tile bring distinct aesthetics and drought-like durability under the right conditions, but their weight, installation considerations, and limited local crews make them more specialized. Clay tile tends to sit near the upper end of the price spectrum, while concrete can be somewhat more forgiving on cost but still higher than asphalt. Expect costs roughly in the 900 to 1800 USD per square range for clay and 700 to 1200 USD per square for concrete, with extra structural assessment and possible decking reinforcement required for heavier systems.
Wood shingles or shakes and synthetic/composite shingles occupy niche roles. Wood brings a traditional look but requires extra maintenance in moisture-rich environments and can be more sensitive to hail damage. Synthetic options offer better hail resistance and often lighter installation profiles, but price varies widely. When choosing wood or synthetic in this market, plan for mid-to-upper mid-range costs, with careful consideration of wind and storm exposure in the selection criteria.
Larson & Keeney Home Services
(262) 303-4008 www.larsonkeeneyhomeservices.com
Woodgate Ct W #400, Pewaukee, Wisconsin
4.9 from 160 reviews
Larson & Keeney Home Services is a trusted local expert in roof replacement, roof repairs, gutter installation, and insulation needs. We offer various types of insulation including spray foam, blow-in, and rigid foam insulation. Founded in 2009 by Andrew Larson and Josh Keeney, our company is dedicated to the principle of always putting the customer’s needs first. When it comes to comprehensive home services in Milwaukee and Southeastern Wisconsin, Larson & Keeney Home Services has you covered. Our highest priorities are top-quality work and providing a stress-free experience. It’s because of our dedication to these ideas that we are considered one of the top home improvement service companies in the area.
Modern Exterior Roofing
(262) 525-4113 modern-exterior.com
841 Sussex St, Pewaukee, Wisconsin
5.0 from 18 reviews
From the start, Modern Exterior committed itself to offer the best roofing service for Southeast Wisconsin Residents. We are always researching and developing processes that allow us to bring even greater return to each of our customers. Through experience and time we have come to the conclusion that one of those ways to better serve our customers was to start installing seamless gutters and Siding to deliver more value on each remodeling project.
Brookfield Contractor
(262) 333-0111 www.brookfieldcontractor.com
1306 Hillwood Blvd STE. 2, Pewaukee, Wisconsin
5.0 from 4 reviews
Brookfield Roofing Contractors have been providing high-grade roof installation and replacement services to Waukesha County, WI for years. Backed by decades of roofing experience, we can handle roofing jobs of any size and scale. Our comprehensive services include roof replacement, repairs, maintenance, emergency repairs, and more. Aside from being exceptionally reliable and courteous, all of our crews are fully licensed, insured, and certified. Unlike many other contractors, we also help iron out the details on insurance claims! We’ll make sure you receive all the money you need for repairs. Brookfield Roofing Contractors, the most reliable and experienced roofing contractor in Wisconsin.

Mighty Dog Roofing of Milwaukee Metro
(262) 587-5867 www.mightydogroofing.com
Serving
4.9 from 150 reviews
When it comes to your home’s exterior, Mighty Dog Roofing delivers top-of-the-line services matched with the neighborly customer care our clients have come to love. Our team of skilled experts will conduct a free, detailed inspection of your home, treating it as our own. Whether your home needs a simple repair or a full roof replacement, expect to receive the transparent guidance you deserve. Whatever the case, our team will work to meet your safety and budget needs. We take pride in operating with quality materials, hiring skilled roofers, and providing our customers with a high-quality experience. See for yourself; our reviews say it all. Schedule your free, home inspection today!
Briggs Family Home Development
(866) 301-0155 briggsfamilyhd.com
Serving
4.7 from 116 reviews
WE’RE A FAMILY BUSINESS WE MAKE HOME REMODELING IN OREGON, WI EASY Home remodeling is stressful. You feel pressure to make all sorts of decisions. Possibly the most important choice you make is who you trust to become your remodeling contractors. Based in Oregon & Kenosha, WI, Briggs Family Home Development, LLC has been in the home remodeling business for over 10 years. We’re experienced remodeling contractors who are passionate about making your dreams come true. Our clients come back time and time again because we take the hassle out of renovations. The Oregon, WI community appreciates our: Customer service Cleanliness Value for the money Organization Timeliness Call now for a free estimate on your home remodeling project.
Erie Home
Serving
4.6 from 288 reviews
Since 1976, Erie Home has manufactured, supplied, and installed the best-performing roofing on the market. By providing ironclad warranties and convenient financing, we ensure that every homeowner we work with receives top quality service and value for their homes and properties. Erie Home professionals are the roofing company of choice in the greater Milwaukee, WI area. Whether you need roof inspections or roof damage repair services, Erie Home has been the go-to roofing contractor for nearly 50 years because of our attention to detail and dedication to making sure our customers are satisfied with their results. Contact us today for a quote and see why we're the trusted roofing company Milwaukee counts on.
American Roofing & Home Improvements
(262) 662-5311 www.american-roofing.net
Serving
4.9 from 34 reviews
American Roofing & Home Improvements is the premier roofing contractor in Waukesha, WI, known for our dedication to quality and customer satisfaction. We offer a wide range of roofing solutions, including asphalt, fiberglass, cedar shake, and shingles to meet various needs. Our services extend to gutter cleaning, installation, repairs, rubber roofs, eco-friendly options, tear-offs, and replacements. Proudly serving Waukesha, Big Bend, Muskego, Franklin, Mukwonago, Brookfield, and Milwaukee, our team is committed to delivering unparalleled professionalism and expertise in every project. Contact us today for an estimate!

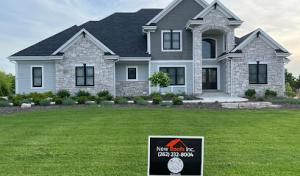
New Roofs
(262) 232-8004 newroofsinc.com
Serving
5.0 from 143 reviews
New Roofs provides primarily roofing services, but also siding services for both commercial and residential properties in Waukesha, WI and surrounding areas. With over 20 years of experience, New Roofs is a trusted roofing partner for flat roofs and slanted or sloped roofs. With extensive maintenance, repair, installation, and replacement experience on Wisconsin roofs, we're trusted by both home and business owners to care for their roof's needs. Whether the roofing system is made of TPO, EPDM, PVC, torch down (modified bitumen), asphalt shingles, metal roofing, wood shake, or tile roofing; we're able to partner with you to address your roofing needs quickly and efficiently. New Roofs is locally owned and operated.
Buck Remodeling
(262) 589-8858 buckremodeling.com
Serving
5.0 from 20 reviews
Buck Remodeling is a trusted roofing contractor and remodeling company based in Waukesha, WI, proudly serving Brookfield, Pewaukee, Oconomowoc, Menomonee Falls, and surrounding Southeast Wisconsin communities. We specialize in roof replacement, roof repair, storm damage restoration, insurance claim assistance, siding installation, and gutter systems. As a full-service remodeling contractor, we also provide kitchen remodeling, bathroom renovations, basement finishing, home additions, and whole-home updates. Whether you need a full roof replacement or a complete interior remodel, our team delivers quality craftsmanship, clear communication, and dependable service from inspection to final walkthrough.
Exterior Pros
(262) 300-5384 www.extpros.com
Serving
4.6 from 493 reviews
Exterior Pros is a locally woman-owned and operated Home Improvement Company based in Sussex, WI. Specializing in roofing, siding, windows, doors, baths, gutters and leaf protection, we are sure to help you complete your project with quality workmanship and products. With just over 13 years in the industry, we are the only company in Southeastern WI to achieve President’s Club status, given to only the top 0.5% of roofing contractors in the US. We carry an A+ rating with the BBB, are 10x Angi’s List Super Service award winners, and strive for 100% customer satisfaction. If you are in need of a home improvement project, look no further! Give us a call today.
Cornerstone Roofing
(262) 323-3223 www.cornerstoneroofingwi.com
Serving
5.0 from 39 reviews
Residential Roofing company serving the greater Milwaukee area

A&M Contractors
(262) 806-1162 amcontractorsllc.com
Serving
4.9 from 46 reviews
Locally & Family owned Roofing contractor servicing southeast Wisconsin. Our mission is to be the most trusted roofing, interior, and exterior contractor in the state providing exceptional customer service while upholding our core values Safety, Quality, and Integrity.
A full roof replacement in Pewaukee is typically treated as a permit-requiring project rather than informal maintenance. This distinction matters because it triggers a formal process with the local building department, rather than a simple homeowner-initiated repair. The permitting framework helps ensure that the replacement protects structures against lake-influenced weather, freeze-thaw cycles, and storm-related wear that are common in this area. When planning a replacement, expect a defined scope review that confirms the materials, venting, and flashing details will meet code expectations and local amendments.
Plans submitted for a new roof are reviewed for compliance with the Wisconsin Uniform Dwelling Code and Pewaukee's specific amendments. The review checks critical elements such as deck integrity, proper roof ventilation, and flashing around penetrations like chimneys and skylights. Once the installation is complete, a final inspection is required to verify that the work aligns with the approved plans and the code standards. In a climate with heavy snow and freeze-thaw cycles, the inspector will pay particular attention to load paths, membrane continuity, and surface drainage to reduce future ice dam risks. Expect a clear checklist that outlines what the inspector will verify, and plan accordingly to avoid rework.
Permit processing and inspection scheduling are commonly coordinated by the roofing contractor. In a market where fast turnaround after storms is a major homeowner concern, this arrangement helps maintain a reliable timeline and reduces the risk of weather-related delays. A contractor-led scheduling approach also improves coordination with material deliveries and crew mobilization, which matters when shingles or panels need to be ordered and staged during a narrow weather window. When selecting a contractor, ask about their experience navigating Pewaukee's permit process and their typical inspection lead times so that the project aligns with your snow and thaw patterns.
Prepare a clear project scope that includes the exact roofing system, attic ventilation plan, and any additional components like underlayment upgrades or ice-and-water barriers in vulnerable eave areas. Have site access organized for the building department and inspectors, including any required safety barriers or temporary staging. If storm damage is a factor, document the condition with photos and notes to support the permit application, but avoid waiving critical code-compliant features to streamline through the process. Communication with the building department should be concise and timely; ask for a primary contact at the department and any specific submission requirements that could affect inspection scheduling.
Weather-sensitive scheduling is a central concern in this area, especially after severe storms. Ensure that the roofing crew has a clear plan for debris containment and site protection to satisfy nuisance and safety standards during inspections. Confirm that all penetrations, ventilation, and drip edge details align with the approved plan before the inspector arrives, as any mismatches can trigger re-inspection fees and extended timelines. A well-documented pre-inspection walkthrough with the contractor can streamline the final check and help maintain momentum through the permitting and inspection sequence.
Wisconsin's hail and wind loss environment makes roof claims a routine part of ownership decisions in Pewaukee, especially after regional storm events. When a storm rattles the lake and drives wind-driven hail across the ridges and valleys, shingles can suffer unseen granule loss, soft spots, or hairline cracks that only show up after a thaw or a strong wind gust. Insurance decisions hinge on demonstrating what existed before the event and what exists after. That means the roof's condition isn't just about the visible dent or a single missing shingle; it's about the overall integrity of the roof deck, flashing, and underlayment, and whether damage extends to attic ventilation or interior drywall.
Insurers commonly want documentation of pre-loss roof condition and may request inspection photos after a damage report, so Pewaukee homeowners benefit from dated photos and contractor inspection records. Start with clear, dated photographs of each roof plane, fascia, and any flashing from multiple angles, including attic space if possible. Keep a simple file noting the age of the roof, the type of shingles, and any prior repairs. If a contractor has performed recent inspections or repairs, secure a copy of the written report and the contractor's professional assessment. After a storm, don't delay in providing impact photos and a detailed summary of observed changes; chains of custody for evidence matter when a carrier is weighing a claim.
Policy terms can change at renewal and carriers may require replacement work to meet current roof standards, making code-compliant replacement more important than patch-only thinking. If a claim is approved, the carrier may push toward replacing compromised sections to restore a uniformly protective barrier against future weather events. A patch that leaves underlying decking or underlayment exposed can invite rapid degradation under continued freeze-thaw cycles and the next big storm. In Pewaukee's climate, a full, properly installed replacement aligned with current standards often reduces the risk of recurring damage and stricter limitations at the next renewal. Maintain open dialogue with the insurer, and have a trusted local contractor evaluate whether a full replacement or a targeted upgrade best preserves the roof's long-term performance.
Connect with contractors who help homeowners navigate the claims process from damage assessment to final approval.
Brookfield Contractor
(262) 333-0111 www.brookfieldcontractor.com
1306 Hillwood Blvd STE. 2, Pewaukee, Wisconsin
5.0 from 4 reviews
Mighty Dog Roofing of Milwaukee Metro
(262) 587-5867 www.mightydogroofing.com
Serving
4.9 from 150 reviews
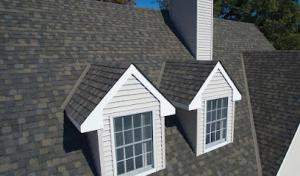
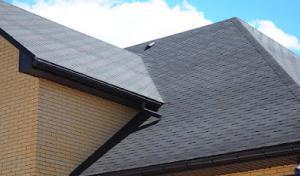
Asphalt shingles dominate the replacement market in Pewaukee because they fit the area's suburban steep-slope housing stock and the local contractor base strongly supports them. The typical installation handles storm damage, wind uplift, and the seasonal freeze-thaw cycle well when paired with proper underlayment and flashing. For most homes facing lake-influenced weather, ordinary dimensional or architectural asphalt shingles offer reliable performance, reasonable replacement timing, and straightforward maintenance. When choosing, prioritize a product with good warranty coverage and a fire rating suitable for the local climate. A solid install detail around chimneys, and along ridge and eave lines, helps prevent ice dams during cold snaps.
Metal roofing is a meaningful but smaller specialty in this market and is often considered by homeowners looking for durability against Wisconsin snow, ice, and temperature swings. Metal panels resist heavy snow loads well and shed moisture quickly, which can reduce ice dam risk in milder thaws. They tend to require a more precise installation and skilled flashing details, especially along roof-to-wall transitions. If the existing roof has a complex layout, or if quiet performance in winter is prioritized, metal can be a strong choice-but it benefits from a contractor with concrete local experience in coastal-influenced setups and the ability to integrate effective attic ventilation.
Cedar shake, clay tile, concrete tile, and synthetic products exist in the market but require more specialized crews and should be evaluated carefully for structural load, flashing detail, and replacement matching. Cedar adds a local charm but can be susceptible to surface wear from freeze-thaw cycles and requires diligent maintenance. Clay and concrete tiles bring long life and a distinct look, yet they demand solid deck structure and precise installation to handle Wisconsin winters. Synthetic products can mimic natural looks while offering lighter weight and potential ease of replacement, but still rely on experienced installers for proper weatherproofing and color consistency.
For any option, plan for flashing at valleys, flashing around roof penetrations, and adequate attic ventilation to manage moisture and temperature swings. The lake-influenced climate emphasizes careful attention to gutter alignment and ice barrier placement in lower areas prone to ice dam formation. When storm damage arises, homeowners often reassess material choice in the context of replacement timing and insurance considerations, so compatibility with existing roof geometry and surrounding structures matters.
The most popular roofing material in the US. Find pros who install, repair, and replace asphalt shingles.

American Roofing & Home Improvements
(262) 662-5311 www.american-roofing.net
Serving
4.9 from 34 reviews
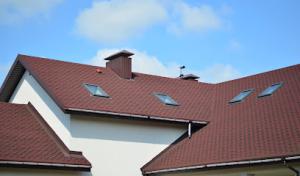
Skylight work is unusually common in this market, so curb flashings and the way surrounding shingles meet the skylight are real local service needs. When the curbs settle with the seasons, the flashings can show hairline gaps that leak only during the dead of winter or in the spring thaw. In practice, that means you may not see water on a sunny afternoon, but you'll notice dampness after a cold snap or a fast melt when the ice dam conditions form around the roof edge. A common trap is neglecting the drip edge and shingle integration where the skylight sits; improper sealing here invites moisture to track along the interior edges rather than dripping straight down. Plan on inspecting the skylight perimeter after heavy snows and after freeze-thaw periods, paying close attention to any staining along the ceiling near the skylight and to family rooms that stay damp longer after storms.
Chimney-related roofing work is also a visible part of the contractor landscape, which fits older and established southeastern Wisconsin housing where masonry penetrations are common. The transition from brick or stone to asphalt or other roofing materials creates a natural vulnerability. If the chimney's flashing is compromised, you may see intermittent leaks that pop up after a few days of warming weather or after a legendary lake-effect wind gusts-leaks that aren't obvious year-round. Look for shingle pull-back at the base, rust spots along the metal flashing, or mortar spalling that directs moisture right into the roof edge.
In this freeze-thaw climate, flashing failures around skylights and chimneys can show up as intermittent winter and spring leaks rather than obvious year-round water entry. Keep an eye on attic condensation patterns after cold nights, and track any fresh ceiling staining after days that swing between below-freezing and above-freezing temps. If you notice moisture that seems to appear or worsen with temperature fluctuations, that's a cue to bring in a professional to reflash or reseal rather than waiting for a larger problem to emerge.
Small remedies, like ensuring proper shingle integration over the flashing and confirming that counter-flashing is sealed, can buy time between bigger repairs. But repeated or expanding leaks almost always signal that the flashing needs a deliberate overhaul-especially with older homes where masonry penetrations show their age first at the flashing joints. Prioritize a coordinated repair that ties the skylight or chimney flashing neatly into surrounding shingles, valley lines, and drip edges to prevent moisture migration.
If winter or spring rains resume a pattern of damp ceilings, call a local roofer familiar with lake-influenced weather. The right pro will assess both the skylight curb and chimney flashing for proper sealant, flashing height, and shingle integration, rather than chasing only the visible drip. A thorough inspection now can stop a small leak from becoming a costly remodel later, especially after the next freeze-thaw cycle.
Find contractors experienced in skylight installation, flashing, and leak repairs to bring natural light into your home.
Modern Exterior Roofing
(262) 525-4113 modern-exterior.com
841 Sussex St, Pewaukee, Wisconsin
5.0 from 18 reviews
Mighty Dog Roofing of Milwaukee Metro
(262) 587-5867 www.mightydogroofing.com
Serving
4.9 from 150 reviews
Flat and low-slope roofing shows up in the local market even though the area is dominated by steep-slope re-roofing. This section matters most for porch additions, attached garages, multifamily sections, and commercial buildings where drainage and membrane detailing differ from standard shingle work. Because low-slope work is a smaller specialty than mainstream re-roofing here, homeowners should verify that the contractor actually handles this roof type rather than treating it like a standard shingle job.
Start by confirming the contractor's track record with membrane systems, roll- or sheet-applied options, and proper edge detailing around parapets or transitions to steep-slope sections. Ask for recent examples within local housing stock similar to yours-porches, additions, or small commercial spaces around Pewaukee's lake-influenced climate. Review warranty terms for membranes, insulation, and flashing, and request a written plan for surface drainage and scupper or-downspout placement that won't pond in winter.
Expect drainage to be a primary concern in additions and attached structures. The plan should specify slope, primary and secondary drainage layers, and a membrane that resists puncture from ice and debris. Flashings must seal reliably at corners, curb penetrations, and transitions to existing roofing. Insulation and ventilation details should align with the attic or crawl space configuration to prevent frost and condensation issues that snow load and freeze-thaw cycles can aggravate.
Avoid assuming a standard shingle crew can perform low-slope work without specialized training. Poor edge detailing, improper membrane seams, or inadequate slope can lead to leaks after heavy snow or rapid thaw. Involve a contractor who provides a clear installation sequence and site-specific drainage plan.
Find specialists in TPO, EPDM, and built-up flat roofing systems for residential and commercial properties.
Pewaukee's market is dominated by re-roofing rather than new construction, so prioritize contractors who demonstrate strong tear-off procedures, storm protection during removal, and thorough cleanup. Look for crews that lay down ground protection, install roof-to-ground containment, and have a clear plan to minimize debris around established neighborhoods. A responsible crew will haul away old materials in a single pass and leave the yard, driveway, and landscaping free of nails and shingle fragments.
Storm-driven demand is common in this lake-influenced area, so quick response matters. When a contractor shows up promptly after a hail or wind event, assess their ability to secure materials, protect nearby property, and stage a temporary containment system to manage drifting debris. Ask for a written outline of daily progress and a realistic timeline that accounts for weather, neighborhood access, and the finite space typical of Pewaukee yards.
Long-established, family-owned, and locally owned firms often have a visible presence in established neighborhoods, which matters for reliability and accountability. Check how they communicate with neighbors about work windows, equipment placement, and parking. A contractor with a well-known local footprint is more likely to stand by warranties and respond quickly to follow-up needs. Favor businesses that can point to recent nearby jobs with solid word-of-mouth feedback.
Require a detailed scope of work, including tear-off method, protection measures for skylights and gutters, and a cleanup plan with nail removal and waste disposal. Request clear references from nearby Pewaukee projects and a few photos from recent storm-related jobs. Ensure the contract specifies warranty terms and a process for addressing post-installation issues promptly.
Evaluate bids not just on price, but on the contractor's tear-off efficiency, site protection approach, debris control, and responsiveness after the job starts. In neighborhoods with mature trees and dense landscaping, a proven cleanup track record and respectful scheduling can save stress and prevent property damage.
Get a clear picture of your project costs upfront - no commitment required.