Last updated: Apr 19, 2026
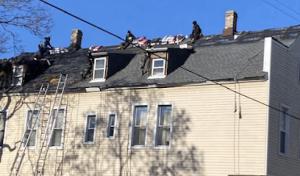
Storms that roll through the Chicago area don't just bruise roofs; they trigger a paperwork chain that can make or break a claim. In this market, insurers frequently request photos, estimates, and proof of work done or planned. After a hail or high-wind event, you'll want to act fast to capture the damage while it's fresh and before seasonal rain or meltwater masks it. Take clear photos from multiple angles, focusing on shingles, flashing, vents, and any obvious leaks on ceilings or closets below the attic. A dated, organized folder of receipts, contractor quotes, and any prior roof reports can streamline the process when your claim is reviewed. Keep a running log of every inspection, phone call, and email with the insurer, adjuster, and contractor-timeliness and clarity here can prevent delays that cost you days of exposure to weather and interior damage.
Spring in this area means sudden roof damage is common, but so is a crowded contractor schedule. The combination creates a tight window for assessing, approving, and scheduling work. Insurance adjusters often want a professional estimate and a proof-of-damage narrative before any tear-off begins. If you delay, you risk a longer path to restoration or a mismatch between the claim scope and the actual repairs needed. To stay ahead, secure a trusted local roofer who understands how to document wind and hail damage specifically in this neighborhood. Have the roofer provide a line-by-line estimate that matches the insurer's expectations, with photographs attached to each item. If a temporary patch is necessary to halt leaks, document that as well, because insurers sometimes want to see interim measures before any major work starts.
Winters here drive a different urgency: small flashing or shingle imperfections can turn into active leaks during repeated freeze-thaw cycles, sometimes long before a full replacement season opens. By the time spring arrives, the problem may have worsened, complicating both the claim and the repair plan. If you notice cracking, loose flashing, or moisture staining after a thaw, treat it as potential storm-related damage. Don't assume temporary fixes will suffice; insurers and adjusters will evaluate whether the damage is ongoing or imminent, which can influence the scope of coverage and the timing of teardown and replacement. Coordinating early documentation of these issues helps ensure the claim reflects actual conditions rather than a best-guess post-event assessment.
First, photograph and document damage within 24 to 48 hours of any hail or high-wind event, then schedule a licensed local roofer for a thorough inspection. Have the contractor prepare two items: a detailed damage report with labeled photos and a separate, itemized scope for both repairs and any necessary tear-off work. Share these with the insurer promptly, and request a written adjustment date or status update. If indoor signs of leaking appear, prioritize a temporary, non-invasive mitigation to reduce interior damage while awaiting full repair authorization. Throughout the process, maintain steady communication with the insurer and the contractor, reinforcing the urgency of timely assessment, approval, and scheduling to minimize exposure to further weather damage and to align with the region's typical spring demand.
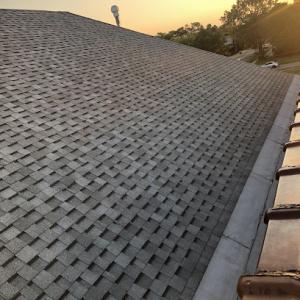
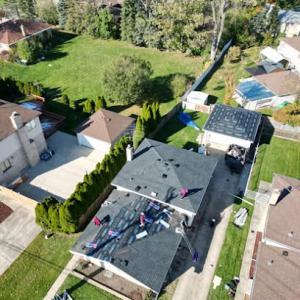
Harwood Heights homeowners commonly choose asphalt shingles, but the local material mix also includes clay tile, concrete tile, wood shakes, synthetic shingles, and slate. In practical terms, this means your roof strategy should be tailored to the material at hand, not a one-size-fits-all approach. Asphalt shingles are the most familiar and commonly stocked by crews working block after block, but a noticeable share of older homes still feature heavier, more delicate materials that demand a different touch. When evaluating a replacement or retrofit, lean on the specifics of your current system: the type, slope, and any distinctive edges around dormers, chimneys, or vent stacks.
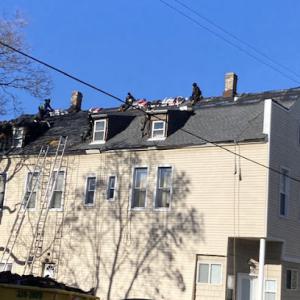
The village's housing stock near Chicago includes many compact lots and older homes where roof geometry, chimneys, and tight access can complicate tear-off and flashing details. This is not the time to assume you can lift a full sheet in one go. Tear-off planning should account for limited workspace, neighboring structures, and tight eaves. Consider a staggered or phased tear-off if access is constrained, and map out temporary protection for walls and landscaping. Flashing around chimneys, vent pipes, and along valley joints can be particularly sensitive in spaces with irregular angles. A careful inspection beforehand helps prevent surprises during weather windows that naturally compress in Harwood Heights between late winter thaw and early spring snow melt.
Tile, slate, and wood systems in this market require crews familiar with heavier or more brittle materials rather than standard shingle-only replacement practices. Clay and concrete tiles demand precise underlayment, secure battens, and careful panel alignment to avoid cracking during removal or reinstallation. Wood shakes and slate call for specialized fasteners, spacing, and attention to potential lumber movement from seasonal moisture fluctuations. When choosing a contractor, verify that crew members have recent experience with the material type present on your home and that they bring material-specific safety and handling protocols to the project.
Harsh weather cycles, especially hail and high winds common to the Chicago area, stress flashing connections and ridge lines. A common pitfall is rushing through a replacement to beat the next freeze-thaw cycle. Instead, plan for weather-smart sequencing: protect vulnerable edges first, then complete a thorough perimeter seal and verify attic ventilation and eave drainage. If your roof slopes into narrow stairwells or attic hatches, ensure the crew has a clear method to dispose of debris without compromising interior finishes. The goal is a durable connection that resists wind-driven debris and hail impact without compromising the integrity of older framing.
Local crews that regularly work in compact lots and with mixed material types are best equipped to handle Harwood Heights projects. Ask for project notes detailing how they will manage edge flashings, chimney transitions, and any required scaffold or tarp protection for adjacent homes. A practical plan includes a staged teardown, material-specific installation details, and a clear sequence for inspections after each major step. If a tile or slate system is involved, request demonstration of correct pallet handling, broken tile replacement, and careful re-laying to preserve roof geometry. The right crew will walk you through a tailored plan that respects both the tight site and the material's sensitivities.
Costs should be evaluated using the per-square ranges provided for each system, not a single citywide average. In this neighborhood context, asphalt shingles run roughly from 350 to 750 USD per square. Clay tile typically sits between 900 and 1800 USD per square, while concrete tile ranges from 600 to 1300 USD per square. Wood shingles or shakes fall about 600 to 1100 USD per square, synthetic or composite shingles about 500 to 900 USD per square, and slate from 1500 to 3000 USD per square. These ranges reflect material quality differences and the realities of dense urban lots where installation challenges can influence final price. Use them as your baseline when you compare bids and choose an end product that matches your budget and climate needs.
Costs in Harwood Heights can rise after regional hail events when demand spikes across the Chicago metro and scheduling pressure affects labor availability. In those windows, crews may charge premiums for expedited tear-off, additional flashing, and mudroom or attic vent checks to prevent future wind-driven leaks. If a storm hits, expect lead times to stretch, with callbacks for weather-related delays and a rush on high-demand underlayments and ice barriers. Planning for these spikes means building contingency into your project timeline and budget. If your insurer is involved, you may also see more extensive documentation requirements that can influence the pace of work and the numbers you're presented with.
Tight suburban lot lines, detached garages, alley access constraints, and debris handling on dense residential blocks can add labor and cleanup complexity compared with open-lot suburbs. Narrow driveways and limited on-street parking push crews to use smaller equipment and more teardown cycles, which can slightly elevate per-square pricing. Access restrictions may also affect disposal fees and the availability of staging space for materials. When evaluating bids, ask contractors to itemize debris disposal, site protection, and cleanup as separate line items so you can see how much those logistics contribute to the total.
To plan wisely, start with your roof size in squares and multiply by the material-specific range to form a price envelope. Then factor in tear-off depth, ventilation needs, and flashing complexity, especially around chimneys and vent stacks common on the area's mid-century homes. If hail exposure was recent, anticipate higher costs for upgraded underlayment, impact-rated shingles, and enhanced wind-flat requirements. For slate or concrete tile, verify connector and substrate work, since heavier systems demand structural checks and sometimes supplementary framing. In all bids, demand clarity on warranty terms, expected life, and the scope of debris cleanup.
When you receive bids, ensure each one reflects the same scope: full tear-off or add-on, inspected ventilation, flashing, ice barrier placement, and attic access protection. Compare the per-square material cost, then add allowances for removal of old roofing, disposal, and site cleanup. If a bid seems lower but omits venting or underlayment, treat it as incomplete. Given the local conditions, also verify scheduling feasibility within your preferred time window, recognizing that demand-driven delays may affect start dates and completion timelines.
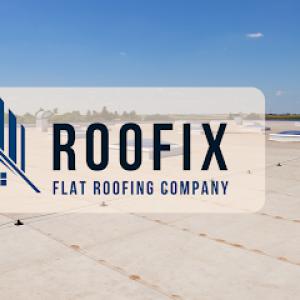
Roofix Flat Roofing Company
(224) 347-9538 roofingharwoodheights.com
4370 N Newland Ave, Harwood Heights, Illinois
4.9 from 42 reviews
AllRoofs Commercial Roofing Company, which specializes in flat roofs, is based in Hardwood Heights. We construct new roofs, repair existing ones, perform commercial roof replacement and maintain a large number of them. Commercial roofs are often enormous, and a professional roofing firm has the tools and expertise to accomplish any size roof installation for a factory, warehouse, or building. Our skilled, licensed, and insured professionals can advise you on the best kind of flat roofing Hardwood Heights for your requirements and give you an estimate. Roofs that are properly erected and maintained should have a life span of 25 years, so you can be certain that when you use AllRoofs Commercial Roofing, you are receiving top-quality work.
Horizon Restoration
(773) 993-0998 www.horizonrestoration.com
Serving
4.9 from 275 reviews
Horizon Restoration Roofing Company located in Chicago Illinois is a premier full-service roofing and exterior contractor proudly serving Chicago, Illinois and the surrounding suburbs. We specialize in roof installation, roof repair, hail damage restoration, and siding installation, delivering exceptional craftsmanship, reliable service, and peace of mind for homeowners and businesses alike. We proudly offer services in Gurnee, Evanston, Norridge, Palatine, Naperville, Park Ridge, Schaumburg, Lake Forest, Lake Zurich, Orland Park, St. Charles, Northbrook, and throughout Northern Illinois. Whether you’re searching for “roofers near me,” “hail damage roof repair,” “siding installation services,” or expert insurance claim negotiation support.
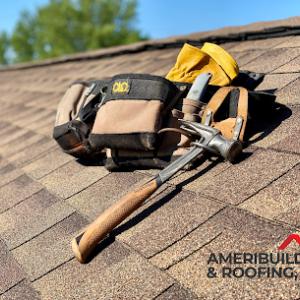
Ameribuild & Roofing
(773) 282-7700 www.ameri-build.com
Serving
4.8 from 50 reviews
Ameribuild & Roofing, Inc. is your trusted, local roofer, fully licensed and insured for your peace of mind. We specialize in a full range of residential and commercial roofing services, offering top-quality roof repair, complete replacement, and new installation. Our experienced team is committed to excellence and protecting your property. We proudly serve Chicago neighborhoods including: Portage Park, Jefferson Park, Irving Park, Avondale, Albany Park, and Norwood Park. Our extensive service area also covers the surrounding suburbs, including Park Ridge, Niles, Skokie, Morton Grove, Norridge, Harwood Heights, and Rosemont. Committed to providing reliable, high-quality solutions using durable materials, we invite you to contact us.
Green World Construction & Roofing
(708) 698-4072 greenworldil.com
Serving
4.9 from 111 reviews
Welcome to Green World Construction, your trusted Roofing Contractor located at 5801 N Northwest Hwy Ave. Specializing in both Residential and Commercial Roofing Services, we are committed to providing top-quality roof repair and installation in your area. Whether you're searching for "Roof Repair Near Me" or need "Affordable Roofing Services," our experienced team delivers reliable solutions tailored to your needs. As a leading "Commercial Roofing Contractor," we ensure durable, energy-efficient roofs for businesses. Choose Green World Construction for superior craftsmanship and exceptional customer service. Contact us today and discover why we're the preferred "Roofer Near Me.
Roofmen & Maintenance
(773) 739-7822 roofmenandmaintenance.com
Serving
5.0 from 46 reviews
"Roofmen & Maintenance is a family-owned and operated roofing company dedicated to serving the roofing needs of both commercial and residential clients in Chicago and its surrounding areas. Our commitment to exceptional customer service and strong ethical values sets us apart from the competition. With every project supervised and an average of 45 years of combined on-site experience, we deliver beautiful, hassle-free roofs to our clients. We offer free estimates and provide discounts for veterans and seniors."
Northwind Exteriors
Serving
5.0 from 129 reviews
Northwind Exteriors is your local specialist for high-performance residential roofing and premium siding solutions. We provide expert roof replacements and are certified installer of James Hardie fiber cement siding, helping homeowners enhance their curb appeal and structural integrity. Our team focuses on precision craftsmanship and long-term durability. Whether you are upgrading your home’s protection with a new asphalt shingle roof or transforming its exterior with the industry-leading aesthetics of James Hardie siding, we deliver stress-free project management and superior results. As a locally owned roofing and siding contractor, we pride ourselves on transparency, top-tier materials, and protecting your most valuable investment.

Chicago Roofing School & Contractors Network & Training Center
(773) 635-0099 www.chicagoroofingschool.com
Serving
4.9 from 137 reviews
Since 2013, Chicago Roofing School and Contractors Network & Training Center in Chicago has created preparation classes to assist contractors in taking their business to the next level. In the state of Illinois, many types of contractors are required to receive their licenses and certifications in their area of expertise. These exams can be very difficult to pass. With the help of CN&TC you will have the resources and tools you need to pass the test the first time. Whether you are looking to get your license or certification in roofing, masonry, or public adjusting, we have the right training course for you. We also assist contractors and property owners in getting their claims approved by the insurance companies.
Windy City Flat Roof
(773) 217-0974 www.windycityroofil.com
Serving
4.9 from 73 reviews
Windy City Flat Roof provides commercial and residential roof replacements, repairs, and waterproofing services to Chicago.
Blue Sky Roofing
(773) 237-7730 www.blueskyroofinginc.com
Serving
4.8 from 67 reviews
Blue Sky Roofing, Inc. is a family owned and operated business that has been servicing Chicago and its neighboring suburbs for over 20 years. We specialize in building, fixing and restoring residential and commercial buildings with the highest of quality. Blue Sky Roofing, Inc. is fully licensed bonded and insured.
Conrad Roofing
(773) 286-6212 www.conradroofing.com
Serving
4.9 from 148 reviews
Conrad Roofing of Illinois is a trusted Chicagoland roofing contractor specializing in commercial and residential roofing and architectural metal work. Serving Chicago, the North Shore, the Western Suburbs, and the greater Cook & DuPage County region, our team delivers high-performance roofing systems built for Midwest weather. We use only top-tier products with industry-leading warranties, backed by decades of experience in flat roofing, steep-slope roofing, metal fabrication, and custom architectural sheet metal. From small residential repairs to large commercial projects, Conrad Roofing provides long-lasting value, precision workmanship, and dependable service throughout Chicagoland.

J&P Exteriors 1
(773) 574-7310 jpexteriors1inc.com
Serving
4.9 from 123 reviews
J&P Exteriors 1 Inc is a licensed, insured, family-owned roofing contractor serving Chicago and its suburbs for over 25 years. We specialize in roof repair, full replacement, emergency repair, and detailed roof inspections. Our skilled team handles leaking roof fixes, storm damage restoration, complete tear-offs, shingle and flat roofing systems, and gutter installation. Built to endure Chicago’s toughest weather, we deliver long-lasting protection and exceptional craftsmanship. Trusted by homeowners and businesses alike, J&P Exteriors 1 Inc offers honest free estimates and enduring roofing solutions.
Vmc Construction Group
(847) 921-5808 www.vmc4group.com
Serving
5.0 from 131 reviews
VMC Construction Group is a trusted Chicago roofing and home improvement expert, offering new roof installations, siding replacements, energy-efficient windows, gutter systems, and precision fascia/soffit repairs. Serving residential and commercial clients across Chicago neighborhoods like Lincoln Park, Wicker Park, and suburbs including Evanston and Naperville, our seasoned team combines local expertise with climate-smart solutions to tackle Illinois’ harsh weather. Committed to transparency, craftsmanship, and community-driven service, we prioritize clear communication, licensed/insured work, and free estimates—ensuring every project, from storm-damaged repairs to historic renovations, meets rigorous quality standards.
A building permit is required for a full roof replacement in this village. The permit process ensures that major work like tear-offs, venting upgrades, flashing, and overall installation meets current codes and local standards. In practice, the contractor typically handles the permit application and coordinates the village inspections. That approach helps you avoid juggling separate plan reviews, which can slow a project during tight weather windows common around the Chicago area's freeze-thaw cycles.
The inspection flow you should expect begins with a tear-off inspection and ends with a final inspection. The tear-off check confirms that old roofing material has been removed down to solid sheathing, that any compromised decking is addressed, and that the roof structure is ready for the new installation. The final inspection verifies that ventilation meets code requirements, flashing details are properly integrated around chimneys, vents, and penetrations, and that the installation adheres to the village's standards for wind uplift and water shedding. In this climate, where freeze-thaw cycles can stress fasteners and seals, the inspector will pay close attention to how roof penetrations are sealed and how flashing integrates with sidewalls and gutter systems.
Ventilation is a critical area of focus in Harwood Heights because improper or insufficient intake and exhaust can accelerate moisture issues and ice dam formation. Expect the contractor to verify that soffit vents, ridge vents, or other venting strategies are balanced to avoid condensation under the decking. Flashing around chimneys, sidewalls, skylights, and roof-to-wall transitions must be continuous and well-sealed, with proper step and counter-flashing, especially where a roof meets a brick veneer typical of dense inner-ring homes. The village expects a code-compliant installation, meaning fasteners and nailing patterns align with manufacturer specs and local amendments. A thorough inspection ensures that ridge and hip placements, shingle exposure, and valley treatments meet the community's standards and won't trigger follow-up corrections during the winter months when freeze-thaw cycles are most aggressive.
Because inspections hinge on weather and permit timing, planning the sequence with the contractor helps secure the window needed for a steady hand-off between tear-off and installation. Ensure that the contractor's crew has all required materials, proof of permit posting, and copies of the roof's venting plan ready for the inspector. If an issue arises-the inspector notes an argumentative misalignment between a vent boot and flashing, for instance-the contractor should address it promptly to minimize delays. Remember, the permit holder can be the contractor, but the village's goal remains a safe, durable roof that withstands Harwood Heights' typical hail and wind events while staying compliant through each inspection stage.
Harwood Heights roofs endure repeated winter freeze-thaw cycling, a cycle that relentlessly stresses shingles, flashing, and sealant transitions. When rain or meltwater seeps into tiny gaps and then refreezes, the resulting ice pressure can lift edges, create micro-cracks, and push sealants apart at vulnerable corners. The consequence is accelerated wear in spots that see the most movement-valleys, chimney-to-roof transitions, and around vent pipes. This climate-driven wear compounds over years, so small flaws today can become noticeable leaks tomorrow if left unchecked.
The village inspection emphasis on flashing and ventilation lines up with the most failure-prone details in this climate zone. Flashing that seems solid during a dry spell can become brittle or shift out of place when temperature swings drive expansion and contraction. In Harwood Heights, joints at valleys, step flashing along walls, and apron flashing around dormers are common failure points. Ventilation plays a twin role: without proper exhaust and intake, moisture accumulates in the attic and beneath the roof deck, increasing condensation and accelerating rot and deck delamination. A roof that breathes poorly during the warm days of fall sets up a harsher cold-season cycle.
Fall wind and debris can reduce drainage performance and worsen winter moisture problems before the next freeze cycle. Leaves and branch litter can clog gutters and downspouts, creating standing water that penetrates sealants and flashing over time. Clogged pathways force water to back up under shingles at vulnerable seams, especially where the roof meets parapets or adjoining structures. As weather shifts toward winter, that perched moisture freezes, expands, and pries apart flush-mounted joints. A routine gutter and debris check in late autumn becomes a practical buffer against sudden ice dam issues during the first hard freeze.
In this neighborhood, a small attention to flashing details can prevent major headaches. Inspect seams around chimneys, vents, and skylights for loose fasteners and missing sealant beads, and verify that step and counter-flashing are properly integrated with the roof deck. Look for any signs of lift along eaves or ridge lines after strong autumn winds. If a leak appears after a freeze, the likely culprits are flashing gaps or compromised sealants rather than a blanket problem with the shingles themselves. Regular seasonal checks focusing on these high-risk zones help keep function intact through the next cycle of cold, wet, and windy weather.
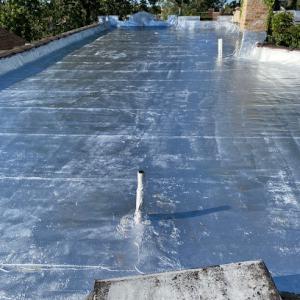
Flat-roof specialization is meaningfully present in the Harwood Heights contractor market, indicating regular demand beyond steep-slope reroofing alone. On compact Chicago-area residential lots, detached garages, porches, and additions often create low-slope sections that need different drainage and membrane detailing than the main house roof. This isn't a cosmetic feature-proper planarity, dew point management, and edge detailing prevent premature leaks.
In practice, you'll see low-slope sections around detached garages or porch roofs that tie into the main system. Pay attention to pitch, scuppers, and internal drains. Specify a compatible membrane system with reinforced edges and a robust flashing transition where the low-slope meets steeper sections. In summer heat, ponding becomes a risk, and in winter, freeze-thaw cycles stress the seams. Insist on a tested drainage plan that removes standing water within 48 hours after rain or irrigation on the roof surface.
During inspection, check how seams, fasteners, and penetrations are treated on flat or near-flat areas. Look for doubled or staggered joints, and verify that edge flashings sit on solid framing and extend past the wall plane. Ensure that any parapet walls have proper moisture barriers and termination bars. For additions or porches, confirm that the connection to the main roof is seamless, with a continuous weather-resistant layer and a proper counter-flash to prevent water ingress at the joint.
Flat and low-slope areas require more frequent surface inspection after hail events or seasonal freezes. Plan routine checks for blisters, lifted seams, and membrane wear, especially where gullies or scuppers are positioned. In Harwood Heights, a proactive approach-tracking wear before the first freeze-will save headaches when the next storm arrives.
Find specialists in TPO, EPDM, and built-up flat roofing systems for residential and commercial properties.
Roofix Flat Roofing Company
(224) 347-9538 roofingharwoodheights.com
4370 N Newland Ave, Harwood Heights, Illinois
4.9 from 42 reviews

In this market, chimney-related work shows up frequently, and the local contractor pool understands the nuances of older homes where roof-to-masonry flashing is a common leak point. When you're evaluating a reroof, don't assume the field of shingles is the only failure point. A neglected chimney chase, cracked mortar joints, or a fatigued step-flashing transition can drip leaks into ceilings long before you notice any shingle deterioration. The freeze-thaw cycle compounds those issues, so expect minor cracks to widen after a cold snap and moisture to migrate behind the flashing even if the shingles look sound.
Skylight service is widely offered around town, reflecting steady demand for daylight without sacrificing energy efficiency. Treat skylight flashing as its own scope during reroofing, not as an afterthought. Local crews will often repair the skylight curb, replace perimeter flashing, and reseal curb-fasteners separately from the main roof replacement. If a skylight has been in place for more than a decade, plan for elevated attention: core seals, glazing, and deck flashing can fail independently of the surrounding roof.
In a freeze-thaw climate, penetrations and masonry transitions frequently fail before the main field of roofing does. Moisture that wicks into mortar joints, around chimney boots, or along the skylight curb can freeze, expand, and push flashing out of alignment. When that happens, water can bypass the shingles entirely and track along framing members or interior walls. Expect the worst moisture paths to emerge at these transitions after a harsh winter, even if the visible shingles look healthy.
Approach a reroof with a tight, targeted inspection of all penetrations: chimney flashing, skylight rims, vent pipes, and masonry joints. Bring the contractor's focus there early, documenting any pre-existing gaps with photos for insurance and warranty clarity. A careful, well-scoped approach reduces the chance of repeat calls for the same leak after the new roof is installed.
Find contractors experienced in skylight installation, flashing, and leak repairs to bring natural light into your home.