Last updated: Apr 19, 2026
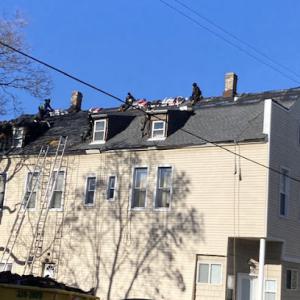
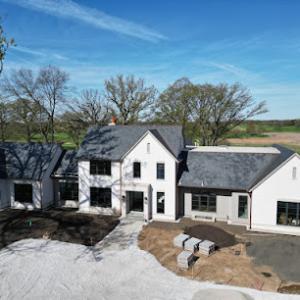
Spring wind and hail events set the cadence for roof inspections, repairs, and replacement scheduling in this area. When the season shifts from winter to spring in this part of the Chicago metropolitan pattern, a rush of storm activity can reveal weaknesses in aging roofs. Shingles that look fine in February may show wind-driven lifting, hail bruising, or granule loss after a storm. Those signs are not cosmetic; they point to vulnerable underlayment and decking that can fail when soaked and stressed by subsequent thaw cycles. The urgency is real: a post-storm assessment in the days that follow can prevent a small leak from becoming a costly, widespread problem.
Cold winters followed by repeated thawing stress shingles and roof decking in a way that only this climate sees. Ice dams may push water under edges, while repeated freezing and expansion degrade adhesive bonds and sealants. In houses with older Chicago-area stock, this combination often leaves soft spots on decking and compromised flashing where water has found its way over a long season. The transition from winter to spring is a critical moment to verify that every vent, boot, and valley is solid, because leaks commonly appear during or right after that transition, even if the storm season seems to be over.
Because local insurers investigate hail and wind claims with roof-age records, photos, and installation documentation, condition evidence before and after storms is essential. A clear, dated photo trail makes a real difference when claims are reviewed, and it helps distinguish pre-existing wear from new damage. For homes with asphalt shingles or other common materials, know that hail can leave subtle bruising or granule loss that isn't immediately obvious from ground level. In many cases, the critical damage is on the slope and underside of the roof, where moisture can hide until a heavy thaw amplifies the issue.
Timing matters here. Schedule a roof condition check soon after a significant hail event or strong wind, and again after the first major thaw of spring. Look for curling, cupping, or buckling shingles, exposed fasteners, cracked vent boots, and lifted flashing along chimneys and skylights. Pay attention to attic signs as well: daylight through decking, any unusual warmth, or mold growth can indicate hidden leaks. In older homes, ensure that ventilation is balanced to reduce condensation that can accelerate deck rot.
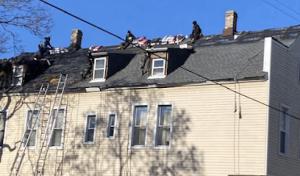
If a storm hits, document every affected area with high-resolution photos and notes on dates, weather conditions, and any observed leaks inside the home. Photograph yard debris, granule accumulation in gutters, and dented or missing shingles from multiple angles. Keep a running log of temporary repairs, such as tarps or sealant applications, and verify that interior remedies address the actual leak source, not just surface symptoms. When storms come, quick, thorough documentation paired with a measured inspection stack the odds in favor of a solid resolution and a smoother path to recovery.
Find local contractors experienced in assessing and restoring roofs after hail, wind, and severe weather events.
Topline Roofing - Roofing Contractors, Public Insurance Adjusters
(773) 814-6005 toplineadjusting.com
8513 Crain St, Niles, Illinois
5.0 from 107 reviews
Presidential Roofing
(847) 581-1040 www.presidentialroof.com
8507 N Osceola Ave, Niles, Illinois
4.9 from 79 reviews
RoofingSource
(800) 507-3177 www.roofingsource.com
6255 W Howard St, Niles, Illinois
4.9 from 47 reviews
The cold winters and hot summers create a repeat cycle of freeze-thaw damage, thermal expansion, and contraction that stresses roofing systems year after year. In this area, the most durable roofs are designed to tolerate moisture intrusion from ice damming, wind-driven rain, and shifting substrates, while still performing under heavy snow loads. The window for ideal replacement work narrows to moderate-weather months, when temperatures and humidity are conducive to proper installation, flashing, and sealants. Understanding that pattern helps you plan ahead and avoid weather-induced setbacks that can complicate insurance claims or long-term performance.
The village follows a thorough, detail-oriented mindset rather than a quick tear-off-and-replace mindset. Final approval checks installation details such as ventilation, underlayment, and fastening, which means a roof project in this area can be more involved than in markets with looser requirements. Contractors who understand the local process prioritize a well-ventilated attic, correctly applied underlayment, and fasteners that secure the roof system without compromising sheathing or deck integrity. This focus helps prevent premature failure due to moisture accumulation, thermal movement, or wind uplift, and it supports insurance documentation when the claim hinges on proper installation.
The local contractor market strongly emphasizes quick response and re-roofing, reflecting how often aging roofs are replaced rather than built anew. This urgency comes with an expectation that a project will move efficiently from first contact to weatherproof protection, especially after a storm or during a harsh season. For homeowners, that means vetting contractors not just on price, but on responsiveness, clarity of schedule, and proven track records with local weather cycles. A reliable contractor will set expectations for material deliveries, permit-related milestones (as the process requires), and the sequence of work that minimizes exposure of vulnerable decking to melt-freeze cycles.
Storm events and the region's climate make documentation a practical step in managing insurance considerations. Gather dated photos and notes that show the roof's condition before, during, and after a storm, including attic signs of moisture, damaged flashing, or compromised underlayment. A detailed record helps support claims that involve wind damage, hail strikes, or freeze-thaw-related wear. When meeting an adjuster, bring a concise summary of observed issues, supplemented by professional assessments of ventilation adequacy, ventilation-related moisture risk, and evidence of proper fastening patterns. Clear documentation can help ensure that repairs address underlying vulnerabilities rather than just cosmetic symptoms.
Begin with a cautious inspection of visible flashing, ridge and hip areas, and eaves for signs of gravel loss, curling shingles, or lifted nails. In the attic, check for condensed moisture, dark staining, or warm spots that indicate inadequate ventilation. If a storm has recently affected the roof, prioritize a quick yet thorough assessment by a trusted contractor who can provide a written inspection report and a proposed remediation plan in alignment with the local expectations for ventilation, underlayment, and fastening. For extended service life under Chicago-area stress, consider systems that balance durable underlayment with effective attic ventilation and fastener patterns designed to resist wind uplift, while keeping in mind the impact of future freeze-thaw cycles on sealants and joints.
Asphalt shingles dominate the local market because they fit the area's common residential roof forms and are widely used for replacement work after weather wear. In Niles homes, they handle the typical hip- and gable-roof lines found on mid-20th-century to modern ranches without demanding special framing. They also tend to pair well with existing underlayment and flashing details that have evolved with Chicago-area weather patterns. For a straightforward re-roof or minor repair, asphalt keeps the system simple, reliable, and resilient against the seasonal freeze-thaw cycles that stress roofs here. When considering asphalt, look for good nail penetration into solid sheathing, continuous ventilation, and appropriate shingle granule retention to curb wind and moisture intrusion during Chicago-area storms.
Metal, clay or concrete tile, synthetic/composite shingles, and slate are present locally, but each brings specific checks. If choosing metal, ensure the panels or shingles are sized and fastened to resist expansion and contraction from wide temperature swings, and verify flashing transitions around vents, chimneys, and skylights are non-corrosive and properly integrated with the roof deck. Tile roofs require attention to weight; some homes in the area carry roof loads that demand structural verification before full replacement, along with correctly detailed step-flashing at penetrations to prevent leaks where water tends to pool. Synthetic or composite shingles offer a broader color and profile range, but still rely on sound underlayment and precise installation to perform under freeze-thaw stress. Slate delivers longevity, but the heavy weight and fragile nature of the material require careful structural appraisal and meticulous flashing to manage moisture movement and expansion joints. In all cases, plan reviews should scrutinize whether assemblies diverge from typical re-roof configurations and how that affects ventilation and fastening patterns kept up to local expectations.
Chicago-area temperature swings and winter exposure make material choice in this area less about appearance alone and more about how the system handles expansion, contraction, and moisture. Roofs experience rapid cycling between cold snaps and warmer thaws, so joints, edges, and penetrations must accommodate movement without inviting leaks. Consider how the chosen roof type interacts with attic ventilation, drip-edge alignment, and the surrounding roof geometry-especially on designs with multiple valleys and dormers. For any option beyond asphalt, have a plan for reinforcing structure where necessary, and ensure flashing around penetrations remains continuous and corrosion-resistant. If a replacement occurs after a severe storm season, documenting the condition of underlayment, fasteners, and flashing becomes crucial for insurance and long-term performance.
In this area, most re-roof projects shift away from the dead of winter. Moderate temperatures in spring, summer, and fall make installation and inspections more reliable, which helps with quality and scheduling. Storm activity across the Chicago area can tighten labor availability and drive demand for tear-offs, repairs, and insurance-related replacements. If a storm hits, expect timelines to lengthen and a backlog of jobs to form, particularly for full re-roofs that require careful coordination with crews and material deliveries. Planning for a spring or early fall start can help secure a smoother window and a more predictable crew.
Costs in Niles align with regional pricing but can edge higher when the project involves tear-offs, extensive underlayment work, or premium materials. Asphalt shingles stay on the more affordable end, with costs commonly seen in the mid-range for a complete re-roof. If a project uses metal, clay tile, concrete tile, synthetic/composite shingles, or slate, you'll encounter higher per-square rates, especially when a full tear-off is required and additional detailing is needed. The village tends to scrutinize nonstandard details more closely, and plan-check time can add to labor hours, particularly when premium materials are specified. Typical ranges for common materials are reflected in the national guidance, but expect adjustments for weather-driven demand and local labor availability in peak seasons.
Nonstandard roof features-such as unusual roof lines, multiple valleys, skylights, or copper accents-tend to increase plan-check complexity and inspection time in this market. Premium materials amplify that effect, since fasteners, underlayment, and ventilation must be coordinated with the overall roof assembly and any specialty detailing. When premium or unusual details are involved, allocate extra planning time and a contingency in both schedule and budget. This isn't about overcaution; it's about ensuring the installation holds up under Chicago-area freeze-thaw cycles and the heavier use that storms can bring.
Storm-damage, wear from freeze-thaw cycles, and high exposure to weather mean documentation matters. Expect insurance-related projects to require meticulous condition notes, photos, and staged progress updates. Having a clear plan for temporary protection during a delay, and a realistic timeline for completion that accounts for possible vendor backlogs, helps keep the process steady. If a claim is involved, ensure the contractor is prepared to coordinate with the insurer and provide the necessary documentation and receipts for material and labor.
Get a clear picture of your project costs upfront - no commitment required.
Topline Roofing - Roofing Contractors, Public Insurance Adjusters
(773) 814-6005 toplineadjusting.com
8513 Crain St, Niles, Illinois
5.0 from 107 reviews
Topline Roofing - Roofing Contractors, Public Insurance Adjusters
(773) 814-6005 toplineadjusting.com
8513 Crain St, Niles, Illinois
5.0 from 107 reviews
Discover TOP LINE ROOFING dba PRO SERVICES ROOFING, a top-rated residential and commercial roofing and masonry contractor in Chicago, partnering with insurance adjusters to offer superior craftsmanship, attention to detail, and exceptional customer service. Our skilled team provides a wide range of services, including emergency roof repair, hail damage as well as slate and tile roof repair, storm damage roof repair, chimney restorations, and masonry services like waterproofing, repointing, and lintel beam installation. Trust PRO SERVICES ROOFING for all your roofing and masonry needs, where quality, honesty, and professionalism meet. Contact us now for a free estimate!
Presidential Roofing
(847) 581-1040 www.presidentialroof.com
8507 N Osceola Ave, Niles, Illinois
4.9 from 79 reviews
Presidential Roofing is residential, commercial and industrial roofing contractor committed to installing quality roofing systems that will provide our customers with years of problem free protection. Our purpose is to provide and install quality roofing systems that reflect the integrity of our company and the people we employ in a manner that is safe and cost efficient. Presidential Roofing was establishe in 1997 and is proudly serving entire Chicagoland since than. Owner of Presidential Roofing Tom Mikolajczyk is personaly involved in all of our projects insuring that our costumers are getting the best quality work at most affordable prices.We believe quality craftsmanship and design are just the beginning when instilling new r
RoofingSource
(800) 507-3177 www.roofingsource.com
6255 W Howard St, Niles, Illinois
4.9 from 47 reviews
The nation’s leading solution-focused rooftop partner.
RENVX Roofing Contractors
(224) 985-1908 roofingparkridge.com
Serving
5.0 from 39 reviews
There is only one right choice when it comes to professional roofing companies in the Park Ridge area. RENVX Roofing Contractors & Company has been serving you for years with reliable roof installation and roof repair that brings you quality and satisfaction. We don’t accept any oversights and treat every project like it was our own. Our team can provide you with multiple roofing styles made of diverse materials. Technical aspects are definitely the essential ones, however, we also pay our attention to design and aesthetics. In case when you notice any leaking place in your current roof - give us a call and we will come to perform certified roof repair in Park Ridge! For all these and much more, contact us even today.
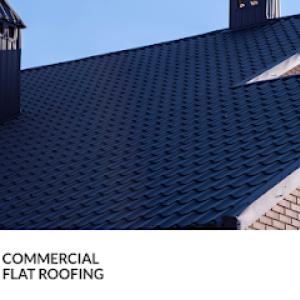
OPI Commercial Flat Roofing
(312) 940-6355 chicagoflatroofer.com
Serving
4.9 from 33 reviews
We are the leading flat roofing company in Chicago offering outstanding flat roofing repair, flat roofing maintenance, and flat roofing replacement. We pride ourselves in providing excellent service that integrates efficiency, quality, and affordability. Our flat roof specialists have many years of experience and knowledge about flat roof services. Whether you have a flat roof leak, small or large scale projects, our flat roof experts can provide you flat roof leak repair and the highest quality workmanship to ensure that your home is safe from any weather conditions it may face. Get in touch with us today, and we will be more than happy to assist you with any of your flat roof needs.
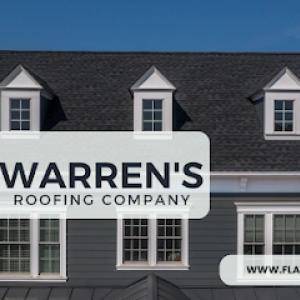
Warren's Roofing Company
(224) 998-6002 flatroofinginc.com
Serving
5.0 from 38 reviews
As Warren's Roofing Company, we serve you in Skokie and surroundings. Our mission has always been delivering you the finest roof installation, repair, and roof inspection that enables us to prevent more serious roof damages. The workers that we hire and well-trained and guide you every step of the roof installation or your roof repair in Skokie. We don’t accept any negligence and oversights. Keep in mind that having your roof installed and maintained properly is paramount to ensure your investment lasts for years. We do our best to supply you with the highest level of service that you’ll be truly glad about. Multiple roofing styles and materials are available. One call is definitely enough to start the cooperation.
Green World Construction & Roofing
(708) 698-4072 greenworldil.com
Serving
4.9 from 111 reviews
Welcome to Green World Construction, your trusted Roofing Contractor located at 5801 N Northwest Hwy Ave. Specializing in both Residential and Commercial Roofing Services, we are committed to providing top-quality roof repair and installation in your area. Whether you're searching for "Roof Repair Near Me" or need "Affordable Roofing Services," our experienced team delivers reliable solutions tailored to your needs. As a leading "Commercial Roofing Contractor," we ensure durable, energy-efficient roofs for businesses. Choose Green World Construction for superior craftsmanship and exceptional customer service. Contact us today and discover why we're the preferred "Roofer Near Me.
Horizon Restoration
(773) 993-0998 www.horizonrestoration.com
Serving
4.9 from 275 reviews
Horizon Restoration Roofing Company located in Chicago Illinois is a premier full-service roofing and exterior contractor proudly serving Chicago, Illinois and the surrounding suburbs. We specialize in roof installation, roof repair, hail damage restoration, and siding installation, delivering exceptional craftsmanship, reliable service, and peace of mind for homeowners and businesses alike. We proudly offer services in Gurnee, Evanston, Norridge, Palatine, Naperville, Park Ridge, Schaumburg, Lake Forest, Lake Zurich, Orland Park, St. Charles, Northbrook, and throughout Northern Illinois. Whether you’re searching for “roofers near me,” “hail damage roof repair,” “siding installation services,” or expert insurance claim negotiation support.
Northwind Exteriors
Serving
5.0 from 129 reviews
Northwind Exteriors is your local specialist for high-performance residential roofing and premium siding solutions. We provide expert roof replacements and are certified installer of James Hardie fiber cement siding, helping homeowners enhance their curb appeal and structural integrity. Our team focuses on precision craftsmanship and long-term durability. Whether you are upgrading your home’s protection with a new asphalt shingle roof or transforming its exterior with the industry-leading aesthetics of James Hardie siding, we deliver stress-free project management and superior results. As a locally owned roofing and siding contractor, we pride ourselves on transparency, top-tier materials, and protecting your most valuable investment.
Safe Roofing Company
(224) 998-6056 roofing-skoki.com
Serving
5.0 from 29 reviews
Skokie, Illinois, is known for its long, cold winters, and having a reliable roof over your head is something you want to be confident about. Call in Safe Roofing Company for an inspection to make sure your shingles, downspouts, gutters, and flashings are all in good enough shape to keep you from moisture damage, ice-dam build-ups, and problems with debris and fallen branches. We offer excellent customer service backed up by our skilled contractors who can repair, replace, or maintain your commercial or residential roof, so it consistently performs to the best of its ability in the upcoming winter. Our contractors are the best in the business and will provide you with an affordable estimate and guide you through the process.
Greater Chicago Roofing - Skokie
(847) 929-9398 www.greaterchicagoroofing.com
Serving
5.0 from 51 reviews
Greater Chicago Roofing - Skokie is an experienced, well-established roofing company. No matter if you require roof installation, repairs or a complete replacement, you’ll be happy with the outcome of our services. Our staff has over 40 years of combined expertise in construction and roofing work. Our work quality is second to none and our dedication to our clients makes us the ideal choice. You can trust us to take care of the entire task - whether for commercial or residential property. We’re dedicated to customer complete satisfaction. We will always go the extra mile to give you excellent service. We also provide skylight and guttering services. Contact us now for your FREE estimate!
O'Hara's Son Roofing Company
(847) 255-3600 www.oharasson.com
Serving
4.0 from 43 reviews
Established in 1987, O'Hara's Son Roofing (OSR) has grown into one of the nation's top commercial and industrial roofing contractors. OSR is a family-owned and operated national roofing company based in Chicago, IL. Our national services include new commercial roof construction, roof replacement, leak repair/service, and preventive maintenance for commercial and industrial flat roofs. Our mission is to provide the highest quality service, materials, and workmanship to maintain our reputation as one of the nation’s best commercial roofing companies.
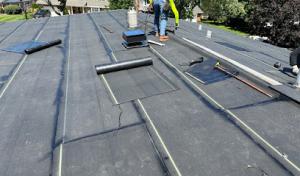
A full re-roof in this community is not permit-free maintenance. The village requires a building permit obtained through the municipal process, and the contractor typically handles the permit application on your behalf. This isn't a formality to gloss over-the village building department reviews plans for ventilation, underlayment, and fastening strategies, and may pause work if anything looks out of spec. If your contractor misses a step or rushes the paperwork, you risk delays, rework, and the potential for added inspections that can impact your timeline and occupancy.
The inspection sequence is not a one-and-done event. After the permit is issued and work begins, multiple checks are standard practice in this climate, especially on full re-roofs where freeze-thaw cycles can accelerate wear. The village building department will conduct inspections at key milestones: framing and flashing review, underlayment and venting verification, and final fastening confirmation. Each stage is an opportunity to catch ventilation shortfalls, improper underlayment, or insecure fasteners before the roof is sealed. Being prepared for each inspection-with labeled ventilation points, correct underlayment orientation, and clear fastening patterns-reduces the risk of rescheduling and extra trips.
Nonstandard details-such as alternative vent configurations, unusual roof angles, or materials that diverge from the approved plan-can trigger plan checks before work proceeds. That means additional review time and potential design clarifications. If your home has unique eaves, dormers, or roof penetrations (sky lights, hvac stacks, or chimneys), anticipate extra scrutiny. Coordinate closely with the contractor to ensure the submitted drawings and product selections align with what will be installed. When plans don't precisely match, the village may require a revised plan or engineering note before any further work, so keep a direct line of communication open with both the contractor and the building department.
Niles final approval specifically verifies ventilation, underlayment, and fastening, and nonstandard details can trigger plan checks before work proceeds. That final sign-off is not merely a checkbox; it confirms the roof system is capable of withstanding the local freeze-thaw cycle and typical Chicago-area weather stress. If approval is delayed or denied, you may face a hold on occupancy, rework, or additional inspections. Knowing this helps you set expectations with the contractor, and emphasizes the importance of meticulous preparation, accurate documentation, and timely communication with the village throughout the project.
Documenting storm damage promptly and clearly helps you navigate the Chicago-area insurance environment that affects Niles. Hail and wind claims are commonly reviewed against the roof's age, prior damage history, and evidence of proper installation. If a storm hits, take time to photograph every visible area from multiple angles, and note any interior signs of leaks after the next thaw cycle. This careful record helps adjusters separate new damage from preexisting wear, which can shape how a claim is processed and paid.
Adjusters may ask homeowners for contractor invoices and photo documentation, so recordkeeping directly affects claim handling. Keep a centralized folder with dates, project notes, and written confirmations from your contractor about materials used and installation details. If repairs were made before a storm, document those outcomes too, as they influence how damage is evaluated and whether a claim is approved for a full or partial replacement.
Manufacturer warranty status can influence claim outcomes in this market, making contractor paperwork and product documentation especially important after a storm. Have your installer provide warranty cards, product data sheets, and installation certificates. When possible, link the warranty to the specific shingle or panel type and show how the current installation meets the warranty criteria. This helps prevent disputes about coverage and supports timely decisions by the insurer.
In homes with older Chicago-area stock, the combination of freeze-thaw cycles and heavy winds can reveal hidden fastener or underlayment issues only after a storm. If inspection reveals signs of improper ventilation, or if the roof deck shows uneven sag or moisture staining, expect documentation to be scrutinized for long-term reliability. Adjusters may request expert opinions on workmanship and installation details, which means your contractor's report matters as much as the physical damage. A well-documented claim reduces the room for dispute and speeds resolution, while sparse records can trigger indecision and extend the time needed to finalize payment. Keep a dedicated file accessible to your insurer and attorney.
Flat and low-slope roofing is a meaningful specialty in this market, reflecting the mix of garages, additions, and commercial-style roof sections found in this part of the Chicago suburbs. In practice, expect more transitions around parapets and parties walls, where ventilation details and edge support matter as much as the field membrane. A well-sealed base helps resist winter moisture intrusion and freeze-thaw cycling.
Skylight projects are common locally, which matters because leak complaints in freeze-thaw climates often trace back to flashing and transition details rather than field shingles alone. When planning, prioritize a comprehensive flashing plan around the curb, curb flashing height, and any step flashing where the skylight meets a low-slope surface. Schedule a careful dry-fit and test water around the skylight after installation to confirm long-term performance.
Autumn leaf buildup in Niles can slow drainage at low-slope sections and around roof penetrations, increasing moisture-related performance issues before winter. Inspect gutters and downspouts for clogs, and keep scuppers clear where applicable. On low-slope areas, ensure the primary drainage pathway remains unobstructed, and pay attention to the transitions where penetrations meet the membrane. Proactive flushing and targeted resealing around penetrations can prevent drip paths that worsen in the cold months.
Find specialists in TPO, EPDM, and built-up flat roofing systems for residential and commercial properties.