Last updated: Apr 19, 2026
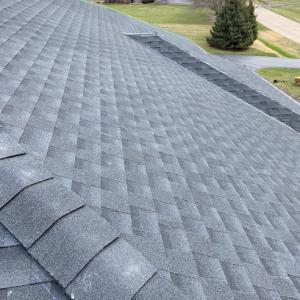
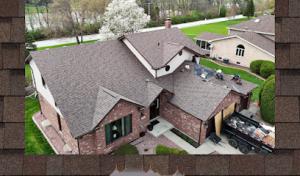
Storms in this area can arrive quickly, with hail and high winds leaving composite shingles and flashing torn up well before a homeowner notices. After a storm, you need a precise record: clear photos from multiple angles, close-ups of damaged shingles, vent pipes, and fascia, and a simple rooftop measurement log. Insurers in this market routinely ask for photo documentation, roof measurements, and contractor estimates before agreeing to replace the entire scope. Your first priority is to assemble a coherent set of evidence that shows new damage distinct from aging wear. If you don't have a good baseline photo set, a quick drone or ladder shot series from a safe vantage point can save back-and-forth delays.
In busy Roselle subdivisions with aging asphalt roofs, adjusters often separate storm-created damage from pre-existing wear. That distinction matters for approval of a full replacement versus patchwork repairs. Before you file a claim, catalog signs of new impact: bruised shingles, granule loss concentrated after a storm, dented metal or gutter damage, and compromised underlayment. Concurrently, note any pre-existing wear patterns such as curling shingles or soft decking that existed before the incident. A well-organized claim package that clearly marks "new" versus "existing" helps the adjuster see the urgency of a full replacement where warranted, and avoids misclassification that slows the process.
Spring and summer thunderstorms in the northwest suburban corridor can create sudden demand spikes that ripple through the response chain. Tarping, inspections, and scheduling for replacement can stretch when storms are frequent. If you have visible damage, don't wait for a perfect, dry day to initiate contact-start with a preliminary contact to your chosen contractor who can stage a rapid assessment. If a tarp is needed, insist on a temporary measure that prevents further interior leakage, and document the tarp's placement with photos and a dated note. Expect some fluctuation in arrival times for crews during peak storm weeks, and plan for potential overruns or rescheduling.
Create a concise, organized file you can hand to the adjuster or upload to the insurer portal. Include: storm date and location, a narrative of what happened, the sequence of observed damage, dated photos, a simple diagram showing the roof area affected, and a preliminary scope from a local contractor that reflects reasonable replacement steps. Make sure the contractor's estimates break out materials, labor, and any scoping details that could influence the replacement amount. This transparency helps prevent back-and-forth debates about scope or necessity, and it speeds up the path from inspection to approval.
Choose a Roselle-area contractor who understands how village oversight, neighboring home designs, and common storm patterns interact with replacements. A familiar contractor can coordinate a measured estimate, ensure accurate roof measurements, and provide a clearly worded scope that aligns with adjuster expectations. If an adjuster asks for third-party measurements, have your contractor deliver precise, buildable figures that can stand up to scrutiny. Quick, accurate documentation and a credible estimate form the backbone of a fast-tracked claim, especially when weather is stacking up on your calendar.

Roofing Gurus
(773) 742-1331 www.roofing-gurus.com
21 S Howard Ave, Roselle, Illinois
4.9 from 110 reviews
Roofing Gurus is a fully licensed, locally owned, and family-operated roofing company proudly serving Roselle, IL, and nearby communities, including Itasca, Carol Stream, Bloomingdale, and Bartlett. We specialize in roof replacement, roof repair, siding installation, and gutter installation. With years of experience, we take pride in using top-quality materials and delivering exceptional workmanship on every project. Homeowners trust us for honest estimates, dependable service, and lasting results that protect and enhance their homes.
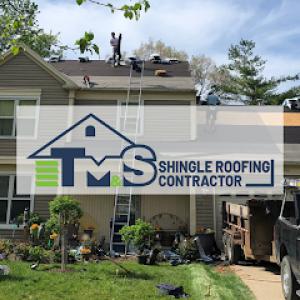
TM & S Construction & Remodeling
Serving
5.0 from 48 reviews
Welcome to TM&S Shingle Roofing Contractor, your trusted roofing expert! With years of experience and a team of skilled professionals, we deliver top-notch shingle roofing solutions that stand the test of time. Whether it's roof installation, repair, replacement or maintenance, we've got you covered. Our commitment to quality craftsmanship and exceptional customer service sets us apart. We take pride in using premium materials and employing industry-leading techniques to ensure your complete satisfaction. Don't compromise on the safety and beauty of your home – contact us today for a free consultation. Let TM&S Shingle Roofing Contractor safeguard your property with excellence!
Global Adjusting & Construction
(773) 726-0182 www.adjustingglobal.com
Serving
4.9 from 177 reviews
Global Adjusting and Construction can help you get free roof repairs by coordinating with your homeowners insurance, to get you the most amount of money to go towards your repairs.
Premier Group
(331) 343-3590 premiergrouproofs.com
Serving
4.8 from 118 reviews
Premier Group: Bloomingdale Roofing Contractors provides a wide range of residential, industrial, and commercial roofing services, as well as additional services such as siding installation, architectural drawings, masonry work, and more. We offer NDL warranties on all of our projects, and have many available options for financing available. If your property has been damaged, we help clients to settle property damage claims by evaluating and documenting damages, negotiating with insurance companies on the client’s behalf, and working to reach the ideal settlement for the policyholder, maximizing coverage and minimizing risk.
Canga Roofing
(224) 222-1642 www.cangaroof.com
Serving
4.7 from 205 reviews
Canga Roofing is the leading Roofing Company near Chicago, IL & the surrounding areas. We proudly offer Roofing Contractors, Roof Repair, and Window Replacements near Chicago! Get in touch with us if you require Roofing Companies. Canga Roofing’s mission is to provide all the home and business owners we work with in the Chicago Area with high-quality artistry that leaves them 100% satisfied. We strive at every job to provide work up to the highest standards of professionalism. You can depend on us for reliable service when you need it. If You need your home to be in great shape, we'll be there to ensure it always is. Contact Canga Roofing can help you with all of your Roofing needs in Chicago Today!

StRoof Roofing Contractors
(224) 347-7594 roofingcompanyschaumburg.com
Serving
5.0 from 55 reviews
There are roofing companies in Schaumburg, IL, and then there is StRoof Roofing Contractors. We are family owned and operated so we are a roofing company that cares about the community we serve. For years we have offered a range of roof installation and roof repair services that are second to none. Our expert roofing contractors in Schaumburg are able to handle any roofing project from minor roof repairs to full roof replacement. We are always ready for any residential or commercial roofing you may need. With fully licensed, bonded, and insured roofing contractors on our team, our roofing company in Schaumburg has the trusted professionals ready to work on any roof with the skill and experience you expect.
Optimal Home Improvement
(630) 988-0029 optimalhomeimprovements.com
Serving
5.0 from 67 reviews
As Optimal Home Improvement, we specialize in shingle, metal, and flat roofs, alongside custom aluminum and copper gutter systems. With years of experience, our team delivers exceptional roofing and gutter solutions, including installation and replacement. We are also leaders in copper works, offering services like copper flashing, chimney flashings, and copper awnings. Our high-quality materials ensure top performance and durability, backed by outstanding customer service that sets us apart in the industry. * Roofing * Gutters * Siding ***Best price and quality***
Pro Home 1
(630) 448-8499 www.prohome1.com
Serving
4.5 from 51 reviews
We proudly provide Chicagoland Communities with quality roofing (commercial and residential), siding installation, window replacement, door replacement, bathroom remodeling, kitchen remodeling, deck installation, and more. We are your trusted roofing and remodeling contractor. Visit our website to learn more and schedule your estimate!
Relianz Restorations & Exteriors
(847) 447-3511 www.werestore4u.com
Serving
4.6 from 89 reviews
Local Commercial and Residential roofing & exterior company. 15 Years in business! Da Vinci Masterpiece Contractor. We honor retail and insurance forms of payments. We Specialize in Composite roofing systems, Metal roofs, low slope / flat/ roofs and are licensed by major manufacturers to install them. Our services include commercial, residential roofing, gutters, windows and custom copper work. We take pride in our work and take on every project personally. We are a Pella Certified window contractor, and a GAF Certified Master Elite Contractor, in addition we are a member of DaVinci Masterpiece Program for synthetic roofs, and a CRCA member.

RogoPro Flat Roofing Company
(224) 242-8220 flatroofingschaumburg.com
Serving
4.9 from 33 reviews
If you are looking for a trustworthy and reliable flat roofing company, then no need to look further. Our company offers flat roof repair, flat roof replacement, and flat roof maintenance in Schaumburg. We only use the highest quality of materials to ensure that your home is safe from any weather conditions that it may face. We have years of experience, which means that we know the ins and out when it comes to flat roofing. You will be provided a detailed explanation of how we will do the process of your repair, replacement, or maintenance. Our team will also give a precise estimate so that there would not be any financial surprises along the way. We will make sure that your experience with us will be as smooth as possible. Contact us now!
Greater Chicago Roofing - Bloomingdale
(630) 283-8173 www.greaterchicagoroofing.com
Serving
5.0 from 42 reviews
Greater Chicago Roofing - Bloomingdale is an experienced and well-established roofing company. If you require an installation, repair or complete replacement, you’ll be satisfied with the outcome of our work. Our staff has over 40 years of combined expertise in construction and roofing work. The quality of our work is unmatched and our dedication to our customers is what makes us the best choice. What keeps us apart from the competition? These: * 15% price match guarantee * Free estimates * Warranties We’re committed to your complete satisfaction. We will always go beyond to offer you top-quality service. Call us now for your FREE estimate!
Chicagoland Roofing Companies
(708) 583-9904 chicagolandroofingcompanies.com
Serving
5.0 from 35 reviews
We are one of the most respected, established roofing companies in the city. We work with many different types of roofing materials, and we take pride in the quality of our work. Our estimates are accurate and thorough. Our people are professional and personable; some of the most highly skilled roofing contractors in the area. We finish our roofing jobs on time and we leave things clean and neat when done. We do both residential roofing and commercial roofing. No roofing installation is too big or too small. When you invest in a new roof, we want you to get the best value for your money. Our goal is to provide the best quality roof, with professional installation for the best possible price.
Winter in this part of Chicagoland uses a repeated freeze-thaw cycle that gnaws at roofs over years. Shingles become brittle as cold lowers their flexibility, and flashing around chimneys, vents, and skylights can shift with temperature swings. This accelerates micro-cracking, edge deterioration, and the invitation for leaks where roof penetrations meet the field. When every night dips below freezing and days rise just enough to thaw, those tiny weaknesses magnify, especially on older roofs that may not have upgraded underlayment or modern flashing detail. The result is a pattern homeowners recognize: small black lines along seams, moisture staining near vents, and a slow creep of damp into attic spaces if those vulnerabilities aren't caught early.
In this market, where storm claims are common after hail and heavy snows, the risk isn't just missing shingles after a storm. It's hidden leaks that travel along sheathing and into attic joists before showing on ceilings. The combination of repeated freeze-thaw and imperfect attic ventilation creates temperature differentials that drive condensation and ice dam formation. Ice dams can back up meltwater under shingles, risking water entry at the fascia, along rakes, and around penetrations. The more you understand that these damages aren't always visible from below, the more timely inspections after storms become a smart habit. A focused look at attic access, insulation depth, and ventilation balance can reveal hot spots where heat loss is pushing ice formation toward vulnerable edges.
Older northwest suburban homes often present mismatches between insulation quality and ventilation expectations. Loose or compacted insulation, gaps around soffits, and under-insulated attic access can create warmer pockets that promote uneven roof temperatures. Those hot spots are the cradle of ice dam development because they melt snow at the top faster than it can drain, refreezing at the colder eaves. A practical approach is to assess attic insulation and seal obvious bypass routes, such as a poorly sealed attic hatch or gaps around pipes. Pair that with improved soffit-to-ridge intake and exhaust balance where possible. If insulation upgrades are on the table, target a continuous, well-sealed layer that reduces heat loss and dampens the temperature swings that feed ice dam formation.
Snow load and ice conditions can limit safe access for repairs and delay replacement work during winter in the village. When temperatures swing, surface ice creates slick work zones, and ladders or temporary platforms can become hazardous. Plan major repairs for days with solid, dry conditions and consider staging work when a warm spell briefly softens ice without risking deeper moisture ingress. Seasonal timing matters: addressing flashing movement and suspected leaks sooner rather than later reduces the chance of amplified damage when spring thaws arrive. A careful, staged approach to repair that prioritizes seal integrity at penetrations and along eave lines can help prevent costly follow-up door-to-roof repairs.
Dry, moderate periods are the preferred replacement window for shingles around Roselle because they help asphalt shingles seal properly and reduce weather-related installation interruptions. In practical terms, that means aiming for a stretch when daytime temperatures are comfortably above freezing and precipitation is scarce for at least several days in a row. The goal is to let the new underlayment and shingle tabs seal without early moisture exposure that can lead to nail pops or seam failure. If the calendar shows a stretch of calm, sunny days with dry forecasts, that is the window to lock in a start date and coordinate milestones with the crew.
Spring rains in the Chicago suburbs can complicate tear-off moisture control and underlayment exposure during active projects. If a project begins late winter or early spring, be prepared for temporary protective measures at eaves and vents, and have tarps ready for quick coverage between daily shifts. The key practical step is to maintain a predictable sun-and-dry pattern for several days, so the roof can dry out fully before any inspection or shingle seating. In Roselle's mix of mature homes and newer remodels, crews often arrange staggered tear-off where weather looks unreliable, then switch to a shorter maintenance cycle to keep the work progressing without exposing the interior to prolonged weather risk.
Summer heat and thunderstorms around Roselle can interrupt crew schedules and affect handling of temperature-sensitive materials. High heat can soften certain shingles and roof appurtenances, slowing installation or requiring adjustments to material handling. Thunderstorm activity can force short suspensions, especially when crews are working on sections above entryways or near electrical terminations. The practical response is to build a flexible schedule with short, weather-aware windows and to prepare for rapid wrap-up if a late-day thunderstorm rolls in. A steady week with predictable afternoons tends to deliver the most consistent results, minimizing the possibility of overheated shingles curling or chattering during placement.
For typical local stock, start with a dry forecast and a plan that sequences tear-off ahead of underlayment and drip-edge work during stable weather. Use the dry spells to stage materials, protect landscaping, and verify attic ventilation is ready to handle the new roof system. When a delay is unavoidable, communicate a clear alternate date range to prevent backlogs in a neighborhood that often sees multiple projects moving in parallel. In Roselle, coordinating around your neighborhood's typical mailings and event schedules helps reduce on-site congestion and keeps crews focused on clean, timely completion.
Get a clear picture of your project costs upfront - no commitment required.
Greater Chicago Roofing - Bloomingdale
(630) 283-8173 www.greaterchicagoroofing.com
Serving
5.0 from 42 reviews
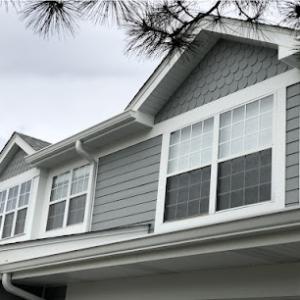
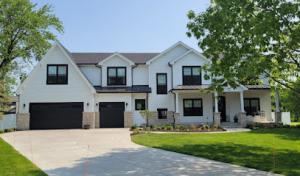
Asphalt shingles dominate the local market because they fit the suburban housing stock and replacement economics better than premium systems. In Roselle's mix of ranches and two-story homes, these shingles align with typical roof pitches, attic ventilation setups, and the long track record of serviceability through freeze-thaw cycles. When you're weighing replacement options, a quality asphalt shingle with a durable granule finish and a reliable sealant system can deliver solid weather resistance without dramatic changes to roofline or insulation needs. The practical benefit here is straightforward maintenance: many local crews recognize the nuances of older truss spacing and can match shingle colors and profiles to existing exteriors, helping the roof blend with the home's character rather than create a jarring update.
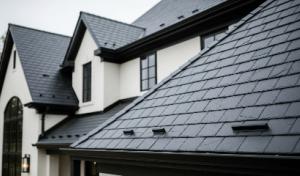
Metal roofing appears in the market, but it remains a smaller specialty segment locally. That makes installer selection more important than in asphalt-heavy jobs. If you're considering metal, expect precise measurement, careful flashing, and attention to deck compatibility with the metal panels. In storms and rapid temperature shifts common to the area, metal can offer excellent wind resistance and a long life, but the right installer matters for seamless integration with chimneys, skylights, and roof-to-wall transitions. Condensed, Roselle households choosing metal tend to do so when the home's design benefits from a distinctive, modern profile or when a metal roof aligns with an extended life plan. Ensure the contractor can demonstrate a solid track record with the exact panel type, insulation interface, and sealant details that prevent leaks at joints visible to seasonal changes.
Tile, cedar, and synthetic roofs exist in the broader contractor market, but they require closer review of structural load, flashing details, and replacement part matching than standard shingle projects. Clay and concrete tiles add substantial weight, so the roof structure must be evaluated for load capacity and proper grid support. Cedar brings a natural look but needs attention to decay risk in freeze-thaw cycles and to potential mold or insect exposure if gaps open up. Synthetic shingles offer versatility and can mimic more expensive materials, yet the installation nuances still demand a precise matching of underlayment, flashing, and color continuity with surrounding homes. In all three categories, you'll benefit from a builder or roofer with recent Roselle-area experience who can address hail patterns, attic ventilation compatibility, and storm-season flashing reliability. The goal is to preserve the home's aesthetic while ensuring dependable performance through our typical winter-to-spring transitions.
When you start planning a full replacement, expect the price to move with the project's scope rather than a flat roofing-only number. In Roselle, the mix of older suburban homes and newer additions means a wide range of roof pitches, penetrations, and accessory structures. Asphalt shingles sit at the lower end of the spectrum, while heavier materials push pricing up quickly as disposal and handling become more labor-intensive. Concrete, clay, and metal options each bring their own labor and material dynamics, and a clear scope helps keep bids apples-to-apples across different crews.
Chicago-area storm surges after hail and strong winds can temporarily raise pricing pressure for labor, scheduling, and material availability. In practice that means bids delivered within a calm window may tighten once a hail event repeats or a cluster of claims hits the market. If you're replacing in spring or late summer, expect some volatility in lead times for shingles, underlayment, and fasteners. Build a cushion into your timeline and budget to absorb sudden shifts in availability or minor price bumps after a major storm.
Homes with steeper suburban rooflines require more scaffolding, longer installation times, and more braking of waste-driving labor and disposal costs higher. Extra penetrations from vents, skylights, or satellite antennas add to flashing work and potential leak risk, which raises both complexity and inspection time. A detached garage or multiple roof sections increases the amount of material and debris management needed. Heavier materials such as clay or concrete tiles demand more labor, specialized equipment, and longer removal cycles, all of which push the square price up versus standard asphalt. In Roselle you'll see these effects magnified by the mix of older framing interfaces and denser neighborhoods where access can slow crews.
In practice, your final square-foot price will hinge on the chosen material, the roof's exact slope, how many penetrations must be flashed, and the overall debris-handling plan. A well-scoped estimate will itemize removal, underlayment, flashing, fasteners, ventilation, and waste disposal so you can compare apples to apples between bids.
Don't let upfront costs delay a critical repair - these contractors offer payment plans to fit your budget.
The village coordinates inspections at rough-in and final, so scheduling and project sequencing need to account for municipal sign-off points. Expect weather-related pauses tied to protective measures, but plan for the two mandatory inspection milestones. Early inspection confirms deck conditions, ventilation, and underlayment installation, while the final inspection verifies flashing details, penetrations, and overall workmanship. Missing an inspection window can delay the project, so coordinate with the contractor to maintain a steady pace.
Roselle permit review covers disposal and workmanship standards, making debris handling and installation quality part of the local compliance picture. Debris must be contained and removed per village rules, and waste streams should be managed to avoid rooftop or street hazards. On the installation side, the village looks for proper fastener patterns, edge detailing, hip and valley treatment, and proper sealing against water intrusion. If the project changes during execution, updated permit documentation may be required to keep the process valid.
Keep a written record of all permit numbers, inspection dates, and any village correspondence. Share those details with the roofing crew and your insurer to prevent run-around and claim disputes. When planning around winter conditions, build a buffer for potential freeze-thaw delays and for the need to protect freshly installed layers from moisture. A well-coordinated permit and inspection plan reduces risk and supports a durable, code-compliant roof. Coordinate early with the village for permit timelines and inspection windows well.
In Roselle, the market shows meaningful demand for skylight work, so you'll encounter more crews focusing on flashing multiple skylight curb details during a replacement. The most common failure path isn't the glass-it's where the curb, underlayment, and flashing meet. If the skylight is older or the curb wasn't properly sealed, you'll see recurring leaks at the joint where flashing edges meet the roof plane. Plan on a careful inspection of the skylight perimeter, including the boot flashings around the curb and the integrity of any surrounding drip edge. Even small misalignments or gaps can become heat-cold cycle leak points after a heavy storm.
Flat and low-slope sections appear often enough in the local market to matter on additions, porches, and mixed-roof homes even though steep-slope shingles dominate overall. When a sunroom, porch, or new addition touches an existing roof, the transition becomes a common failure zone. Look for inconsistent slope, improper edge terminations, and insufficient drainage at these junctions. The goal is a continuous, well-sealed plane, with matched penetration details for vents, skylights, and any parapet or rake edges. In taller seasons, small pooling on a low-slope surface can foul membrane seams and hidden fasteners.
Freeze-thaw movement and storm-driven water make transitions between low-slope membranes and adjacent shingle sections a higher-risk detail in this region. When cold snaps hit, any hairline seam or corner seam can crack, allowing water to migrate under layers. Even a minor misalignment at a transition from membrane to shingle can become a slipstream for moisture during a heavy storm. Ensure flashing is continuous across the transition, and confirm that the membrane's edge detail sits flush against the shingle line without exposed fasteners or punctures.
During planning, treat skylight and low-slope transitions as explicit check points. Have the contractor verify roof-to-wall detailing, edge closures, and the integrity of any curb flashings before work begins. Document existing issues with photos, focusing on the skylight perimeter, low-slope interfaces, and any signs of previous repairs. This local approach helps catch hidden leaks that could surface during the first thaw or after a hail event.
Find contractors experienced in skylight installation, flashing, and leak repairs to bring natural light into your home.

Roselle homeowners face a Chicago-area landscape where hail, wind, and severe storms drive many roof replacements. Insurers in this region commonly expect date-stamped photos, measurement reports, and contractor documentation that clearly distinguishes storm damage from age-related deterioration. When you file, gather before-and-after photos that show the effected hail strikes, wind-driven debris, and any observed leaks or sagging. A simple, dated calendar of storms can help corroborate your timeline. Have your contractor provide a measurements packet that includes roof area, visible damage, and any attic-level moisture indicators. This isn't a generic photo log; it should read as a clear, concise narrative tied to a specific storm event and the observed changes since then.
Start with a dated damage log the day after a storm. Capture exterior elevations, gutters, vents, and shingles (close-ups of bruising or fractures are helpful). Have the contractor include a schematic or sketch of the roof with labeled damage sites and a responsible party's contact details. Ask for a written policy excerpt from the insurer, if available, that outlines what constitutes storm damage versus wear. When you receive an estimate, ensure it references the exact damaged components and differentiates replacement needs from repair work. Holding these items together in a single claim file makes reviews smoother for adjusters and reduces back-and-forth.
Because permit and inspection requirements can affect final scope, homeowners should keep permit records and final inspection proof with their claim file. Store all correspondence, approved scope changes, and inspection reports in the same folder. If the scope shifts due to an inspection result, document the new measurements and update the storm-damage narrative accordingly. In the event of a dispute, these records form a transparent trail tying the claim to the actual work performed and the local inspection outcomes. Keeping this organized from the outset minimizes delays and helps protect the claim through the full replacement process.
Roselle homeowners are shopping in a large local field where re-roofing is the dominant service, so replacement experience matters more than niche new-construction positioning. Look for crews that regularly complete full replacements and have a track record of finishing jobs on occupied homes without extended disruption. In this market, visibility during cleanup and a quick turnaround from start to finish often weighs as heavily as the initial quote.
Storm-driven projects are common, and people move in between tarps and final shingle classes. A responsive contractor should answer calls promptly, schedule a timely on-site assessment, and provide a clear timeline. Notice how cleanup is handled day to day: are streets and yards left clear at the end of each shift, and is licensed disposal included? Local crews that demonstrate consistent, proactive cleanup tend to be the same teams that protect interiors and landscaping during cold snaps and thaw cycles.
Long-standing local firms are well represented, and buyers often compare responsiveness and documentation quality as much as price. Firms with a multi-generational presence tend to have steadier crews, clearer communication channels, and better warranty handling. Ask about who will be on-site for the project and who customers should contact after hours. Family-owned businesses often balance competitive scheduling with careful, transparent reporting.
Documentation is a practical daily measure of reliability. Request a written scope of work, material specifications, and a staged schedule that accounts for winter weather realities. Confirm who holds the permits and how changes will be communicated if weather interrupts progress. A contractor should provide legible invoices, a detailed change-order process, and a simple point of contact for questions throughout the project.
Ask for recent Roselle or nearby projects with similar roof types and exposure. Visit completed homes if possible, and talk to neighbors about the on-site crew's behavior, protection of landscaping, and how storm cleanup was handled. The right choice blends proven replacement experience, responsive service, and clear, consistent documentation that matches the expectations of busy, occupied homes.