Last updated: Apr 19, 2026
In this inland South Shore setting, cold winters bring snow that sits on rooftops and then retreats with a dramatic freeze-thaw cycle. That cycling forces tiny cracks in shingles, makes edges brittle, and nudges flashing joints to shift. Over the years, those small movements compound, and you start to notice hairline leaks around vents, valleys, and where the roof meets siding. Asphalt shingles fare well enough under normal use, but in Bridgewater these freeze-thaw routines accelerate aging more quickly than in milder climates. If you own an older roof, expect more frequent soft spots and harder-to-find leaks at low spots or along rake edges after a heavy thaw.
Warmer months bring humid air and heavy downpours, so moisture exposure doesn't end with melting snow. Summer moisture sits on the surface longer and can push on underlayment and attic ventilation alike. When a roof already has brittle shingles from winter, prolonged summer moisture compounds wear at the shingle surface and at the edges of flashing. The result can be moss or algae growth in shaded sections, which traps more moisture and amplifies thermal cycling. In practical terms, winter damage often looks worse after a wet summer, and a roof that survived one harsh season might show new signs of aging the following year if moisture management wasn't addressed.
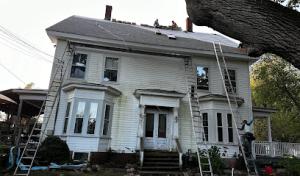
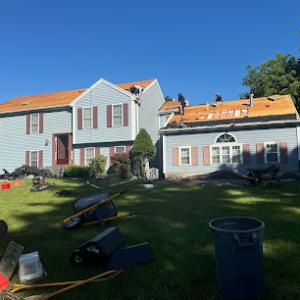
Because winter weather limits safe tear-off and installation, most full replacement work in this area is concentrated from late spring through fall. That makes seasonal planning more important here than in milder climates. If a roof shows recurrent leaks or widespread shingle crazing, waiting until late spring for a full tear-off could extend the risk of interior damage, especially in attic spaces that tend to trap heat and moisture. On the flip side, a fall replacement runs into earlier cold snaps, so coordination with crews to avoid winter delay is essential. Plan ahead by aligning a replacement timeline with anticipated spring weather, and factor in potential wet spells that could push work into early summer.
Start with a careful exterior inspection after a major thaw or storm. Look for shingle edges curling up, granule loss in gutters, and any lift around chimney flashing or vent pipes. Pay attention to areas where the roof line meets the wall, as freezing and thawing can shift those junctions and invite leaks. In mid-summer, check for moss or lichen growth in shaded sections; remove small patches with a plastic scraper and treat with a moss-inhibiting solution to slow moisture retention. Ensure attic ventilation is sufficient: a well-ventilated attic reduces heat buildup that can accelerate asphalt shingle deterioration and underlayment aging. If there is persistent dripping into the attic or damp insulation during dry spells, that signals a need for professional assessment sooner rather than later.
If seasonal changes reveal cracking, widespread curling, or recurring leaks near flashing, do not delay a professional evaluation. A local roofer can isolate whether the culprit is the aging of the shingles themselves, flashing movement from freeze-thaw cycles, or inadequate ventilation that magnifies moisture-related wear. Early intervention can prevent more invasive damage, such as rotted sheathing or compromised attic insulation, which tends to escalate quickly in Bridgewater's climate. The goal is to keep the roof deck dry through the worst of winter and to maintain a steady, well-ventilated attic environment during the humid summers.
Spring storms in Bridgewater bring heavy rain and gusty wind that can interrupt active roofing jobs and expose weak flashing, ridge lines, and older shingle roofs to swift leaks. If a storm hits mid-project or when crews are locating a suspected entry point, water can surge under edges where roof-to-wall transitions fail or where ridge vents have deteriorated seals. You need a plan that prioritizes rapid tarp protection, quick temporary sealants, and a fast call to an experienced local crew that can respond to active leaks within hours. Keep a close eye on corners where flashing meets siding, around vent pipes, and along any recent patchwork-these are prime leak paths when wind-driven rain arrives suddenly.
Autumn in this area piles up leaves and lingering moisture, creating a cloak that hides telltale signs of aging in the roof deck. Wet leaves stacked along rims can trap moisture against underlayment, while moss or algae growth can deteriorate shingles faster than expected. The risk is that leak sources aren't obvious until winter pressure tests start, and by then you're faced with rapid melt-and-freeze cycles that widen any existing gaps. Inspect after the first long concrete-dry spell, then again after heavy wind events. If you notice damp spots on ceilings or attic condensation that wasn't there in the summer, treat it as a warning-delays can turn into concrete repairs and re-roofing during prime winter windows.
The local contractor market shows unusually strong demand for emergency response and quick turnaround, indicating that homeowners often hire for active leaks and urgent re-roofing rather than purely elective upgrades. That means you should keep a short list of on-call specialists who can prioritize rapid assessment, temporary containment, and expedited scheduling. When a leak starts and the weather is still unsettled, you want a crew that can seal the path quickly to stop interior damage, then outline a concrete plan for a proper fix without forcing you into a rushed re-roof under deteriorating conditions.
Start with a temporary, weatherproof cover over the most exposed section of roof if you detect active dripping. Use a sturdy tarp anchored away from overhanging branches and secure flashing edges with contractor-grade tape or sealant as a temporary measure until the crew arrives. Clear the attic of valuable items and protect insulation from further moisture intrusion. Document every drip pattern with photos and notes, including wind direction and magnitudes, so a responder can pinpoint the likely entry points fast. When a leak is confirmed, don't wait for perfect conditions-call a local pro who can mobilize within hours for a rapid containment and a inspected plan for the next weather window.
Find local contractors experienced in assessing and restoring roofs after hail, wind, and severe weather events.

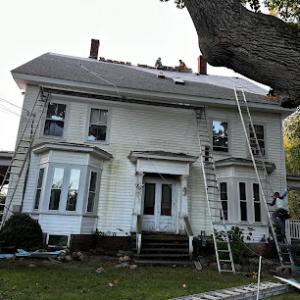
Kevin Lyman Roofing Company
(508) 697-8244 www.lymanroofing.com
123 Green St, Bridgewater, Massachusetts
4.1 from 8 reviews
Owner Kevin Lyman has been a roofing contractor in Massachusetts for over 40 years. He opened this business in 1985 and has achieved great success due to the integrity and honesty that has always guided his business operations. Kevin Lyman Roofing has a well known reputation for high quality and long lasting work. Kevin Lyman Roofing Specializes in commercial flat rubber roof installation, commercial flat rubber roof replacement, flat roof leak repair, slate roof leak repair, and custom copper roof work.

Cycle Carpentry
(781) 412-3006 www.cyclecarpentry.com
Serving
4.9 from 148 reviews
Cycle Carpentry provides roofing, siding, gutters to East Bridgewater, MA and surrounding areas.
J4
Serving
5.0 from 11 reviews
4LLC for all your roofing needs!🏠 ➡️ GAF Certified (Systems Plus Warranty) ➡️ Licensed (MA CSL - MA HIC) ➡️ Insured ➡️ Free Estimates
Summer Exterior
(774) 279-3283 www.summerexteriorinc.com
Serving
4.9 from 18 reviews
Summer Exterior provides roofing, gutter, doors, windows and siding installation and repair to the West Bridgewater, MA, area.
Skyway Exteriors
(508) 272-6895 www.skywayexteriors.com
Serving
5.0 from 48 reviews
Skyway Exteriors provides roofing, siding, window, skylight, and gutter services in Rhode Island and Eastern Massachusetts

Mighty Dog Roofing of South Shore
(508) 928-3755 www.mightydogroofing.com
Serving
5.0 from 146 reviews
When it comes to your home’s exterior, Mighty Dog Roofing delivers top-of-the-line services matched with the neighborly customer care our clients have come to love. Our team of skilled experts will conduct a free, detailed inspection of your home, treating it as our own. Whether your home needs a simple repair or a full roof replacement, expect to receive the transparent guidance you deserve. Whatever the case, our team will work to meet your safety and budget needs. We take pride in operating with quality materials, hiring skilled roofers, and providing our customers with a high-quality experience. See for yourself; our reviews say it all. Schedule your free, home inspection today!
Sunset Home Improvement
(508) 510-2233 sunsethomeimprovementinc.com
Serving
5.0 from 36 reviews
Sunset Home Improvement is a Contractor located in South Easton, MA. We offer Roof Repair, Roof Installation, Commercial Roofing, Residential Roofing, Roof Inspection, Flat Roofing, Metal Roofing, Shingle Roofing, Slate Roofing, Tile Roofing, Gutter Installation, Gutter Repair, Skylight Installation, Roofing Maintenance, and other Contractor Services. Our mission is to exceed our clients’ expectations on every assigned project by working diligently, professionally, effectively, and efficiently. Choose Sunset Home Improvement to get high-quality standards, cost-effectiveness and great customer service. Contact us today for more information and services or to schedule an appointment!
Revered Metal Roofing
(781) 536-4589 www.reveredroofing.com
Serving
5.0 from 82 reviews
Revered Metal Roofing is a full service, locally owned and operated business that provides friendly and reliable service with 100% customer satisfaction guaranteed. We specialize in Metal Roofing! Asphalt shingles and rubber roofing options are also available. Our expert craftsmen and trained installation staff have the experience and knowledge to install the roofing system your property deserves. Estimates are always free! Quality and affordable commercial and residential metal roofing products; metal panel, standing seam meat roof and our new metal shingle roofing line. Conveniently located on the South Shore service the lower Cape, Boston metro and metro west area
Northeast Roofing Contractors
(508) 776-4916 www.northeastroofingcontractors.com
Serving
5.0 from 15 reviews
Welcome to Northeast Roofing Contractors, your trusted partner for all your roofing needs in the area. As a leading roofing company, we specialize in providing top-notch roofing services, gutter installation and repair, and exceptional siding solutions. Our team of experienced and skilled professionals is dedicated to delivering superior craftsmanship and ensuring customer satisfaction. Whether you need a new roof installation, roofing repair, gutter service, or siding installation, we have the expertise to handle it all. Contact us today for a free estimate and let us take care of all your roofing, gutter, and siding needs.
Gomes’s Construction
(774) 381-4481 www.gomessroofing.com
Serving
5.0 from 76 reviews
Empresa de reparación y instalación de techo
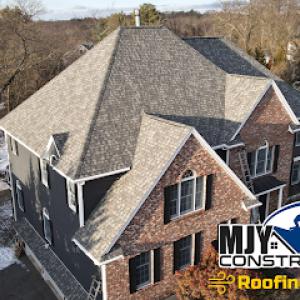
MJY Construction
(866) 766-3637 mjyconstructionma.com
Serving
5.0 from 151 reviews
MJY Construction is a roofing contractor in Brockton, MA serving Avon, Holbrook, Randolph, Whitman, Abington and nearby areas. Our roofing company offers residential roofing, commercial roofing, residential roof repair, chimney services, and more. Customers love us because of our comprehensive roof warranties and our affordable roof financing options. We also have industry affiliations and certifications such as CertainTeed Select Shingle Master, Velux Certified, GAF Certified, Owens Corning Preferred Contractor and many more. If you want to experience how your most trusted Brockton roofing company embraces our motto "One Call Does It All", call us now for a free estimate!

Express Home Restoration
(508) 225-3552 www.expresshomerestoration.com
Serving
5.0 from 20 reviews
At Express Home Restoration in Brockton, MA, we know that your roof is more than just a shelter -- it's the protection from the elements for your home or business. Our mission is to listen to your needs and deliver top-notch service every time, ensuring your peace of mind from the first shingle to the final inspection. What sets us apart? Speedy service, exceptional quality, and prices that won’t break the bank. At Express Home Restoration, we combine efficiency with excellence. We take pride in quick turnarounds without compromising on craftsmanship, ensuring you get the best value and results that stand the test of time. Allow us to be your go-to team for everything roofing and beyond
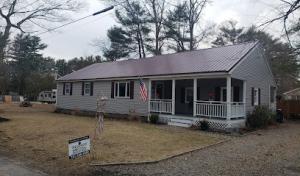
For most homes in this market, asphalt shingles are the practical default. The combination of a large re-roofing market and the typical sloped residential stock means quick, reliable installation and broad contractor familiarity. In the winter, asphalt performs well enough with proper underlayment and venting, and in the humid summers it resists the moisture cycles that drive aging of cheaper overlays. When choices are limited by contractor availability and ongoing maintenance expectations, this material stays the steady workhorse, offering consistent performance and straightforward repairs after seasonal freeze-thaw cycles.
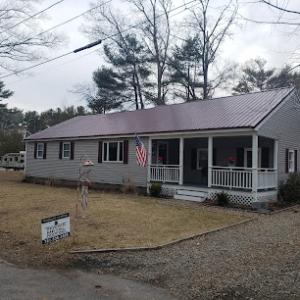
Metal has a meaningful local presence and is a realistic upgrade path for homeowners prioritizing snow shedding, longevity, and lower maintenance in a wet, four-season climate. In Bridgewater, metal roofs tend to shed snow more predictably, reducing the risk of ice dams on lower sections and improving dry-out times after storms. The smooth surface also resists moss and algae growth better than some other options, which matters in humid summers. If you expect frequent roof access for maintenance or want a longer service life with fewer re-roofing events, metal can be a smart long-term bet. The key trade-off to plan for is installation complexity and compatibility with existing fascia, gutters, and attic ventilation-metal systems often require precise underlayment and flashings to handle freeze-thaw movement without leaks.
Clay tile and concrete tile exist in the market, but they remain far less common locally. Their heavier weight and specific framing and support needs mean installer availability and structural compatibility are critical considerations. If a home here already has a suitable structure and you're aiming for a tiles aesthetic or improved solar reflectivity, you'll want a qualified installer who understands local substrate constraints and wind-load considerations. Wood shakes and synthetic/composite products offer distinctive looks, yet their local presence is limited. Shake houses are more sensitive to moisture-driven deterioration in the region's freeze-thaw cycles, and synthetic options vary in how they handle heat and humidity over time. When these paths are considered, confirm that nearby crews have recent experience with the product line and that attic ventilation aligns with the selected system to mitigate moisture-driven aging.
The seasonal shifts demand a roof system that can tolerate rapid freeze-thaw stuffing and drying cycles, with effective moisture management from the day of install onward. In practice, that means paying attention to underlayment choices, attic ventilation, and proper flashing at eave lines and chimneys. Asphalt shingles benefit from good ventilation to prevent early curling in cold snaps, while metal systems benefit from precise panel alignment and corrodible-free fasteners in wet conditions. For any non-asphalt choice, verify compatibility with the home's existing framing, venting routes, and guttering strategy so that snow and rain runoff don't create unexpected leaks or ice dam issues after a heavy winter. A well-chosen material will also pair with a contractor's availability in a market that often prioritizes quick leak response and timely re-roofs, ensuring replacements happen when the weather window opens.
In this market, you will frequently encounter flex between fast, reliable replacement and longer-term upgrades. Asphalt shingles deliver dependable performance with broad installer networks, while metal offers superior snow shedding and durability for those prioritizing low maintenance. If considering tiles or shakes, plan for installer availability and structural checks, and be prepared for longer lead times or higher labor costs. Regardless of material, prioritize a thorough inspection of flashing details and a bundled approach to ventilation and insulation to address moisture and temperature swings typical of the area.
Pricing in this coastal-inland South Shore town follows the seasonal rhythm of contractors as spring warms and fall cools. Bridgewater cost planning should reflect the area's strong re-roofing market, where pricing is influenced by how busy contractors become during the late spring through fall replacement window. That means a project scheduled for May or June can come with tighter crews and higher early-season lead times, while late summer might push materials and crews into peak demand. If you're aiming to minimize delays, start with a firm timeline and be prepared for potential price shifts tied to crew availability and material deliveries.
Projects in spring can cost more when sudden spring storms disrupt scheduling or material delivery, or when winter damage creates a surge of urgent work competing for crews. In practice, that means you may see pressure on both scheduling and eager bids that assume quick turnover. A fall window often yields steadier scheduling, but changes in weather can still shift crews to weatherproofing or temporary leak work before a full replacement, affecting overall cost and timeline. Plan a cushion for both staffing and unforeseen weather-driven interruptions, especially if choosing a higher-end system that requires more on-site coordination.
Material pricing in Bridgewater spans from asphalt shingles at 350 to 700 USD per square up to tile systems above 1000 USD per square, with metal and synthetic products sitting in the middle and labor varying by roof complexity and timing. Asphalt remains the practical, common choice when you're balancing winter moisture concerns with reliable performance during thaw cycles. Metal or synthetic options can handle freeze-thaw cycles well, but they come with longer lead times during busy months. Clay or concrete tile delivers durability but also adds weight and installation considerations that can extend the project and affect labor costs. Consider both the expected winter moisture exposure and the on-site complexity when weighing trade-offs between upfront cost and long-term performance.
Get a clear picture of your project costs upfront - no commitment required.
Residential roof replacements in Bridgewater generally require a building permit through the Bridgewater Building Department rather than being handled informally. That means your project is not just a matter of choosing shingles or metal; it is also a legal process with records that stay with your home. The formal path helps ensure that the work meets structural and moisture-control standards that matter after freeze-thaw cycles and humid summers. If a bid looks easier because it glosses over permit steps, tread carefully-the absence of proper permitting can surface as costly delays or noncompliant repairs later on.
In this market, the roofing contractor typically files the permit application. This matters for homeowners who compare bids, because permit handling is part of a compliant replacement process. A bid that omits permit tasks may save a little upfront, but it can push you into risky territory where inspections are skipped or rushed. Confirm with the contractor who is responsible for submitting the paperwork, what documents will accompany the permit, and how the schedule aligns with local inspection windows. Having clear accountability helps avoid the scenario where work starts without the right approvals, only to stall when a clerk requests missing forms.
Bridgewater inspections are scheduled during and after the work to confirm compliance with the Massachusetts Building Code and any local amendments. The permit process creates a formal timeline for these checks, so understand that inspections are not merely a formality but a safeguard against moisture intrusion and improper flashing, especially where snow loads and freeze-thaw cycles stress the roof edge and gutters. After completion, ensure you receive the final sign-off and keep all permit records, inspection reports, and any correction notices together in a location you can access. Should future work be needed or if a claim arises, these documents simplify verification of what was approved and installed.
Ask early for a copy of the permit application checklist and a projected inspection schedule when you request bids. Verify that the contractor is licensed and insured and that the project scope explicitly includes proper underlayment, ventilation checks, flashing details, and ice-dam considerations, all aligned with local interpretations of the code. If there are any amendments to the local code, request a brief explanation of how they affect your roof replacement design. Finally, treat the permit and inspection trail as part of your roofing system's longevity strategy-keep the documents dry and organized, and review them before signing any agreement.
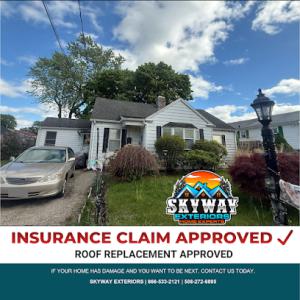
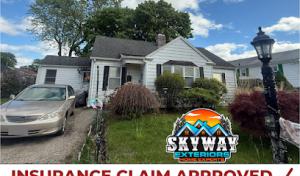
In Bridgewater, storm-related roof claims are typically evaluated with close attention to roof age, material type, installation quality, and whether the work was properly permitted. That means a claim won't be judged on damage alone; the history of the roof matters just as much as the dented ridge vent. If a roof has endured multiple freeze-thaw cycles, or shows moisture-driven aging from humid summers, insurers will weigh whether those factors contributed to the loss. A well-documented roof settles more predictably, while gaps in records can slow payments or invite aftermarket scrutiny.
Massachusetts carriers serving Bridgewater generally have not broadly pulled back from the market, but underwriting and premiums can tighten after major damage events, making roof condition documentation more valuable. Start by organizing evidence that speaks to the roof's life story: the age of the roof, the material type, and any signs of improper installation or corner-cutting. Keep copies of completion photos from past work, and store clear images that show how the roof was installed and how it has aged with seasons. Documentation that demonstrates code-compliant installation can be a quiet, powerful asset when a claim is reviewed.
If a storm touches down, avoid assuming the claim is automatic-that is especially true in a season of heavy rain and freeze cycles. After the event, photograph the roof from multiple angles, note any fallen debris, and preserve damaged materials for inspection. When the time comes to file, have your records ready: age, material, installation notes, and the completion photos you kept. In this climate, the combination of aging, material choice, and recent weather history often shapes how quickly a claim moves and what is considered repairable versus replaceable.
Connect with contractors who help homeowners navigate the claims process from damage assessment to final approval.

Mighty Dog Roofing of South Shore
(508) 928-3755 www.mightydogroofing.com
Serving
5.0 from 146 reviews
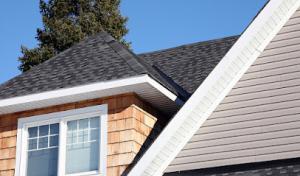
The wet climate and freeze-thaw cycling in this area make roof penetrations such as skylights and chimney flashing especially vulnerable to recurring leaks. In Bridgewater, these symptoms show up after storms and thaws, not during dry spells. Expect flashing to be lifted, sealant to crack, and interior moisture to trail along joists near penetrations.
During seasonal checks, wipe away pine needles and leaves from around the curb or curb-mount units, since debris traps moisture. Confirm that end cap joints and the skylight frame sit flat against the roofing material. In snow, ice buildup along the flashing is a common leak path; install a snow adapter or reflash if ice has wedged under metal. For new installations, choose a low-profile or curb-mounted unit with proper drainage channels to direct runoff away from the flashing.
Chimneys present a persistent risk in this climate due to freeze-thaw cycling. Inspect the mortar joints at the base and the step flashing where it meets the shingles. If you see hairline cracks or loose shingles, plan prompt re-flashing with backer-rod and a compatible sealant. Ensure the flashing is continuous around all sides, and that the chimney cap seals properly to prevent wind-driven moisture intrusion. Local contractors show meaningful specialization in chimney-related roofing details, so a pro can often identify strain points you might miss. If a chimney breathes with moisture after each thaw, investigate the counterflashing at the top, and run a quick check along the coping stones for movement there.
Leak tracing in this area is often complicated by seasonal debris and moisture, especially in fall when leaves can conceal trouble spots around penetrations and valleys. Start outside by inspecting valleys, roof-to-wall transitions, and any vent cuffs. From the attic, look for staining, dark damp spots, or shaggy insulation indicating past leaks. Trace the likely path from the roof to the interior to avoid chasing shadows across shingles.
Find contractors experienced in skylight installation, flashing, and leak repairs to bring natural light into your home.

Mighty Dog Roofing of South Shore
(508) 928-3755 www.mightydogroofing.com
Serving
5.0 from 146 reviews
Bridgewater's market is still largely driven by pitched-roof replacements, but there is enough local contractor specialization in flat roofing to merit careful attention for porches, additions, and garage sections. Low-slope areas in the community faces a different aging pattern than main roof planes, so recognizing that distinction helps prevent surprises after a winter thaw or a heavy early-spring rain.
Low-slope sections are more exposed to standing moisture during frequent precipitation periods. In Bridgewater, seasoning with freeze-thaw cycles can trap water along edges and at transitions where a flat porch roof meets a steeper main roof. Over time, that moisture can creep into seams, valley connections, and flashing details if not properly integrated. The goal is to keep those membrane joints clean, dry, and well-sealed through seasonal shifts. Acknowledge that porch and garage roofs often experience more foot traffic and edge exposure, meaning wear on sealants and fasteners can accumulate faster than on higher, steeper sections.
Homeowners with mixed rooflines should not assume the same replacement method fits every section, especially where low-slope transitions meet standard shingle roofs. When a flat or low-slope porch connects to a sloped main roof, the transition needs precise flashing and load management to resist leaking paths during winter storms. Choose solutions that provide continuous waterproof performance across materials, rather than quick fixes at a single plane. In practice, this means selecting compatible membranes, properly timed overlapping details, and dedicated drainage considerations at the edge of the low-slope surface.
Seasonal checks should pay extra attention to edge details, flashing at parapets, and the condition of any gravel ballast or membrane coverings on garage and porch roofs. Look for signs of moisture staining, blistering, or loose flashing after heavy rain. Because these areas often serve utility or storage spaces, maintain prompt resealing and prompt panel replacements when you notice wear. A focused inspection cadence helps catch issues before they migrate into adjacent shingle sections. Bridgewater homes with multiple roof types benefit from a consistent, cross-section approach to care rather than treating each plane in isolation.
Find specialists in TPO, EPDM, and built-up flat roofing systems for residential and commercial properties.
Kevin Lyman Roofing Company
(508) 697-8244 www.lymanroofing.com
123 Green St, Bridgewater, Massachusetts
4.1 from 8 reviews

In a crowded re-roofing market with many affordable, quick-response contractors, you need to distinguish basic replacement offers from bids that include stronger workmanship and manufacturer-backed protection. Start by asking for a written scope that details underlayment, flashing, attic ventilation checks, and the exact number of roofing squares covered. Look for clarity on what happens if a leak shows up in the first winter after installation. A bid that outlines a defined corrective process, a future-weathered inspection, and a clear warranty term signals a more responsible approach to Bridgewater's freeze-thaw cycles.
A smaller but meaningful share of local pros advertise manufacturer certification and warranties. These cues matter when insurance claims or resale documentation come into play, because installation quality documentation can be scrutinized later. When a contractor presents manufacturer-backed options, verify which products carry transferable warranties and how long the workmanship coverage lasts. If the installer's crew changes, ask who holds the warranty and whether you receive a written transfer of protection. This is particularly relevant for homes with aged decking or evidence of prior moisture exposure, where steadfast performance matters.
Long-established, cleanup-focused crews stand out in Bridgewater's crowded market. Insist on a written commitment to remove all debris daily and to repair any incidental damage to driveways, landscaping, or gutters before they're back under snow. Check crew turnover as part of the bid; frequent changes can indicate inconsistent workmanship. A proven team should arrive with a project supervisor who is available for quick calls and who routinely documents progress with photos.
Ensure you receive a signed warranty certificate, product data sheets for the chosen materials, and a detailed punch list from day one. Ask for contact information of a local service contact who will follow up after installation. In a climate defined by freeze-thaw and moisture-driven aging, this paper trail provides real value when leaks appear or when resale documentation is reviewed.