Last updated: Apr 19, 2026
The SE Michigan pattern of snow cover, ice, and repeated winter thaw-refreeze cycles is a primary driver of shingle aging and leak progression on aging homes in this area. In Redford, those cycles tend to push moisture into the roofing system long after the first big freeze, when the attic and decking have already endured months of stress. The result is a delayed but real spread of issues you'll notice as spring rains arrive.
Redford sits in a climate where winter moisture presses on every angle of the roof. Many older single-family homes carry decks that have settled or moved over time, flashing that's seen better days, and attic ventilation setups that aren't keeping pace with modern moisture loads. When winter moisture gets trapped, the vulnerabilities in those components become more pronounced. The typical leak progression often starts with small, barely noticeable signs and slowly escalates as freeze-thaw cycles continue year after year. From a practical standpoint, the concern is less the coldest weeks and more the post-winter period when everything thaws and moisture finds seams and joints.
Inspecting after the thaw is your best early-warning window. Start with the attic: look for damp spots on decking, dark staining near vent fans, or musty odors that didn't exist before winter. If insulation appears damp or altered, that's a signal to check the attic ventilation setup. In homes with older vents, you may see uneven moisture distribution across attic reach, which translates into uneven shingle aging on the roof surface. In many cases, a simple attic vent adjustment or a modest upgrade to keep a steady flow of dry air can make a meaningful difference the following winter.
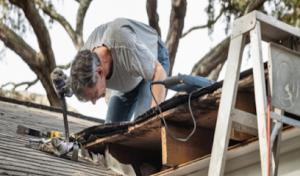
Back on the roof, lift or movement in shingles is a common late-winter to spring sign. Shingle tabs that curl or lift at the edges indicate weeping underlayment or weak granule adhesion, often exacerbated by the freeze-thaw loop. Flashing corners where two planes meet-valleys, chimneys, or vents-are frequent trouble spots. Look for gaps at flashing seams, loose sealant, or corrosion at metal pieces. In older homes, flashing may have settled, creating micro-gaps that only reveal themselves after a heavy spring rain. A professional assessment can confirm whether replacing flashing or resealing joints will restore long-term integrity.
Take a proactive, staged approach to repairs. First, address ventilation and underlayment in the attic as a preventive measure; improving air flow reduces interior moisture that can accelerate deck and shingle deterioration. Second, prioritize the most exposed flashing and ridge areas for resealing or replacement, especially where roof lines change direction or meet dormers. Third, consider upgrading select shingles in the most sun-exposed or weather-facing sections to slow the pace of deterioration over the next cold season. For homes with older decking, plan for targeted deck repair or stabilization in concert with shingle replacement to avoid trapping moisture behind a new surface.
If a spring rain reveals active leaks, start with a temporary, roof-safe tarping solution to reduce interior damage while arranging a timely repair. Do not delay addressing persistent dampness or visible moisture marks on the ceiling-these are warning signs of ongoing water intrusion that can worsen as temperatures swing again. In this season, the combination of older decking, aged flashing, and marginal attic ventilation is the most common package that needs attention to prevent a repeat cycle next winter.
Spring hail cells across the Detroit metro area aren't just a quick headline here; they're a weekly worry for Redford homeowners. The rides of gusting thunderstorm winds push debris and impact damage onto aging roofing systems, exposing underlayment and decking when shingles lift or crack. This isn't theoretical-storm-driven leaks are a major local service category, and a quick response can mean the difference between a minor patch and a full re-roof. If a hail event or severe wind hits, plan for immediate assessment and brief temporary measures to stop water intrusion before the next round of storms.
Because spring storms can interrupt active jobs, exposed roof areas and underlayment are a scheduling risk during replacement season. In Redford, crews often need to stage tarping and temporary containment if weather windows collapse or a delivery is delayed. If you notice curling, granule loss, or dented flashing after a hail event, you should assume the wind-and-rain cycle can reopen weak points even after a fix. Have a plan for rapid tarping and leak containment ready, so ongoing work doesn't stall and further interior damage doesn't accrue while conditions improve.
The contractor signal mix in this market strongly favors emergency repair and storm damage response, indicating homeowners here commonly need rapid tarping and leak containment after weather events. That means a nearby, trusted crew should be on speed dial for inspections within 24 hours of a storm, with a portable tarp kit and temporary sealants ready to deploy. A quick assessment helps separate cosmetic blemishes from compromised underlayment that could fail with the next rainfall. If water is actively dripping or you hear steady dripping after a storm, treat the situation as urgent and initiate a temporary shield while arranging a formal evaluation.
First, document the damage with photos from multiple angles, especially any bruising or pitting on shingles and exposed flashing. Second, arrange for a temporary tarping solution to cover vulnerable valleys, chimneys, and eaves. Third, set up a clear path with the contractor for a storm-response window; ask about prioritizing your roof if the next front is forecasted to bring more moisture. Finally, keep a log of any new leaks, stains, or ceiling bulges, so your contractor can verify whether the damage is ongoing or a one-time event. Redford homeowners understand that the fastest repairs and containment save the most interior wear, so act decisively when the skies turn aggressive.
Find local contractors experienced in assessing and restoring roofs after hail, wind, and severe weather events.


Frabutt Brothers Construction
Serving
5.0 from 5 reviews
Located in Redford, MI. We are family owned and operated for over 20 years. Licensed and insured. We offer Tear-offs, Roof repairs, Recovers, Vent installations, and Free estimates.
Billy's Roofing
(734) 421-9100 www.billysroofing.com
Serving
4.9 from 198 reviews
Billy’s Roofing | Livonia & Plymouth, MI Family-owned. Locally trusted. 37+ years strong. At Billy’s Roofing, we’re not just roofers — we’re real, hardworking people who care about doing things right. We’ve been serving the Livonia and Plymouth areas for over three decades with quality craftsmanship, honest service, and a team that truly feels like family. Our crews are experienced, detailed, and dependable. Our sales team is friendly, knowledgeable, and always here to help — no pressure, just real advice. We take pride in delivering high-quality work and a great customer experience from start to finish. Come see why people love working with Billy’s Roofing. Real people. Really good roofs.

J.R.S.P. Inc Mobile Home Repair Company
Serving
4.9 from 17 reviews
Cold Floors or Areas of your Home? Foul smell, missing skirting, and or noises in your crawlspace? You more than likely have a critter, who’s made your crawlspace/ attic their new home. And believe it or not, the damages done are covered under most home owners insurance policies. With years of experience, let us help you make the process as easy as possible, with the least amount out of pocket. Call today for your free/annual inspection. JRSP Mobile Home Repair in Michigan is a specialist for manufactured home repairs & remodeling, and we service all of Michigan. With decades of experience, you can have peace of mind that we offer quality craftsmanship, personal service, and a full suite of mobile home repair and remodeling services

Kearns Brothers
(888) 355-6700 www.kearnsbrothers.com
Serving
4.7 from 851 reviews
Since 1986, our business has operated upon our core values of honesty, integrity, value, and dependability. We are continually grateful to serve clients in Southeastern Michigan utilizing the most highly skilled professionals in the trade marketplace. Kearns Brothers is a nationally recognized and awarded premier home improvement company.
Lake Effect Exteriors
(313) 518-4258 www.lakeeffectexteriors.homes
Serving
5.0 from 13 reviews
Lake Effect Exteriors is a trusted exterior construction company serving Metro Detroit and Southeast Michigan. Specializing in roofing, siding, and deck construction, we pride ourselves on delivering high-quality craftsmanship and durable solutions designed to withstand Michigan’s toughest weather conditions.

McGlinch & Sons
(248) 987-6300 www.mcglinchsons.com
Serving
4.7 from 368 reviews
About McGlinch & Sons McGlinch & Sons is a family owned and operated company established in 1917. Our high quality of workmanship has been handed down for four generations. Over 100 years of knowledge and experience produce not only the best quality work but also a total dedication to professionalism which is applied to every job. Since we take pride in our work and our family business ethics, we consistently train our crews to ensure your project requests are personally met. Moreover, we always think of customer’s needs first and provide what is the best for your home project. Therefore, you can rely on McGlinch & Sons for home improvement excellence. We value and appreciate your loyalty and support.
Building Blocks Home Improvements
Serving
4.4 from 16 reviews
Building Blocks Home Improvements revitalizes your home from the roof down. Since 2019, they've been Davison, Michigan's trusted contractor for roof replacement, renovations, and remodeling projects.

Sterling Construction & Roofing
(248) 802-3900 sterlingconst.com
Serving
4.8 from 343 reviews
Sterling Construction & Roofing has proudly served Southeast Michigan since 2017, providing expert residential and commercial roofing services from repairs and replacements to storm damage restoration. Based in Livonia, MI, our team also specializes in siding, seamless gutters, windows, doors, decks, and carpentry. Known for quality workmanship, fair pricing, and white-glove cleanup, we deliver durable solutions that stand up to Michigan’s harsh weather. Whether you need a new roof in Livonia or flat roofing for a Metro Detroit business, Sterling Construction is your trusted local contractor.
Gabriel’s Roofing Construction
(248) 383-3449 www.gabrielsroofingconstruction.com
Serving
4.9 from 96 reviews
Your trusted home Improvement expert for a lifetime. We pride ourselves on presenting the best quality replacement Roofing, Gutters, Vinyl siding, Windows. We install these products in your home as if we were putting them into our own. Should those products ever need service, we will always be there to take care of any problems. It’s our lifetime guarantee.
ROOF Management
(248) 474-2767 www.roofmgmtco.com
Serving
4.9 from 27 reviews
Commercial New Roofs, Re-roofs, Repairs, Roof Maintenance and Flashings on all Commercial Roof Systems are within the expertise of ROOF Management. Family Owned & Operated, Licensed & Insured, 75+ Years’ Experience.
MacDermott Roofing
(734) 422-1990 www.macdermottroofing.com
Serving
4.9 from 201 reviews
MacDermott Roofing: Southeast Michigan's Commercial Flat Roof Experts. Thanks for stopping by! With 45 years on the job, McDermott Roofing is Southeast Michigan's trusted source for commercial flat roof installation and repair. Talk to us before you replace your roof! Unlike those who rush to replace, we first assess your roof to determine if repairs can effectively extend your roof's lifespan at a fraction of the cost. Why Choose Us? Built in Michigan, for Michigan: Locally manufactured solutions tailored to our environment. Flat roof specialists: Extensive knowledge of all flat roof materials & techniques. Duro-Last Platinum Contractor since 1995: More than 10 million square feet installed!
Shain Roofing & Sheet Metal
(734) 524-0155 www.shainroofing.com
Serving
5.0 from 10 reviews
Shain Roofing & Sheet Metal is a trusted roofing company in Livonia, MI, known for generations of family expertise and dedication to quality. Specializing in commercial roofing in Livonia, MI, our team provides reliable solutions for businesses across the Metro Detroit area. From commercial roof installation services to long-term commercial roof maintenance in Livonia, MI, we ensure every project is completed with safety and precision. Our skilled team also handles commercial roof leak repair in Livonia, MI, offering dependable service without cutting corners. As a family-owned company, we take pride in delivering lasting results and upholding a reputation built on accountability and craftsmanship.
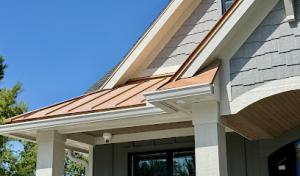
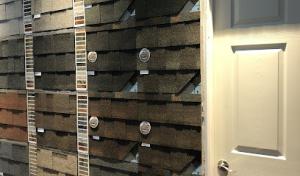
Asphalt shingles are the dominant roof type for Redford homes, aligning with the township's stock of modest-pitch suburban houses. The material remains the most practical replacement option when considering labor availability and common local roof geometries. In this climate, asphalt systems are favored because crews are familiar with the typical roof lines, and installation schedules from late spring through early fall tend to fit the local weather pattern better than heavier premium materials. On older roofs, the focus shifts from material prestige to how well the system is integrated with ventilation, flashing updates, and underlayment that submits to township review.
On older homes, performance hinges less on the shingle's appearance and more on the backbone components: ventilation, flashing, and the underlayment. Before a new roof goes on, verify that the attic space has adequate intake and exhaust ventilation to reduce freeze-thaw stress. When replacing underlayment, choose a product with proven moisture resistance and compatibility with the local climate cycles; this helps resist interior condensation and ice dam risks that show up after heavy storms. The flashing at chimneys, vents, and valleys needs to be upgraded or reinforced to handle Redford's storm-driven leaks. A smooth transition from underlayment to flashing reduces the chance of voids that lead to slow leaks after the winter.
Storm-driven leaks are a common call driver in this town, especially where older Flashing details haven't aged well. Pay particular attention to valleys and step-flashing where roof planes meet to prevent capillary leakage during thaw cycles. Metal step-flashing should be inspected for corrosion or loose fasteners, and old sealants should be replaced with modern, flexible sealants designed for freeze-thaw movement. If the attic exposes any gaps around plumbing vents or roof penetrations, address them before the next winter cycle. In practice, a careful upgrade of flashing is a quieter investment than chasing recurring leaks after a heavy spring rain.
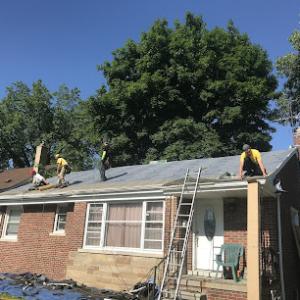
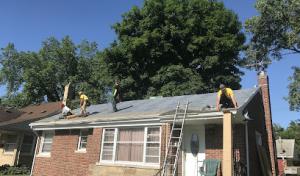
The local labor market favors asphalt installations that can be coordinated around a relatively predictable window from late spring into early fall. When planning, align inspections with the shoulder seasons to minimize weather-related delays. A well-coordinated crew will complete a full tear-off and replacement with attention to ventilation routing and drip-edge alignment, ensuring the new system breathes correctly and sheds water away from the fascia. For older homes, insist on matching the new shingles to existing color tones and roof pitch to preserve curb appeal while satisfying functional requirements.
After installation, you'll want a simple maintenance habit that catches issues before they become leaks. Inspect flashings after major storms, check ridges for loose granules after the first winter, and peek in the attic for any signs of moisture or insufficient ventilation. Red flags include peeling sealant at flashings, damp attic insulation, or a sudden spike in ice dam formation during thaw cycles. A proactive routine reduces storm-driven calls and preserves the system's performance through repeat freeze-thaw cycles.
The most popular roofing material in the US. Find pros who install, repair, and replace asphalt shingles.

When a full roof replacement is on the table, a permit submitted to the local building department with detailed project information is the norm. In this jurisdiction, the permit process is not a box to check but a records-driven gate that helps ensure the work aligns with township standards for older postwar housing stock. Expect the department to request specifics about underlayment, ventilation details, flashing, and how the roof lines integrate with existing fascia and soffits. If the scope changes midstream-such as switching from asphalt to metal or altering venting configurations-the permit may need an update, and the timeline can stretch accordingly. Failing to present a complete, precise plan can trigger delays or spot inspections, which can complicate a project that's already sensitive to Michigan's freeze-thaw cycles.
Inspections in this area are typically tied to work in progress and a final completion review. During the course of the project, inspectors may visit to verify that the installed systems meet the approved specs and that ventilation and underlayment choices reflect the colder, storm-prone conditions common to Redford neighborhoods. A recurring theme is that the roof does not fully pass until final clearance is issued. That means temporary workarounds or premature closures can lead to rework, back charges, or non-compliance notices if the inspector finds gaps between actual installation and what was approved. Preparation for each staged inspection-especially after removing old decking or installing new ventilation-helps avoid these delays.
Homeowners and contractors should expect township back-and-forth on material specifications, with particular emphasis on how ventilation and underlayment are addressed. The specification dialogue is not merely bureaucratic; it can determine how well the roof handles freeze-thaw cycles and how leaks are controlled after a storm-driven incident. Gather manufacturer data on shingles, underlayment, and vents, and ensure that the chosen products align with the approved plan. Keep a tidy, complete set of submittals on-site or readily accessible during inspections. Any deviations-whether a different underlayment class, altered vent locations, or changes in flashing detail-should be documented and explained to avoid hold-ups at the final clearance stage.
As final clearance approaches, ensure all penetrations and drip edges are cleanly finished, with flashing details reviewed for compatibility with the surrounding structure. The goal is a compliant, weather-tight roof that passes the final check without notes that require corrective work after completion. In practice, the clearance signals not just a pass, but a concrete acknowledgment that the installation withstands Redford's climate, its storm patterns, and the township's expectations for older homes. Plan for a cautious but steady pace that respects these steps, since rushing through inspections often invites unnecessary questions and rework.
When you're budgeting a replacement, use the local ranges as your starting point. In this area, asphalt shingles run about $350-$550 per square. Metal roofing typically lands between $600-$1100 per square. Clay tile is commonly $700-$1200 per square, concrete tile $700-$1300 per square, synthetic/composite $450-$800 per square, and slate $1000-$1800 per square. These figures reflect the Redford market's mix of older homes and the need for careful material selection to hold up through Michigan winters.
Costs tend to rise on older homes because the tear-off work uncovers decking that may need repairs or replacement. If you have warped or rotted boards, you'll see an upcharge for decking repairs before the new underlayment and roofing go down. The extra labor and disposal of deteriorated materials can push a project toward the higher end of the local ranges, especially if redundant flashing or rotted sheathing is revealed after the old roofing is removed.
Township expectations for venting and underlayment can push replacements toward the higher end of the price bands. If the existing system isn't up to current standards, you'll be looking at upgraded underlayment, improved ventilation baffles, or additional ridge vents. Those upgrades add both material and labor time, which translates to higher overall per-square costs compared with a straightforward shingle swap.
Pricing can rise after regional storm activity because the local market shows strong demand for quick-response re-roofing crews, especially during the late spring through early fall replacement window. If a storm creates urgent leaks or widespread damage, you may encounter shorter lead times and premium labor rates. Plan for a tighter window and a modest surcharge if you need expedited service.
If you're weighing asbestos-free updates or mixed-material builds, keep the per-square ranges in mind and layer in potential decking repairs and vent/underlayment upgrades. For older homes, a careful assessment of what lies beneath the shingles is as important as choosing the top layer, because the right foundation makes the chosen material perform for a full lifetime without premature failures.
Get a clear picture of your project costs upfront - no commitment required.

In Redford, insurance decisions hinge on documented wind, hail, and storm-loss patterns that are common across SE Michigan rather than coastal or wildfire risks. Those patterns shape how adjusters assess damage after freeze-thaw cycles, and they influence whether a roof issue is treated as a gradual failure or a storm-driven loss. Knowing these tendencies helps you frame what to photograph and what to document when a claim starts.
Because of a strong storm-response contractor presence, you should keep date-stamped photos and records from the first sign of damage through final repair to support adjuster review. Photos taken at different angles capture shingle granule loss, lifted edges after wind events, and any visible penetration around flashing. A simple, dated timeline makes it easier to demonstrate progression and correlation with reported storm dates.
Michigan carriers serving this area may ask for detailed photo sets, scope documentation, and sometimes engineer support on larger roof claims, especially when replacement extent is disputed. If an engineer is requested, obtain a written evaluation that links observed conditions to known SE Michigan weather patterns and the roof's specific assembly. Clear, objective documentation reduces ambiguity and supports a fair review.
The combination of freeze-thaw cycles and storm-driven leaks means the first inspection is not enough; repeated events can compound damage over a season. Keep a running file of contractor notes, receipts, and any temporary repairs. If you notice unusual moisture in ceilings after a hail event or a spike in attic temperature, document it promptly, because timely records can prevent a mismatch between what you expect and what an adjuster approves.
Connect with contractors who help homeowners navigate the claims process from damage assessment to final approval.

Gabriel’s Roofing Construction
(248) 383-3449 www.gabrielsroofingconstruction.com
Serving
4.9 from 96 reviews
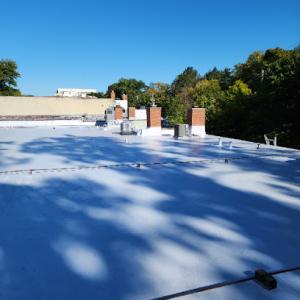
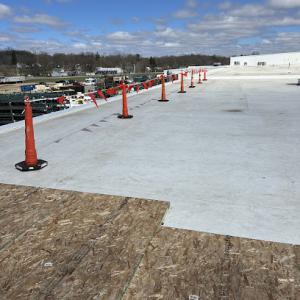
Ponding risk is a real concern where low-slope sections tie into the main roof, especially on additions, porches, garages, and some older commercial properties. In SE Michigan's winters, meltwater can freeze and create ice dams that push water toward seams and curb flashings. When inspecting, look for persistent standing water after a warm day or a heavy rain, and check for smoothing or sagging at the low points. Address drainage by confirming adequate slope toward discharge points, ensuring scuppers or internal drains stay clear, and reinforcing edge details where flashing meets the roof edge. Redford homes with preexisting postwar framing often show deck deflection under low-slope areas, so verify the substrate is solid and free of moisture-softened wood before sealing or re-roofing.
Flat-roof work asks for meticulous detailing at terminations and transitions. Pay close attention to bitumen or modified-bitumen membranes around parapets, edge metal, and any connection to the main roof. In this climate, aging flashing around skylight curbs, chimney caps, and vents tends to fail first; corrosion, wind uplift, and freeze-thaw cycling loosen sealant joints. Replace deteriorated counterflashing where it overlaps the base flashing, and use wide, continuous seal paths with debris-free margins. If a flat section connects to a pitched main roof, ensure step flashing is compatible with the slope change and that integrated drip edges shed water away from the wall line.
Skylight service is active locally, and aging curb details often become leak points on Redford homes. Inspect skylight curbs for rust, rot, or warped wood, and examine sealants around the base where the curb meets the roofing membrane. Pay particular attention to the transition at the flashing kick-out and to the condition of the perimeter sealant. When replacing or resealing, choose compatible, UV-stable sealants and verify that the flashing integrates with the main roof's membrane system rather than creating a hard drop from the skylight to the interior. Regular inspections after thaw cycles help catch hairline leaks before they worsen.
A proactive maintenance plan targets both flat sections and skylight transitions. Schedule seasonal checks to verify drainage, test sealants, and observe any wind-driven leakage after storms. In Redford's climate, spring inspections should focus on post-winter membrane integrity, while fall checks emphasize preparing flashing and seals for the upcoming freeze-thaw cycle. Keep roof edges and parapets clear of leaves and debris to prevent ponding that concentrates stress on low-slope interfaces.
Find specialists in TPO, EPDM, and built-up flat roofing systems for residential and commercial properties.
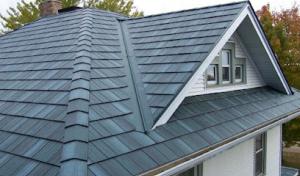
Although metal, tile, synthetic, and slate are all available in the Redford market, they are secondary to asphalt in a township better known for practical suburban housing than for widespread luxury roof stock. For most homes, the roof choice still centers on dependable, serviceable shingles, with metal or synthetic options reserved for select projects or long-range upgrades. The neighborhood character-older postwar homes with modest footprints-tends to lean toward steady performance and familiarity over high-end appearances.
Heavier systems such as clay, concrete, and slate can create structural and cost questions on older homes that were more commonly built around lighter roofing assemblies. Before choosing any of these, verify the underlying deck condition, attic support, and the potential need for reinforcement. In many Redford houses, improper or insufficient ventilation and insulation interact with heavier roofs to magnify freeze-thaw stress, leading to cracks, nail failures, or early shingle lift. A careful assessment of attic clearance and load-bearing capacity is essential to avoid unintended weakening of the roof structure.
Synthetic and metal can appeal to homeowners seeking longer service life through harsh Michigan winters, but local adoption is still much smaller than standard asphalt replacement. Metal brings strong wind resistance and a clean, modern appearance, while synthetic shingles offer staggered resilience against freeze-thaw cycles without the weight of natural slate or tile. However, these options require careful detailing at penetrations, transitions, and eave edges to prevent storm-driven leaks and air ingress. In Redford, the right system aligns with existing attic ventilation, underlayment quality, and a conservative approach to drainage and snow shedding.
For a homeowner eyeing longevity without overburdening the structure, a well-chosen metal or synthetic option can be a measured upgrade from asphalt. The key is to match the system to the house's load capacity, ensure robust underlayment, and maintain meticulous sealing around chimneys, vents, and skylights-areas most prone to leak during our Michigan storms.
Explore specialists in steel, aluminum, and standing seam metal roofs built to last 50 years or more.
Rhino Brothers Roofing & Construction
(734) 648-5535 rhinobrothersroofing.com
Serving
4.7 from 26 reviews