Last updated: Apr 19, 2026
Fall coastal storms and high winds are a recurring roofing concern along the South Shore. As leaves twist across the roofline and storms push in from the Atlantic, shingles and edge vents take the first hits. Winter brings freeze-thaw cycles that push water into micro-cracks, widen gaps, and loosen fasteners between rounds of snow and melt. Spring arrives with heavier rain and wind delays that can stall repairs when contractors chase the next storm. Summer can expose handling issues under heat, stressing seals and flashing, while fall storms arrive with rapid onslaughts of rain and gusts that test compromised roofs. In this climate, a single weak seam can become a telltale leak within hours after a heavy rain. Stay alert for sudden moisture in the attic, attic soffit staining, or telltale drip lines along interior walls after a windy evening.
Storm wear shows up differently here than in milder zones. Look for pulled nails at rake edges, lifted shingles along the eaves, and flashing that has pulled away from the chimney or vent pipes. Freeze-thaw action in winter often hides damage until heavy rain reveals it; by the time you notice a drip, the underlying decking may already have edema and rot. Wind-driven spray from coastal storms can lift loose granules, dulling the roof's surface and accelerating wear. If you spot rust on metal flashings, torn underlayment, or water staining that expands after a wind event, treat it as a siren. Roofs with older seals and vent boot gaps are especially vulnerable to the surge of moisture that follows a storm front.
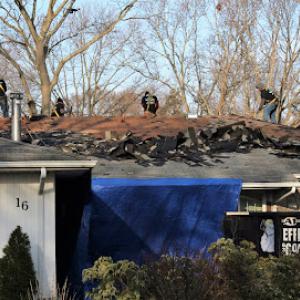
If rain starts pouring through after a gusty night, take immediate steps to reduce damage. Move valuables away from affected rooms, place buckets under drips, and avoid using electrical devices near water. If the attic shows active leakage, carefully trace the path of the water to identify the most likely entry point. Do not delay temporary patching if a contractor can stabilize the area the same day; tarping or sealing with roof-safe materials can buy precious hours until a permanent repair is possible. For Bay Shore homes, emergency repairs are a common need after weather events, so having a plan with a trusted contractor who can respond quickly is essential.
High-wind areas across this coastline stress roof edges and ridge lines first. Pay particular attention to the drip edge, gutter connections, and any existing shingles that show curling or lifting. Valleys and flashing around chimneys, skylights, and roof penetrations are frequent leak pathways when wind shifts the rain angle. If you notice granule loss clustered near the gutter line, that signals rapid surface wear that will escalate in the next storm cycle. Act fast on any sign of lifting, gaps around vents, or water marks that travel along the ceiling in a straight line from a single penetration.
Create a quick storm readiness kit: waterproof tarps, starter sealant, roofing cement, and a roll of self-adhesive flashing tape. After heavy winds or hail, inspect the attic access and look for damp insulation, which indicates hidden leaks. Schedule a fast-acting inspection as soon as weather allows; even a small repair now can avert a larger, more disruptive leak after the next storm front. Document damage with photos and notes to share with your contractor, focusing on entry points around chimneys, vents, and flashing. In Bay Shore, a reliable network of contractors is accustomed to rapid-leak response-keep their contact ready for when the next coastal weather event rolls through.
In Bay Shore, the dominant materials you'll see on local homes include asphalt shingles, metal roofing, clay tile, concrete tile, synthetic/composite shingles, and slate. Asphalt remains the local specialty among contractors, with many builders offering rapid, reliable installations on standard roof shapes. Metal and tile specialists exist, but they're far less prevalent in the market, so getting a project scheduled with the right crew may require a bit more planning and vetting. The South Shore exposure-wind-blown rain, coastal humidity, and periodic coastal spray-shapes what works best on a given roof. Heavier materials like clay, concrete, and slate bring a distinct look and long-term durability, but they also demand careful detailing and a sturdier support system.
Long Island's freeze-thaw cycles and regular precipitation make underlayment and flashing quality especially important when weighing heavier tile and slate systems against lighter shingles. If a home's roof is already overburdened by strong wind events or has a history of ice damming, the choice of underlayment, fasteners, and edge detailing becomes as critical as the chosen covering. Lighter shingles offer forgiving installation and a quicker re-cover, but in regions with winter-driven moisture movement, a premium underlayment paired with well-sealed flashing around dormers, chimneys, and vents pays dividends in leak resistance. For those considering tile or slate, expect a more demanding install: additional roof deck preparation, secure anchoring, and deliberate continuity of weatherproofing across hips, ridges, and transitions. The result is a roof that stands up better to salt air and winter ice, but only if the installation is executed with careful attention to every seam and termination.
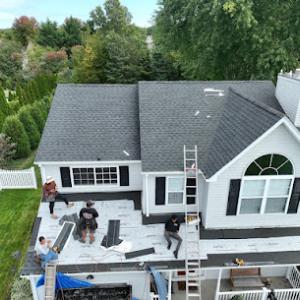
Standard asphalt shingles pair well with most common roof shapes and deck conditions. They tolerate minor framing imperfections and meet typical wind and rain demands when installed with quality underlayment and proper ventilation. If your home features steeper pitches or complex geometry, asphalt often remains the simplest path to a durable, cost-friendly solution that resists wind-driven rain when sealed correctly at valleys and penetrations.
Clay and concrete tiles bring a lasting aesthetic and excellent durability in dry, well-ventilated attics, but their weight and required structural support must be aligned with the existing deck and framing. If the roof isn't already reinforced, upgrading the deck or adding mechanical fasteners for tile installation becomes necessary. In coastal environments, the extra care given to substrate prep, corrosion-resistant fasteners, and careful sealant selection is not optional-it's essential.
Slate offers the longest potential service life and a classic appearance, but it's the most demanding option. Lightweight slate alternatives exist, but the installation still hinges on a solid deck, precise nailing or clipping, and meticulous flashing details at hips, ridges, and transitions. If the budget allows and the roof structure supports it, slate can be a standout choice; if not, a high-quality synthetic or composite shingle can deliver similar aesthetics with a simpler installation and maintenance profile.
When evaluating options, compare how each material handles wind exposure, seasonal moisture movement, and maintenance needs. Heavier tiles demand reinforced framing and careful edge detailing, whereas shingles benefit from a well-sealed underlayment and robust flashing. Talk through the anticipated life cycle, including routine inspections after winter storms and how each system handles color retention under coastal sun. In the end, your choice should align with the roof's architectural style, the home's framing capacity, and your willingness to engage in proactive maintenance to safeguard against the South Shore's unique mix of wind, rain, and freeze-thaw cycles.
Typical Bay Shore pricing runs about $350-$650 per square for asphalt shingles, $800-$1500 for metal, $1400-$2500 for clay tile, $1200-$2200 for concrete tile, $400-$800 for synthetic/composite shingles, and $1800-$3500 for slate. Those ranges reflect the South Shore climate: frequent freeze-thaw cycles, coastal moisture, and the way salt air can affect fasteners and edge detailing. When you're getting bids, expect the asphalt option to dominate the area, with heavier or more specialized systems pulling a bigger portion of the budget. The order of magnitude below can help you sanity-check quotes without getting lost in contractor math.
Costs in Bay Shore can rise when storm demand spikes across coastal Long Island, making scheduling and labor availability more volatile after major weather events. If a nor'easter or late-season tropical system checks a lot of roofs in a short time, crews may price rush work higher or quote shorter lead times. That ripple can affect both material delivery and on-site labor. In practice, you'll often see a tighter window between deciding to proceed and project start, plus potential push on incremental costs if extra days are needed for weather-sensitive work like tile or slate installations.
Material choice matters more locally because heavier systems like tile and slate may add structural and labor complexity compared with the asphalt re-roofing that dominates the area. For asphalt, you're often looking at quicker installs and familiar nailing patterns that tolerate Bay Shore's wind exposure. Metal offers durability but can require more precise sealing around penetrations and rakes. Clay and concrete tiles bring weight and need for framing checks, plus careful underlayment and roof deck conditions. Synthetic/composite shingles provide a middle ground, balancing cost and ease of installation. Slate, while elegant, typically demands a reevaluation of roof framing and fastener strategy, and the price reflects that complexity.
Start with a target price for the roof you want, then add a cushion for storm-season volatility-roughly 5-15% is reasonable in peak-demand periods. Gather at least three bids and verify each contractor's ability to manage coastal conditions, including wind-driven rain and freeze-thaw realities that are common here. If you're weighing heavy materials like tile or slate, request a structural assessment if the old deck or rafters show signs of stress or moisture damage. For asphalt, confirm the nailing pattern and underlayment quality, since those factors often determine long-term performance in salty air and seasonal temperature swings. Finally, factor in maintenance costs after installation; some systems may require more frequent sealants or edge repair to withstand the bay breeze and storm cycles.
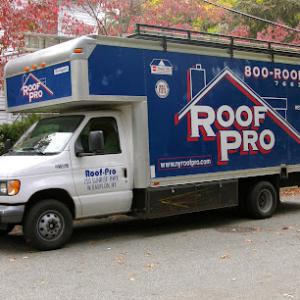
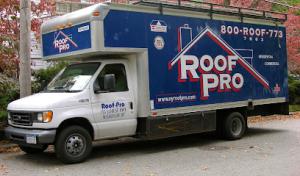
Roof Pro
(800) 766-3773 www.nyroofpro.com
21 Washington Ave, Bay Shore, New York
5.0 from 54 reviews
We are a family own business since 1994, helping everyone in Long Island New York. We are a Residential and Commercial Roofing company. We are proud members of the GAF Master Elite program and the Roofing & Solar Reform Alliance (RSRA).
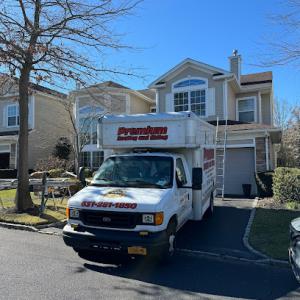
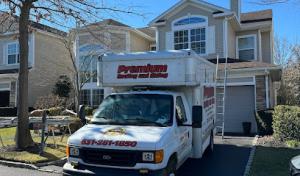
Premium Roofing & Siding
(631) 281-1850 www.premiumroofingandsiding.com
31 Bay Shore Ave, Bay Shore, New York
5.0 from 39 reviews
Welcome to Premium Roofing & Siding, Inc.! We are the experts when it comes to residential roofing & siding repairs. Our reputation for quality work, responsiveness, and competitive pricing has been the primary factor in our success. We are committed to client satisfaction in which we serve the client from the developmental stages of a project to final completion. By early involvement in the conceptual phase of a roofing project, we can explore all installation design possibilities with the client to assist in obtaining the best balance of aesthetics and budget covering all aspects. We bring the latest innovations in roofing products for your consideration to assure you of any current offerings for all of your project needs with our ongoing
Tony the Roofer
(631) 300-7870 www.facebook.com
1392 N Clinton Ave, Bay Shore, New York
5.0 from 34 reviews
Commercial and Residential Affordable Quality Roofing Installation

American Side Home Improvement
(631) 961-0404 www.americansidehomeimprovements.com
1667 Pine Grove Blvd, Bay Shore, New York
5.0 from 33 reviews
At American Side Home Improvement, Inc., we bring quality roofing, siding, remodeling, and construction services right to Long Island. Our skilled team is dedicated to providing lasting results, whether it’s durable roofing for reliable protection, stylish siding that boosts curb appeal, or full-scale remodeling that transforms your living spaces. We work closely with you to ensure every project aligns with your vision and stands the test of time. Plus, we’re proud to offer free estimates to get your project started with ease. Choose American Side Home Improvement, Inc., and experience the commitment to quality that sets us apart on Long Island.
Keenridge Construction
(631) 609-0409 keenridgeconstruction.com
1409 Chicago Ave, Bay Shore, New York
5.0 from 24 reviews
Keenridge Construction is a Roofing and Siding business that serves residential and commercial property owners all across Long Island. Our company provides all Roofing, Siding, Window and Framing services at the most professional level possible. We are fully licensed and insured, and strive for 100% customer satisfaction. Here at Keenridge, our objective is to change the home improvement experience. We help busy homeowners, property owners and businesses avoid the pain of working with a bad contractor or getting a low quality product. We are committed to providing you with the best home improvement experience possible.
Cover All Solutions
(877) 722-5521 coverallsolutions.com
28 Maple Ave, Bay Shore, New York
4.9 from 18 reviews
Within the contracting industry, there are few companies that truly stand out in the crowd. At Cover All Solutions, we pride ourselves on building customer relationships that will last for generations. We do everything possible to ensure that you will not hesitate to recommend us to your closest friends and family. That means that we consider every detail of every roof we install, bathroom we renovate, siding we install, and we do it properly or not at all. Our long list of satisfied customers is a testament to our work quality and our commitment to quality. You can trust us with your next project, and we look forward to working with you very soon.
All Island Pro Roofing & Chimney
(631) 892-6313 www.allislandprobayshoreny.com
217 Third Ave, Bay Shore, New York
5.0 from 16 reviews
All Island Pro Roofing and Chimney is a premier contractor serving Long Island with expert roofing, chimney, and gutter services. With years of experience, we specialize in installations, repairs, inspections, and maintenance—ensuring lasting quality and peace of mind for our customers. Our dedicated team uses top-notch materials and craftsmanship to protect your home and enhance its appearance. Count on us for reliable service, honest assessments, and a commitment to keeping your property safe and beautiful.
Medina Gutters
110 Pineoaks Ln, Bay Shore, New York
5.0 from 15 reviews
Medina Gutters is a family-owned company that was established 20 years ago in Bay Shore, NY. Our company was built with the commitment to ensure cost-effectiveness and high-quality in every Gutters project, we are hired to work on for the community of Bay Shore, NY and the surrounding areas. Our company was founded under the great values of: Professionalism Commitment Diligence Cost-Effectiveness Contact our team today at 631-278-6207 and get a free estimate for any of the services that we offer. If you hire us to do the job we will work hard and smart until your expectations are exceeded. Contact our professional and reliable company today to save time and money on your upcoming Gutters project!
Above All Roofing
(631) 665-3158 www.aboveallroofingli.com
Bay Shore, New York
4.8 from 19 reviews
Above All Roofing is a family owned business and has been in business for 35 years with over 40 years of experience. We have an A+ rating with the Better Business Bureau.
Quick Roof & Siding
(877) 524-2159 www.quickroofandsiding.com
Serving
5.0 from 28 reviews
Welcome to Quick Roof and Siding, a reputable family-owned home renovation company based in Deer Park, New York. With over 50 years of collective experience in home renovation and contracting, our licensed and insured specialists are dedicated to delivering exceptional results. Our core values of speed, accuracy, and integrity guide us in approaching every project, regardless of its size. Specializing in roofing, siding, windows, and doors, Quick Roof and Siding takes pride in being an Owens Corning Preferred Roofing Contractor and an Anderson Certified Contractor. These esteemed affiliations enable us to offer you the industry's finest warranties, ensuring your peace of mind. Your home is your most valuable asset, and we are here to help
Clearview Roofing & Construction Babylon
(631) 827-7088 longislandroofs.com
Serving
5.0 from 50 reviews
Clearview Roofing in Babylon, NY, offers top-quality roofing services, including installations, roof repairs, and roof inspections for residential and commercial properties. As a trusted "roofer near me," we use premium materials from leading manufacturers like GAF and Owens Corning to ensure durability and reliability. Our services include siding, gutter installations, skylights and emergency roof repairs. With over 60 years of experience, we provide exceptional customer service and fair pricing. Choose Clearview Roofing in Babylon, NY, for professional and reliable roofing solutions. From asphalt shingles to Flat Roofing. TPO and EPDM roofing repair, Clearview Roofing in Babylon, NY, has you covered!

Roof Repair Long Island
(631) 459-4254 roofrepairinlongisland.com
Serving
5.0 from 27 reviews
Welcome to Roof Repair Long Island your local one stop shop company for any Home Improvement project you might need. Get started today with a Free Estimate Appointment. Available 24/7 for any Roofing Emergency.
Full re-roof projects in the Bay Shore area typically require a building permit. This means any replacement of roofing materials that involves removing existing layers down to the sheathing, or significant repair to the roof structure, should go through the permit process. The goal is to ensure the work complies with local wind, snow, and drainage considerations, as well as fire safety and material compatibility with the existing roof deck. If you're unsure whether a project qualifies as a full re-roof, check with the permit reviewer early in the planning stage to avoid delays.
Permits are handled by the Town of Islip Building Department rather than a separate Bay Shore city agency. While the roof itself is visible from the street, the town reviews structural, drainage, and fire-safety aspects that affect neighboring properties and the overall built environment. Expect to submit project details, a plan or sketch of the roof framing, and any proposed vent, chimney, or skylight work for review. Having documentation ready - including existing utilities and accessibility considerations - helps the process move smoothly.
The local process includes inspections during construction. A permit applicant should anticipate at least one or more inspections as the work progresses: an initial framing or deck inspection if structural work is involved, a mid-roof inspection to verify underlayment and venting, and a final inspection once the roof is in place and any penetrations are sealed. Inspections verify that the installation accounts for freeze-thaw cycles, wind uplift, and proper drainage to curb future leaks after winter storms. Scheduling inspections promptly keeps the project on track and reduces the risk of rework.
A final inspection closes the permit once the roofing system has been completed and meets all applicable codes and approved plans. The final step confirms that all components-underlayment, flashing, fasteners, and vents-are installed correctly and that roof access points and eaves are protected. Work cannot be deemed complete until the town grants permit closure. Seasonal workload and weather can influence inspection timing, so plan accordingly and keep contact information up to date with the Building Department to avoid missed appointments.
Before starting, call the Islip Building Department to confirm permit requirements for your specific roof type and scope. Have your contractor provide a detailed outline of the work, including proposed materials, ladder access, and any changes to ventilation or drainage. If a prior permit exists for an older roof, verify that all dormant or expired permits are renewed or closed properly to prevent conflicts with the current project. Remember that inspections are part of the process, so coordinate access and provide ready-to-review documentation to prevent delays.
Bay Shore sits in a coastal Long Island insurance environment where wind- and hail-related roof claims are common enough that documentation standards are strict. Homeowners who understand the expectations around proof-photos, timelines, and repair history-build a stronger case when a storm hits. Your goal is to create a clear, organized narrative that makes it easy for an adjuster to see what happened, when it happened, and how it was handled.
Because roofs are frequently evaluated after storm events, damage should be photographed and dated as soon as safely possible, even before any temporary tarps or quick fixes are done. Don't rely on memory or scattered files; capture wide-angle shots of the entire roof and close-ups of damaged shingles, flashing, or vents. Keep a simple log noting the date, weather conditions, and a brief description of what was observed. This contemporaneous record helps prevent later disputes over when damage occurred.
Insurers in this market often want contractor estimates, date-stamped photos, and a clear record of prior repairs and roof age before approving or limiting a claim. Have a trusted local contractor provide a detailed, itemized estimate that distinguishes exact repair scopes from overall roof replacement when needed. Preserve receipts for any emergency temporary repairs and note who performed them, along with the date and purpose. A consistent narrative across photos, notes, and estimates reduces back-and-forth and accelerates claims review.
When a storm passes, create a simple folder for the claim that includes up-to-date photos, contractor estimates, repair logs, and any correspondence with the insurer. If there was a prior repair or an aging roof, document that history with dates and notes. Avoid delaying documentation until after the insurer requests it; initiating a ready-to-submit package helps prevent claim drift or requests for additional information.
Store all claim-related materials in a single, organized location-digital copies with date stamps and physical copies in a labeled binder. Maintain backups in a separate place, and ensure photos are clearly labeled by date and damage type. Consistent organization supports quicker approvals and clearer communication with the adjuster during the settlement process.
Connect with contractors who help homeowners navigate the claims process from damage assessment to final approval.
Clearview Roofing & Construction Babylon
(631) 827-7088 longislandroofs.com
Serving
5.0 from 50 reviews

In Bay Shore, the ideal replacement window aligns with late spring through early fall, when the landscape offers moderate temperatures and gentler weather patterns for roofing crews to work safely and efficiently. The goal is to minimize freeze-thaw stress on materials and to keep the project moving without weather-related delays. Start planning as soon as the last of the winter storms recedes and you can reasonably expect stable conditions for several weeks.
Winter freezing temperatures and snow can affect both roof integrity and project scheduling on Long Island. Cold snaps can make shingles crack more easily, sealants cure improperly, and ice dam formation complicate both installation and performance once the roof is in place. If a winter repair is unavoidable, focus on temporary measures to protect the interior while scheduling the full replacement for a later window when temperatures exceed freezing for consecutive days.
Spring rainfall and humidity introduce a different set of constraints. Wet conditions slow ladder setup, fibered underlayment can become slippery, and gutters may overflow during heavy downpours, complicating material handling. If a spring project is necessary, plan for shorter, more frequent workdays and err on the side of drying days in the forecast to keep crews efficient and materials dry.
Summer heat and coastal exposure bring their own considerations. High heat accelerates some sealants and can stress roof membranes during long installations, while salty air and gusty days demand careful attention to fastening and ventilation. Schedule the bulk of the work during cooler mornings and late afternoons, and coordinate with the crew to avoid peak sun hours when the roof surface becomes unsafe to traverse.
Fall coastal storms add urgency to timing. Early fall can be ideal, but brief remnants of storm systems or strong winds can disrupt material deliveries and panel alignment. Have contingencies for securing open areas and protecting interior spaces, and aim to complete the core roof work before the heart of autumn storms arrives.
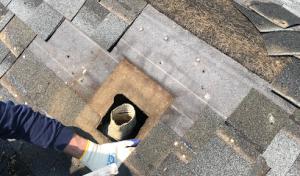
Skylight service is a notably active specialty in the Bay Shore market, so leak-prone skylight details are a common homeowner concern. The combination of regular precipitation and freeze-thaw cycles means flashing and seal detail around skylights wears out faster than you might expect. Look for daylight around the skylight frame from inside the attic, condensation on the glass during dry days, or musty attic smells after a rain. Outside, inspect the curb flashing where the skylight meets the roof, the rubber gasket around the dome, and any silicone sealant patches that have split or pulled away. Small drips at the seam often indicate a failed gasket or aging flashing. If you see water staining near the skylight, don't wait for a heavy rain to test it; dry conditions aren't a guarantee the seal held up to last winter's cycles.
Chimney work appears frequently in local contractor profiles, which matters because flashing transitions are often where Long Island leak calls begin. The chimney's joints and the step flashing along the sides are common failure points after years of wind-driven rain and salt-laden spray. Inspect the area where the chimney meets the roof for peeling shingles, rusted or separated metal flashing, and any gaps in the mortar that allow water to travel downward. Inside, staining along the ceiling or walls near the chimney can reveal slow leaks that travel behind the siding and into the attic. When addressing chimney leaks, prioritize the flashing at the base and along the sides, and verify the cap and chase cover are intact and sealed.
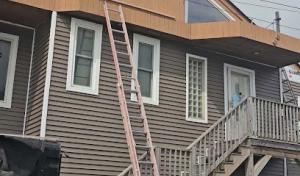
For both skylights and chimneys, start with a clean roof-facing surface before re-sealing. Use a steady ladder setup and be mindful of slick shingles during winter thaw. A common, actionable step is to reapply a compatible sealant around the flashing, replacing any worn gaskets, and resealing any cracked or missing shingle tabs that expose underlying material. If shingles or flashing show signs of significant aging, plan for a targeted repair rather than a full roof replacement to minimize disruption and maintain performance through another cycle of Bay Shore weather.
Find contractors experienced in skylight installation, flashing, and leak repairs to bring natural light into your home.
Roof Pro
(800) 766-3773 www.nyroofpro.com
21 Washington Ave, Bay Shore, New York
5.0 from 54 reviews
Premium Roofing & Siding
(631) 281-1850 www.premiumroofingandsiding.com
31 Bay Shore Ave, Bay Shore, New York
5.0 from 39 reviews

Tony the Roofer
(631) 300-7870 www.facebook.com
1392 N Clinton Ave, Bay Shore, New York
5.0 from 34 reviews
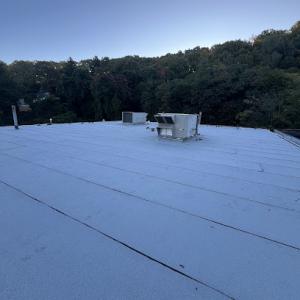
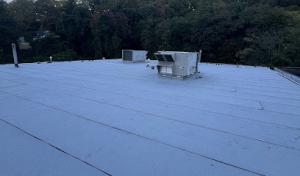
Flat-roof sections on Bay Shore homes are a recognizable feature on porches, additions, and low-slope decks. They are present, but they sit behind traditional asphalt shingle work in the local market. The South Shore exposure means flat areas see frequent wind-driven rain, spray from coastal showers, and winter freeze-thaw cycles that stress seams, drains, and edge details. Understanding how these areas behave helps you spot trouble before leaks develop.
On homes with flat or low-slope roofs, proper drainage is not optional-it protects the structural deck and interior rooms. Regular precipitation increases the load on drainage seams, curb details, and transition points where flat sections meet vertical walls or existing shingles. In practice, check that gutters and downspouts are clear, scuppers are open, and overflow paths aren't blocked by debris. Seams should be inspected for open caulk lines, loose fasteners, or aging seam tape, especially near the drip edge and any parapets. In Bay Shore's climate, you want confidence that rainwater moves away quickly and does not pond.
Spring rain and winter freeze-thaw cycles are the local forces most likely to reveal weaknesses in low-slope areas. Ice buildup can push against fasteners and seam closures, while repeated thawing loosens flashings and corner joints. Pay attention to any damp spots on ceilings below flat sections after heavy rains or rapid temperature swings. Routine checks after winter storms and after significant spring rainfall help catch deterioration early, before interior damage shows up.
Then, a simple, neighborly habit helps: schedule semiannual inspections of flat roof sections, focusing on drainage paths, edge flashings, and any signs of uv or wind-driven wear along seams. Replace compromised flashings promptly and reseal joints with products compatible with the existing membrane or overlay system. Keep the roof surface clear of leaves and seasonal debris to maintain continuous drainage and reduce the risk of ponding, which concentrates wear over time.
Find specialists in TPO, EPDM, and built-up flat roofing systems for residential and commercial properties.
Clearview Roofing & Construction Babylon
(631) 827-7088 longislandroofs.com
Serving
5.0 from 50 reviews
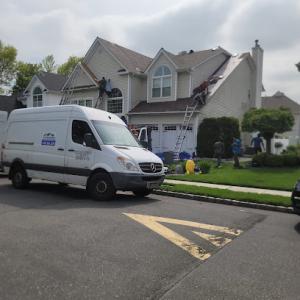
The Bay Shore market is dominated by re-roofing contractors, so you should compare scope, cleanup, and response time rather than assuming every company handles specialty systems equally well. In practical terms, ask for a detailed line-item scope that covers tear-off, debris haul-off, and the exact components being installed. Make sure the contract specifies how crews will protect your landscaping, driveways, and those delicate coastal plants common along the water. Quick, thorough cleanup after any storm event isn't a bonus; it's a baseline that keeps neighbors and your own property from encountering lingering nails or ripped tarps in the next wind gust.
Response time matters as much as the actual roof work, because Bay Shore homes depend on fast leak control when a storm breaks. Look for a contractor who can promise a timely on-site assessment after heavy rain or a wind event, plus a clear plan for temporary protection if needed. Clarify who handles the temporary repairs and how long the interim measures stay in place. A crew that returns promptly to complete the job after weather interruptions is more than convenience-it reduces the chance of more interior damage and extended exposure to a leaking roof.
Manufacturer-certified and warranty-offering contractors are present but not universal in Bay Shore, making warranty terms worth checking closely before signing. Read the fine print on coverage for both materials and labor, and verify who bears responsibility if a leak reappears near a seam or flashing after a storm. If a contractor cannot provide documentation of product warranties or fails to name the issuing manufacturer, reconsider. A solid warranty and verifiable certifications aren't guarantees of perfection, but they do create a safer path when the next coastal storm hits.