Last updated: Apr 19, 2026
Ronkonkoma roofs face both winter freeze-thaw stress and autumn nor'easters, a combination that commonly exposes weak flashing and moisture-control details on Long Island homes. The repeated cycles of thawing and refreezing expand hairline gaps, push up flashing, and drive water under shingles where it can fester behind ledger boards and hips. Add the gusty spring winds and sudden hail events typical of Long Island springs, and small leaks can become large problems fast. Your roof's ability to shed water quickly in these conditions isn't cosmetic-it keeps your attic space dry and your insulation performing as designed.
In the weeks after a nor'easter, inspect for lifted shingles, loose or missing flashing around chimneys, vents, and skylines, and any sheen of moisture along interior ceilings near exterior walls. Even when a roof looks intact from the ground, wind-driven rain can exploit gaps under edge metal and rough-cut plywood joints. After freeze-thaw cycles, look for cracked or popped caulk joints around vent flashings and dormers, plus any staining that traces a path from a seam or chimney. In Ronkonkoma, where homes cluster closely and trees brush roofs, keep an eye on gutter flow- clogging or ice dams can back up moisture and force leaks into valleys and under eaves.
Spring wind and hail events can interrupt jobs and create sudden repair demand before the main reroofing season ramps up. If damage is detected outside the traditional late-spring to early-fall window, you must stabilize leaks immediately to minimize interior damage and wood rot. Simple, temporary measures-covering exposed areas with a watertight tarp, securing loose flashing, and diverting water away from vulnerable eave ends-buy precious time. When you apply temporary fixes, prioritize areas where water can migrate along rafter tails, into soffits, or behind underlayment layers. Do not rely on temporary patches as a substitute for a proper repair; use them only as a bridge to a timely, full re-roof when the weather and scheduling align.
If you notice active dripping, place a bucket beneath the leak and limit attic traffic to reduce moisture exposure. Clear gutters and downspouts to prevent backflow, then inspect the roof edge for any lifted shingles or loose metal around vents. Seal small gaps with a temporary, exterior-grade sealant that remains flexible in cold weather, but do not rely on it for long-term performance. Document every affected area with photos and note the date of the observation. This record helps prioritize urgent repairs when crews swing into action as the spring and summer months approach, ensuring that temporary measures transition quickly into lasting, weather-tight fixes.
Ronkonkoma falls under the Town of Islip, where a full re-roof typically requires a building permit rather than being handled as an informal contractor-only job. The Islip Town Building Department reviews reroof plans and conducts inspections, making permit handling a practical issue homeowners in Ronkonkoma need to confirm before work starts. In this climate, where winter freeze-thaw and nor'easter-driven moisture test every seam, having a properly permitted project helps ensure that ventilation, flashing, and underlayment are designed and installed to stand up to Long Island conditions. A permit also provides a formal path to final approval, which matters when insurance or resale timing comes up.
First, identify whether your roof needs a full re-roof permit or if a smaller scope can be handled under a general construction permit. Because this is a full-roof scenario in many Ronkonkoma homes, expect to submit a set of plans that show roof geometry, ridge venting strategy, flashing details around chimneys and vents, and an underlayment specification suitable for freeze-thaw cycles. Contact the Islip Town Building Department ahead of scheduling to confirm the exact submittal package, including any required permit application forms, contractor disclosures, and project description. If you work with a roofer who understands the local permit process, they should coordinate the submission and keep the paperwork moving, but you still retain responsibility for the final closing.
Second, prepare for a review and possible adjustments. The department will check ventilation adequacy and flashing around joints, dormers, and chimneys, since these details drive durability through winter storms. If the plan appears to lack proper intake and exhaust balance, or if flashing details don't clearly show step and counter-flashing integration, expect requests for revisions. These reviews can affect the project timetable, particularly in late fall or winter when weather windows are narrow and inspections demand dry conditions.
Third, schedule inspections in sync with the work. The Islip process typically requires a rough framing or roof deck inspection, followed by a mid-stage flashing check, and a final inspection after installation and weatherproofing are complete. Make sure the contractor coordinates the timing so inspections occur during predictable weather, avoiding a backlog that can stall a storm-prepared schedule. Keep the permit number handy and ensure a licensed, insured roofer is attached to the permit to maintain compliance.
When the crew finishes, the final inspection verifies that all code-compliant elements-ventilation, flashing, and underlayment-are in place and functioning for long-term performance. Do not let the project finish without securing a clear final approval from the town. Without it, even a well-executed reroof can sit in limbo, complicating insurance claims or future resale. Confirm that the roofer completes the permit close-out steps and that you receive the official final documentation. If any deficiencies are noted during the final inspection, address them promptly to avoid delays and to ensure the roof performs well through the next freeze-thaw cycle and nor'easter season.
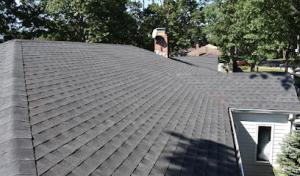
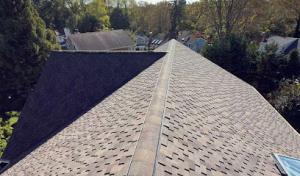
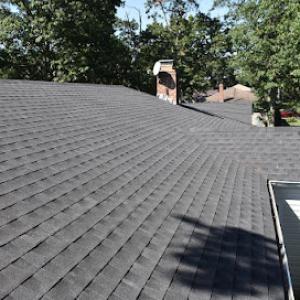
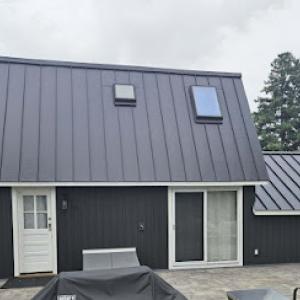
Asphalt shingles are the dominant roofing material in Ronkonkoma, matching the area's large stock of suburban pitched-roof homes and making them the baseline option for most replacements. In this climate, you'll notice that the balance between cost, ease of installation, and field performance keeps asphalt as the default choice for many homeowners. The typical Long Island weather pattern-year-round moisture, winter freeze-thaw cycles, and occasional Nor'easters-puts a premium on a system that can shed water quickly, resist wind uplift, and maintain a solid seal around hips, valleys, and penetrations.
Metal roofing is present but at a much higher cost range in this market, so Ronkonkoma homeowners usually compare it against asphalt for durability and weather performance rather than treating it as a default upgrade. Metal shines when storm-driven elements are a major concern: strong wind events, rapid snow melt, and the need for longer service life with fewer roof penetrations over time. If you live on a windy block, or you're planning a long-term installation that minimizes roof maintenance and seasonal disassembly, metal can offer compelling advantages. However, the higher upfront and replacement costs, plus the need for careful attic ventilation and flashing details, require thoughtful budgeting and a clear view of competing priorities.
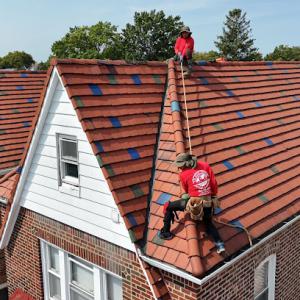
Clay tile, concrete tile, wood shakes, and synthetic products exist in the market but are more specialized choices in Ronkonkoma, with fewer contractors actively signaling tile, cedar, or metal expertise than general reroofing and asphalt work. For most suburban pitched roofs in this area, asphalt delivers reliable shingle performance, straightforward flashing around chimneys and skylights, and predictable workmanship from local crews who understand Nor'easter weather and frost cycles. If you're weighing options beyond asphalt, you'll want to verify installer comfort with Long Island freeze-thaw dynamics, especially around edge details, valleys, and roof-to-wall transitions where any lapse in flashing can become a storm-driven leak source during a rapid thaw.
When planning for storm-driven leaks, the key is a robust, well-ventilated attic, properly sealed penetrations, and a flashing strategy that accommodates seasonal moisture swings. If choosing metal, ensure the system includes appropriate underlayment compatibility and secure fasteners chosen for the local climate to minimize panels lifting in a Nor'easter. For asphalt, emphasize quality shingle selection with good granule retention and reliable, correctly placed flashing. In either case, establish a quick-response plan with a trusted local contractor for sun- and thaw-cycle vulnerabilities, especially around roof-to-wall transitions and near dormers or skylights where moisture tends to concentrate.
In this area, asphalt shingles run about 360 to 700 USD per square, metal 800 to 1300, clay tile 1100 to 1900, concrete tile 1000 to 1700, wood shingles or shakes 750 to 1200, and synthetic or composite shingles 600 to 1000. These numbers reflect the mix of suburban homes in the Islip corridor and the ready availability of locally sourced products. When you're budgeting, understand that the size of your roof and the chosen profile (and whether you're replacing like-for-like or upgrading to a heavier system) will shift those totals. A practical approach is to plan for the midpoints of the ranges and add a contingency for waste and disposal, which can creep up after a weather event.
Storm activity compresses the late spring through early fall replacement window across Long Island, and Ronkonkoma properties feel the squeeze after wind, hail, or heavy rain events. If a storm hits, crews may prioritize high-visibility projects first, pushing your start date into a tighter schedule. That pressure can drive incremental costs, especially if you need expedited ordering of materials or after-hours work to minimize exposure to more storms. If you're weighing options, discuss lead times with the contractor early, and lock in a realistic window that avoids the worst of the spring and fall busy periods when possible. Preparation helps keep labor and material costs from drifting due to last-minute rushes.
Start with a written scope that includes the chosen roof system, underlayment, flashing details, ridge ventilation, and waste disposal approach. The aim is to avoid scope creep once a project begins, because small changes can add up quickly in this market. Obtain a ballpark estimate for the specific product you want, then compare that to a conservative, fully scoped bid that includes a best-practice venting plan and robust flashing-key components to performing well during freeze-thaw cycles and nor'easters. Finally, build a modest contingency (10-15%) into your budget to cover unexpected storm-year adjustments.
Long Island Roofing & Siding
(631) 766-7745 liroofingandsiding.com
751 Koehler Ave Unit 12, Ronkonkoma, New York
5.0 from 673 reviews
We have you covered for all your Roofing, Siding, Windows, Doors and Gutter needs! We use the best quality products at the best prices. We also have the industry leading warranties on all of our work. Call us today for a free quote!
Arlo Roofing
(631) 336-0438 www.arloroofing.com
242 Avenue C, Ronkonkoma, New York
5.0 from 139 reviews
Arlo Roofing "The Best you can Get" we are family-owned Roofing Company who has a priority give our customers highest quality of work with best practices and highest customer service. We specialize in Roofing, Siding, Gutters, Windows, Bathroom and Kitchens only. Our mission is to build relationships with our clients and communities for a long term. We know how hard and difficult is to find the right contractor who does quality work at an affordable prices that's why we are here to help our customers right away and solves their questions.If you need a roofing contractor in Suffolk county, Nassau county , East Hampton, South Hampton and NYC who will go above and beyond for you,Call us at 631-336-0438.
Top 1 home improvements
(631) 507-9098 top1homeimprovements.com
2334 Locust Ave, Ronkonkoma, New York
4.7 from 21 reviews
Top 1 Home Improvements is based in Long Island New York ,has specialized in providing everything from new roofing installations to gutter renovations. We have an outstanding reputation, and much of our business has always come from referrals and word of mouth!
Triple Crown Exteriors - Roofing & Siding
(631) 682-5572 www.triplecrownext.com
Serving
5.0 from 111 reviews
Triple Crown Exteriors is a roofing, siding, and exterior home improvement company based on Long Island. We specialize in providing high-quality services such as roof repairs and replacements, siding installations, and gutter services. Being known for our attention to detail and customer satisfaction, we ensure durable and aesthetically appealing results to enhance the protection and curb appeal of homes across Long Island.
Top Pros Construction
(516) 879-0466 topprosconstructionny.net
Serving
5.0 from 57 reviews
Long Island roofing company Emergency roofing services Near you.

King Quality Roofing & Siding
(631) 817-4359 www.kingquality.com
Serving
4.9 from 2897 reviews
Since 1990, King Quality’s team of award-winning contractors has been transforming Long Island homes into castles fit for a king or queen. Trust us for expert installation of roofing, siding and windows for your home. Serving Nassau and Suffolk Counties on Long Island, New York, King Quality installs industry-leading roofing, siding and window products to ensure your home looks beautiful and is protected against damage from bad weather. Get peace of mind for a lifetime with exceptional protection provided by quality products backed by lifetime warranties. We also offer low monthly payment options. King Quality's dedication to personalized service will make your experience exceptional. Call 631-573-0642 to schedule a free consultation.
Safeway Roofing & Chimney
(631) 651-1990 www.safewayroofingandchimney.com
Serving
5.0 from 52 reviews
Safeway Roofing and Chimney is a local Family Owned & Operated Long Island Roofing, Siding, Gutter and Chimney Company, and is here to take care of all your Roof Repair, Roof Leak Repair, Skylight Repair, Chimney Repair, Chimney Cleaning, Chimney Liner Installation, Gutter Cleaning and Siding Repair needs. We believe in maintaining the highest standards of quality without ever compromising. We are a full-service, licensed and insured company Serving Long Island, Suffolk County NY and Nassau County NY for over 20 years.
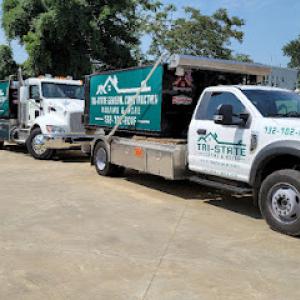
Tri-State General Construction
(718) 600-8416 www.tristategc.org
Serving
4.9 from 28 reviews
Financing available $0 out-of-pocket expense, 0% interest available depending on terms & conditions. We are GAF and Owens Corning Certified Roofers. Our mission is to provide premier craftsmanship and professional service to the New York, New Jersey and Connecticut area for our Roofing services. We bring our Skills, Excellence, Commitment and Dedication to every project. No project is too big or too small. Call for free estimates.
K&K Construction Solutions
(631) 553-8903 kandkchimneys.com
Serving
4.9 from 111 reviews
K&K Roofing is a leading home improvement company that has been providing quality roofing services for over 20 years. Our experienced team of roofers are knowledgeable and skilled in all aspects of roofing and siding work committed to providing the best home solutions for every budget. We strive to exceed expectations with every job. . From roofing repair and replacement to siding replacement or repair, we have the solution that fits your needs. We are proud to offer competitive pricing, reliable service, and a 100% satisfaction guarantee as we strive to provide a hassle-free experience for each of our customers.
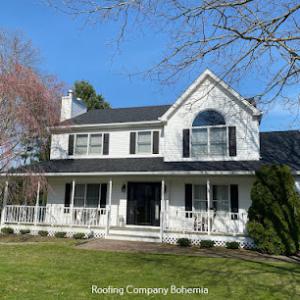
Ready Roof
(631) 766-5656 readyroofli.com
Serving
5.0 from 167 reviews
Ready Roof is a fully licensed and insured roofing company serving Bohemia and all of Long Island, from Nassau to Suffolk County. We specialize in roof repair, roof replacement, flat roof systems, chimney flashing, siding, and gutter installation for both residential and commercial properties. Our team focuses on delivering fast, dependable service with durable, high-quality materials built to handle Long Island’s tough weather. Whether it’s a small leak or a full roof replacement, we make the process smooth, affordable, and stress-free. With a strong commitment to customer satisfaction and workmanship you can rely on, Ready Roof is here to provide the expert roofing solutions your property deserves.
Sav A Roof
Serving
4.9 from 130 reviews
Sav A Roof is here to help you every step of the way with your roofing project. We will work tirelessly to ensure your roof is secure from the elements. Our most basic roof starts with some of the best materials known in the roofing industry, because we wouldn't have it any other way. Unlike other roofing companies we buy our materials in bulk, storing them ourselves in our own warehouses. We do this so that we can pass on those savings to you in the form of premium building materials. We won't compromise by using sub standard roofing materials in any of our projects. It doesn't matter to us the size of your project, from a shed to a condominium complex, we'll treat every customer the same - as if you're family.
Top Notch Roofing
(516) 373-9573 topnotchroofingny.com
Serving
5.0 from 231 reviews
Top Notch Roofing has been a trusted name in the roofing industry since 1998. Serving Long Island NY Over the years, we've built a reputation for excellence in both residential and commercial roofing services. From roof repairs to complete roof replacements, we've got you covered.
New York carriers serving Ronkonkoma closely review wind, hail, and storm-related roof claims, with adjusters commonly looking for clear photo evidence and a defensible timeline of loss. When a storm passes through, a photo trail that shows the affected area before and after, plus dated notes from any temporary, protective steps you took, helps anchor the claim. Missing details can invite questions or a slower payout, especially when the claim asks for evidence of preexisting damage versus new damage from the latest event.
Rising premiums and occasional coverage retentions in the New York market can push homeowners to weigh repair versus full replacement more carefully on older roofs. If a roof has seen repeated exposure to Nor'easters and freeze-thaw cycles, the adjuster will scrutinize the remaining expected life and the likelihood of recurring damage. This isn't a trap to avoid reporting damage, but a reminder to document the full picture: what failed, why it failed, and what temporary measures were taken to prevent further interior exposure.
Because the weather here includes repeated storm exposure rather than a single predictable hazard season, homeowners benefit from documenting damage immediately after wind, hail, heavy rain, or a nor'easter. Take high-resolution photos from multiple angles, including ridge lines, flashing joints, valleys, and any signs of water intrusion in the attic. Keep repair receipts for emergency fixes and note dates when professional assessments were conducted. A clear sequence of events helps a file move faster and reduces back-and-forth with adjusters.
Avoid delaying a claim when you notice attic staining, exterior peel-back, or shingles that curl or lift after a storm. Insurance providers often request a professional inspection or roof report as part of the process; having this ready-credibly dated and labeled by zone-speeds the review. If possible, coordinate with a contractor who understands the local climate and the suburb's typical roof assemblies, so the documentation aligns with what is most likely to be covered under your policy.
Ronkonkoma's housing stock often shows leak points around penetrations, especially where skylights and chimneys meet the roof. The contractor market here reflects unusually strong demand for both skylight work and chimney-related roofing tasks, so leaks are a real homeowner concern. When inspecting a reroof, pay close attention to the transition from flashing to the surrounding roofing material at these penetrations. A small gap or misalignment can become a big problem after a nor'easter or a winter freeze-thaw cycle.
In the Town of Islip, flashing quality is a specific closeout issue that surfaces during inspections. This means that chimney and skylight detailing isn't just about appearance; it's a functional hinge point for a long-lasting roof. Ensure that backer flashing is continuous and intersecting flashing is properly lapped. Boot or curb flashings should be sealed, and any step flashing must be properly seated to shed water both in heavy rain and the heavier pressure of winter melt.
Freeze-thaw cycles and frequent nor'easters can expose weak flashing transitions around chimneys and skylights. Plan for extra overlap, extra fasteners, and corrosion-resistant materials in these areas. If a storm is brewing, identify the most vulnerable penetrations first-skylights with exposed curb flashing and chimneys with no dedicated cricket or proper cap flashing. Having temporary, secure coverings ready helps prevent wind-driven rain from finding a path through imperfect seams.
During reroofs, prioritize integrated flashing that blends with the roof deck, using compatible sealants and durable metal flashing. For skylights, specify reinforced curb flashings with continuous sealant bead and counter-flashing that extends up the frame. For chimneys, ensure a cricket or saddle is installed where appropriate, with lead or aluminum flashing that wraps the chimney base and transitions smoothly to the roof plane. In heavy storms, a well-sealed, properly integrated detail is the difference between a dry home and repeated interior damage.
After installation, perform seasonal checks focusing on penetrations. Look for hairline gaps at flashing seams, loose shingles near skylight edges, and any signs of moss or debris buildup that can trap moisture. Cleaning gutters and ensuring water flows away from the chimney base helps reduce pressure on flashings during peak storm periods. A proactive approach keeps leaks from becoming emergencies in the mid-winter thaw and spring rains.
Find contractors experienced in skylight installation, flashing, and leak repairs to bring natural light into your home.
Long Island Roofing & Siding
(631) 766-7745 liroofingandsiding.com
751 Koehler Ave Unit 12, Ronkonkoma, New York
5.0 from 673 reviews
Arlo Roofing
(631) 336-0438 www.arloroofing.com
242 Avenue C, Ronkonkoma, New York
5.0 from 139 reviews

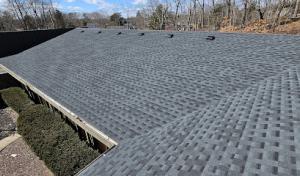
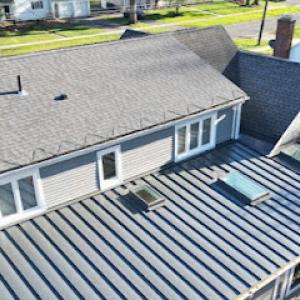
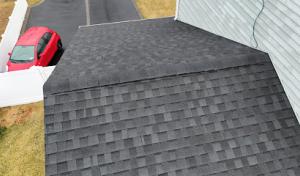
In this area, year-round precipitation and autumn heavy-rain events hit low-slope and flat sections first, so drainage must be prioritized. Ensure proper slope away from the primary shingle field and verify that scuppers, gutters, and downspouts are free of debris before every wet season. On porch and extension roofs, confirm that drainage paths are continuous and that any wastewater or condensate from HVAC or parapets has a clear route off the roof. Durable edge details, such as integral gutters or state-of-the-art internal drainage systems, reduce ponding and the risk of leaks during freeze-thaw cycles.
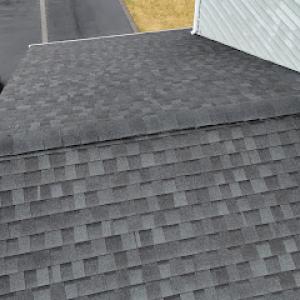
Ronkonkoma homes often stack low-slope sections onto the main roof, but these areas behave like separate roof systems. Treat flat porch roofs and rear extensions as their own assemblies when planning repairs or replacement. Evaluate insulation, vapor barriers, flashing at transitions, and the connection to the main field separately. For each low-slope area, confirm that insulation and ventilation meet the needs of that specific plane, and check for mismatches in insulation thickness or roof membrane type that can drive condensation or uneven drying.
Low-slope sections demand robust flashing at penetrations, transitions, and terminations. Pay careful attention to terminate flashing beneath any edge membranes where adjacent roof planes meet, and ensure compatibility between the membrane material and the main roof system. Where parapets exist, install cap flashing and counter-flashing that resist wind-driven moisture. In Ronkonkoma's climate, a well-sealed edge detail helps keep interior spaces dry and reduces the chance of ice dam formation along the perimeter during winter.
Schedule inspections after major Nor'easters and freeze-thaw cycles, focusing on seams, fasteners, and flashing lines around low-slope areas. When repairs are needed, prioritize resealing seams and reflashings before addressing the larger field, since leaks often originate at joints or transitions first. For additions or porches, develop a repair plan that isolates the low-slope section from the main roof so that work on one area doesn't complicate the other. This approach supports timely leak prevention and minimizes disruption to the rest of the roof system.
Find specialists in TPO, EPDM, and built-up flat roofing systems for residential and commercial properties.