Last updated: Apr 19, 2026
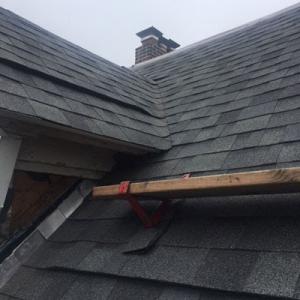
Melville's cold winters and repeated freeze-thaw cycles put extra stress on eaves, flashing lines, gutters, and the first courses of roofing near roof edges. When temperatures swing below and above freezing, those edgeswork in attacks: ice forms, expands, then melts, forcing shingles, underlayment, and flashing to flex and pull away. You may not notice the damage on a clear day, but a thawy afternoon can reveal stressed edge details that were quietly deteriorating all winter. The result is a quiet buildup of vulnerability right where the roof meets the wall, and that vulnerability becomes a loud leak problem once the spring rains arrive.
Late winter damage in this area often becomes visible during spring rains, when ice-related underlayment breaches and loosened shingles start leaking. The ice edge acts like a wedge, prying apart seams and creating pathways for water to reach the attic or ceiling. Look for telltale signs: dark streaks along the first row of shingles, pilled granules in gutters, damp spots on ceiling drywall near exterior walls, and fresh stains that appear after a steady rain. If you notice shingle edges curling or flashing showing gaps where it meets the wall, that's a red flag you are dealing with ongoing edge failures, not a one-off drip.
In the late-winter to early-spring window, you must act with urgency. Clear gutters of ice buildup and ensure downspouts drain away from the foundation; clogged or frozen gutters magnify edge stress and funnel water into the soffit. If you see ice along the eave line or near roof penetrations, avoid walking on the roof-melting ice can be deceptive and slippery, and compromised shingles can fail under your weight. From ground level, inspect easily reachable areas for bubbling paint or damp patches on the siding where moisture may be tracking down. Schedule a targeted inspection of roof edge flashing, the first row of shingles, and the underlayment beneath them. Document all signs of wear with photos timed to a specific storm or rainfall event to guide a professional assessment.
If you notice active drips during a storm, rapidly worsening ceiling stains, or a roll of flashing that visibly lifts at the edge, escalation is necessary. Edge damage tends to advance quickly once a leak starts; small breaches in late winter can become full roof penetrations by spring. In this climate, replacement planning is commonly pushed into late spring through early fall because winter conditions and freeze-thaw cycling complicate full tear-offs. A professional should verify the integrity of eaves, flashing lines, and the first roofing courses, and provide a plan for securing the edge while preparing for a more thorough edge repair or replacement when conditions allow.
Given the edge-focused risks, invest in robust edge detailing that resists ice buildup and keeps water from seeping under the underlayment. Proactive protection means better flashing integration, reinforced eave protection, and appropriate ventilation and drainage near the roof edge. Regular inspections, especially after major storms or heavy freeze-thaw cycles, are essential to staying ahead of creeping edge failures. The goal is to keep the edge solid so the rest of the roof remains shielded during Melville's volatile late-winter to spring transition.
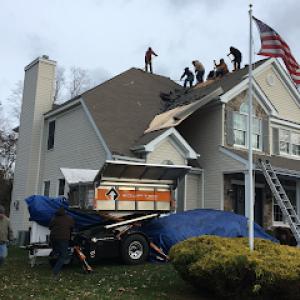
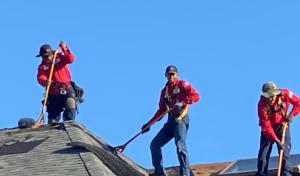
Melville's spring storm season brings wind and hail exposure that can damage shingles, metal trim, gutters, and skylight perimeters. Late-winter freeze-thaw cycles leave edges vulnerable, so a strong wind gust or hailstorm can peel or dent materials that already bent from the season's cold. Check around the roof edge for lifted shingles, naching metal trim, or flashing that shows exposed underlayment. If gutters were heavily loaded by ice or debris, downstream damage on fascia or soffit can appear as leaking seams inside the attic or ceiling. Acting quickly reduces the chance of a small issue turning into a costly roof-wide repair.
In the days after a storm, walk the perimeter with a bright flashlight at dusk to spot lifted shingles or granular loss along the eaves. Look for shiny or gouged metal trim at rake edges and around vents. Skylight perimeters deserve a careful look; a tight seal that's compromised by hail or wind can invite moisture seepage behind the flashing. If you notice sudden damp spots in ceilings or upstairs walls after a storm, treat that as a red flag. Capture clear photos from multiple angles, especially of any exposed underlayment or flashing, and note the storm date and wind conditions if available. Keep a simple log of every affected area so you can relay a precise timeline to a contractor.
In the New York metro insurance environment, homeowners in this area are often asked to document roof age, recent storm dates, photos, and contractor estimates before claims are evaluated. Have those items ready in a single folder: the roof's age, recent maintenance notes, a sequence of storm dates with wind speeds if you have them, and recent interior leaks that align with outdoor moisture events. When you contact your insurer, present the documentation in an organized timeline to avoid back-and-forth delays. If a contractor finds damage during a repair assessment, request a written estimate that clearly itemizes affected components (shingles, trim, gutters, skylight seals) and proposed remediation steps. This strengthens a claim's credibility and speeds review during Melville's variable spring weather.
If damage is confirmed or suspected, prioritize safeguarding the interior. Use tarps or temporary coverings over damaged roof areas to limit water intrusion until a permanent fix can be scheduled. Schedule a reputable local contractor with a track record of storm-related repairs to perform a thorough assessment and provide a condition-based remediation plan. Keep communication direct with your insurer, sharing the contractor's notes and photos promptly. In Melville, a well-documented, timely response often makes the difference between a clean, partial repair and a larger, more invasive replacement, especially during the late-winter to spring transition when edges are most vulnerable.
Connect with contractors who help homeowners navigate the claims process from damage assessment to final approval.

Imagine Remodeling
(516) 398-6595 imagineremodelinginc.com
200 Broadhollow Rd Suite 207, Melville, New York
5.0 from 130 reviews
Clearview Roofing & Construction Babylon
(631) 827-7088 longislandroofs.com
Serving
5.0 from 50 reviews

Imagine Remodeling
(516) 398-6595 imagineremodelinginc.com
200 Broadhollow Rd Suite 207, Melville, New York
5.0 from 130 reviews
Imagine Remodeling has provided Long Islanders with exceptional customer service and high quality craftsmanship for over 18 years. Our main focused trades are roof replacement, siding replacement and repair, Jame Hardie siding installation and repair, bathroom renovation and kitchen renovation. We are a GAF Master Elite roofing installer, James Hardie Preferred siding installer and a Certainteed 5 Star certified siding installer. We service all of Nassau county, NY USA and Suffolk county, NY USA Customer satisfaction is our number one priority here is Imagine Remodeling, give us a call today and see why Don't forget to ask us about our special 0% interest free financing for 72 month program on All purchases!
David General Contractors
(917) 295-5598 davidgeneralcontractors.com
25 Melville Park Rd Suite 110D, Melville, New York
4.9 from 115 reviews
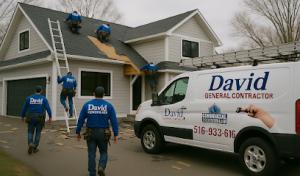
With over 20 years of experience, David General Contractors INC is your trusted partner for high-quality residential and exterior remodeling work across Long Island and New York City. We specialize in roofing, siding, blacktop and concrete driveways, extensions, dormers, and full interior renovations. Our skilled team is known for fast response, reliable service, and superior craftsmanship on every job. Whether you’re planning a small upgrade or a major renovation, we bring professionalism, transparency, and results you can count on. Contact us today for a free estimate , We do not accept advertising or marketing calls. All solicitation will be ignored.
County Roofing Systems
(631) 400-7663 countyroofingsystems.com
68 S Service Rd #100, Melville, New York
4.9 from 95 reviews
Established in 1987, County Roofing Systems is a licensed contractor offering comprehensive roofing solutions for residential and commercial properties across Suffolk and Nassau Counties, . services include Roof replacement, siding, and window installation, Dormers and extensions exterior work.
SW Roofing Of Huntington
(631) 991-9107 huntingtonroofingandchimney.com
105 Maxess Rd, Melville, New York
4.9 from 44 reviews
SW Roofing Of Huntington is a local Family Owned & Operated Melville NY Roofing Company!
All Weather Pro
(917) 633-6121 allweatherprony.com
200 Broadhollow Rd Suite 207, Melville, New York
5.0 from 20 reviews
All Weather Pro, Inc is a Remodeling contractor / roofer serving the NY Metro and Long Island area focused on bringing you quality services that dont break the bank. Our services include Roofing for Residential and Commercial Properties, Replacement Vinyl Windows, Roof Installation, Commercial/ Flat Roof Waterproofing, Flat Roof Repairs, Vinyl Windows Installation, Roof Inspection, Storm Damage, Shingle Roofs, Rubber Roofs, Roof Coating and of course Free Roofing Price Estimates. Our Expert team offers a variety of cost-effective Home Improvement services for homeowners. Financing also available upon request. Contact us today or Book a Free Estimate appointment at your convenience"
Klein Contracting
(516) 259-4444 klein-contracting.com
560 Broadhollow Rd, Melville, New York
4.9 from 29 reviews
Long Island's #1 Trusted Home Improvement Company. Licensed and Insured with Over 30 Years Experience. Exterior Services Include: Roofing, Siding, Windows, Gutters, Chimneys, Decks & Porches, Masonry, Waterproofing and Painting. Interior Services Include: Basement Waterproofing and Refinishing, Bathrooms, Carpentry, Flooring, Closets, and Painting.
Will Testa Home Remodeling
(631) 802-7663 www.gowilltesta.com
25 Melville Park Rd suite 110F, Melville, New York
5.0 from 15 reviews
We are a full-service, award-winning home improvement contractor proudly serving all of Long Island with over 25 years of hands-on experience. Our team has won multiple awards for our kitchen and bath remodels, but can also handle your dormer, extension, basement, roof, or siding project - no matter how intricate the design! We are a turn-key solution for your next remodel endeavor, and will help in all aspects of planning and design along the way.
Built Right Commercial Roofing Long Island
(631) 646-2681 www.builtrightcommercialroofing.com
Serving
4.9 from 55 reviews
Built Right Commercial Roofing provides commercial flat roof repair, restoration, and replacement across Long Island, Nassau County, Suffolk County, and all NYC boroughs. We specialize in TPO, EPDM, and silicone roof coating systems for warehouses, shopping centers, office buildings, schools, and multifamily properties. Our team responds quickly to active roof leaks, storm damage, and emergency repairs, helping property owners prevent costly interior damage. We also offer maintenance programs, roof inspections, and full system upgrades designed for long-term durability and energy efficiency. Commercial-only roofing. Fast response. Strong warranties. Call now for a free inspection.
ML Best Construction
(631) 643-1404 mlbestconstruction.com
Serving
5.0 from 309 reviews
With over two decades of experience, ML Best Construction is a trusted name in residential, commercial, and industrial exterior renovations. Since opening in 2000, this family-owned company has provided top-tier craftsmanship for all roofing, siding, and gutter needs. Their skilled professionals also specialize in skylight, window, and door installations, using premium materials to ensure quality and durability. Their commitment to excellence has earned them a reputation for reliable service and superior results.
Marcor Construction
(631) 321-0593 www.marcorny.com
Serving
4.9 from 381 reviews
Marcor Construction Roofing & More has been providing high-quality home improvement services to Long Island for over 30 years. We provide expert roof repair, roof replacement, siding installation, and more, and we can give you the perfect solution for your home's exterior improvement needs. We have installed thousands of roofs over the years, and we service a variety of roofing materials for both residential and commercial properties. We always put customer service first, and we will work with you to ensure that you are completely satisfied.
Leak Stoppers Inc - Roof Leak Repair Long Island
(631) 669-1570 leakstoppersinc.com
Serving
4.8 from 35 reviews
Long Island’s Most Reliable Residential and Commercial Roof Repair Specialists! Since 1999, Leak Stoppers has been providing the highest level of roofing and waterproofing services to homes and businesses on Long Island. We specialize in leak analysis and repairs for roofing, skylights, chimneys, windows, and doors to ensure that replacements of these items are only done when absolutely necessary. We save our customers thousands of dollars by prioritizing repairs, and when replacement becomes necessary, we provide lifetime guarantees on solutions that will truly last a lifetime. Call us today and experience The Leak Stoppers Difference!
All American Home Improvement
(516) 986-3979 www.allamerican-hi.com
Serving
4.8 from 55 reviews
3rd & 4th generation family owned and operated residential roofing company. Specializing in roof leak detection, roof repairs and full roof replacements at affordable prices. Our other services include Siding, Windows and Gutter systems. Call us today to experience why its better to go with a local knowledgeable company as opposed to a large corporate sales organization.
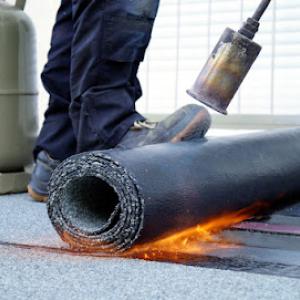
Provided local pricing ranges run from about $350 to $650 per square for asphalt shingles. In a town with a mix of steep-slope suburban roofs and some low-slope commercial-style sections, expect prices to shift with roof geometry and edge conditions. A simple gable on a standard single-family home will sit toward the lower end, while roofs with multiple valleys, irregular hips, or existing tear-off debris can push costs toward the upper end. As a practical rule, plan for a straightforward replacement around the mid-range, and budget more if edge detailing, vents, or specialty flashing are needed along the eaves and ridges during the late-winter to spring transition when freeze-thaw cycles can stress edge membranes.
Metal options typically run from about $700 to $1100 per square, and that range reflects Melville's blend of homes and commercial-like transitions. Metal is often favored where edge protection and wind resistance matter, but complex roof lines or taller structures can add to the price through more material cuts, additional fastening points, and drain adjustments. Heavier detailing at eaves or around skylights can also tilt costs higher. For renovations that involve rim boards or underlayment upgrades to ensure long-term performance, expect incremental increases aligned with the roof's complexity.
Clay tile generally falls in the $1100 to $1700 per square range. Heavier material brings structural considerations, which can elevate overall costs, particularly when permit-driven checks are part of the process. In Melville, clay tile often surfaces on homes with Mediterranean-inspired designs or second-story additions that demand careful roof framing assessment. Expect higher labor and transportation costs with multiple roof sections or challenging access points, such as tight driveways or busy streets.
Concrete tile typically ranges from $1000 to $1600 per square. The weight and dimensional variability of concrete tile can trigger more substantial framing and edge-support work. In local neighborhoods with mixed roof forms, realization of a watertight edge and proper drainage becomes critical during the late-winter to spring transition, with price jumps possible for complex tear-offs or retrofits to existing drainage schemes.
Slate jobs cluster between $1400 and $2300 per square. This premium category is sensitive to roof geometry, with steep pitches and irregular edges driving additional labor and precise installation. In Melville's landscape of older homes and newer additions, slate often requires upgraded underlayment and careful edge flashing, which can push costs up quickly if heavy weather protection or ice-damming mitigation is needed at the edges during thaw cycles.
Copper stands from about $2400 to $4000 per square. It represents a substantial premium, tempered by the long service life and symbolic edge detailing. In areas with complex eaves, dormers, or multiple roof planes, copper installation can require meticulous flashing and seam work, contributing to sharp price variability. Expect costs to reflect both material heft and the need for precise corner and rake finishing when late-winter melt and early-spring rain stress edge zones.
A full roof replacement in Melville typically requires a building permit through the local town building department serving this part of Long Island. Before any shingle removal or material delivery, you should submit a permit application that outlines the scope of work, roof type, and any structural work tied to the project. If the project project includes changes to framing, decking, or load-bearing support, plan review may be required before work proceeds. That review helps ensure the proposed changes won't compromise the existing structure, especially on steep-slope roofs or when over-carport or low-slope sections are involved.
Structural changes or support concerns trigger a plan review in many Melville-area jurisdictions. If trusses or rafters are being altered, or if new ridge lines, skylights, or vents will change weight distribution, expect a formal plan check. Have engineered drawings or a licensed contractor's notes ready to accompany the permit package. The goal is to confirm that the reinforcement or alterations meet current code, wind resistance, and drainage requirements, which can be particularly relevant after freeze-thaw cycles that stress edge details.
Replacements commonly involve inspections during installation and again after completion to confirm code compliance before the permit is closed out. Scheduling typically aligns with key milestones: the rough inspection when decking and roof sheathing are in place, a re-coverage check as underlayment and flashing are installed, and a final inspection once the entire system is installed and all penetrations are flashed. If a storm event precedes the project, the inspector may pay special attention to ice-edge detailing, drip edge, and roof-to-wall interface. Keep a record of all approvals, and ensure any shop drawings, product data, and ventilation details are on site for the final review.
In this area, the most favorable replacement window runs from late spring through early fall, after the winter freeze-thaw stress has passed and before colder installation conditions return. That means planning for projects to kick off once roofs are dry and temperatures are reliably above freezing, with crews able to work steadily without sudden cold snaps slowing progress. For a homeowner facing edge repairs after a harsh winter, target a stretch when mornings are cool but days stay consistently warm, and the risk of late-season rain is manageable.
The transition from winter to spring is especially telling for roof edges. Freeze-thaw cycles push and pull at shingles, underlayment, and drip edges, often revealing subtle gaps where water can start to intrude. Pay attention to ice dams and any abnormal staining or peeling along fascia boards, drip edges, or close to chimney penetrations. In Melville, the tendency for rapid temperature swings means edge damage can worsen quickly once the sun returns and surfaces heat up. A proactive approach is to inspect gutters and downspouts for clogging that can back up water to the edge, and to address missing or cracked edge materials before spring storms arrive in earnest.
Storms in late winter and early spring can drive leaks that seem to appear overnight. When a strong wind or heavy rain pushes against a compromised edge, water can find its way under shingles or flashing. The practical response is to perform a targeted inspection of all edge flashings, chimney-to-roof transitions, and valley details after a significant storm. If moisture is found near transitions, dry-up and tarp as a temporary measure to limit interior damage, then prioritize a professional assessment of edge integrity and flashing performance. Scheduling pressure can spike after spring storms, so secure a reputable contractor early in the season to avoid delays in repairs or replacements.
If edge damage is moderate but stable, plan for a late spring repair window to prevent escalation during a demanding summer. For extensive edge flashing or multiple damaged sections, a coordinated replacement during the early fall window can align with milder fall conditions and a longer installation run. Keep in mind that Melville's peak summer heat accelerates aging, so aligning major work with the cooler portion of the season helps sustain the roof's performance into the next cycle.
Get a clear picture of your project costs upfront - no commitment required.
David General Contractors
(917) 295-5598 davidgeneralcontractors.com
25 Melville Park Rd Suite 110D, Melville, New York
4.9 from 115 reviews
All Weather Pro
(917) 633-6121 allweatherprony.com
200 Broadhollow Rd Suite 207, Melville, New York
5.0 from 20 reviews
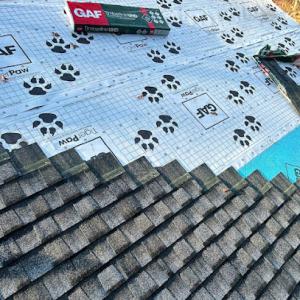
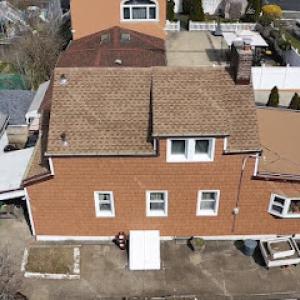
Asphalt shingles are a dominant choice for a large stock of conventional suburban pitched roofs, fitting the local climate and neighborhood aesthetics at the lowest local cost range. They handle the freeze-thaw cycles that creep in during late winter and early spring, provided their edges and valleys are well-sealed and protected from wind-driven moisture. When inspecting edge areas, look for curling, granule loss, and minor splitting that can become notable after repeated freeze-thaw events and storm exposure. Maintenance focuses on keeping roof edges clear and ensuring flashing around chimneys and vents remains tight, since meltwater and ice edge growth can exploit any small gaps.
Metal roofing in Melville offers a higher-cost option that can better tolerate repeated freeze-thaw exposure than more brittle assemblies when properly detailed. If choosing metal, prioritize a system with accurate edge detailing, snow guards, and well-seated panels to prevent ice dams from forming along the eave line during late-winter thaws. Metal's durability shines in storm-driven leaks when the roof deck is well-supported and fasteners are properly sealed. A professional assessment should verify the substrate's condition and any need for additional insulation to reduce condensation and thermal bridging in transition seasons.
Clay tile and concrete tile appear in the Melville market but bring higher local cost ranges and may trigger added structural scrutiny during replacement planning. These materials can be resilient in sun exposure and heat, yet they are heavy and susceptible to crack initiation from freeze-thaw cycles if installation details aren't precise. Edge and valley detailing, proper underlayment, and venting are crucial to mitigate ice-edge challenges that often surface during late winter into spring.
Slate provides long-term durability but sits at a premium and requires careful assessment of roof support due to its weight. In late-winter transitions, edge disruptions and rapid temperature changes can reveal brittle connections if the installation relied on marginal detailing. If slate is considered, a thorough review of fastener security, flashings, and potential seismic or wind-related stress is essential.
Copper roofing remains a premium option that shows distinctive patina over time and excellent edge performance under freeze-thaw conditions. However, it requires meticulous detailing at eaves and penetrations to avoid moisture tracking in winter storms. In practice, copper appeals to homeowners seeking durability and a unique aesthetic, with attention to support structure and expansion joints during replacement dialogue.
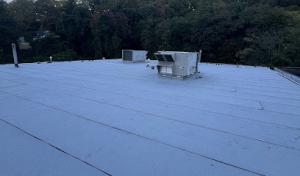
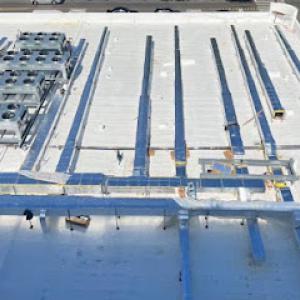
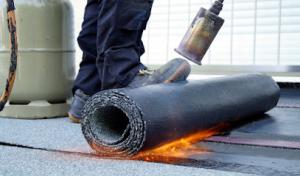
Find specialists in TPO, EPDM, and built-up flat roofing systems for residential and commercial properties.
County Roofing Systems
(631) 400-7663 countyroofingsystems.com
68 S Service Rd #100, Melville, New York
4.9 from 95 reviews
All Weather Pro
(917) 633-6121 allweatherprony.com
200 Broadhollow Rd Suite 207, Melville, New York
5.0 from 20 reviews
Built Right Commercial Roofing Long Island
(631) 646-2681 www.builtrightcommercialroofing.com
Serving
4.9 from 55 reviews
Insurance decisions in this market are tightly tied to the roof's age and how well the home has been maintained. In Melville, carriers closely scrutinize these factors within the broader New York metro pool, and a long-standing roof with gaps in timely upkeep can tilt a claim toward partial payment or dispute. The results hinge not only on what happened in a storm, but on what the policyhouse sees as ongoing care and monitoring over the years.
After storms that hit late winter or early spring, the adjuster will look for a clear trail of documentation. Date-stamped photos showing the exact timing of damage, contractor assessments, and notes that separate sudden impact or wind-driven events from pre-existing wear are all critical. In this climate, freeze-thaw cycles can blur lines between new damage and long-term deterioration, so clean, professional records are essential for any claim narrative to stand up under review.
A roof's remaining lifespan can materially influence whether a Melville-area claim is paid in full, limited, or disputed. If the edge damage or interior leaks sit atop a roof that has already shown significant aging, insurers may weigh the likelihood of future failure against the current incident. This doesn't mean denial by default, but it does mean expectations should be mapped to the roof's actual condition as documented over time. Honest, consistent maintenance records and clear expert evaluations become the strongest anchors when a claim moves through the adjuster's desk.
For homeowners facing a storm or alarm about a developing leak, the practical takeaway is clarity. Gather date-stamped photos, collect contractor assessments promptly, and maintain a straightforward timeline that distinguishes emergency responses from prior wear. In this market, the story your records tell can heavily influence not just whether a claim is paid, but how comprehensively the recovery can cover necessary repairs.
Connect with contractors who help homeowners navigate the claims process from damage assessment to final approval.
Imagine Remodeling
(516) 398-6595 imagineremodelinginc.com
200 Broadhollow Rd Suite 207, Melville, New York
5.0 from 130 reviews
Clearview Roofing & Construction Babylon
(631) 827-7088 longislandroofs.com
Serving
5.0 from 50 reviews