Last updated: Apr 19, 2026
Elmont sits in western Nassau County on Long Island, where humid winters regularly create freeze-thaw stress at eaves and roof edges rather than the heavy inland snow loads seen farther north. That means every year you're watching for hairline cracks, lifted shingles, and moisture wicking into underlayment right at the drip edge. In aging pitched roofs and low-slope additions, those stress points aren't cosmetic-they're your first failure points. Water can wick back into fascia boards, rafter tails, and soffits if the edge detail isn't weather-tight. The warning signs are curling edges, exposed nail heads, and granular loss along the eaves after a windy night. Action is urgent: shore up edge transitions now before a thaw cycle compounds the damage.
Autumn coastal storms and nor'easter-type wind events commonly drive debris and uplift damage on older shingle roofs in this part of Long Island. A stray branch or harboring pine needle layer can create localized suction that pries shingles or flashing loose at the most vulnerable corners and valleys. On a home with multiple additions, garages, and porch roofs, those vulnerabilities multiply: every valley intersection and edge step creates a potential stack-up for wind pressure. If you've got missing granules, torn asphalt tabs, or loose flashing around chimneys, vents, or skylights, the clock is ticking. Don't wait for the next front to test the integrity-address missing or loose components now to prevent rapid water intrusion when a storm hits.
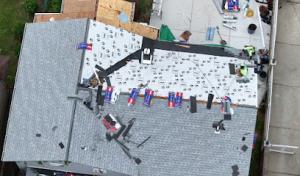
Many Elmont homes are older detached houses with additions, garages, and porch roofs that create multiple valleys, edge transitions, and drainage pinch points where leaks often begin. Valleys are the "wettest" zones on a roof, and in your climate they freeze and thaw repeatedly, weakening sealant and causing ice dams to form at the transitions. Heavy attention should be paid to fastener patterns, valley metal, and the condition of underlayment where two planes meet. Drainage pinch points-areas where water flow is funneled or restricted by roof geometry-are notorious for ice build-up and gutter overflow. Inspect for pooled water, sags in the eaves, and corrosion or punctures in metal drip edges. If you don't see clear, clean water shedding in the proper direction after a rain, you likely have a hidden leak path developing at a critical edge.
Start with a focused edge-to-valley inspection after the first hard freeze, then again after significant wind events. Look for loose or missing edge metal, exposed nails, and compromised flashing around chimneys and vents. Seal any gaps with material rated for exterior roofing and ensure the drip edge is securely fastened and sealed to the fascia. Reinforce valleys with proper flashing and check drip edge to gutter connections for tight seals. When in doubt, prioritize repairs that prevent water entry at the most vulnerable points: eaves, flashing junctions, and door and window penetrations near the roofline. A proactive approach now will dramatically reduce the risk of water intrusion during the next wet, windy season.
Find local contractors experienced in assessing and restoring roofs after hail, wind, and severe weather events.
Royal Roofing & Siding - Long Island
(516) 252-3001 www.gafroofinglongisland.com
Serving
5.0 from 26 reviews
Most homes in this area use conventional pitched roof framing, and replacement budgets tend to track practical mid-range choices. Asphalt shingles are a straightforward fit for that pattern: familiar installation, dependable durability, and a broad range of styles to match aging facades. When choosing asphalt, prioritize a higher quality fiberglass mat shingle with a good warranty and a layered (architectural) profile to better shed wind-driven debris and damp winter air. Durability in this climate comes from a shingle with robust microsealant or the equivalent, which helps resist freeze-thaw damage at the eaves and ridges. For homes with a longer exposure to sun on southern slopes, consider a reflective shingle option to curb heat buildup inside attic spaces.
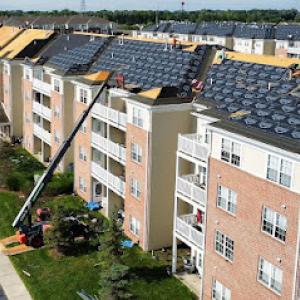
Low-slope sections over rear extensions and porches are common on western Nassau homes, so material decisions often involve both a main shingle roof and a separate low-slope system. In practice, that means pairing a dependable asphalt main roof with a compatible low-slope product, such as a sealed membrane or a derived asphalt roll roofing that matches color and texture. The key is to prevent edge water from wicking under the main roof and to ensure a continuous ventilation path at the transition from slope to low-slope. Pay attention to flashing at step-downs, skylight interfaces, and parapet edges, since wind-driven spray and debris tend to accumulate there.
Long Island humidity makes ventilation and underlayment choices especially important when comparing asphalt, metal, slate, wood, clay tile, and fiber cement. In Elmont, a well-ventilated attic helps slow condensation and reduces ice dam risk during freeze-thaw cycles. Choose an underlayment with proven moisture resistance and a breathable ridge vent strategy that fits the roof geometry. For metal or tile options, ensure the underlayment is compatible with the chosen material and that edge detailing is designed to resist wind uplift and water intrusion. In any system, a continuous, properly sealed drip edge and adequate soffit intakes support effective air exchange across the entire roof plane.
In this market, each material brings its own edge. Metal roofing offers exceptional wind resistance and longevity but may require careful venting and insulation detailing to prevent condensation. Clay tile provides a long life with distinctive curb appeal but demands a strong, well-vented structure to manage weight and thermal movement. Wood shingles/shakes deliver classic character but need meticulous moisture management to prevent curling or rot in humid periods. Fiber cement shingles strike a balance of durability and weight, with good resistance to humidity when installed with proper underlayment. Slate remains a premium option with excellent longevity, yet it demands precise framing and professional installation. Across all options, prioritize a paired approach: a main roof that handles the bulk of weathering and a compatible edge system that protects the vulnerable eaves and valleys from wind-driven spray and freeze-thaw stress.
Roofing work in Elmont is typically best scheduled from late spring through early fall because Long Island's humid winters and spring moisture complicate tear-off, sealing, and drying conditions. That window gives crews a solid stretch of dry days to set up, ventilate, and dry out sheathing after tear-off. If you are dealing with aging pitched roofs or a low-slope rear addition, aim to finish the project before the first hard coatings of winter sealant become unreliable. In practice, start planning in late winter or early spring so you can lock in a contractor and avoid peak summer heat when asphalt shingles and underlayment can heat up and blister. If you have a smaller window, prioritize the most essential work-tear-off, decking repair, and flashing-so you can seal and dry before rainier months arrive.
Costs in Elmont can rise when older Nassau County homes require multiple layer tear-off, decking repairs, chimney flashing work, or separate treatment of low-slope rear sections. A double or triple layer tear-off adds labor and disposal charges, and decking damage is not uncommon on aging homes near Belmont Park where shade and humidity have lingered. Chimney flashing and sidewall detailing can surprise you with additional materials and specialized sealants. For typical projects, material choices align with common local stock: asphalt shingles, metal, fiber cement, and other standard options. Being aware of these extras helps you budget beyond the base price per square.
Storm-driven demand spikes after regional wind and rain events can tighten scheduling and labor availability across Nassau County, affecting pricing and start dates. After a big Nor'easter or hurricane-impulse damage, nearby crews get booked quickly, and emergency repairs may push routine replacements later or into tighter windows. If your roof has visible wind-related damage or loose flashing after a storm, address it promptly to prevent leaks, but know that you may face higher mobilization costs or longer lead times.
1) Get at least three written quotes and ask each contractor to itemize tear-off, decking, flashing, and any chimney work separately. This clarifies where costs are going and helps compare apples-to-apples.
2) If your roof has multiple layers or visible decking concerns, request a preliminary inspection focused on structural integrity and ventilation. A stressed deck or frozen-then-thawed wood is more common in older homes and can drive extra cost.
3) Schedule the project to avoid peak storm periods, but build a buffer for any moisture delays. Confirm lead times for materials, especially if choosing premium options.
4) Budget for potential edge repairs and wind-driven debris mitigation, which are practical defenses against recurring seasonal gusts.
5) Plan for a follow-up inspection after the first hard freeze and again after the initial thaw to catch edge and seal failures early.
Don't let upfront costs delay a critical repair - these contractors offer payment plans to fit your budget.
Prodigy Contracting
(516) 318-0105 www.prodigycontracting.net
Serving
4.9 from 38 reviews
Prodigy Contracting is a Veteran owned business servicing Long Island, New York since 2005. As a GAF Presidential Master Elite Roofer, we offer our clients exceptional quality and a lifetime warranty. Our siding designs feature innovative looks, with rustic contemporary touches and attention to detail service. We use Drone Technology to provide a 360 degree rendering of your project before and highlight your beautiful results after. We look forward to meeting you. Let us transform your home into you Dream Home

Reliable Seamless Gutters
(347) 416-0771 reliableguttersroofers.com
Serving
4.9 from 94 reviews
Reliable Seamless Gutters is your trusted partner for professional roofing and gutter services that not only enhance the overall aesthetics of your home but also provide essential protection against the most challenging weather elements. Our team consists of highly trained contractors who take pride in their workmanship and go the extra mile to ensure your satisfaction. We specialize in installing quality gutters and roofing systems tailored to your needs. When you choose us, you can expect a thorough consultation to assess your home and discuss the best options. Our meticulous installation ensures every component fits perfectly for optimal effectiveness and durability. Trust us to provide a reliable roofing and gutter system for years.
MasterCraft Chimney Sweep & Cleaning
Serving
4.9 from 36 reviews
Chimney Sweep & Repair Services
Island Roofing
(516) 303-7663 www.islandroofingus.com
Serving
5.0 from 190 reviews
With over 25 years of proven expertise, Island Roofing is a roofing company delivering top-tier solutions for commercial, industrial, and residential projects. We serve Long Island, New York, and 30 other states in the Eastern U.S. As a reliable roofing contractor, we’re known for our use of top-grade materials, expert craftsmanship, and honest service. We handle it all, from residential roofing, commercial roofing, multi-family roofing, and preventative roof maintenance to leak repairs and emergency service. We also provide gutter installation, gutter cleaning, and gutter maintenance, all with precision and care. What sets us apart is our commitment to customer satisfaction and our relentless focus on excellence in everything we do.

Royal Roofing & Siding - Long Island
(516) 252-3001 www.gafroofinglongisland.com
Serving
5.0 from 26 reviews
Royal Roofing Long Island, a division of Royal Renovators, provides reliable roofing and exterior services to homeowners and businesses across Nassau and Suffolk County. Our licensed and insured team specializes in roof replacement, flat and shingle roofing, leak repair, siding, gutters, and 24/7 emergency roof service. Backed by one of NYC’s most respected roofing companies, we bring trusted craftsmanship, transparent pricing, and lasting results to Long Island properties. Our mission is to protect homes and businesses with quality roofing built to last. Trust Royal to ensure complete customer satisfaction. Call Royal today for a free estimate!
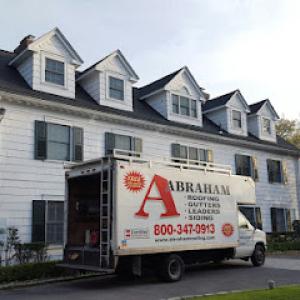
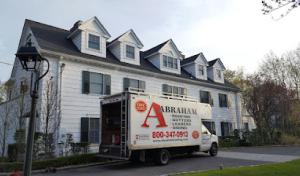
Abraham Roofing
(516) 990-6548 www.abrahamroofing.com
Serving
4.7 from 112 reviews
Located at 23 Blake Ave in Lynbrook, Abraham Roofing serves Nassau County and Queens with over two decades of expert roofing and siding services. Specializing in roof replacement, repair, installation, and more, our certified team provides top-notch solutions for "roofing and siding companies near me" searches. From tackling "roof leak repair long island" to "vinyl siding installation," we emphasize quality, safety, and customer satisfaction. As a GAF Master Elite® Contractor, we offer exceptional roof service repair and leader system installations. For prompt and professional "roofing in New York," choose Abraham Roofing—where your needs always come first.
Power Roofing & Siding Queens NY
(718) 908-8851 powerroofingnyc.com
Serving
5.0 from 20 reviews
Power Roofing & Siding Queens NY delivers top-quality roofing and siding solutions to homeowners throughout the Queens region. We handle everything from minor repairs to complete roof replacements and siding installations, ensuring lasting protection and curb appeal. Choose us for our commitment to reliable service, transparent pricing, and exceptional workmanship backed by years of experience. What sets us apart is our dedication to exceeding customer expectations and using only premium materials for durable, long-lasting results. Contact us today for a free quote and let us enhance your home's safety and value.
Preferred Exterior
(516) 354-7252 www.preferredexterior.com
Serving
5.0 from 50 reviews
We are a family owned and operated establishment specializing in commercial, industrial and residential roofing and siding. We are certified installers of all major manufacturers. We are fully licensed and insured. Our reputation is built on knowledge, craftsmanship and integrity.

Delta Roofing Long Island
(516) 689-0889 deltaroofinglongisland.com
Serving
5.0 from 74 reviews
Delta Roofing Long Island is your trusted roofing contractor, serving residential and commercial clients across Long Island, New York. We specialize in metal roofing, roof repairs, cleaning, and maintenance services. Our fully licensed roofing expert team offers quality roof inspections, leak repairs, and complete replacements. Whether it's a new roof installation or a routine checkup, we use premium materials to ensure lasting results. We are proudly serving Long Island and surrounding areas. Contact us today for a free estimate and professional roofing solutions you can trust!

EA Chimney & Roofing
(718) 480-8350 eachimneyroofing.com
Serving
5.0 from 106 reviews
EA Chimney And Roofing has been safeguarding homes since 2009. Specializing in roofing services, we bring expertise and dedication to every project. Located in Jamaica, NY, we're committed to providing reliable solutions, ensuring the safety and beauty of your home's essential structures. Trust EA Chimney And Roofing to protect what matters most.
TMT Roofing
Serving
5.0 from 69 reviews
Established in 1963, TMT Roofing is your top choice for all commercial and residential roofing needs in Long Island, NY. We specialize in commercial roofing, gutter services, and siding, ensuring our dedicated team provides unparalleled expertise and exceptional customer service. We offer comprehensive roofing solutions, including silicone coatings, EPDM, shingles, and metal roofing. Whether you require a new roof installation or urgent repairs for leaks or damage, we have you covered. Trust TMT Roofing for high-quality materials, expert craftsmanship, and affordable rates—your satisfaction is our top priority.
John G Hubler & Sons
(516) 764-6437 johnghubler.com
Serving
4.8 from 68 reviews
Founded by John G. Hubler Sr. in 1973, we have over 45 years of experience. Our family is from Rockville Centre and we proudly operate our home office on North Park Avenue We strive to run a business that does truly care for our customers by offering professional service throughout every step of every project. Our team’s experience makes us the right choice for your home makeover. From full roof replacements to roof repairs, we are your local GAF Master Elite Roofer. Our family and roots are based in Rockville Centre, New York but our service area extends beyond the village. We are licensed in Nassau County, Suffolk County, Queens, and the Hamptons.
A full roof replacement in Elmont typically requires a building permit through the Town of Hempstead or the applicable local village building department, depending on the property's jurisdiction. This means the project cannot proceed without the official green light from the overseeing agency, and the department's records should reflect the scope of work, materials, and the planned timeline. In neighborhoods where a village code applies, the village building official may have slightly different submittal requirements or forms, so it is important to verify which authority handles the permit before starting the project.
Plan review is a key step in the local process, serving as the first checkpoint for compliance with underlayment, ventilation, and energy-code requirements. Submittals typically include project sketches, roof vent calculations, and details on attic ventilation strategy, along with the chosen roofing system components. In practice, the review ensures that the selected materials and installation methods will withstand Long Island's freeze-thaw cycles, wind-driven debris, and the region's humidity. Submitting complete, code-complying plans early helps minimize delays once the project is underway.
Inspection activity is integral to confirming that the job matches the approved plan and meets code. Rough-in inspections focus on underlayment installation, roof vents, attic ventilation paths, and any decking work, while final inspections verify finished work and energy-code compliance. Expect inspectors to verify that flashing at hips, valleys, chimneys, and roof-to-wall transitions is properly installed and that edge details resist wind uplift. Cooperation during inspection visits can keep the project moving smoothly and help catch issues before the crew leaves the site.
Inspection timing in Nassau County can be affected by department workload, so permit lead time can influence when an Elmont replacement actually starts and finishes. Plan for potential review backlogs, especially during peak construction seasons or after weather events, and align material deliveries with anticipated inspection windows. Maintaining clear access for inspectors and having all documentation ready at each stage reduces the chance of postponements and helps ensure the project progresses in a timely, compliant manner.
In Elmont, roof claims are most often tied to covered wind and storm events rather than a broad insurer retreat from New York's homeowners market. That means your claim exposure hinges on whether the event caused a sudden, storm-related failure-like lifted shingles, blown-off flashing, or interior leaks from a storm-driven disturbance-not simply on aging or pre-existing wear. Understanding this distinction helps you gauge whether your damage is likely to be covered and how quickly a claim decision might come.
Adjusters commonly ask Elmont-area homeowners for roof age, maintenance history, and dated photos showing storm-created damage rather than long-term wear. Because Nassau County roofs often show both age-related deterioration and recent wind damage, documentation that separates sudden storm loss from pre-existing issues is especially important. Prepare a concise record that marks the storm date, wind speeds if known, and any immediate impacts you noticed-like attic condensation after a night of gusty weather or water stains appearing soon after a storm.
To avoid delays or disputes, assemble a clear, time-stamped trail of evidence. Start with dated photos of the roof from multiple angles, focusing on areas typically vulnerable during high wind-ridge caps, valley intersections, and roof-to-wall transitions. Keep copies of prior repair notes and any maintenance you performed in the years leading up to the incident. If you experienced interior leaks, photograph ceilings and walls where the water intrusion appeared, and note the sequence of events-storm onset, peak winds, and when leaks were first noticed. This kind of organization helps separate abrupt storm loss from slow, age-related deterioration in the adjuster's view.
Do not delay reporting a suspected wind-driven loss while waiting for perfect conditions to document everything. Insurers often require prompt notification and a reasonable effort to mitigate further damage. If a contractor already tarped or shingled a roof, keep receipts and take photos of the temporary fixes as part of your claim record. Because many Elmont roofs blend aging materials with recent storm damage, a careful, compartmentalized record-storm damage clearly distinguished from pre-existing issues-can improve the odds that the claim reflects actual, event-related loss rather than cumulative wear.
If the adjuster approves coverage for the storm portion, verify the scope aligns with the most urgent needs: preventing further leaks and addressing edge damage that storms typically expose. If sections of the roof show age-related deterioration that you believe contributed to the damage, document those observations separately and discuss them with your contractor and insurer. Clear, well-organized evidence remains your strongest tool to ensure a fair settlement that addresses both immediate storm impacts and lingering vulnerabilities in aging materials.
Connect with contractors who help homeowners navigate the claims process from damage assessment to final approval.
HK Builders: Best Roofing Company in Flushing
(718) 479-8888 hkbuilderscorp.com
Serving
4.8 from 119 reviews
Older Elmont homes frequently include masonry chimneys and later-built rear additions, creating flashing details that are more failure-prone than simple gable roofs. When inspecting, pay close attention where the chimney step-flashes into the roof deck and where the chase meets shingles. In winter, freeze-thaw cycles can lift mortar joints and push flashing outward, so look for hairline gaps around the base and along the sides. Reinforcement often means resealing with compatible flashing, bridging any gaps between the chimney crown and the roofing material, and ensuring the counter-flashing extends several inches under the masonry and over the shingles. If additions share a wall with the main roof line, check the rake and valley connections at the junctions; treat these as potential leakage pathways even where appearance looks intact.
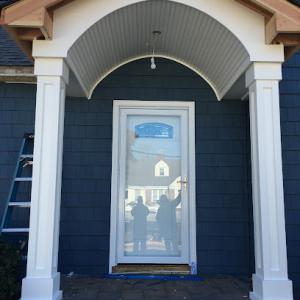
Skylight leaks in this market often show up where aging flashing meets older shingle fields exposed to Long Island humidity and seasonal expansion-contraction. Start with the skylight curb: confirm the flashing bends sit flush and that the waterproof sealant around the curb remains elastic, not brittle. Inspect the metal flashing at the edges for signs of corrosion or lifted corners, especially along the north-facing exposures that see more moisture retention. If you have multiple skylights or a dormer-inflected roof area, ensure each curb has continuous step-flashing under the shingles, with end dams where needed to prevent water tracking along the field. Address any warped or missing shingles immediately around skylights to prevent pry-out under wind-driven rain.
Multi-part rooflines common in western Nassau neighborhoods require careful tie-ins between the main house, dormers, porches, and attached or detached garage structures. Each transition point can host a hidden edge or valley that leaks under wind-driven debris. When planning repairs, treat the main roof, dormers, and additions as a single system: extend underlayment fully across the transition zones, cap with continuous flashing at every break, and maintain consistent shingle exposure across each plane to reduce differential movement. In windy conditions, pay special attention to edge eaves and rake lines where severe gusts can peel back conditional flashing. Regular checks after storms help catch loosened field shingles before water finds its way into the attic or wall cavities.
Find contractors experienced in skylight installation, flashing, and leak repairs to bring natural light into your home.
In Nassau County, Elmont's mix of pitched roofs, older decking, and sometimes unexpected geometry means that material performance hinges on careful installation. Rushing details or cutting corners around hips, valleys, and edge treatments can undermine even the best shingles or metal panels. When decking is aged or slightly uneven, improper fastening or misaligned flashing becomes a latent pathway for leaks that only show up after a few freeze-thaw cycles or a windy storm. The result is not just a short-term lapse-it can compromise decades of expected life.
The local contractor market shows meaningful but not universal prevalence of warranty offers, so homeowners should verify whether a proposal includes both material and labor coverage. A solid warranty should specify who stands behind the workmanship and for how long, and it should clearly define what conditions void coverage. If the proposal only mentions material coverage, consider the risk of unseen labor failures manifesting after installation is complete. Verification of the scope, including flashing, underlayment, and ventilation, is essential.
Because Nassau County inspections focus on underlayment, ventilation, and code compliance, warranty value is strongest when installation details are documented before the roof is closed up. Ask for a written plan that shows proper underlayment placement, nail patterns, flashing transitions, and attic venting strategy. A delay to correct any detail identified on paper can prevent a lukewarm warranty claim later. In the long run, precise documentation saves you from costly surprises after a storm or a harsh winter.