Last updated: Apr 19, 2026
Seymour homeowners are exposed to East Tennessee spring thunderstorm patterns that bring wind-driven rain, hail, and sudden damage spikes that can overwhelm contractor schedules. After a storm passes, the first look should be a calm, systematic walk around the perimeter of the roof and attic. Note any missing shingles, dented metal, cracked seals, lifted flashing, or pooled water in the attic-places where water can find its path into the living space. If you see daylight shining through between shingles or feel a draft near ceilings, treat that as an urgent warning signal. Quick, conservative documentation-photos with timestamps and a simple map of damaged areas-will help when you call for help and can shorten the waiting period for emergency responses.
In this market, emergency repair demand spikes right after a storm, and temporary protection can make a big difference in limiting further damage. Start by covering exposed roof areas with a sturdy tarp or heavy-duty plastic sheeting, anchored securely to resist wind, and extend the cover well past the damaged zone. Seal obvious entry points into the attic with temporary, waterproof material to slow interior leaks while arranging professional assistance. If insulation and interior ceilings show signs of moisture, place plastic sheeting or a tray beneath the leak to catch dripping water and prevent secondary damage to walls, floors, and personal belongings. Remember that time is critical-each hour a leak persists, the risk of structural or insulation damage climbs.
Non-professional temporary fixes are about containment, not restoration. Use 6-mil or heavier plastic sheeting to cover interior ceiling penetrations if water is actively dripping, and tape seams with heavy-duty tape to reduce airflow. Avoid stacking heavy objects against weak spots; instead, create a clear path for professional crews to work and remove equipment quickly. If you must vent an attic during a storm, use a temporary vent to minimize heat buildup that can accelerate interior condensation and further damage. When scheduling a professional visit, have a practical route for access-easy parking and safe egress from the roof, especially in windy or stormy conditions that can delay access.
The Knoxville-Sevier County corridor experiences regional post-storm contractor surges, which can affect response times and replacement scheduling. If a storm event coincides with a busy season, expect longer than usual delays for full rebuilds, but urgent leak stabilization and temporary protection should still be prioritized. Build a short list of preferred local roofers who offer emergency stabilization, temporary patching, and rapid assessment services. When talking with contractors, be precise about the damage you've observed, the locations of leaks, and any signs of water intrusion into the attic or walls. Ask for an on-site triage visit that can distinguish between urgent temporary measures and longer-term repair plans, so you're not left waiting in uncertainty.
After initial stabilization, set a clear repair plan anchored in safety and structural integrity. Prioritize leaks that threaten electrical systems, insulation, or living spaces, then schedule more extensive roof work in a sequence that minimizes further weather exposure. In this urgent window, demand-driven scheduling can be unpredictable, so maintain open lines of communication with your chosen contractor and document all repairs with photos and notes. Keep a running list of affected areas and a rough timeline for when temporary protections will be replaced by permanent repairs. Having that plan on hand helps align expectations with the contractor team and reduces the risk of stalls during peak demand.
Brian King Roofing
(865) 573-6859 briankingroofing.com
2021 E Union Valley Rd, Seymour, Tennessee
4.8 from 98 reviews
Even the sturdiest construction is useless without a quality roof to keep it safe and dry. Your roof is your home's first line of defense against wind, rain and debris. When you need a new one, hire a roofing company you can trust for dependable work. Contact Brian King Roofing today to speak with a preferred roofing contractor in Seymour, Maryville & Knoxville, TN. Since 1991, we've completed countless roof repair, replacement and installation services. Our residential and commercial clients rely on us for quality workmanship at affordable prices. Call 865-573-6859 today to get a free estimate from your local roofing contractor.
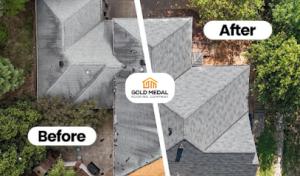
Gold Medal Roofing of Eastern Tennessee
(423) 607-7061 www.goldmedalroofing.com
Serving
4.9 from 161 reviews
Gold Medal Roofing Company assists thousands of homeowners in getting roof repairs, or a completely new roof, through the insurance claims process. Let our team of licensed roofing contractors walk you through the process and help save you thousands of dollars! Book a FREE inspection today!
Five & Two Construction
(865) 324-4588 www.52construction.com
Serving
5.0 from 16 reviews
At Five & Two Construction, we are a locally owned roofing and construction company serving Maryville, TN, and surrounding areas. With our team of skilled professionals, we provide top-notch construction services tailored to meet the needs of our clients. From roof repairs to home renovations, we take pride in delivering exceptional craftsmanship and customer satisfaction.
Cover Pro Roofing
(865) 999-7663 coverproroofing.com
Serving
4.9 from 54 reviews
Cover Pro Roofing is a trusted family-owned roofing company serving Knoxville and nearby areas with reliable residential and commercial services. With over 15 years of experience, our certified team has specialized in roof installation, replacement, storm damage repairs, inspections, and ongoing maintenance. Customers value our clear communication, honest pricing, and dedication to quality protection. We are fully licensed and insured, offering industry-leading warranties and financing options. From shingles, metal, and flat roofing to leak repair, insurance claim assistance, and preventive maintenance, we deliver durable workmanship backed by a trusted guarantee. Call today for a free inspection and estimate in Knoxville, Tennessee.
FLOW Roofing
(865) 910-5530 flowroofing.com
Serving
5.0 from 406 reviews
FLOW Roofing is a veteran‑owned and operated roofing contractor in Knoxville, TN, specializing in metal and shingle roof installation, roof replacement, storm damage repair, and emergency roofing services. Our licensed, insured team provides free inspections, fast quotes, insurance claim assistance, and quality workmanship for homes and businesses across Knoxville and surrounding East Tennessee communities.
Affordable Roofing Solutions
Serving
5.0 from 18 reviews
All things roofing, whether it's a leak repair, replacement, or a simple cleaning.

Bellator Roofing & restoration
(615) 934-1421 bellatorroofingandrestoration.com
Serving
4.9 from 140 reviews
"At Bellator Roofing & Restoration we strive for excellence and 100% customer satisfaction. We offer full roof replacement and repairs . We service all types of shingle and metal Roofing products. Our specialty here is guiding the homeowner through the insurance process from initial inspection to meeting with adjuster and finally doing the work to the full manufacturer and local codes specifications. "

Tony's Roofs
Serving
4.9 from 135 reviews
Looking for professional roofing service in Knoxville, TN? We're ready to deliver expertise and innovation to your next project. Tony's Roofs specializes in a wide range of services including gutter repair, replacement, and installation. As a trusted roofing contractor in Knoxville, TN, we also provide roof installation, inspection, and emergency repair services. From asphalt shingle and metal roofing to flat and commercial roofing solutions, we ensure your roof is strong and reliable. If you need winter roof repairs, our team is here to help keep your home protected year-round. For all your gutter and roofing needs in nearby areas, contact Tony's Roofs today and let us get started on your next project!

Daniel Hood Roofing
(865) 855-4501 danielhoodroofingsystems.com
Serving
4.8 from 412 reviews
Daniel Hood Roofing is proud to be Tennessee’s go-to roofing company, serving Knoxville, Maryville, and Oak Ridge. Our certified roofers are experts in GAF architectural shingles and skilled at tackling all kinds of roof repairs—especially the pesky leaks that never show up at a good time. Ready for a full roof upgrade? We’ve got you covered there too, with top-quality replacements that protect your home and boost curb appeal. Our team also specializes in storm damage inspections along with fascia, gutters, and siding with the same care and craftsmanship. Give us a call today to schedule your free roof inspection or ask about our financing options!
RoofScapes
Serving
5.0 from 125 reviews
We are a licenced and insured roofing and decking company that will make your home stand out from the rest. We take pride in all of our work and ensure that your home will stand no matter what comes your way. RoofScapes has you covered!
Roof Maxx of West Knoxville
(865) 418-7663 www.theroofrejuvenators.com
Serving
5.0 from 40 reviews
The Roof Rejuvenators are a locally owned Roof Maxx dealership in West Knoxville. Homeowners now have options when it comes to their roofs. We offer roof rejuvenation and roof cleaning to help homeowners extend the life of their roof and get it looking great! We love helping our customers get the most life out of the roof they currently have and saving them money in the process! We now offer full roof replacements as well as roof rejuvenation! Whatever your roof needs we are here to help!!
Rescue Roofing & Exteriors
(865) 424-7670 www.rescueroofexteriors.com
Serving
5.0 from 208 reviews
We are Knoxville’s FIRST “Purpose-Driven” roofing company! The foundation for our company is based on giving back to our community. Our motto: “saving a k-9, one roof at a time” means that every we job we complete will directly aid in providing assistance to our local animal shelters in need. Monthly donations of food, supplies, vaccinations, and adoption help are just a few of the ways in which we give back to life’s most loyal companions. We strive to provide an excellent service to our Knoxville neighbors and do a bit of good within our community in the process. We would love the opportunity to earn your business!
Tennessee's severe-weather claim environment means homeowners should expect insurers to request clear documentation of pre-existing roof condition and post-storm damage. In this market, a stubborn granule loss on shingles, minor lift at a seam, or a few cracked profiles can be the difference between an approved repair and a reinspect or denial. Because Seymour sits in a foothill corridor between Knoxville and Sevier County, storms arrive with rapid intensity and clustered timing. That means a single hail event can trigger multiple similar claims in nearby neighborhoods, making the claim review process longer and more meticulous. Prepare for a patient, detail-driven process and be ready to provide consistent, dated evidence of what existed before the storm.
Adjuster timelines can lengthen during regional hail periods, which matters in Seymour because spring storm clusters can create many simultaneous roof claims across nearby communities. When multiple roofs are damaged at once, offices juggle higher caseloads and may stagger on-site inspections. You should expect possible delays between initial reporting and an in-person adjuster visit. To avoid frustration, submit a complete, well-documented claim quickly, and be prepared for follow-up questions or additional photo requests. The goal is to establish a clear, paper-backed narrative of the roof's condition before the event and the specific damage caused by the storm.
Wind-related endorsements or mitigation requirements can affect claim outcomes, so Seymour homeowners need photo records, dated repair invoices, and prompt temporary leak mitigation documentation. Start with a dated photo log or video diary that shows the roof's state before the storm, focusing on shingles edges, valleys, chimney flashings, and any prior repairs. After the storm, photograph visible damage from multiple angles and in good lighting, then collect any temporary measures taken to stop leaks-tarps, buckets, or quick repairs. Keep receipts or invoices for temporary fixes and for any professional assessments. A concise, organized package makes it easier for the adjuster to match reported damage to specific roof components, reducing back-and-forth and potential disputes.
Expect discussions around wind-related features such as fastener integrity, edge damage, and underlayment exposure if the storm's force was significant. Be ready to provide dated repair invoices for any immediate mitigation work, and to share independent contractor assessments when a claim hinges on condition prior to the event. If the insurer flags pre-existing conditions or wear-and-tear, your documented history becomes the deciding factor. A careful, patient approach that clearly distinguishes pre-existing issues from storm-induced damage helps protect the long-term integrity of the roof and the credibility of the claim.
Connect with contractors who help homeowners navigate the claims process from damage assessment to final approval.
Gold Medal Roofing of Eastern Tennessee
(423) 607-7061 www.goldmedalroofing.com
Serving
4.9 from 161 reviews
Asphalt shingles and metal roofing are the dominant practical choices in Seymour, matching the area's steep-slope residential stock and storm-driven replacement market. When you're sizing up replacements after a hail event or a heavy thunderstorm, these two options line up with what local crews see most often on roofs that need to shed moisture quickly and resist wind-driven projects. Shingle courses that lay tightly and metal panels that lock at seams are the baseline for long-term performance in this part of East Tennessee. If the roof faces frequent tree line impacts or lawn debris, the easy-to-install nature of asphalt and the durability of standing-seam or enhanced-metal configurations can keep maintenance cycles predictable.
Hot, humid summers here accelerate shingle aging, so you want a product that tolerates heat without premature curling or granule loss. For that reason, impact resistance should be a practical criterion, not a marketing headline-look for laminated or architectural asphalt shingles with a robust nailing zone and a strong adhesive that seals as the wind picks up. In metal options, choose coatings that resist chalking and color fade, especially on south-facing slopes that see extended sun. While you're evaluating options, factor in fastening quality and flashing durability; a storm season emphasizes flashing around chimneys, skylights, and vent stacks because those are common leak points after a fast-moving thunderstorm.
Leaf buildup in fall and moisture retention in valleys are recurring Seymour-area concerns, so material selection should account for drainage performance around wooded lots. Asphalt shingles shed pine needles better than many flat-slope alternatives, but valleys and gutters still collect debris. A metal roof with a good panel profile can offer better runoff in heavy leaf years, yet it demands meticulous flashing to avoid ice dams in colder snaps. Whatever you choose, pair it with a drainage-minded installation: proper valley orientation, clean edge detailing, and a gutter plan that prevents pooled moisture at eave lines and transitions.
After hail or strong storms, inspection focus shifts from looks to fasteners and seals. Asphalt shingles should show uniform granule retention and no exposed adhesive tabs. Metal roofs must have all panel seams sealed and nails driven to the correct depth with corrosion-resistant fasteners. In wooded neighborhoods, ensure one layer of shingles or panels can be replaced without disturbing the entire roof deck; that simplifies timely repairs when storms force quick decisions. For most homeowners, the goal is to keep roof lines tight, edge seals intact, and drainage channels clear so a leak response doesn't lag during the next storm cycle. This approach keeps a durable, practical roof that stands up to Seymour's weather reality.
When you start planning, anchor your budget to the per-square ranges provided: asphalt shingles are the entry point, with metal roofing chosen by many homeowners here for longer-term storm durability. In practice, you'll see numbers cluster around the low-to-mid end for asphalt, rising quickly if you tilt toward metal or premium materials like clay or concrete tile. This is especially true after a hail event, when local crews are juggling multiple projects and scheduling can tighten up. Knowing that the market moves with demand helps you set realistic expectations for timing and bidding.
Thunderstorms and hail in the Knoxville-Sevier County corridor don't just cause damage; they shift how fast crews can start and finish a project. In Seymour, a big storm cycle can push labor availability into tight windows, creating pressure to lock in dates and hold line items on a contract. If you're replacing after a storm, expect price reminders tied to surge labor and the need to coordinate roofer arrival times with weather windows. Being proactive about scheduling in the weeks following a storm can smooth out the process and potentially reduce delays.
Costs shift when you're dealing with steeper slopes, larger suburban home footprints, and complex valley configurations. Steep geometry increases safety equipment needs and labor time, while more valleys mean more flashing details and potential leak pathways to address during the tear-off and reinstallation. In Seymour, those features are common on newer homes in growing subdivisions, and they can nudge the per-square cost above the entry baselines, especially if the roof plan requires extra ventilation or intricate edge work.
If the project involves a full tear-off rather than a simple overlay, expect the price to reflect disposal, labor, and the added steps of debris management in a market where homes contend with leaf-heavy drainage issues and storm debris. Replacements after repeated repairs often require more material and labor to restore a dependable, weather-tight seal, which can shift costs upward beyond your initial material choice.
Get a clear picture of your project costs upfront - no commitment required.

Brian King Roofing
(865) 573-6859 briankingroofing.com
2021 E Union Valley Rd, Seymour, Tennessee
4.8 from 98 reviews

When planning full roof replacement in this foothill area, permits are commonly required through the local city or county building department, depending on jurisdictional handling for this unincorporated community. Because Seymour does not operate a standalone large municipal permitting system, the process often relies on either county-level oversight or the specific arrangement your contractor has with local authorities. Your first step is to confirm which office handles permit applications for your property-county building services or a designated local agency-and whether the contractor or the homeowner will file on your behalf. The difference can impact how quickly the project gets rolling, so map out the filing responsibilities early in the planning phase.
In Seymour, the inspection sequence typically follows a practical, staged path aligned with the tear-off and install process. After the old roofing material is removed and the roof deck is inspected for any structural or moisture-related issues, a first inspection is commonly scheduled. This visit focuses on deck condition, flashing readiness, nail base quality, and the compatibility of underlayment with the chosen roofing system. A second inspection usually occurs after the new roof is installed, ensuring proper layer placement, proper alignment of hips and ridges, and an overall finish that meets code requirements. The final approval centers on workmanship, venting adequacy, and a code-compliant completion that will hold up through humid summer storms and winter freeze events typical of the area.
Because Seymour relies on county-level or shared jurisdictional handling, inspection timing can influence project duration. Coordinate with the contractor to schedule inspections promptly and avoid weather-driven delays that can compound the timeline during storm season. Since storms and hail events can trigger emergency repairs, ensure that permit applications are filed promptly after any necessary tear-out decisions are made, so inspections don't lag behind the physical work. Your contractor should provide you with a clear calendar showing when tear-off, underlayment installation, and final roofing stages are slated for inspection, plus any required corrections that may arise on the spot. Expect a short window between the completed installation and the final inspection, during which workmanship is reviewed for the quality and safety standards that a durable, code-compliant roof demands.
Have readily available the permit acknowledgement, project address, and contractor license details. Keep a record of inspection approvals and any correction notices, as these may affect warranty validation and future maintenance. For hail-prone seasons, documenting the sequence and dates of inspections helps correlate with storm-related repair history should any questions arise at a later date. In this jurisdictional context, having orderly paperwork not only speeds up approvals but also supports timely insurance interactions if related to the project.
Spring and fall are generally the most favorable replacement windows for a steep-slope roof here. The milder temperatures help asphalt shingles lay flat and seal properly, while humidity is manageable enough to keep installation pace steady. In spring, you'll often dodge the peak heat of summer and avoid the wet, leaf-heavy grip of autumn storms later on. In fall, crews can wrap up before the winter chill sets in and before early-season freeze risk ramps up. Plan around drying periods after late-wite storms that push moisture onto the deck or underlayment.
Summer installation can be complicated by high heat and humidity that slow crew pace and complicate material handling, especially on dark steep-slope roofs that absorb heat. If a summer project is unavoidable, aim for early-morning starts and a focused schedule to minimize heat exposure. Hydration and shade become practical concerns for the crew, and asphalt shingles may experience accelerated aging if exposed to direct sun during installation. Have a contingency plan for temporary protection if a heavy afternoon shower rolls through.
Winter is not continuously severe, but freeze events and occasional ice or snow can delay tear-off and complicate leaks. Ice dam risk rises on uninsulated eaves or poorly vented attic spaces, so avoid times when temperatures hover around freezing and thaw cycles are frequent. If work must occur in winter, ensure the roof is kept as dry as possible during staging and that temporary coverings are in place to prevent water intrusion during thaw periods. Fasteners and sealants should be chosen with cold-weather performance in mind.
After a Seymour thunderstorm or hail event, prioritize assessing the roof once it's safe to do so. Drying-out periods, tarp placement, and careful leak tracing can buy time before a full replacement, but solid scheduling should align with the next favorable seasonal window to minimize disruption and optimize long-term performance.
Fall leaf accumulation is a recurring concern on tree-lined lots, where debris loves to collect in valleys and along gutters. When leaves blanket the roof edges, moisture lingers and corrals where shingles meet valleys, creating hidden spots for rot and moss growth. The consequence is slower drainage, increased weight during wet seasons, and more frequent ice dam formation in winter. Regular, targeted cleaning before winter storms can prevent subtle but costly damage that isn't obvious from the ground.
Repeated thunderstorm exposure makes flashing at chimneys, skylights, and roof penetrations a common weak point when workmanship is inconsistent. Water can seep behind flashing if joints aren't sealed properly or if surrounding shingles are damaged by hail or wind. The result is micro-leaks that grow with each storm, gradually slipping into attic spaces and interior ceilings. Inconsistent workmanship translates to recurring repairs and surprise leaks after strong bursts.
Periodic winter freeze-thaw cycles can turn minor drainage or flashing defects into interior leaks, especially where prior storm repairs were only temporary. When water sits in clogged valleys or around flashing and then freezes, it expands and pries at seams. If the roof isn't draining properly, those small issues become visible water intrusion in living spaces. The key is proactive, staged repairs and timely resealing after major storm events.
Spotting early signs-soft spots on the deck, curling shingles at eaves, or staining on interior ceilings-can prevent a small problem from turning into a costly leak. After storms, inspect for loose shingles, displaced flashing, and clogged gutters. If a leak is suspected, prioritize a careful dry-out, then address the underlying drainage or sealing defect to minimize recurring damage.
Find contractors experienced in skylight installation, flashing, and leak repairs to bring natural light into your home.
Brian King Roofing
(865) 573-6859 briankingroofing.com
2021 E Union Valley Rd, Seymour, Tennessee
4.8 from 98 reviews
After a thunderstorm rolls through the foothills, homeowners want a roofer who can show up fast, assess weather-damage reality, and outline a clear recovery plan. In this market, the best local roofers are known for showing up with a crew, tarping vulnerable areas, and moving from temporary fixes to permanent repairs without dragging the process out. Look for a contractor who can explain how they prioritize leaks, shingle lift, and hail impacts on steep slopes, and who can schedule work around the next round of weather rather than letting delays compound the risk of interior damage.
The typical Seymour home has a mix of steep slopes, leaf-heavy drainage, and occasional winter freeze cycles that stress roofing systems differently than flatter towns. A seasoned local roofer should demonstrate a track record of both repairs and full replacements, with access to the same underlayment and ventilation options that best suit humid summers and rapid temperature swings. Ask for recent projects with comparable roof lines and climate conditions, and request a concise description of how their approach differs for storm-driven damage versus elective upgrades.
Cleanup is more than sweeping debris at the end of the day. A reliable contractor carries out thorough debris removal, seals nail holes, and conducts a final walk-through to confirm that no stray fasteners remain in yard or driveway. In this market, homeowners place high value on a contractor who treats the job site as a long-term neighbor would-protecting landscaping, leaving no shingle shards in drainage paths, and returning with post-work touch-ups if shingles settle after installation.
Because the area sits along a busy contractor corridor, choosing a locally accessible operator matters. Prefer a team with an established local base, marked vehicles, and a point person who can be reached during and after the project. This makes scheduling, follow-up, and quick responses for any warranty questions more reliable than dealing with a distant crew.
Before signing, confirm who in the company handles warranty follow-up, inspections, and any necessary touch-ups after completion. A clear, written plan for post-install service demonstrates that the contractor will stand behind the work beyond the checkmark of a finished roof. In a fast-moving market, this diligence protects you from surprises and helps ensure the roof lasts through the next round of storms.