Last updated: Apr 19, 2026
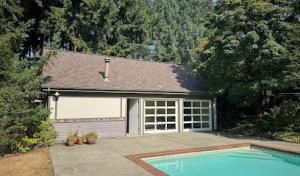
Edmonds experiences a mild marine climate on Puget Sound with substantial rainfall through much of the year, so roofs often stay damp longer than inland roofs. That persistent dampness invites slower drying cycles, which gives moss and algae plenty of time to grab hold. In practical terms, a roof that feels damp after a rain event is not a sign of a healthy roof-it's a warning sign that moisture is lingering where it shouldn't. Pay particular attention to shaded roof planes and areas under mature trees, where sun rarely reaches and dew point is effectively trapped. When moisture sits, granule loss, accelerated degradation of sealants, and softening in vulnerable areas become bigger risks over the seasons.
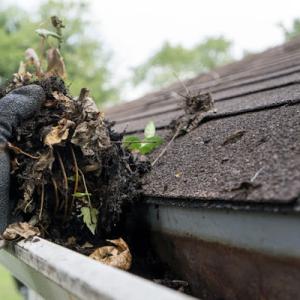
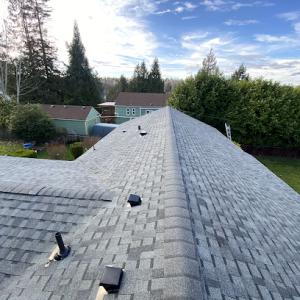
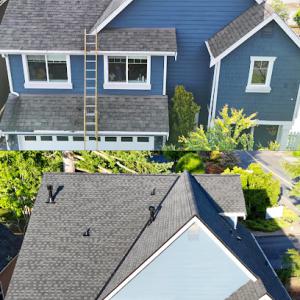
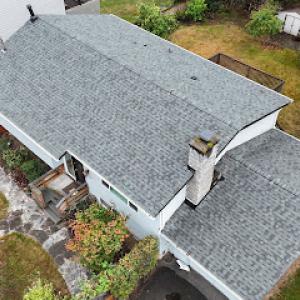
Damp spring and fall conditions in this area strongly favor moss and algae growth, especially on shaded roof planes under tree cover common in established neighborhoods. Moss isn't just an aesthetic issue-it retains moisture against the surface and can lift shingles or tiles over time, compromising the roof's weather barrier. Algae can darken surface coatings and trap more moisture, which magnifies heat absorption and expansion cycles in winter storms. If you notice a green, gray, or black patina spreading across shingles or tiles, you are dealing with a moisture problem that needs timely intervention. The longer moss and algae are allowed to establish, the more invasive the remediation becomes, potentially affecting adhesion of flashing and the effectiveness of underlayment.
Winter rain and wind in Edmonds increase the risk that small flashing or underlayment defects turn into active leaks before interior staining appears. A tiny seam gap, a loose hip flashing, or a mis-seated vent boot can become a leak in a heavy rain event when the roof is already saturated. The consequence is not just a drip; it is moisture wicking into decking and attic spaces, which accelerates wood rot and invites mold growth. Your eye should routinely scan for hairline gaps around chimneys, vents, and skylights after storms, then address them promptly. If interior staining appears, the problem almost always started with a slowly expanding exterior leak that only worsened with more rain.
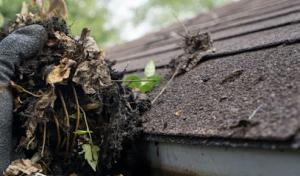
You should schedule regular, moisture-aware inspections twice a year, with an emphasis on spring and fall when conditions favor moss and algae. During your inspection, look for lichen and moss on shaded slopes, inspect shingles at edges for curling or lifting, and test flashing seals around penetrations. Remove moss carefully using a soft-bristle brush or plastic scraper to avoid damaging the surface, and rinse away debris with a gentle spray that won't blast granules loose. Treat persistent growth with a moss inhibitor that is compatible with your roofing material and underlayment, following manufacturer instructions. Keep gutters free of debris so moss spores and standing water don't have a chance to back up onto the roof plane. If flashing or underlayment shows signs of deterioration, address those issues before they turn into full-blown leaks. In areas with tall trees, consider trimming to reduce shade and moisture retention, which directly reduces moss growth potential.
Develop a maintenance cadence that aligns with Edmonds' year-round wet climate: annual or biannual inspections, targeted cleaning of moss-prone zones, and timely repair of any flashing, sealant, or underlayment vulnerabilities. Prioritize roofs with complex shapes or dense tree canopies, where moisture pockets form and moss gets a foothold most easily. The goal is to keep the roof surface dry enough that moss struggle becomes non-competitive and small issues don't escalate into interior water damage. By acting decisively on dampness and moss early, you preserve roof integrity through Edmonds' wet seasons and protect the structure long-term.
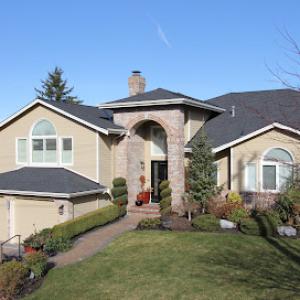
In this Puget Sound climate, moisture management outgums heat resistance every time. Asphalt shingles, metal, tile, slate, and cedar all appear in the local market, but water shedding, flashing quality, and ventilation take priority over how well a roof handles heat. The goal is a system that sheds rain quickly, resists persistent dampness, and breathes enough to keep decking dry. The neighborhood mix leans toward roofs that tolerate salt air near the water, moss pressure on shaded slopes, and a predictable schedule for maintenance.
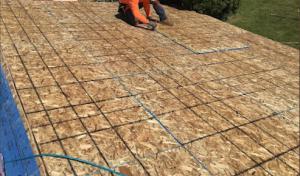
The first decision point is how the roof deals with frequent rain and recurring fog. Choose fast-shedding profiles and proven flashing details at valleys, ridges, and penetrations. In practice that means double-checking underlayment compatibility with each material, and insisting on continuous drip edges and well-sealed transitions around chimneys, vents, and skylights. Ventilation matters every month of the year to keep sheathing dry and to slow moss growth, so pair a solid ridge or soffit vent plan with insulation that minimizes condensation.
Asphalt shingles are common and resilient for Edmonds' climate when installed with a robust underlayment and proper flashing. Metal roofs perform well for edge detailing and longevity, but the salt-air exposure near Puget Sound can accelerate corrosion at fasteners and flashings if lower-grade components are used. Tile options-clay and concrete-offer durable performance, yet require careful slope and drainage design to keep water from pooling on fasteners or bedding. Slate delivers long life but needs meticulous accent flashing and support to handle moss-prone, damp conditions. Cedar shakes remain locally relevant but demand proactive moss control and regular cleaning to prevent moisture retention; treat or seal as part of a maintenance routine and keep slopes clear of debris.
Edmonds' persistent dampness makes maintenance more critical than in drier climates. Schedule annual inspections focused on flashing integrity, ridge vent performance, and any areas where moss could trap moisture. Keep gutters clean and ensure downspouts direct water away from the fascia and foundation. For cedar, consider a moss-prevention regimen that includes selective cleaning and, if appropriate, preventative treatments that are compatible with the wood and local climate. In all cases, coordinate moss management with your chosen roof system so cleaning or treatment does not compromise flashing or underlayment.
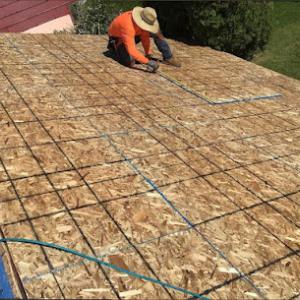
Heavy rain and wind-driven squalls in the area can slow roofing work at the most inconvenient times. When tear-off windows collide with a shifting storm front, roof decking sits exposed longer than expected, soaking through vulnerable underlayment and opening the door to further interior moisture by the time new layers go on. If a tear-off drags into a lull between fronts, the deck can dry too slowly, inviting edge rot and hidden fastener corrosion. The practical takeaway is clear: coordinate the schedule so that removal and reseaming stay ahead of the wettest sequences, and always have a contingency plan for delayed weather windows. A mis-timed tear-off that leaves deck exposure overnight can set moisture battles in motion that echo through the rest of the year.
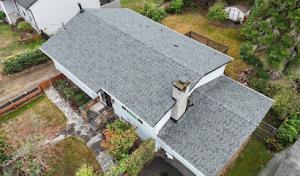
Fall wind events bring a repeatable stress pattern that lighter roofing assemblies struggle to resist, especially along the shoreline where gusts funnel through. Edges, ridges, and older shingle systems near the bluff are the first to feel the effect, with uplift trying to peel material upward and outward. In Edmonds, the combination of wind pressure and persistent moisture creates a situation where even a well-sealed roof can suffer from micro-buckles, loose fasteners, and flashing that's been stripped of its grip over time. The consequence is not just a few blown shingles, but accelerated wear that invites leaks around penetrations and along eave lines during the next storm sequence. The actionable approach is to inspect the lateral seams and ridge lines after every significant wind event and to consider reinforcing edges and using more secure fastening patterns on vulnerable slope sections. Do not wait for the first heavy gust to reveal a problem; preemptive edge detailing matters.
In this climate, leaks are most often tied to flashing failures, poorly sealed penetrations, or gaps that allow wind-driven rain to reach the attic side of the roof deck. Flashing around chimneys, vents, and skylights can deteriorate faster than the surrounding roof surface in salty, moist air; sealants can become brittle with freeze-thaw cycles and persistent humidity. The risk isn't a dramatic ice dam scenario; it's a steady procession of small leaks that track along a seam and slowly saturate decking and insulation. The practical fix is meticulous flashing installation with continuous, corrosion-resistant components, proper vertical and horizontal termination details, and a robust sealant strategy that accounts for year-round moisture movement. If a roof has older shingle systems near the shoreline, examine the transition zones where shingles meet flashing-these are common trouble spots after winter storms. Prioritize reliable drip edges and properly integrated underlayment at all penetrations to keep rain from tracking inward.
A neighborly reminder: winter is a test of every roof detail that touches the exterior envelope. Moisture that lingers after a storm is not a trivial inconvenience-it can undermine decking, invite mold growth in attic spaces, and shorten the life of fasteners and seals. Keep a focused eye on roof-to-wall transitions, look for any lifted edges after a windy day, and schedule targeted resealing where channels and step flashing meet. In Edmonds, the daily reality is that leaks hide in plain sight behind vents and skylight collars until a heavy rain finally makes a splash indoors. Stay proactive with seasonal inspections and timely, detailed repairs that address the specific weaknesses exposed by damp winters and salt-air exposure.
Find local contractors experienced in assessing and restoring roofs after hail, wind, and severe weather events.
Replacement work is typically scheduled for late spring through early fall, when drier conditions help reduce moisture exposure during tear-off and dry-in. That window aligns with Edmonds's marine climate, where persistent rain can complicate each phase of a roof replacement. If the project runs into the shoulder months, a tight plan for moisture protection becomes essential, and crews often adjust sequences to minimize exposure times.
Wet spring and autumn weather can stretch timelines and elevate the need for same-day dry-in planning. On a rainy week, crews stage materials, tarp decks, and seal penetrations carefully to prevent any backslide in roof exposure. A robust dry-in plan means tarping and temporary coverings over openings, plus rapid protection for underlayment and interior spaces. In practice, this means the crew arrives with a concrete plan for storm days and keeps the build moving during dry spells to avoid weather-induced delays.
Dry summer weather usually shortens installation time, but direct sun can still affect handling and installation of cedar and asphalt products. Cedar shakes and shingles can dry out quickly once exposed, which makes fast, careful handling important to prevent cracking or warping. Asphalt shingles, while more forgiving, should still be laid in cooler parts of the day when the sun is harsh to avoid oversoftening the adhesive. Plan material staging to minimize long heat exposure and to keep bundles off hot surfaces.
Edmonds homes often feature decks and roof lines that sit close to bluff edges, where salt air and wind bring extra moisture challenges. Before removal begins, confirm that the deck and framing have adequate ventilation and that any moss-dense areas are treated in ways that won't compromise the new system. If moss or lichen is present on the existing deck or sheathing, address it promptly to prevent transfer into the new layers.
A practical approach is to sequence the work so that tear-off proceeds in zones with continuous protection from weather, followed by a clean dry-in move across the entire roof. Clear communication between homeowner, inspector (if applicable), and the crew helps keep everyone aligned on weather forecasts, anticipated wind events, and tarp integrity. A steady, zone-by-zone progression minimizes exposure time and supports a smoother installation in this coastal climate.
Get a clear picture of your project costs upfront - no commitment required.

Blue & Blue Roofing
(206) 367-2601 blueandblueroofing.com
7814 228th St SW, Edmonds, Washington
5.0 from 217 reviews
Residential Roofing, Repairs, Skylights Services, Composition Roofing, Torch Down Roofing, CertainTeed, Roof Ventilation
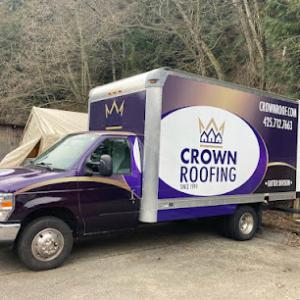
Crown Roofing
(425) 712-7663 www.crownroof.com
18596 76th Ave W, Edmonds, Washington
4.8 from 33 reviews
Since 1999, Crown Roofing has been providing professional residential roofing in Edmonds, Lynnwood and the surrounding areas. Our commitment to the highest standards of quality is what sets us apart form all of the other local roofing companies. Our family owned and operated company offers a personalized re-roofing experience that is designed to ensure that your project exceeds your expectations.
Addicott Roofing
(425) 774-0806 www.addicottroofing.com
18926 83rd Ave W, Edmonds, Washington
4.5 from 40 reviews
Residential & Commercial Roofing company in Edmonds, WA since 1974

Assurance Roofing & Construction
(425) 409-0291 assurance-roofing-and-construction.ueniweb.com
411 Main St, Edmonds, Washington
5.0 from 5 reviews
Assurance Roofing and Construction offers high-quality roofing design and services in Edmonds. We are seasoned roofers who deliver top quality and budget-friendly roofing services. Get in touch with us on +14254090291. When you hire us, you know you’re getting skilled, passionate technicians you can trust to do the best job possible. And, as a bonus, we always feature competitive pricing on our services.
Triton Roofing & Commercial Waterproofing
9504 Edmonds Way, Edmonds, Washington
5.0 from 5 reviews
We service, repair, clean and install both commercial and residential roofs, also clean & install gutters. We have 10+ year of experience in the roofing industry. Give us a call for a free estimate!
Krown Homes
(206) 391-6767 www.krownhome.com
Serving
4.9 from 58 reviews
Krown Homes is a family-owned roofing contractor serving Snohomish County and surrounding areas. As a GAF Master Elite® Contractor (a distinction held by less than 2% nationwide), we provide expert roof replacement, repair, and gutter services. Our crew is fast, efficient, and leaves every site spotless. Whether it’s storm damage, leaks, or full replacements, we deliver quality you can trust, backed by lifetime warranties. Call today for your free roof estimate.
Sierra Exteriors
(206) 661-0452 sierraexteriorsnw.com
Serving
4.9 from 29 reviews
Sierra Exteriors is a Lynnwood based roofing company, siding installation, and gutter company. We are experts at finding the exterior solutions our clients are looking for. Sierra Exteriors also works hard to ensure that our customers are completely satisfied and have peace of mind knowing their homes will be secure for the years to come. Sierra Exteriors has completed hundreds of roofing, siding, and gutter installation jobs all over the Snohomish county, King county, and surrounding areas. Our roofing contractors take a lot of pride in their work, we always appreciate it when our customers value our craftsmanship as much as we do!
Hernandez & Sons Roofing
(425) 332-1500 hernandezsonsroofing.com
Serving
4.9 from 74 reviews
At Hernandez & Sons Roofing, we prioritize quality, customer satisfaction, and tailored solutions to meet your roofing needs.
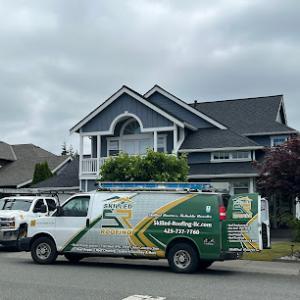
Skilled Roofing
(425) 737-7760 skilledroofingllc.com
Serving
5.0 from 64 reviews
We are a family-owned business that offers personalized roofing services that treat your home with the care and respect you deserve. Our expertise, commitment to quality and dedication have earned us the trust of homeowners and made us the most trusted roofing company serving North King & Snohomish counties with a 100% customer satisfaction.
Elite Gold Contractors
(206) 823-4805 elitegoldcontractors.com
Serving
4.9 from 237 reviews
Elite Gold Contractor, LLC is a family owned and operated company. Throughout our 10 in business, we have completed quality work on a consistent basis for property owners, property managers, and general contractors. We specializes in roofing and gutters installation, repairs and protection for residential and commercial properties. We are a highly skilled team that works closely with you to ensure that you receive exactly what you want. We walk you through the process from beginning to end, answering questions and meeting the goals of each and every client. Our commitment to our clients is to have complete client satisfaction and provide our clients with the highest quality of service. We pride ourselves on delivering the best unique exp

Titan Roofing
(206) 591-4015 theroofingtitan.com
Serving
5.0 from 130 reviews
Titan Roofing serves King and Snohomish counties with roof replacement, repair, cleaning, gutters, and TPO/PVC flat roofing. We prioritize accurate timelines, consistent updates, and quality workmanship. Financing options are available, and new installations include manufacturer-backed material and workmanship warranties. Book your inspection or get a quote today!
Blitz Roofing
(425) 900-4828 roofbyblitz.com
Serving
5.0 from 36 reviews
At Blitz Roofing, we understand the stress of roofing issues. Whether it's leaks threatening your home or an aged roof affecting curb appeal, our experienced team is here to help. We use only the highest quality materials, ensuring every project meets our standards for durability and excellence. Don't let roofing concerns weigh you down. Choose Blitz Roofing for solutions that secure your home and enhance its aesthetic value, potentially boosting its market worth. Our commitment includes transparent pricing and professional advice. Contact us today for a FREE estimate and start your journey towards a safe and attractive home. With Blitz Roofing, your roof is in expert hands.
Typical Edmonds material pricing runs about $350-$700 per square for asphalt shingles, $600-$1100 for metal, $1000-$1800 for clay tile, $700-$1200 for concrete tile, $1500-$2400 for slate, and $650-$1300 for cedar shakes. That spread reflects the Puget Sound climate, where longer moisture exposure and moss pressure push some projects toward higher-quality systems. When you're budgeting, start with asphalt as the baseline for a straightforward replacement, then factor in upgrades if you're aiming for longer life or a stronger wind performance.
Costs in Edmonds can rise when contractors must sequence work around wet weather windows, protect exposed decking from rain, or replace moisture-damaged sheathing discovered during tear-off. If a crew needs to pause for several days between steps, you'll see crews re-sequence, tarp, and re-dry everything, which adds labor hours and may push timelines and pricing upward. For materials sensitive to moisture-like cedar shakes or slate-the scheduling drag is even more pronounced, because the job demands a drier, more controlled environment to avoid sudden repairs after installation.
Asphalt remains the most economical entry point, but the year-round marine climate makes moss control and moisture management especially important. Metal roofs can shed moisture well and resist moss, but the visible panels and potential panel seams add cost. Clay and concrete tiles bring long life and good water shedding, yet their weight and installation complexity can elevate both labor and structural considerations. Slate offers exceptional durability in theory, but the premium price is matched by careful framing, underlayment, and potential soft costs if your roof is larger or uniquely pitched. Cedar shakes provide a classic look and solid moss resistance when properly maintained, though they carry the mid-to-upper price range and require proactive upkeep against moisture and rot.
Costs in Edmonds can rise when you blend material price with soft costs tied to project value and sometimes material type, so higher-end systems such as tile or slate can carry higher soft costs in addition to labor and structural considerations. If you're replacing damaged decking or rehabbing sheathing, expect a longer schedule and a larger bump in soft costs. A practical approach is to plan for a contingency that covers both weather-driven delays and any moisture-related surprises uncovered during tear-off, which helps keep your project on track and within a predictable budget.
Don't let upfront costs delay a critical repair - these contractors offer payment plans to fit your budget.

A roofing permit is typically required in Edmonds, and permit issuance is handled by the City of Edmonds Building Department. Before any tear-off or new installation, confirm that the project is entered into the permit workflow and that all required plans are on file. The local code sees the roof as a structural and waterproofing element, so having the paperwork in order reduces delays and protects you from unexpected corrections when the city inspects.
Edmonds inspections commonly occur at key stages including before or after underlayment and flashing work, followed by a final inspection. The sequence may vary slightly by contractor, but the focus remains on how the roof is sealed against moisture. A typical inspection will verify proper nailing, underlayment installation, flashing at valleys, chimneys, and roof penetrations, and overall integration with the existing structure. Expect the inspector to look at ventilation and drip edge as part of moisture management.
Because Edmonds inspections focus on underlayment and flashing stages, homeowners should expect contractors to coordinate timing carefully during the city's wetter months. Scheduling around rain-heavy periods helps keep interior spaces dry and reduces the need for reworking during delays. If crews anticipate a setback in late fall or winter, discuss temporary measures with the permit holder and the inspector so that work can progress through the critical moisture-control steps without compromising safety.
Keep a visible log of permit numbers, inspection dates, and any corrections requested by the Building Department. Have all required documentation on site for each inspection window, including diagrams of flashing details and underlayment type. Communicate with the inspector as soon as the crew identifies any potential moisture barriers that could affect the schedule. Local weather patterns and the bluff-and-bowl landscape emphasize meticulous moisture management throughout the project.
After the final inspection, make sure any required adjustments are documented and that the permit is closed with the Building Department. A completed moisture management plan, as-built flashing details, and a clean roof line will help avoid lingering questions during future resale and code checks too.
In Edmonds, claim activity is driven more by weather-related wear and moisture intrusion than by large hail events. The marine climate means roofs endure constant dampness, moss growth, and wind-driven spray from Puget Sound. Experience shows that slow degradation, not dramatic catastrophe, often triggers insurance questions. Understanding how moisture behaves on your specific roof-shading, drainage, and material compatibility-helps frame what later may be considered wear versus damage.
Insurers handling Edmonds roof claims generally expect photo documentation, detailed estimates, and adjuster access for inspection. Photos should illustrate both the roof surface and underlying decking where possible, capturing any signs of staining, soft spots, or moss buildup. Detailed estimates should distinguish cosmetic conditions from structural concerns. Allowing the adjuster onto the roof and into attic spaces, when safe, accelerates the process and reduces the chance of disputes about what is covered.
Because Edmonds roofs often deteriorate through long-term wet exposure, coverage outcomes can depend heavily on whether damage is documented as sudden storm loss versus deferred maintenance. A storm may reveal preexisting moisture-trend weaknesses, complicating coverage decisions if documentation appears retrospective. Proactive, timely moisture mitigation-such as moss control and drainage improvements-can influence conclusions about causation and repair scope, making vigilant maintenance records a practical safeguard.
Connect with contractors who help homeowners navigate the claims process from damage assessment to final approval.
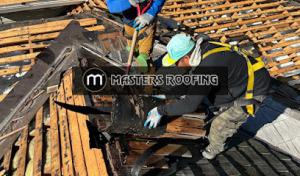
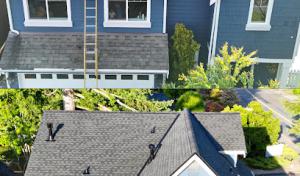
Skylights are a common installation detail you'll see among Edmonds crews, and that means flashing details can become the weak link in prolonged wet weather. Start with a careful inspection of the curb or deck flashing where the skylight meets the roof plane. Look for loose pavers, tired sealant, or gaps where salt-scented air and rain can creep in. In maintenance cycles, remove any old caulk and re-flash with a compatible, long-Weather seal, paying attention to the intersection between curb flashing and the roof sheathing. If the skylight sits on a low slope or near a valley, double-check the drip edge and ensure countersunk fasteners don't mirror the path of water. In Edmonds' damp climate, you'll want membrane transitions that extend beyond the skylight edge and proper turfing around the curb to slow wind-driven spray. When in doubt, re-flash with metal flashing that overlaps membrane layers to create a waterproof step.
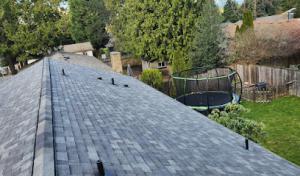
Low-slope and flat-roof sections dry slowly here, so membrane detailing becomes a daily concern in Edmonds' year-round wet cycle. Ensure the drainage plan moves water toward scuppers or interior drains without pooling. Inspect field seams, edge detailing, and penetrations where pipes or vents pass through. On flat portions, confirm that the membrane is continuous across the entire roof plane and that any tees or horizontal transitions are mechanically fastened and sealed with a compatible seam system. If a roof section shows blistering or fishming, address it promptly before it propagates. For older homes, counterflashing around parapet walls and skylight boxes should be inspected as a rule of thumb during dry spells, since lingering moisture can reveal hidden rust or rot in wooden framing.
Chimney-related roof intersections are a visible part of the local contractor landscape, making counterflashing and masonry transitions a recurring concern on older homes. Start with a visual pass along the base of the chimney, looking for mortar gaps, missing crown cement, or cracked brick that can funnel moisture into roof decking. Re-flash with a durable counterflashing that ties into the chimney crown and the surrounding shingles, ensuring the transition overlaps the roof membrane by a safe margin. Seal joints where brick and roofing meet, and keep an eye on mortar joints that have softened or spalled. In wetter springs, this area tends to reveal slow leaks first, so address marginal flashing and masonry cracks before they worsen.
Find contractors experienced in skylight installation, flashing, and leak repairs to bring natural light into your home.

Blue & Blue Roofing
(206) 367-2601 blueandblueroofing.com
7814 228th St SW, Edmonds, Washington
5.0 from 217 reviews
Addicott Roofing
(425) 774-0806 www.addicottroofing.com
18926 83rd Ave W, Edmonds, Washington
4.5 from 40 reviews
Edmonds presents a unique roofing rhythm: damp winters, salt-tinged air, and moss that thrives on shaded, north-facing exposures. You should screen for materials and systems that slow moisture intrusion, resist wind-driven moisture, and shed standing water quickly on steep pitches. The goal is a roof that breathes without drying out exposed structural wood, while staying resilient to long wet seasons. In this market, you're looking for assemblies that handle year-round dampness and minimize moss-friendly surfaces, especially on roofs with limited sun.
The Edmonds market shows especially strong demand for re-roofing and quick-response service, suggesting many homeowners are replacing aging roofs rather than building new ones. Long-established, family-owned, manufacturer-certified, and residential-focused contractors all have a meaningful presence, so you often compare responsiveness and workmanship reputation as much as price. Seek firms that can demonstrate consistent moss mitigation strategies, proper underlayment choices, and proven moisture-control details specific to northwest climates. A local crew that communicates clearly about scheduling during rainy periods is a real asset.
Cleanup is a major local hiring signal in Edmonds, which matters on landscaped residential lots and in established neighborhoods where debris control affects homeowner satisfaction. Ask about how crews protect plant beds, mulch, and walkways during removal and installation. Look for measures to contain moss, dirt, and shingle granules so you don't accumulate debris between storms. A strong cleanup plan often reflects a contractor's everyday attention to neighborhood standards and long-term workmanship.
Prioritize contractors who offer moss-aware maintenance plans, detailed moisture management notes, and documented warranties tied to climate-specific performance. Request references from nearby homes with similar exposure, and confirm response times after storms. In this climate, a contractor's willingness to adapt scheduling and protect your landscape often matters as much as the initial roof installation.